Idea里用gradle构建第一个springboot项目遇到的问题

 1.问题

最近研究Gradle进行项目构建,记录下第一次使用Gradle遇到的兼容性问题

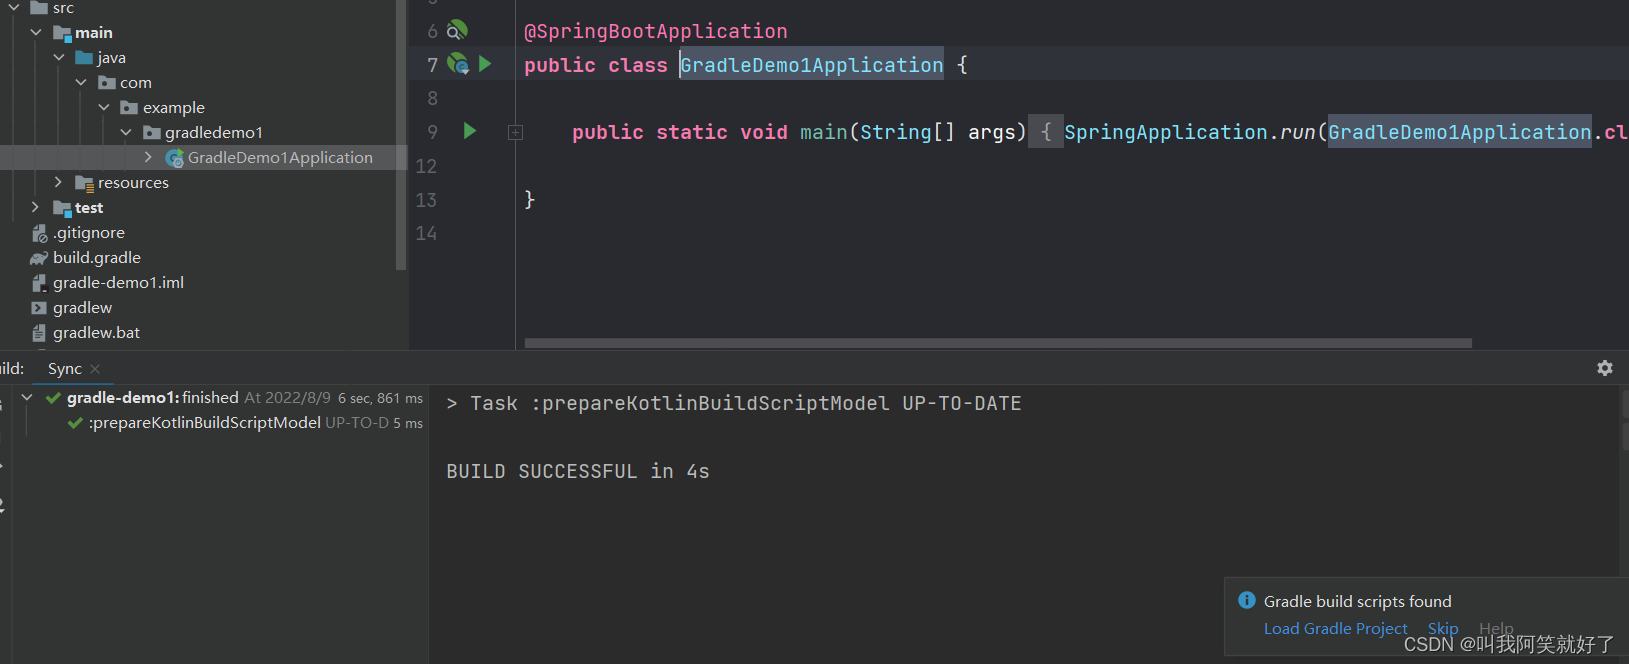
 采取idea里创建springboot项目的方式创建gradle project,springboot版本2.7.2,idea为2019.2.4版本,创建项目后自动进行Gradle配置后遇到这个报错信息.


FAILURE: Build failed with an exception.

* Where:
Build file 'D:\work\gradle-demo1\build.gradle' line: 2

* What went wrong:
An exception occurred applying plugin request [id: 'org.springframework.boot', version: '2.7.2']
> Failed to apply plugin [id 'org.springframework.boot']
   > Spring Boot plugin requires Gradle 6.8.x, 6.9.x, or 7.x. The current version is Gradle 5.2.1

* Try:
Run with --stacktrace option to get the stack trace. Run with --info or --debug option to get more log output. Run with --scan to get full insights.

* Get more help at https://help.gradle.org


将gradle版本更换到7.5后又报下面的错误信息.试了下重新安装gradle的依赖但仍未解决

Unable to find method 'org.codehaus.groovy.runtime.StringGroovyMethods.capitalize(Ljava/lang/String;)Ljava/lang/String;'.
Possible causes for this unexpected error include:
Gradle's dependency cache may be corrupt (this sometimes occurs after a network connection timeout.)
Re-download dependencies and sync project (requires network)

The state of a Gradle build process (daemon) may be corrupt. Stopping all Gradle daemons may solve this problem.
Stop Gradle build processes (requires restart)

Your project may be using a third-party plugin which is not compatible with the other plugins in the project or the version of Gradle requested by the project.

In the case of corrupt Gradle processes, you can also try closing the IDE and then killing all Java processes.

后面发现自己2019.2.4版的idea自带的plugin里gradle版本是5.2.1,跟7.5相差了2个大版本.猜想是不是idea版本过低,于是换成2021.3版的idea,重新创建gradle项目,顺利运行.


2.总结

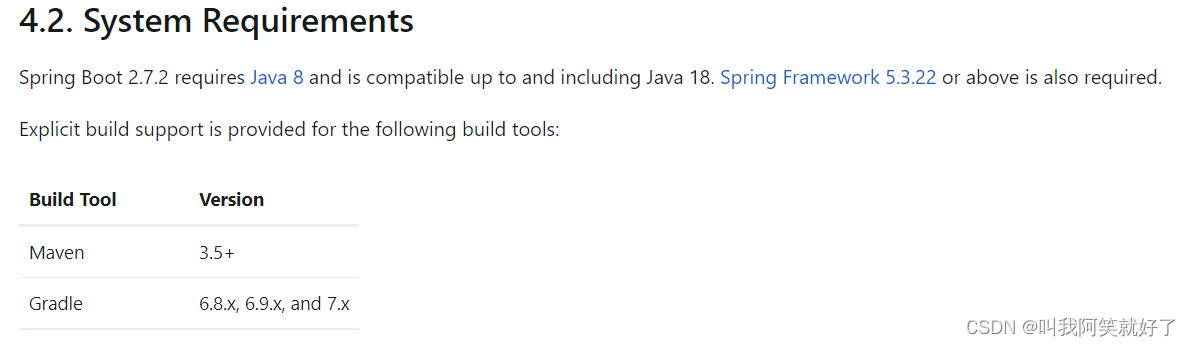
1.Gradle版本和Springboot版本需要兼容,参考springboot官方.


2.Gradle和idea版本也要兼容,暂时不清楚版本兼容对应关系

可以查看idea里plugins\gradle\lib里gradle的jar包版本作参考,如果想用gradle来构建springboot项目,还是建议idea升级换代到新版本.

  • 2
    点赞
  • 1
    收藏
    觉得还不错? 一键收藏
  • 0
    评论
### 回答1: 在使用Gradle构建Spring Boot项目之前,需要确保已经安装了Gradle和相应的Java SDK。接下来,遵循以下步骤创建项目工程: 1.首先创建一个文件夹,并在此文件夹中创建一个build.gradle文件。 2.在build.gradle文件中添加以下代码块来声明Spring Boot插件: ``` plugins { id 'org.springframework.boot' version '2.2.4.RELEASE' id 'io.spring.dependency-management' version '1.0.9.RELEASE' } ``` 3.接着添加以下代码块来声明项目的依赖: ``` dependencies { implementation 'org.springframework.boot:spring-boot-starter-web' implementation 'org.springframework.boot:spring-boot-starter-data-jpa' implementation 'org.springframework.boot:spring-boot-starter-thymeleaf' implementation 'org.springframework.boot:spring-boot-devtools' testImplementation 'org.springframework.boot:spring-boot-starter-test' runtimeOnly 'mysql:mysql-connector-java' } ``` 4.运行Gradle来下载和安装项目所需的依赖: ``` gradle clean build ``` 5.创建一个Spring Boot应用程序: ``` package com.example.demo; import org.springframework.boot.SpringApplication; import org.springframework.boot.autoconfigure.SpringBootApplication; @SpringBootApplication public class DemoApplication { public static void main(String[] args) { SpringApplication.run(DemoApplication.class, args); } } ``` 6.构建并运行项目: ``` gradle bootRun ``` 以上就是使用Gradle构建Spring Boot项目工程的详细教程。这种方法可以提高开发效率,并将代码与项目依赖性集成在一起。 ### 回答2: Gradle是一款开源的自动化构建工具,是目前最为流行的Java项目自动化构建工具之一,可以帮助我们管理项目依赖、执行构建任务、自动化测试等。 Spring Boot是一个快速开发应用程序的框架,几乎可以零配置使用,可以轻松地构建Web应用程序并且支持很多种开发方式。使用Gradle构建Spring Boot项目工程,可以快速构建Spring Boot应用程序。 以下是详细步骤: 一、创建Spring Boot项目 在开始使用Gradle构建Spring Boot项目之前,首先需要创建Spring Boot项目。可以使用Spring官方提供的Spring Initializr工具来创建Spring Boot项目。 具体步骤如下: 1.访问Spring Initializr网站 https://start.spring.io/ 2.选择项目的基本配置信息,包括项目类型、项目名称、项目包名、项目版本号等。 3.选择项目依赖,例如选中Web、JPA、MySQL等依赖。 4.点击“Generate”按钮生成Spring Boot项目,将项目下载到本地电脑上。 二、配置Gradle 1.在项目根目录下创建build.gradle文件, 具体内容如下: //设置Gradle版本 buildscript { ext { springBootVersion = '2.4.1' } repositories { mavenCentral() } dependencies { classpath("org.springframework.boot:spring-boot-gradle-plugin:${springBootVersion}") } } //设置依赖项 apply plugin: 'java' apply plugin: 'org.springframework.boot' apply plugin: 'io.spring.dependency-management' group = 'com.xxx.xxx'//修改为自己的工程名称 version = '0.0.1-SNAPSHOT'//工程版本号 sourceCompatibility = '1.8' repositories { mavenCentral() } dependencies { implementation 'org.springframework.boot:spring-boot-starter-web' implementation 'org.springframework.boot:spring-boot-starter-data-jpa' runtimeOnly 'mysql:mysql-connector-java' testImplementation 'org.springframework.boot:spring-boot-starter-test' } 2.保存build.gradle文件后,在终端中执行gradle build命令即可构建项目,生成的工程目录如下: /build /classes /generated /libs /reports /resources /tmp /bootJar 三、运行Spring Boot应用程序 1.在build.gradle文件中添加以下配置信息: bootRun { sourceResources = sourceSets.main.output.resourcesDir } 2.在终端中执行gradle bootRun命令,即可运行Spring Boot应用程序,在浏览器中输入http://localhost:8080/hello进行访问。 四、打包应用程序 1.在build.gradle文件中添加以下配置信息,用于打包应用程序: bootJar { archiveName = 'app.jar'// 修改生成的文件名 } 2.在终端中执行gradle bootJar命令进行打包,生成的应用程序在工程目录下的build/libs文件夹中,即可部署到服务器上进行使用。 五、总结 通过Gradle构建Spring Boot项目,可以帮助我们更方便地管理项目依赖,执行构建任务,自动化测试等,从而提高项目开发效率和质量。希望本文对你有所帮助。 ### 回答3: 构建Spring Boot项目工程时,使用Gradle是一个较好的选择。因为Gradle是一个极其强大的构建工具,可以快速方便地构建出高效稳定的项目。下面是使用Gradle构建Spring Boot项目工程的详细教程: 第一步:创建新的Gradle项目 在创建Gradle项目时,需要确保使用的Gradle版本是5.0及以上版本。 第二步:添加依赖 在构建Spring Boot项目的过程中,我们需要导入一些必要的依赖,比如web依赖。可以在build.gradle文件中添加以下内容: dependencies { compile('org.springframework.boot:spring-boot-starter-web') } 第三步:添加Spring Boot插件 可以通过在build.gradle文件中添加以下内容,来将spring-boot插件添加到项目中: plugins { id 'org.springframework.boot' version '2.6.0' } 第四步:添加源代码 src/main下新建java目录,java目录下新建包名 com.zxy.springboot ,随后在这个包下新建一个名为 SpringBootDemoApplication.java 的文件; 然后在 SpringBootDemoApplication.java 中添加如下内容: package com.zxy.springboot; import org.springframework.boot.SpringApplication; import org.springframework.boot.autoconfigure.SpringBootApplication; @SpringBootApplication public class SpringBootDemoApplication { public static void main(String[] args) { SpringApplication.run(SpringBootDemoApplication.class, args); } } 第五步:运行程序 在build.gradle所在目录,运行以下命令: gradle bootRun 至此,构建Spring Boot项目工程的详细教程已经介绍完毕。

“相关推荐”对你有帮助么?

  • 非常没帮助
  • 没帮助
  • 一般
  • 有帮助
  • 非常有帮助
提交
评论
添加红包

请填写红包祝福语或标题

红包个数最小为10个

红包金额最低5元

当前余额3.43前往充值 >
需支付:10.00
成就一亿技术人!
领取后你会自动成为博主和红包主的粉丝 规则
hope_wisdom
发出的红包
实付
使用余额支付
点击重新获取
扫码支付
钱包余额 0

抵扣说明:

1.余额是钱包充值的虚拟货币,按照1:1的比例进行支付金额的抵扣。
2.余额无法直接购买下载,可以购买VIP、付费专栏及课程。

余额充值