


 这篇博客详细介绍了在Linux系统中如何安装、启动Apache服务,并提供了如何配置防火墙策略、更改默认发布目录、设置访问控制以及创建虚拟主机的步骤。通过实例展示了Apache在Linux下的基本操作和高级应用。
作为最受欢迎的Apache,linux怎么会少了它呢。就让我们在这篇博客中搞定linux下的apache服务吧
Apache的传输形式
apache是一个提供超文本传输的软件。在web被访问时通常使用http://的形式
http:// :超文本传输协议,把文件共享出去的一种协议
已知比较流行的软件还有:nginx,stgw,jfe,tengine
redhat8中Apache的安装
dnf install httpd.x86_64

Apache的启动
systemctl enable --now httpd ; 开启服务并设定服务位开机启动
firewall-cmd --list-all ; 查看火墙信息
firewall-cmd --permanent --add-service=http ; 在火墙中永久开启http访问
firewall-cmd --permanent --add-service=https ; 在火墙中永久开启https访问
firewall-cmd --reload ; 刷新火墙使设定生效

加入防火墙策略:

Apache的基本信息
Apache服务名称: httpd
端口号:80
加密端口号:443
Apache配置文件:/etc/httpd/conf/httpd.conf ; 主配置文件
/etc/httpd/conf.d/*.conf ; 子配置文件
Apache默认发布目录:/var/www/html;默认发布文件:index.html(必须以html结尾)
DirectoryIndex index.html ##规定了默认发布页面
可以增加一个默认发布文件:DirectoryIndex index.html westos。
然后重启服务。


默认端口: 80 ; http
443 ; https
用户: apache
日志: /etc/httpd/logs
Apache的基本配置
1、Apache端口修改
vim /etc/httpd/conf/httpd.conf ; 编辑配置文件
Listen 8080 ; 修改端口
firewall-cmd --permanent --add-port=8080/tcp ; 在防火墙允许范围内加上8080端口
firewall-cmd --reload ; 重新加载防火墙
semanage port -l | grep http ; 过滤端口
semanage port -a -t http_port_t -p tcp 8080 ;
systemctl restart httpd ; 重新启动httpd服务
访问的时候要加上8080。172.25.254.210:8080,这样可以访问到默认发布页面

2、默认发布文件
vim /etc/httpd/conf/httpd.conf
DirectoryIndex hello.html index.html ; 发布文件有先后顺序
systemctl restart httpd

3、默认发布目录
vim /etc/httpd/conf/httpd.conf ; 编辑配置文件
DocumentRoot “/var/www/westos” ##指定更改后的发布目录
<Directory “/var/www/westosl”> ##对于更改目录进行授权访问
Require all granted

semanage fcontext -a -t httpd_sys_content_t ‘/westos(/.*)?’
restorecon -RvvF /westos/
systemctl restart httpd
http://192.168.0.8
基于ip的Apache的访问控制
实验素材:
mkdir /var/www/html/westos ; 建立一个westos目录
vim /var/www/html/westos/index.html ; 编辑westos目录下的index.html文件
westosdir's page
192.168.0.8/westos ; 浏览器搜索 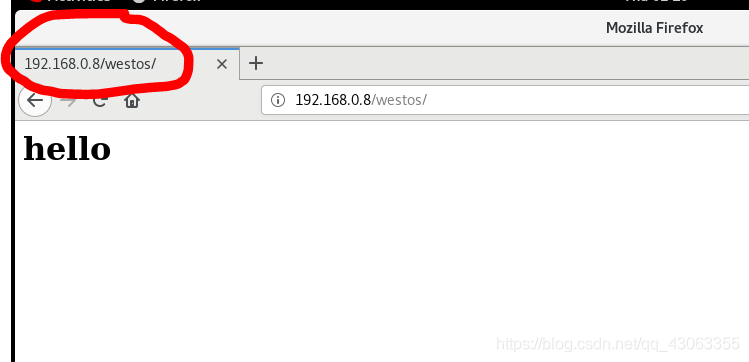更改默认发布目录:
vim /etc/httpd/conf/httpd.conf ; 编辑配置文件
<Directory “/var/www/html/westos”>
Order Deny,Allow
Allow from 172.25.254.200 ##只可以允许172.25.254.200主机访问这个目录
Deny from All
<Directory “/var/www/html/westos”>
Order Allow,Deny
Allow from All
Deny from 192.168.0.7 ## 任何人都可以访问/var/www/html/westos, 仅仅拒绝了192.168.0.7主机的访问

基于用户的访问认证:
vim /etc/httpd/conf/httpd.conf
编辑如下:
<Directory “/var/www/html/westos”>
AuthUserFile /etc/httpd/htpasswdfile ; 指定认证文件
AuthName “Please input your name and password” ; 认证提示语
AuthType basic ; 认证类型
Require user admin ; 允许通过的认证用户 :admin
Require valid-user ; 允许所有用户通过认证 2选1
htpasswd -cm /etc/httpd/htpasswdfile admin ; ##生成认证文件
注意:当/etc/httpd/htpasswdfile 当用户存在那么在添加用户时不要加-c参数,否则会覆盖源文件内容


Apache的虚拟主机
目的:在一台apache主机上访问除了默认发布目录之外的发布目录。也就是让用户访问到多个不同的网页。
实验环境的设定:mkdir -p /var/www/westos.org{a,b,c} ; 新建三个目录westos.org/a,b,c

编辑配置文件vim /etc/httpd/conf.d/vhost.conf ##这个文件没有,自己建立。

在要访问的用户所在的本机上编辑hosts文件,让系统自动解析地址:vim /etc/hosts
172.25.254.210 www.westos.org a.westos.org ## b.westos.org ## c.westos.org

重新启动服务之后访问:这样就可以访问不同的发布目录。


 264
264

 被折叠的 条评论
为什么被折叠?
被折叠的 条评论
为什么被折叠?
 到【灌水乐园】发言


