


实现不同路由页面(如新增、编辑、详情)用同一个组件,减少代码冗余
有一些业务的页面大同小异,尤其是新增、编辑、详情,如果在router.js里面配置时不同的路由用不同的组件,会导致代码冗余,重复的代码复制来复制去,而且维护起来很不方便。
我后来想到一个方法,就是配置不同的路由,但是它们所引用的组件都一样,进入页面时通过路由来判断是哪个页面,从而控制页面元素的显隐,调不同的接口
以下举例:
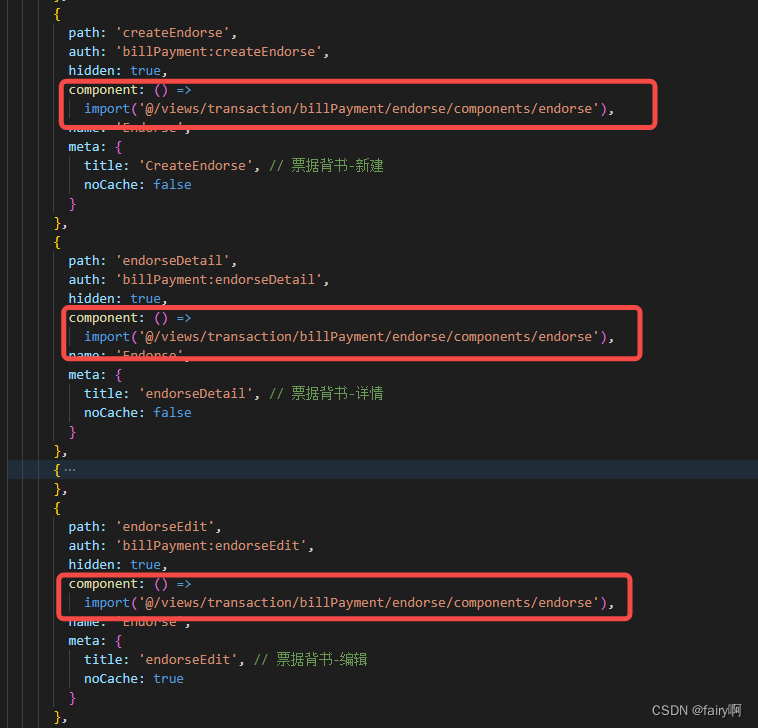
1、不同的路由配置相同的组件
2、组件data()中定义一个标志,用于判断是该页面是属于哪个路由

3、定义一个getPageType()方法,页面初始化的时候调用,通过路由来判断当前页面是属于哪个(是新增,编辑,还是详情?)
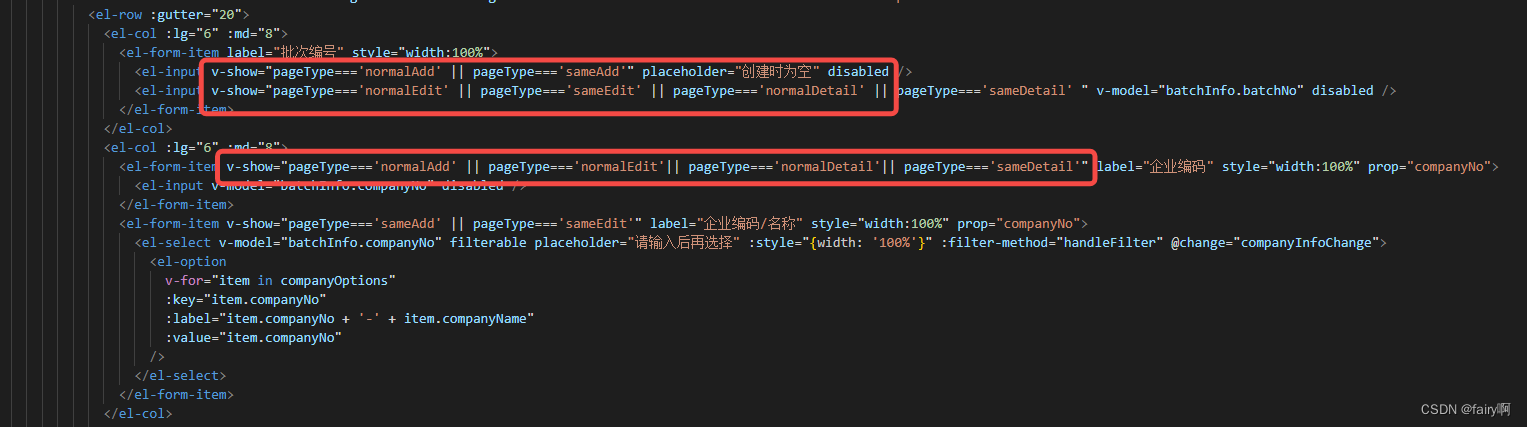
4、根据pageType标识控制页面元素的显隐、不同接口的调用
以上为本人拙见,如有小伙伴发现哪里有错误或者有更好的实现方式,欢迎大家指正交流~


 855
855


 被折叠的 条评论
为什么被折叠?
被折叠的 条评论
为什么被折叠?
 到【灌水乐园】发言


