


利用3台机器源码|安装Linux+Nginx+PHP+MySQL主从,
发布两个虚拟主机网站:Discuz和WordPress,数据库使用不同的库,
实现通过两个域名dz.jf.com|wp.jf.com访问。
3台主机
Node1:Linux+Nginx+PHP (FastCGI)ip:192.168.0.35
Node2:MYSQL主库 ip:192.168.0.34
Node3:MySQL从库 ip:192.168.0.33
模拟主库宕机,从库接管,网站还可以正常访问!
操作系统:centos7.4
软件版本及安装方式:源码安装,软件版本安装步骤有说明
安装前先关闭防火墙及selinux
一.首先安装mysql
MYSQL主库 ip:192.168.0.34
MySQL从库 ip:192.168.0.33
先在两台主机上分别安装mysql,步骤如下:
1、首先查看系统内是否有安装mysql、mariadb
rpm -qa |grep mysql#查看mysql是否安装
rpm -qa |grep mariadb#查看mariadb是否安装
卸载命令
yum remove -y mysql*#卸载mysql(*免输入版本号)
yum remove -y mariadb*#卸载mariadb(*免输入版本号)
2、安装mysql相关依赖、组件
yum -y install gcc-c++ ncurses-devel cmake make perl gcc autoconf automake zlib libxml libgcrypt libtool bison
查看是否有mysql用户,没有可以直接创建,如果有则删除重新创建
id mysql#查看mysql用户
useradd mysql#新建mysql用户
3、下载mysql和boost
wget https://dev.mysql.com/get/Downloads/MySQL-5.7/mysql-5.7.25.tar.gz#下载mysql
wget https://nchc.dl.sourceforge.net/project/boost/boost/1.59.0/boost_1_59_0.tar.gz#下载boost
4、解压mysql和boost
tar xzf mysql-5.7.25.tar.gz#解压
tar xzf boost_1_59_0.tar.gz#解压
5、新建boost安装目录,并将解压好的boost目录下的文件移动至安装目录
mkdir /usr/local/boost#新建boost的目录
mv boost_1_59_0/* /usr/local/boost#移动解压后的boost下所有文件至新的boost目录下
6、新建mysql数据目录,并添加至mysql用户及组权限
mkdir -p /data/mysql#递增新建目录
chown mysql:mysql -R /data/mysql/#修改用户及组权限
7、进入mysql解压目录,使用cmake预编译
cd mysql-5.7.25#切换目录
cmake . -DCMAKE_INSTALL_PREFIX=/usr/local/mysql5/ -DMYSQL_UNIX_ADDR=/tmp/mysql.sock -DMYSQL_DATADIR=/data/mysql/ -DSYSCONFDIR=/etc -DMYSQL_USER=mysql -DMYSQL_TCP_PORT=3306 -DWITH_XTRADB_STORAGE_ENGINE=1 -DWITH_INNOBASE_STORAGE_ENGINE=1 -DWITH_PARTITION_STORAGE_ENGINE=1 -DWITH_BLACKHOLE_STORAGE_ENGINE=1 -DWITH_MYISAM_STORAGE_ENGINE=1 -DWITH_READLINE=1 -DENABLED_LOCAL_INFILE=1 -DWITH_EXTRA_CHARSETS=1 -DDEFAULT_CHARSET=utf8 -DDEFAULT_COLLATION=utf8_general_ci -DEXTRA_CHARSETS=all -DWITH_BIG_TABLES=1 -DWITH_DEBUG=0 -DDOWNLOAD_BOOST=1 -DWITH_BOOST=/usr/local/boost
8、编译安装
make && make install#编译及安装
9、进入安装目录,并设置mysql用户及组权限
cd /usr/local/mysql5#切换目录
chown mysql:mysql -R .#给当前目录修改用户及组
10、将mysql下的bin目录命令软连接到系统目录下
ln -s /usr/local/mysql5/bin/* /usr/bin/#添加软连接至系统命令目录
11、进入安装目录,复制mysql启动程序至系统,并添加执行权限
cd /usr/local/mysql5 && \cp support-files/mysql.server /etc/init.d/mysqld#切换目录并复制
chmod +x /etc/init.d/mysqld#添加执行权限
12、新建并配置my.cnf文件(如果有my.cnf文件,删除即可)
vim /etc/my.cnf
#内容如下:
[mysqld]
# These are commonly set, remove the # and set as required.
basedir = /usr/local/mysql5
datadir = /data/mysql
port = 3306
# server_id = .....
socket = /tmp/mysql.sock
sql_mode=NO_ENGINE_SUBSTITUTION,STRICT_TRANS_TABLES
12、添加启动项到系统目录,启动mysql,并登录,第一次登录进入需要更改密码才可进入命令操作
cd /usr/local/mysql5 && \cp support-files/mysql.server /etc/init.d/mysqld#进入安装目录复制启动文件至系统默认启动目录
13、初始化mysql,会生成密码,需要记住(如初始化失败,需要检查/data/mysql/目录下不能有文件,文件夹权限是否正确)
/usr/local/mysql5/bin/mysqld --initialize --user=mysql --basedir=/usr/local/mysql5 --datadir=/data/mysql#初始化
chmod +x /etc/init.d/mysqld #添加执行权限
service mysqld start#启动
mysql -uroot -p"密码"#登录
set password for root@localhost = password('密码');#修改密码
**
mysql主库及从库做主从复制
主库操作(192.168.0.34)
修改配置
vim /etc/my.cnf
添加
server-id=1
log-bin=mysql-bin
重启后登录mysql
service mysqld restart
mysql -uroot -p "初始化的密码"
如下显示:
[root@localhost mysql5]# mysql -uroot -p"=+wvrF4u(UC3"
mysql: [Warning] Using a password on the command line interface can be insecure.
Welcome to the MySQL monitor.  Commands end with ; or \g.
Your MySQL connection id is 2
Server version: 5.7.21

Copyright (c) 2000, 2018, Oracle and/or its affiliates. All rights reserved.

Oracle is a registered trademark of Oracle Corporation and/or its
affiliates. Other names may be trademarks of their respective
owners.

Type 'help;' or '\h' for help. Type '\c' to clear the current input statement.

mysql>
第一次修改密码
set password for root@localhost = password('新密码');
刷新用户权限
flush privileges;
从库操作(192.168.0.33)
修改配置
vim /etc/my.cnf
添加
server-id=2
log-bin=mysql-bin
重启后登录mysql
service mysqld restart
mysql -uroot -p "初始化的密码"
如下显示:
 [root@localhost mysql5]# mysql -uroot -p"aDr(z9U.ZuD>"
    mysql: [Warning] Using a password on the command line interface can be insecure.
    ERROR 1045 (28000): Access denied for user 'root'@'localhost' (using password: YES)
    [root@localhost mysql5]# mysql -uroot -p"aDr(z9U.ZuD>"
    mysql: [Warning] Using a password on the command line interface can be insecure.
    Welcome to the MySQL monitor.  Commands end with ; or \g.
    Your MySQL connection id is 3
    Server version: 5.7.21

    Copyright (c) 2000, 2018, Oracle and/or its affiliates. All rights reserved.

    Oracle is a registered trademark of Oracle Corporation and/or its
    affiliates. Other names may be trademarks of their respective
    owners.

    Type 'help;' or '\h' for help. Type '\c' to clear the current input statement.

    mysql>
第一次修改密码
set password for root@localhost = password('新密码');
刷新用户权限
flush privileges;
**
主库及从库登录正常
主库操作
mysql复制权限给192.168.0.33主机,指定IP,可换成%所有主机
grant replication slave on *.* to'discuz'@'192.168.0.33'identified by'1';
查看bin-log文件及 position点
show master status;
如图
从库操作
选择链接的主机ip,账号,密码,bin-log文件及 position点
change master to master_host=‘192.168.0.34’,master_user=‘tongbu’,master_password=‘1’,master_log_file=‘mysql-bin.000001’,master_log_pos=465;
启动slave
start slave;
查看slave同步状态
show slave status\G
如图:
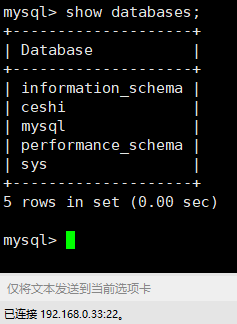
测试mysql数据库是否同步,在主库里新建名为:ceshi的表

查看从库数据表
数据库主从配置完毕
二.安装nginx及php
Linux+Nginx+PHP (FastCGI)ip:192.168.0.35
在一台主机上安装nginx及php,安装步骤如下:
nginx安装
下载或上传nginx安装包
我这边使用wget命令直接在centos7主机上下载,上传安装包的可以忽略直接下一步
[root@localhost ~]# wget http://nginx.org/download/nginx-1.16.1.tar.gz
解压软件包
tar xzf nginx-1.16.1.tar.gz
安装nginx依赖
yum install -y zlib-devel pcre-devel gcc-c++
进入nginx目录后预编译
cd nginx-1.16.1 && ./configure
编译并安装
make && make install
启动nginx
/usr/local/nginx/sbin/nginx
网页访问nginx,出现如下图说明安装成功(访问前关闭防火墙)

php安装
源码上传php-5.6.9.tar.gz
解压
tar xzf php-5.6.9.tar.gz
安装依赖:
yum -y install gd curl curl-devel libjpeg libjpeg-devel libpng libpng-devel freetype freetype-devel libxml2 libxml2-devel mysql-devel gcc-c++
进入解压后的目录
cd php-5.6.9
预编译
./configure --prefix=/usr/local/php5 --enable-fpm --enable-debug --with-gd --with-jpeg-dir --with-png-dir --with-freetype-dir --enable-mbstring --with-curl --enable-mysqlnd --with-mysqli=mysqlnd --with-pdo-mysql=mysqlnd --disable-fileinfo
编译、安装
make && make install
复制解压目录文件至安装目录下
cp php.ini-development /usr/local/php5/lib/php.ini

cp /usr/local/php5/etc/php-fpm.conf.default /usr/local/php5/etc/php-fpm.conf

cp /usr/src/php-5.6.9/sapi/fpm/init.d.php-fpm /etc/init.d/php-fpm
指定目录权限
chmod 755 /etc/init.d/php-fpm
chkconfig --add php-fpm
chkconfig php-fpm on
启动
systemctl start php-fpm
整合nginx及php
添加index.php文件
源码默认发布网页目录/usr/local/nginx/html下
vim /usr/local/nginx/html/index.php
添加代码:
<?php
phpinfo();
?>
修改nginx配置文件
vim /usr/local/nginx/conf/nginx.conf
server {
        listen       80;
        server_name  localhost;
        location / {
            root   html;
            index index.php index.html index.htm;
        }
        location ~ \.php$ {
            root           html;
            fastcgi_pass   127.0.0.1:9000;
            fastcgi_index  index.php;
            fastcgi_param  SCRIPT_FILENAME  $document_root$fastcgi_script_name;
            include        fastcgi_params;
        }
    }
网页访问192.168.0.35/index.php,检测php安装状态,出现如下图,说明安装完成(访问前关闭防火墙)

本地上传网页包
Discuz_X3.2_SC_UTF8.zip
wordpress-4.9.4.zip
解压
unzip Discuz_X3.2_SC_UTF8.zip
unzip wordpress-4.9.4.zip
新建发布目录
mkdir /usr/local/nginx/html/discuz
mkdir /usr/local/nginx/html/wordpress
添加目录权限
cd /usr/local/nginx/html/ && chmod o+w -R discuz/ wordpress/
移动wordpress内所有文件至发布目录
mv wordpress/* /usr/local/nginx/html/wordpress/
移动discuz解压后的upload内所有文件至发布目录
mv upload/* /usr/local/nginx/html/discuz/
修改nginx配置文件
vim /usr/local/nginx/conf/nginx.conf
如下
server {
        listen       80;
        server_name  wp.jf.com;
        location / {
            root   html/wordpress/;
            index  index.php index.html index.htm;
        }
        location ~ \.php$ {
            root           html/wordpress/;
            fastcgi_pass   127.0.0.1:9000;
            fastcgi_index  index.php;
            fastcgi_param  SCRIPT_FILENAME  $document_root$fastcgi_script_name;
            include        fastcgi_params;
        }
    }
    server {
        listen       80;
        server_name  dz.jf.com;
        location / {
            root   html/discuz/;
            index  index.php index.html index.htm;
        }
        location ~ \.php$ {
            root           html/discuz/;
            fastcgi_pass   127.0.0.1:9000;
            fastcgi_index  index.php;
            fastcgi_param  SCRIPT_FILENAME  $document_root$fastcgi_script_name;
            include        fastcgi_params;
        }
    }
windows本地浏览器访问域名测试
修改C:\Windows\System32\drivers\etc下的hosts文件
添加以下配置后保存
192.168.0.35 dz.jf.com
192.168.0.35 wp.jf.com
浏览器访问效果如图:


继续往下配置


这里提示需要连接数据库,需要在数据库授权访问
主库操作如下:
新建数据库discuz
create database discuz charset=utf8;
授权192.168.0.35主机可以访问discuz数据库,账号为discuz密码1
grant all on discuz.* to discuz@'192.168.0.35' identified by "1";
顺便给wordpress新建一个数据库及授权
create database wordpress charset=utf8;
授权
grant all on wordpress.* to wordpress@'192.168.0.35' identified by "1";
刷新权限
flush privileges;
使用刚才新建的数据库及账号密码,安装完成

wordpress操作同上


至此lnmp基本安装完成
前面有安装mysql主从服务器,如果主服务器宕机,怎么样使用到从库解决方法:
使用域名连接数据库,在主库服务器宕机时,更改域名解析的主库ip为从库服务器ip
还可以更改发布目录应用程序的全局配置文件,举例:diszcuz
vim /usr/local/nginx/html/discuz/config/config_global.php


 168
168


 被折叠的 条评论
为什么被折叠?
被折叠的 条评论
为什么被折叠?
 到【灌水乐园】发言


