


和风App第二周开发经验总结
实现功能
- 首页底部显示明天和后天的天气预报基本信息,包括晴雨,温度
- 多日详情页面改用CollectionView展示详情
- 所有信息实现本地缓存存储,多城市信息使用plist存储,首页实时信息使用归档接档方式存储,其余信息使用coredata存储
- 绘制当日湿度饼图
- 实现首页实况天气的动态背景
产品展示
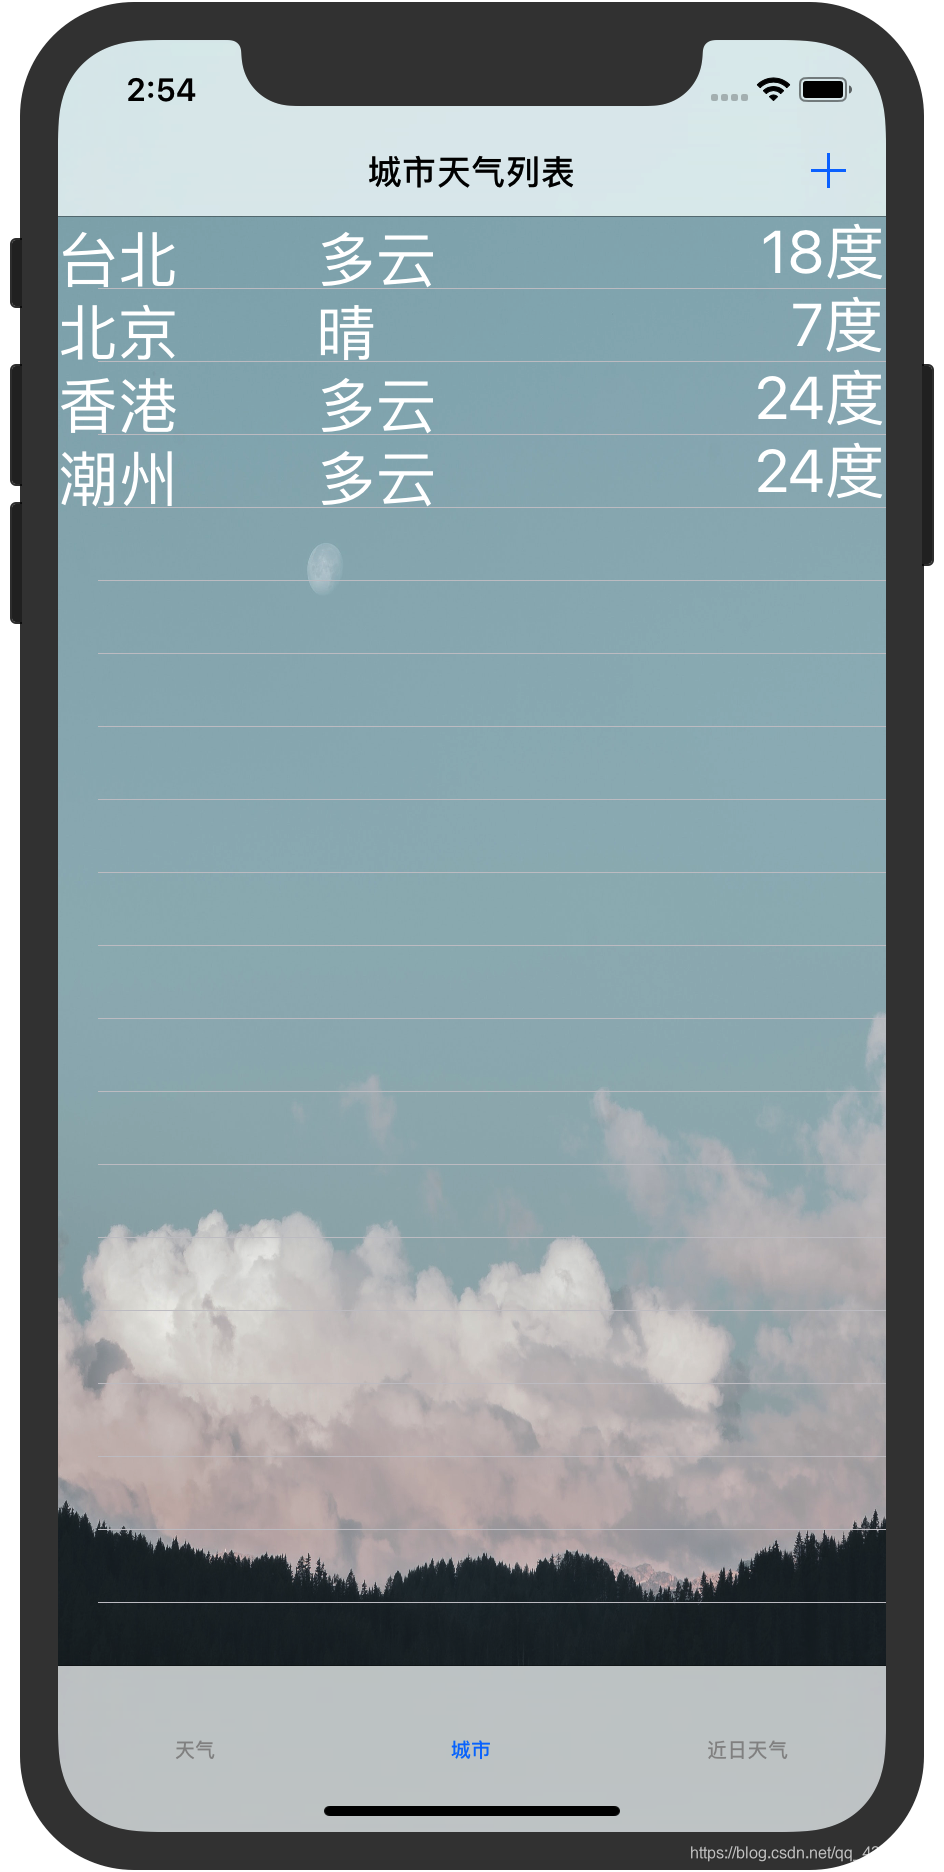
首页:天气展示,默认为展示选中的城市列表第一个的天气和明天及后天的天气预报,如果城市列表没有则显示的是当前城市(无网络则为深圳),利用绘画实现了动态背景,下雨效果和飞行的鸟

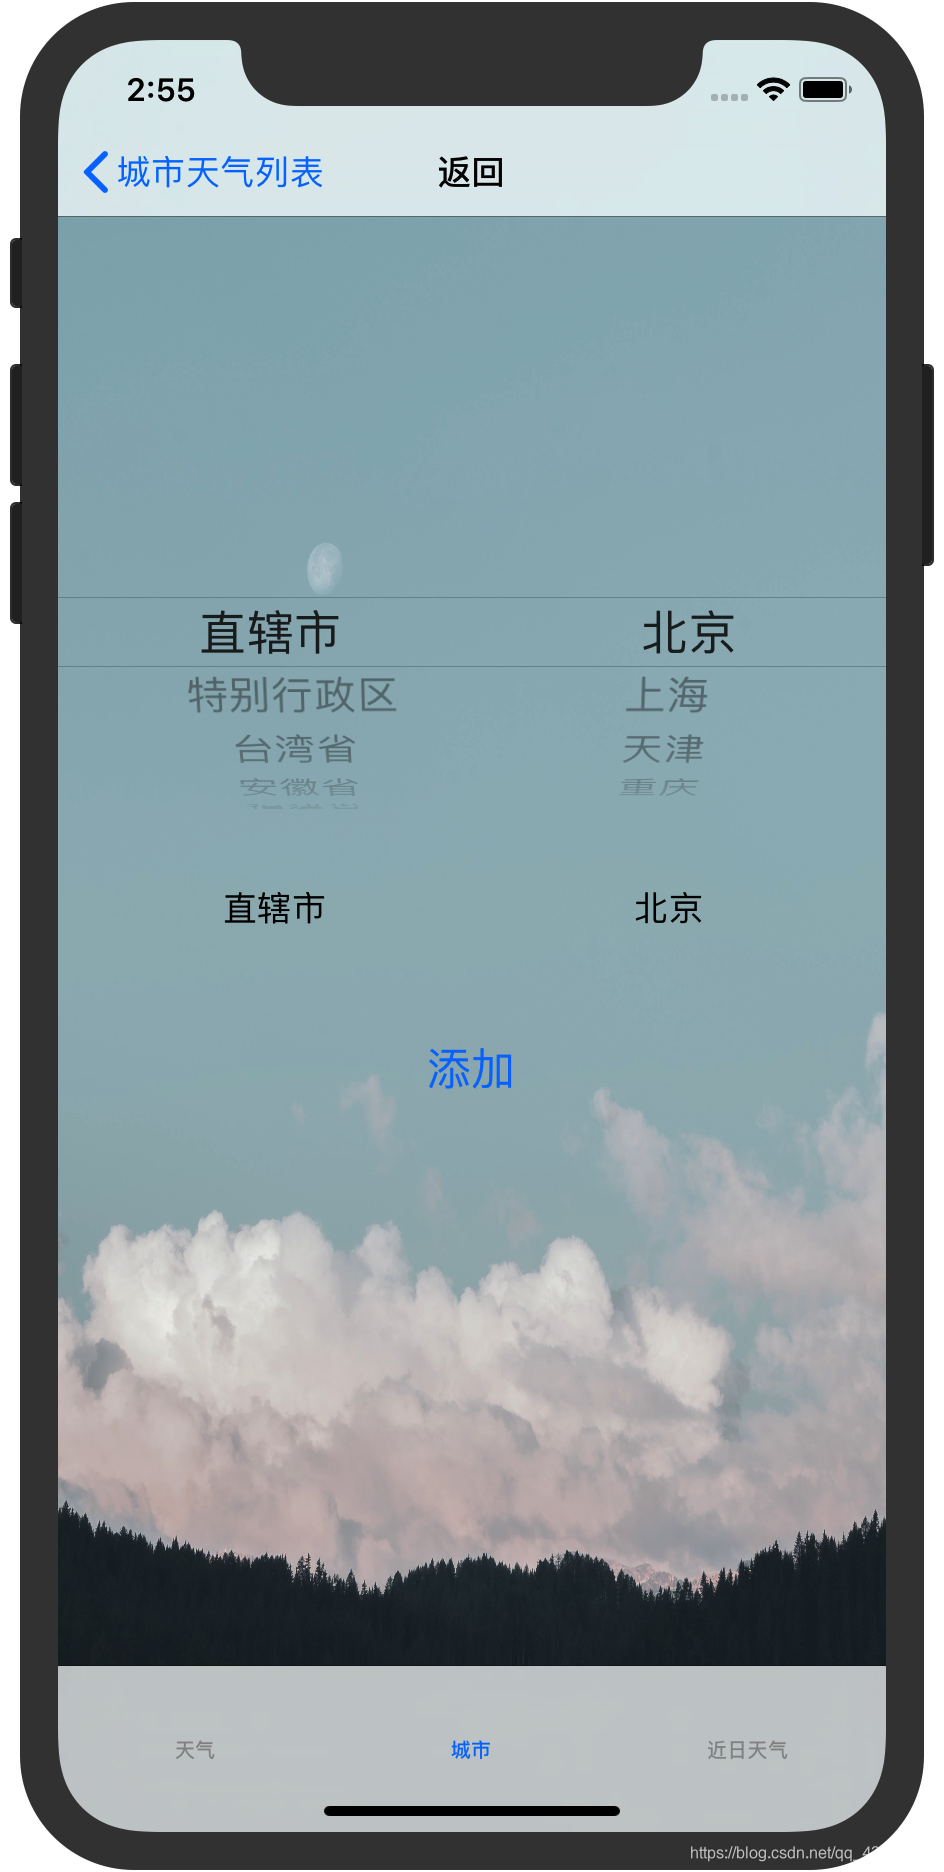
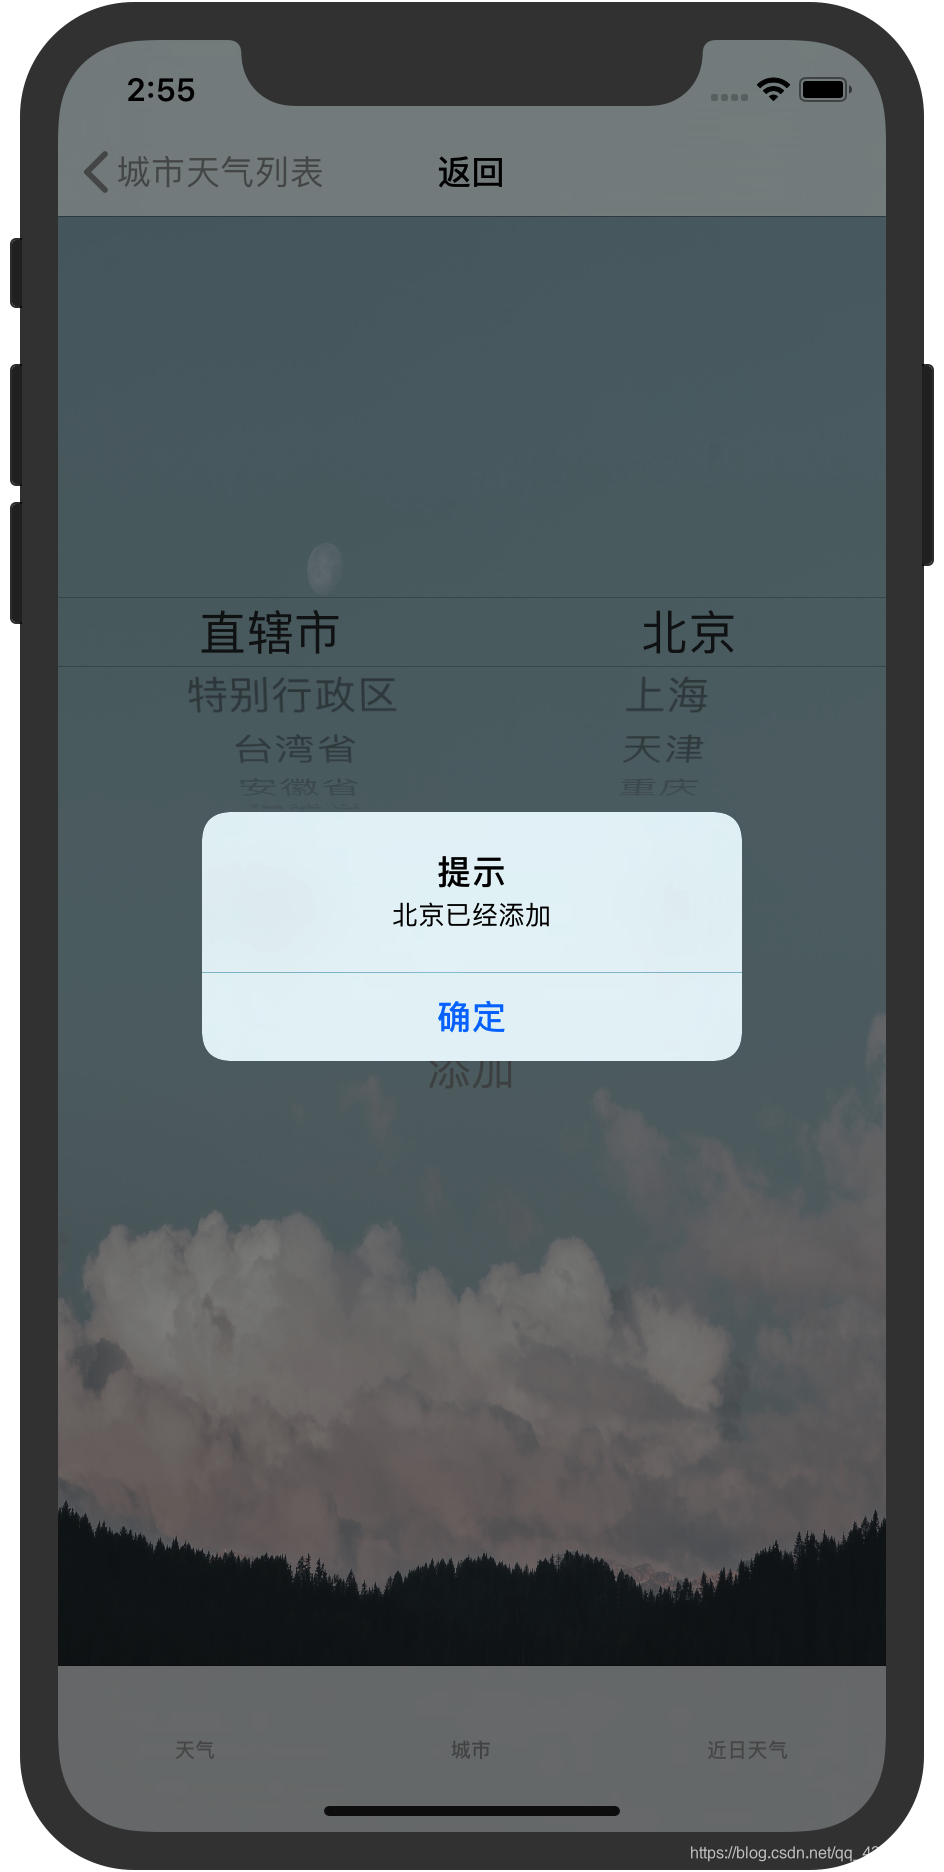
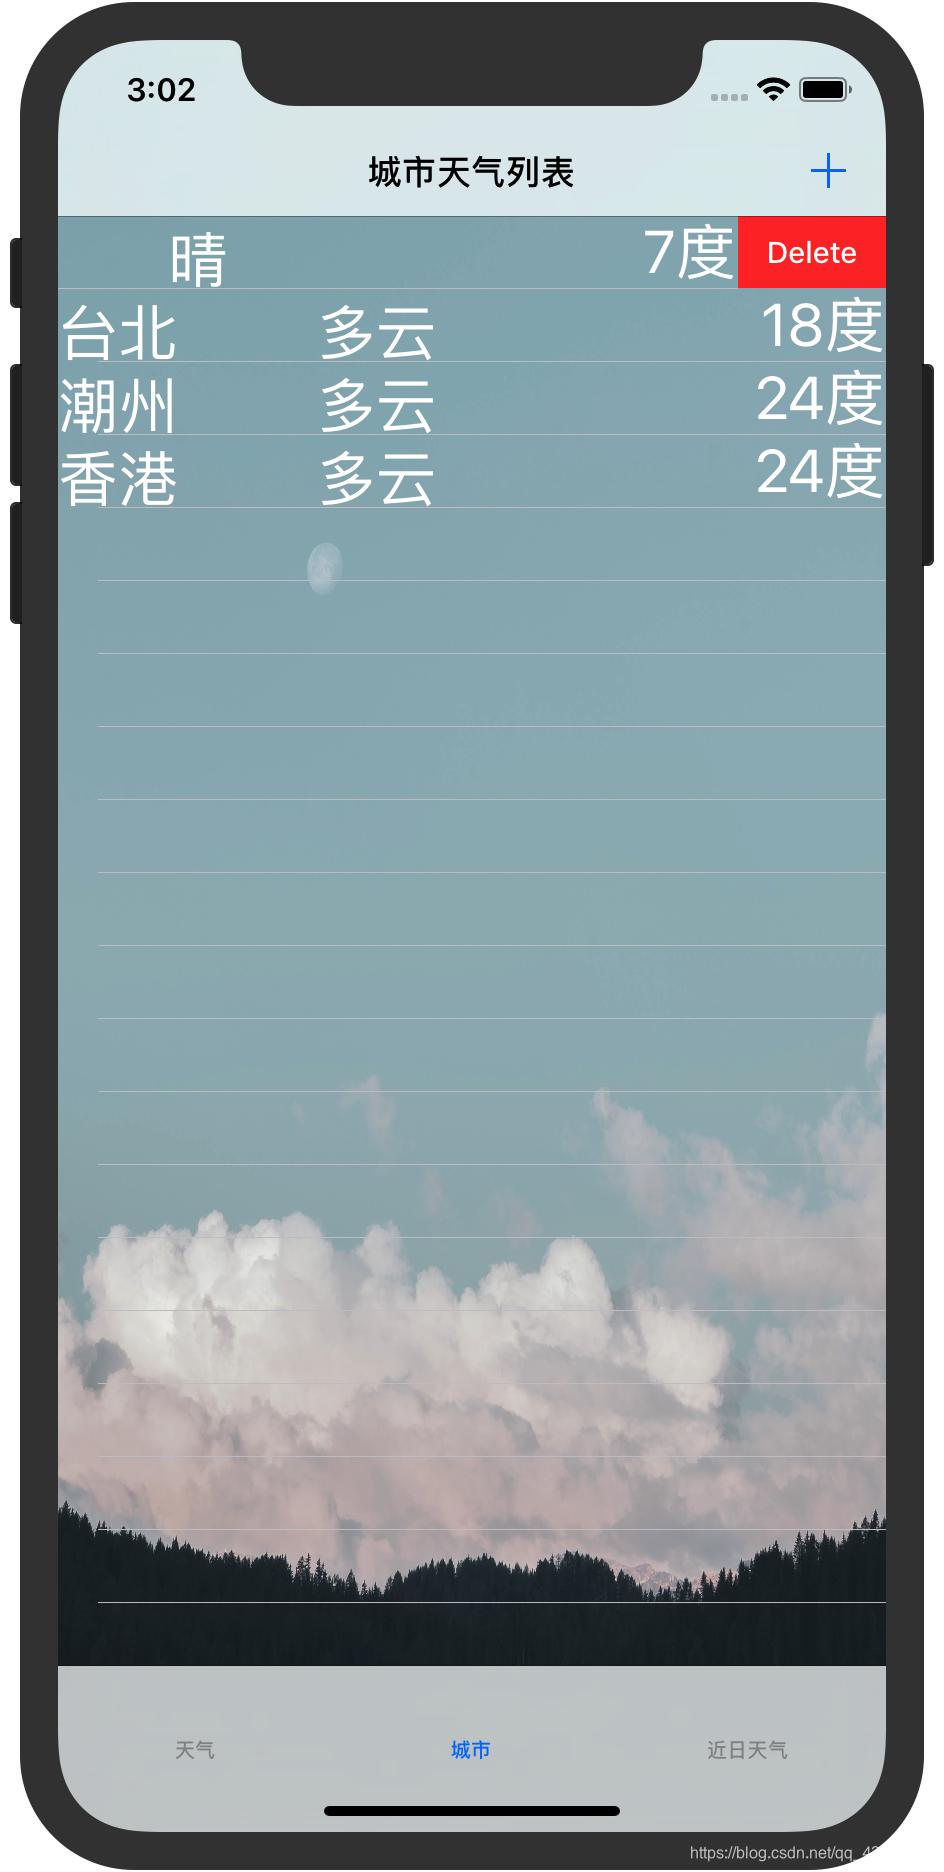
城市页面:多城市天气展示,可以增加删除城市列表,左滑删除,点击添加按钮进入城市选择界面进行添加,点击添加会确认,重复添加会弹出提示框
点击添加按钮,弹出选择界面,若重复添加则弹出提示
左滑删除城市
多日天气详情:展示今后几天的天气预报详细情况

学习经验总结
bug和需要改进的地方
- 首日详情页面城市由读取用户本地地址改为在多日城市选择确定
- 网络请求返回对象的元素为空,则页面显示为空,添加判断,当元素为空时不进行更新操作
- MVC模式理解不够,代码耦合度较高
- 写项目时没有设计好功能模块
- UI加载比网络请求快,而创建多少
- autolayout使用不熟练,会出现布局上的问题
- 如果要调整功能,代码需要调整的部分过多
- 多日详情页面没有实现滑动切换
自动布局
屏幕适配过程:
- 直接使用frame计算控件位置,大小
- autoresizing进行屏幕适配,参照父控件来设置子控件frame
- autolayout,不仅根据与父控件的参照来设置,也可以在不同控件之间设置
autolayout:
核心概念:
参照:参照于谁
约束:设置大小和距离
警告和错误:
- 红色箭头:约束不完整,必须要有x,y:weight,height
- 红色箭头:约束冲突
- 黄色箭头:约束和当前的位置不一致,可以不管
处理:点进去箭头->fix Misplacement
Storyboard上的autolayout
-
预览(查看在不同设备上的效果)
Command+option+Enter -> preview
-
创建
使用control+drag的方式创建
-
更新frame
Editor->resolve autolayout issues->update Frames
使用xcode的按键来实现
右下角的按钮
代码实现:
通过代码布局控件的方法:
- 直接设置frame
segment.frame = CGRectMake((414-80*dayM.count)/2,100,80*dayM.count,50);
//生成一个子控件
 UIButton *button = [UIButton buttonWithType:UIButtonTypeRoundedRect];
    [button setFrame:CGRectMake(100, 100, 100, 50)];
    [button setTitle:@"it is cool" forState:UIControlStateNormal];
    [button setBackgroundColor:[UIColor redColor]];
    [button addTarget:self action:@selector(touchButton) forControlEvents:UIControlEventTouchUpInside];
    [self.view addSubview:button];
- 添加约束
+ (instancetype)constraintWithItem:(id)view1
                         attribute:(NSLayoutAttribute)attr1
                         relatedBy:(NSLayoutRelation)relation
                            toItem:(id)view2
                         attribute:(NSLayoutAttribute)attr2
                        multiplier:(CGFloat)multiplier
                          constant:(CGFloat)c
参数:
- view1左手边的受约束视图
- attr1左手边受约束视图的参考参数
- Relation约束的关系
- view2右手边的受约束视图
- attr2
- Multiplier 通常为1.0
给一个view添加约束
 NSArray *c_v = [NSLayoutConstraint constraintsWithVisualFormat:];
 NSArray *c_h = [NSLayoutConstraint constraintsWithVisualFormat:];

[self.view addConstraints:c_h];
[self.view addConstraints:c_v];
绘图
绘图的步骤
准备
- 在storyboard中添加一个view,给它添加一个控制类UIView,会生成一个drawRect方法,在drawRect方法中绘图
- (void)drawRect:(CGRect)rect{

NSString *str;
[str drawAtPoint:CGPointMake(50, 750) withAttributes:nil];
}
- (void)drawRect:(CGRect)rect {//绘图步骤
    //1.获取当前上下文
    struct CGContext *ctx = UIGraphicsGetCurrentContext();
    //2.拼接路径,同时把路径添加到上下文
    CGContextMoveToPoint(ctx,50,50);
    CGContextAddLineToPoint(ctx,100,100);
    //3.渲染
    CGContextStrokePath(ctx);}
-
绘制饼图
- (void)drawRect:(CGRect)rect{ NSArray *arr = @[@0.3,@0.1,@0.2,@0.4]; CGFloat start = 0,end = 0; for(int i=0;i<arr.count;i++){ end = 2*M_PI*[arr[i] floatValue]; UIBezierPath *path =[UIBezierPath bezierPathWithArcCenter:CGPointMake(100, 100) radius:100 startAngle:start endAngle:end clockwise:1 ]; //向扇形圆心连线 [path addLineToPoint:CGPointMake(100, 100)]; //设置颜色 [[UIColor colorWithRed:(float)(arc4random_uniform(256)/255.0) green:(float)(arc4random_uniform(256)/255.0) blue:(float)(arc4random_uniform(256)/255.0) alpha:(float)(arc4random_uniform(256)/255.0)] set]; [path fill]; start = end; } } -
绘制柱形图
// Drawing code NSArray *arr = @[@0.9,@0.5,@0.7,@0.3,@0.1,@0.6]; //计算cube for(int i=0;i<arr.count;i++){ CGFloat w = 20; CGFloat h = [arr[i] floatValue] *rect.size.height; CGFloat x = i*2*w; CGFloat y = rect.size.height - h; UIBezierPath* path = [UIBezierPath bezierPathWithRect:CGRectMake(x,y,w,h)]; //设置颜色 [[UIColor colorWithRed:(float)(arc4random_uniform(256)/255.0) green:(float)(arc4random_uniform(256)/255.0) blue:(float)(arc4random_uniform(256)/255.0) alpha:(float)(arc4random_uniform(256)/255.0)] set]; [path fill] -
绘制折线图
struct CGContext *context = UIGraphicsGetCurrentContext();
    CGContextMoveToPoint(context,10,10);
    CGFloat x=50,y=50;
    for(int i=2;i<5;i++){CGContextAddLineToPoint(context, x, y);x+=50;if(y==50)y=0 ;else y=50;}
    CGContextStrokePath(context);
- (void)drawRect:(CGRect)rect { //绘制坐标轴 UIBezierPath *path = [UIBezierPath bezierPath]; [path moveToPoint:CGPointMake(200, 10)]; [path addLineToPoint:CGPointMake(10, 10)]; [path moveToPoint:CGPointMake(10, 200)]; [path addLineToPoint:CGPointMake(10, 10)]; //添加箭头 省略 //绘制折线 [path moveToPoint:CGPointMake(50, 50)]; CGFloat y = 0; for(int i=2;i<5;i++){ [path addLineToPoint:CGPointMake(50*i,y)]; if(y==0) y=50;else y = 0; } [path stroke]; }
动画
要做动画的类,记录其layer
 UIView *redView = [[UIView alloc] init];
    redView.frame = CGRectMake(10, 10, 10, 10);
    redView.backgroundColor = [UIColor redColor];
    self.layer = redView.layer;
    [self.view addSubview:redView];
基本动画
//基本动画 核心动画会回到原来的位置
    //1.创建动画对象
    CABasicAnimation *anim = [[CABasicAnimation alloc] init];
    //2.怎么做
    anim.keyPath = @"position.x";
    anim.fromValue = @(10);
    anim.toValue = @(300);
    //anim.byValue=@(10) 加10移动
    //不希望回到原来的位置
    anim.fillMode = kCAFillModeForwards;
    anim.removedOnCompletion = NO;
    //3.添加动画
    [self.layer addAnimation:anim forKey:nil];
关键帧动画
//基本动画 核心动画会回到原来的位置
    //1.创建动画对象
    CABasicAnimation *anim = [[CABasicAnimation alloc] init];
    //2.怎么做
    anim.keyPath = @"position.x";
    anim.fromValue = @(10);
    anim.toValue = @(300);
    //anim.byValue=@(10) 加10移动
    //不希望回到原来的位置
    anim.fillMode = kCAFillModeForwards;
    anim.removedOnCompletion = NO;
    //3.添加动画
    [self.layer addAnimation:anim forKey:nil];
组动画
 //组动画
     CAAnimationGroup *group = [[CAAnimationGroup alloc] init];
    //基本动画 自旋转
    CABasicAnimation *anim = [[CABasicAnimation alloc] init];
    anim.keyPath = @"transform.rotation";
    anim.byValue = @(2*M_PI*10);
    //关键帧动画
    CAKeyframeAnimation *anim1 = [[CAKeyframeAnimation alloc] init];
    //
    anim1.keyPath = @"position";
    UIBezierPath *path = [UIBezierPath bezierPathWithArcCenter:CGPointMake(150, 150) radius:100 startAngle:0 endAngle:2*M_PI clockwise:1];
    anim1.path = path.CGPath;
    //操作
    group.animations = @[anim,anim1];
    group.duration = 3;
    group.repeatCount = INT_MAX;
    //添加动画
    [self.layer addAnimation:group forKey:nil];


 被折叠的 条评论
为什么被折叠?
被折叠的 条评论
为什么被折叠?
 到【灌水乐园】发言


