


google的双向认证
Google Authenticator介绍
通常我们直接通过ssh输入密码连接服务器,但这样很容易出现暴力破解情况,所以我们可以结合 google的动态认证+ssh密码,这样能够大大的提升登陆的安全。简单来说,就是当用户通过ssh登陆系 统时,先输入google的随机验证码,然后在输入服务器的ssh密码
话不多说先展示我上家公司在用的双向认证,可以看得见我们有很多平台,都接入了Google 的双向认证
-
giltab
-
jumpserver
-
服务器
-
zabbix
部署Google Authenticator
# 安装依赖 yum -y install pam-devel libpng-devel autoconf automake libtool # 下载代码 ## 国内源 wget http://test.driverzeng.com/other/1.04.tar.gz ## 国外源 wget https://github.com/google/google-authenticator-libpam/archive/1.04.tar.gz # 解压代码 [root@web02 ~]# tar xf 1.04.tar.gz # 进入工作目录 [root@web02 ~]# cd google-authenticator-libpam-1.04/ # 构建 ./bootstrap.sh # 生成 ./configure # 编译安装 make && make install # 验证插件是否安装 ll /usr/local/lib/security/ total 136 -rwxr-xr-x 1 root root 1021 May 21 08:59 pam_google_authenticator.la -rwxr-xr-x 1 root root 133552 May 21 08:59 pam_google_authenticator.so # 将安装好的软件拷贝到系统库 cp /usr/local/lib/security/pam_google_authenticator.so /usr/lib64/security/
生成google认证识别
google-authenticator Do you want authentication tokens to be time-based (y/n) y # 输入y! Do you want me to update your "/root/.google_authenticator" file? (y/n) y # 输入y Do you want to disallow multiple uses of the same authentication token? This restricts you to one login about every 30s, but it increases your chances to notice or even prevent man-in-the-middle attacks (y/n) y # 输入y Do you want to do so? (y/n) y # 输入y Do you want to enable rate-limiting? (y/n) y # 输入y 是否更新用户的 Google Authenticator 配置文件,选择 y 才能使上面操作对当前 root 用户生效,其 实就是在对应用户的 Home 目录下生成了一个 .google_authenticator 文件,如果你想停用这个用户的 Google Authenticator 验证,只需要删除这个用户 Home 目录下的 .google_authenticator 文件 就可以了。 Do you want me to update your "/root/.google_authenticator" file? (y/n) y 每次生成的认证码是否同时只允许一个人使用?这里选择 y。 Do you want to disallow multiple uses of the same authentication token? This restricts you to one login about every 30s, but it increases your chances to notice or even prevent man-in-the-middle attacks (y/n) y 每次生成的令牌30s生成一次,最高允许存在误差4分钟。 By default, a new token is generated every 30 seconds by the mobile app. In order to compensate for possible time-skew between the client and the server, we allow an extra token before and after the current time. This allows for a time skew of up to 30 seconds between authentication server and client. If you experience problems with poor time synchronization, you can increase the window from its default size of 3 permitted codes (one previous code, the current code, the next code) to 17 permitted codes (the 8 previous codes, the current code, and the 8 next codes). This will permit for a time skew of up to 4 minutes between client and server. Do you want to do so? (y/n) y
将google 2FA加入到ssh
# 编辑配置文件 vim /etc/pam.d/sshd #%PAM-1.0 auth required pam_google_authenticator.so
修改ssh配置文件 关联google认证
# 编辑配置文件 vim /etc/ssh/sshd_config :69 # 将no 改为 yes ChallengeResponseAuthentication no -----> yes # 重启ssh服务 systemctl restart sshd
验证谷歌双向认证
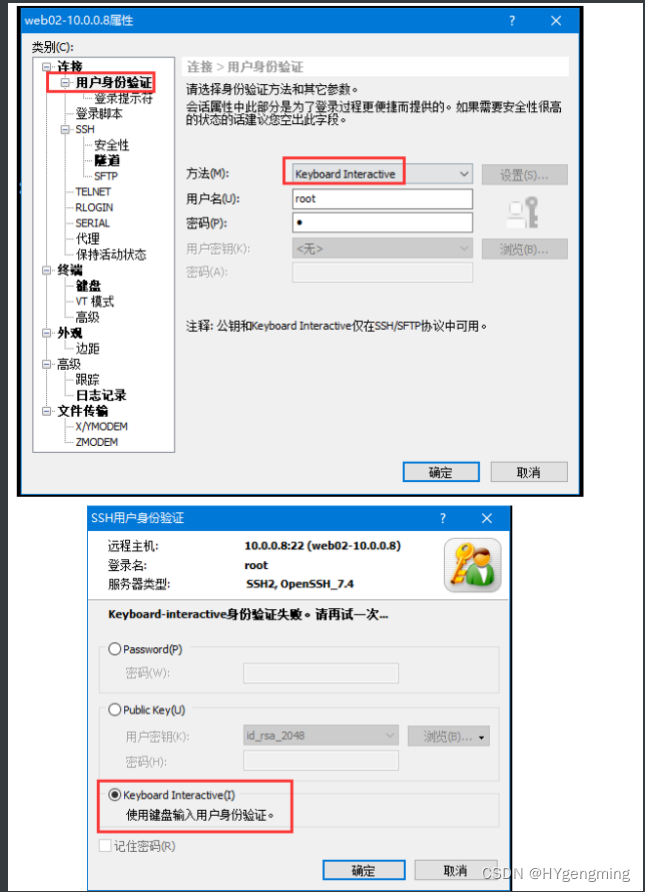
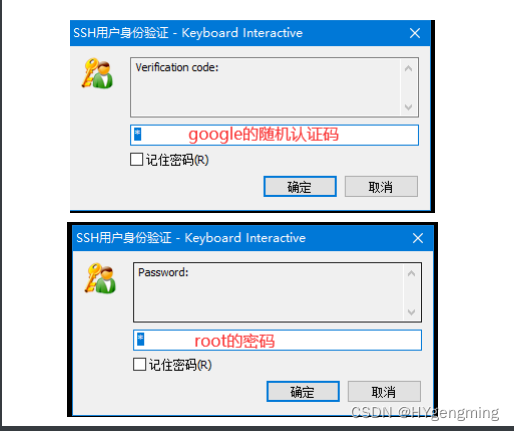
# 使用机器的远程连接 [root@web01 ~]# ssh root@10.0.0.8 The authenticity of host '10.0.0.8 (10.0.0.8)' can't be established. ECDSA key fingerprint is SHA256:086q8NqRUTkXtvcfy0QckL5pD2RrVUo9qCu6lum+8gI. ECDSA key fingerprint is MD5:81:cc:e8:88:ad:35:53:7d:07:22:9c:44:2a:6a:a2:2e. xshell如何验证 # 第一次连接的交互 是否连接 输入yes Are you sure you want to continue connecting (yes/no)? yes Warning: Permanently added '10.0.0.8' (ECDSA) to the list of known hosts. # 输入google认证的随机码 Verification code: # 输入root用户的密码 Password: Last failed login: Tue May 21 09:59:30 CST 2024 from 10.0.0.1 on ssh:notty There were 3 failed login attempts since the last successful login. Last login: Tue May 21 09:52:10 2024 from 10.0.0.1 # 成功登录 [root@web02 ~]#
xshell如何验证
nginx
# yum安装 优点:安装启动简单 缺点: # 源码安装 优点:版本随意 缺点:安装复杂 升级繁琐 # 二进制安装 绿色软件 解压开即用
nginx源码安装
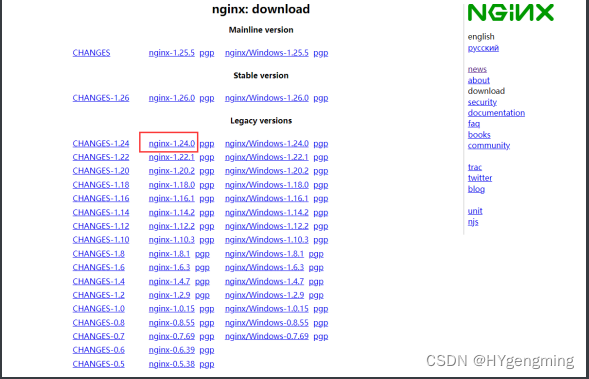
# 下载源码包
wget https://nginx.org/download/nginx-1.24.0.tar.gz
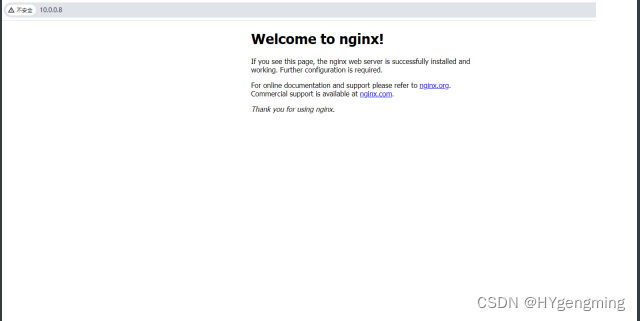
# 解压源码包 tar xf nginx-1.24.0.tar.gz # 创建工作目录 mkdir /app # 移动nginx目录到工作目录 mv /root/nginx-1.24.0 /app # 进入工作目录nginx cd /app/nginx-1.24.0/ # 生成 ./configure --prefix=/opt/nginx-1.24.0 --with-http_ssl_module --with-http_stub_status_module # 问题1.缺号pcre的依赖 ./configure: error: the HTTP rewrite module requires the PCRE library. You can either disable the module by using --without-http_rewrite_module option, or install the PCRE library into the system, or build the PCRE library statically from the source with nginx by using --with-pcre=<path> option. ## 解决方案 yum install -y pcre-devel # 再次执行生成命令 ./configure --prefix=/opt/nginx-1.24.0 --with-http_ssl_module --with•http_stub_status_module # 问题2 缺少openssl的依赖 ./configure: error: SSL modules require the OpenSSL library. You can either do not enable the modules, or install the OpenSSL library into the system, or build the OpenSSL library statically from the source with nginx by using --with-openssl=<path> option. ## 解决方案 yum install -y openssl-devel # 出现如下内容就代表生成完毕 Configuration summary + using system PCRE library + using system OpenSSL library + using system zlib library nginx path prefix: "/opt/nginx-1.24.0" nginx binary file: "/opt/nginx-1.24.0/sbin/nginx" nginx modules path: "/opt/nginx-1.24.0/modules" nginx configuration prefix: "/opt/nginx-1.24.0/conf" nginx configuration file: "/opt/nginx-1.24.0/conf/nginx.conf" nginx pid file: "/opt/nginx-1.24.0/logs/nginx.pid" nginx error log file: "/opt/nginx-1.24.0/logs/error.log" nginx http access log file: "/opt/nginx-1.24.0/logs/access.log" nginx http client request body temporary files: "client_body_temp" nginx http proxy temporary files: "proxy_temp" nginx http fastcgi temporary files: "fastcgi_temp" nginx http uwsgi temporary files: "uwsgi_temp" nginx http scgi temporary files: "scgi_temp" # 编译 (让系统能够识别你的代码) make # 安装 make install # 添加软链接 ln -s /opt/nginx-1.24.0/ /opt/nginx # 添加环境变量 vim /etc/profile.d/nginx.sh export NGINX_PATH=/opt/nginx/sbin export PATH=$PATH:$NGINX_PATH # 生效环境变量 source /etc/profile # 检验环境变量 [root@web02 nginx-1.24.0]# echo $PATH /usr/local/sbin:/usr/local/bin:/usr/sbin:/usr/bin:/root/bin:/opt/nginx/sbin:/opt/nginx-1.26.0/sbin # 启动nginx nginx # 检查进程 [root@web02 nginx-1.24.0]# ps -ef | grep nginx root 17899 1 0 11:57 ? 00:00:00 nginx: master process nginx nobody 17900 17899 0 11:57 ? 00:00:00 nginx: worker process # 检查端口 [root@web02 nginx-1.24.0]# netstat -lntup | grep 80 tcp 0 0 0.0.0.0:80 0.0.0.0:* LISTEN 17899/nginx: master # 访问nginx页面 10.0.0.8


 1万+
1万+

 被折叠的 条评论
为什么被折叠?
被折叠的 条评论
为什么被折叠?
 到【灌水乐园】发言


