


一、本地ssh连接gitlab
参考文档:https://juejin.cn/post/7070190024200814629
1、mac笔记本
1.1、笔记本生成ssh密钥
> cd ~/.ssh
> ssh-keygen -t rsa -f ./id_rsa_gitlab -C "123456@163.com"
> ls id_rsa_gitlab*
id_rsa_gitlab		id_rsa_gitlab.pub

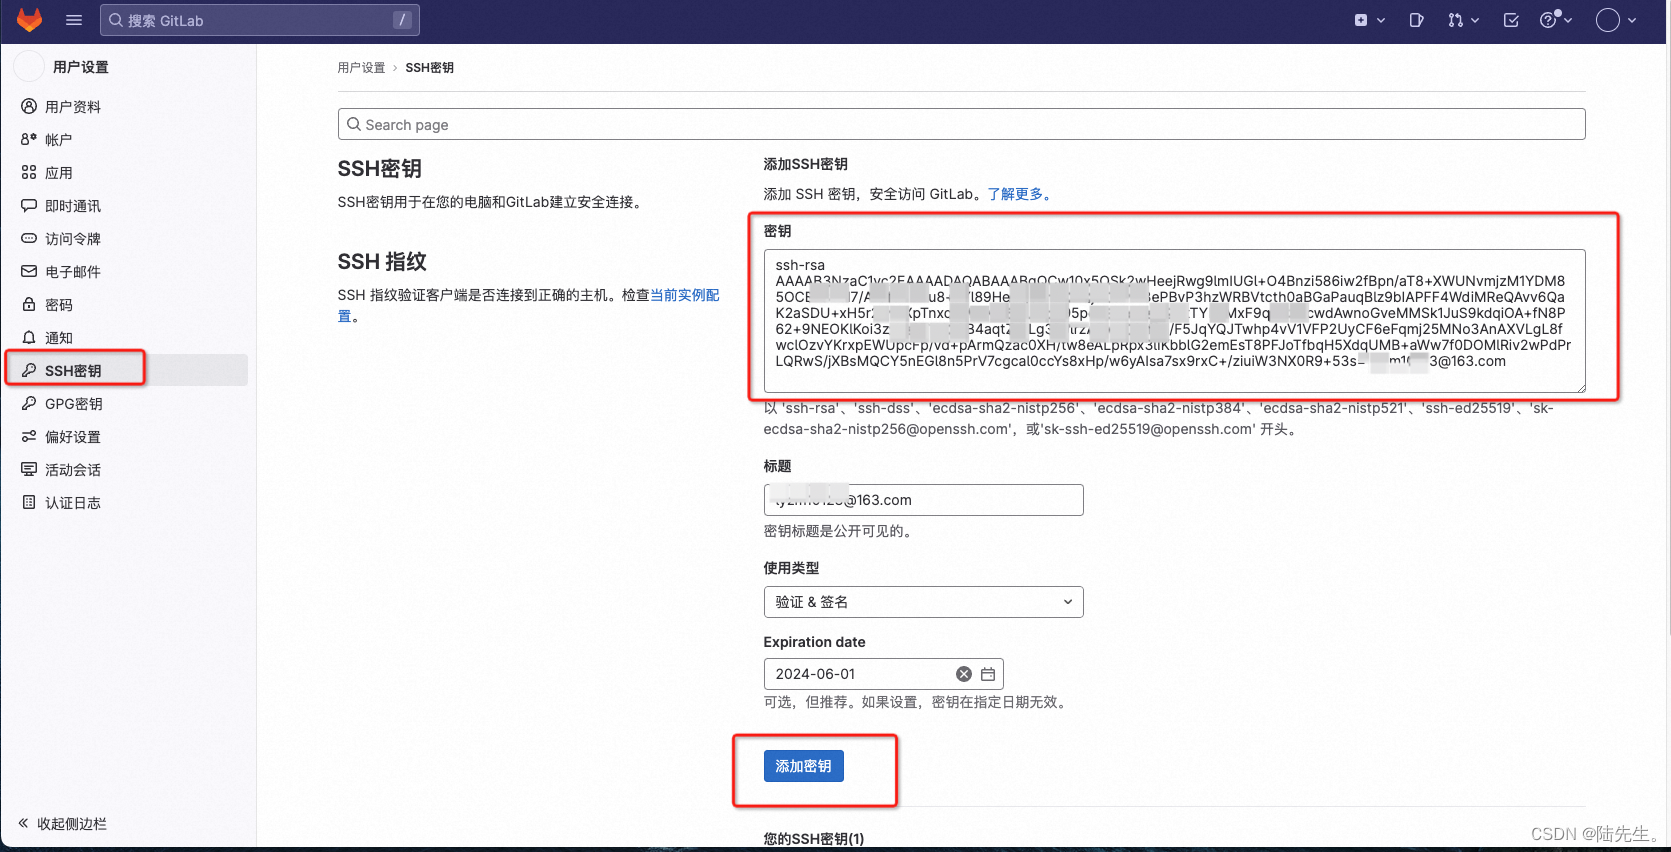
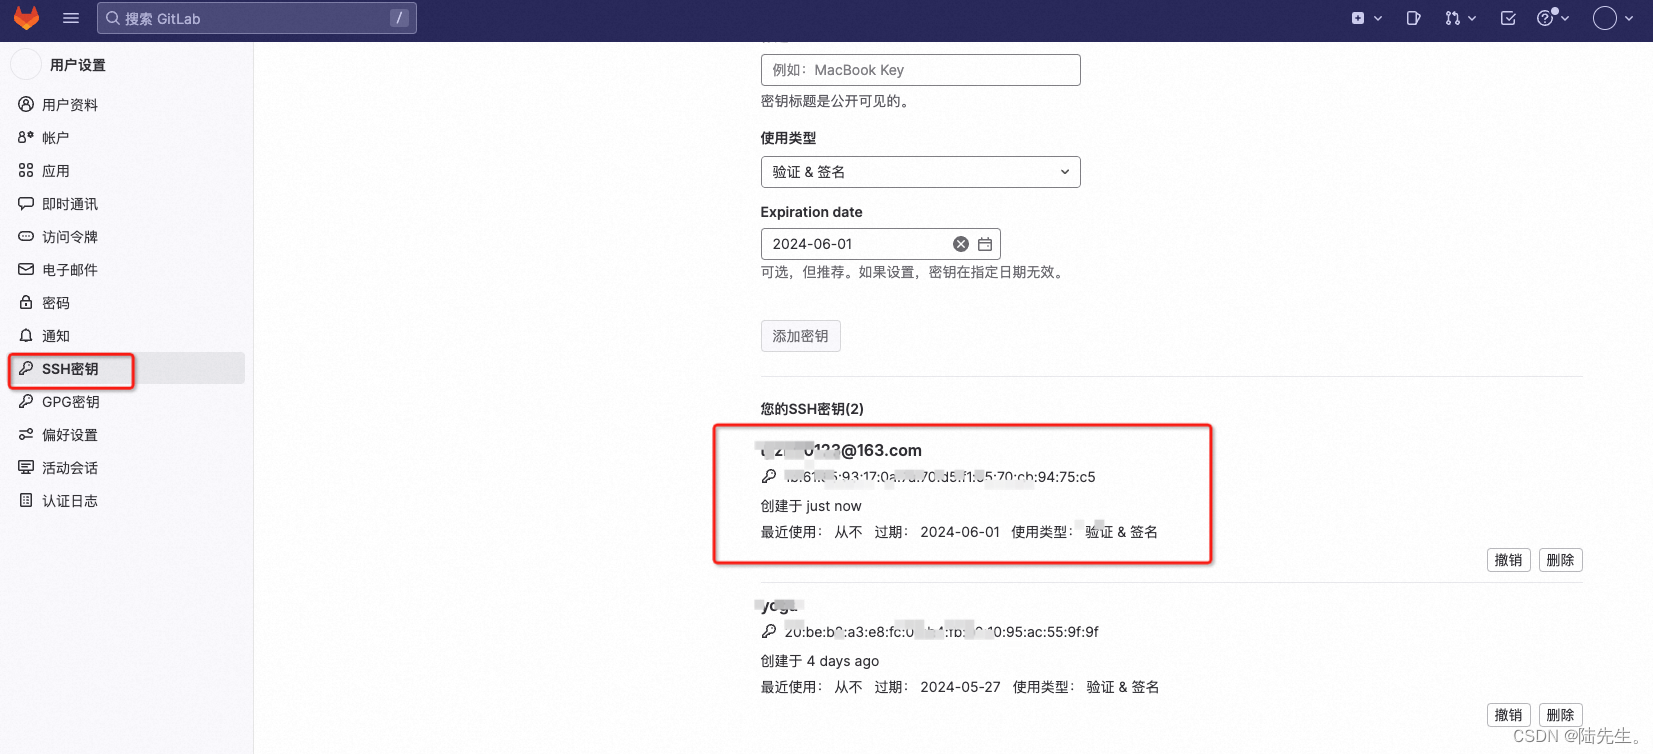
1.2、复制公钥到gitlab上,在gitlab上新建ssh key
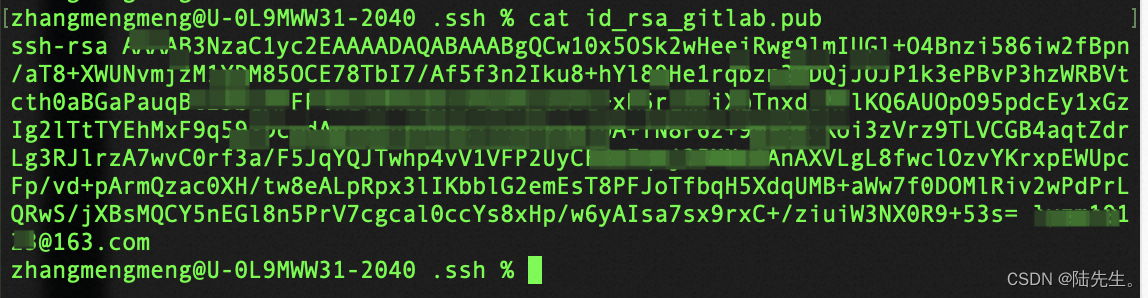
> cat id_rsa_gitlab.pub
1.3、本地配置Host指向密钥
> cd .ssh
> vim config
Host 192.168.12.104
HostName 192.168.12.104
User 123456@163.com
PreferredAuthentications publickey
IdentityFile ~/.ssh/id_rsa_gitlab
- 测试ssh连接
> ssh -T git@192.168.12.104 -p 9922
Welcome to GitLab, @root!
1.4、同时绑定gitlab和gitee,操作步骤参考以上
- 生产ssh密钥,
- 拷贝公钥到gitee上
- 追加config配置host指向新生成的gitee密钥
cat config
Host gitee.com
HostName gitee.com
User 123@163.com
PreferredAuthentications publickey
IdentityFile ~/.ssh/id_rsa_gitee
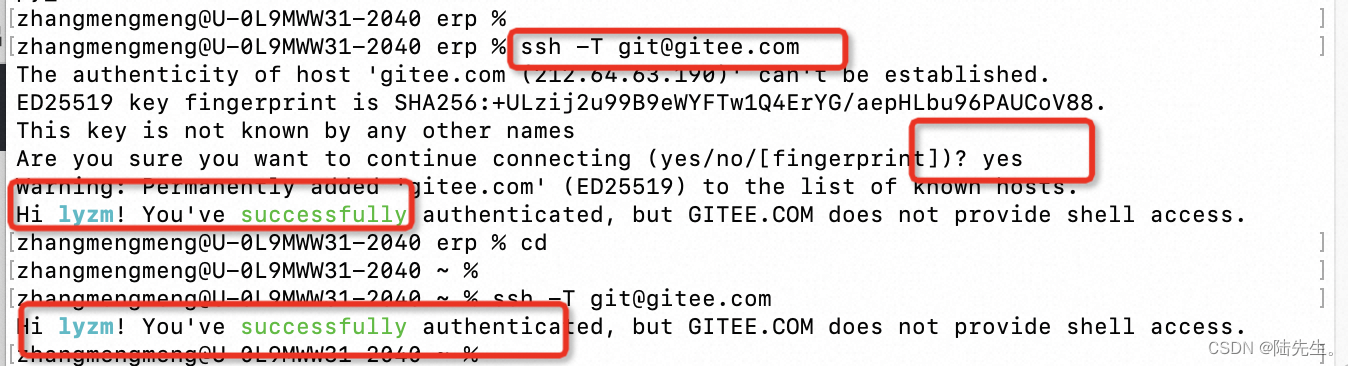
- ssh连接测试
ssh -T git@gitee.com
Hi lyzm! You've successfully authenticated, but GITEE.COM does not provide shell access.
zhangmengmeng@U-0L9MWW31-2040 ~ %
1.5、全局配置和本地配置
// 全局配置
$ git config --global user.name  'gitlab账号名'
$ git config --global user.email  'gitlab账号邮箱'

// 本地配置
$ git config --local user.name  'github账号名'
$ git config --local user.email  'github邮箱'
二、与gitlab交互步骤
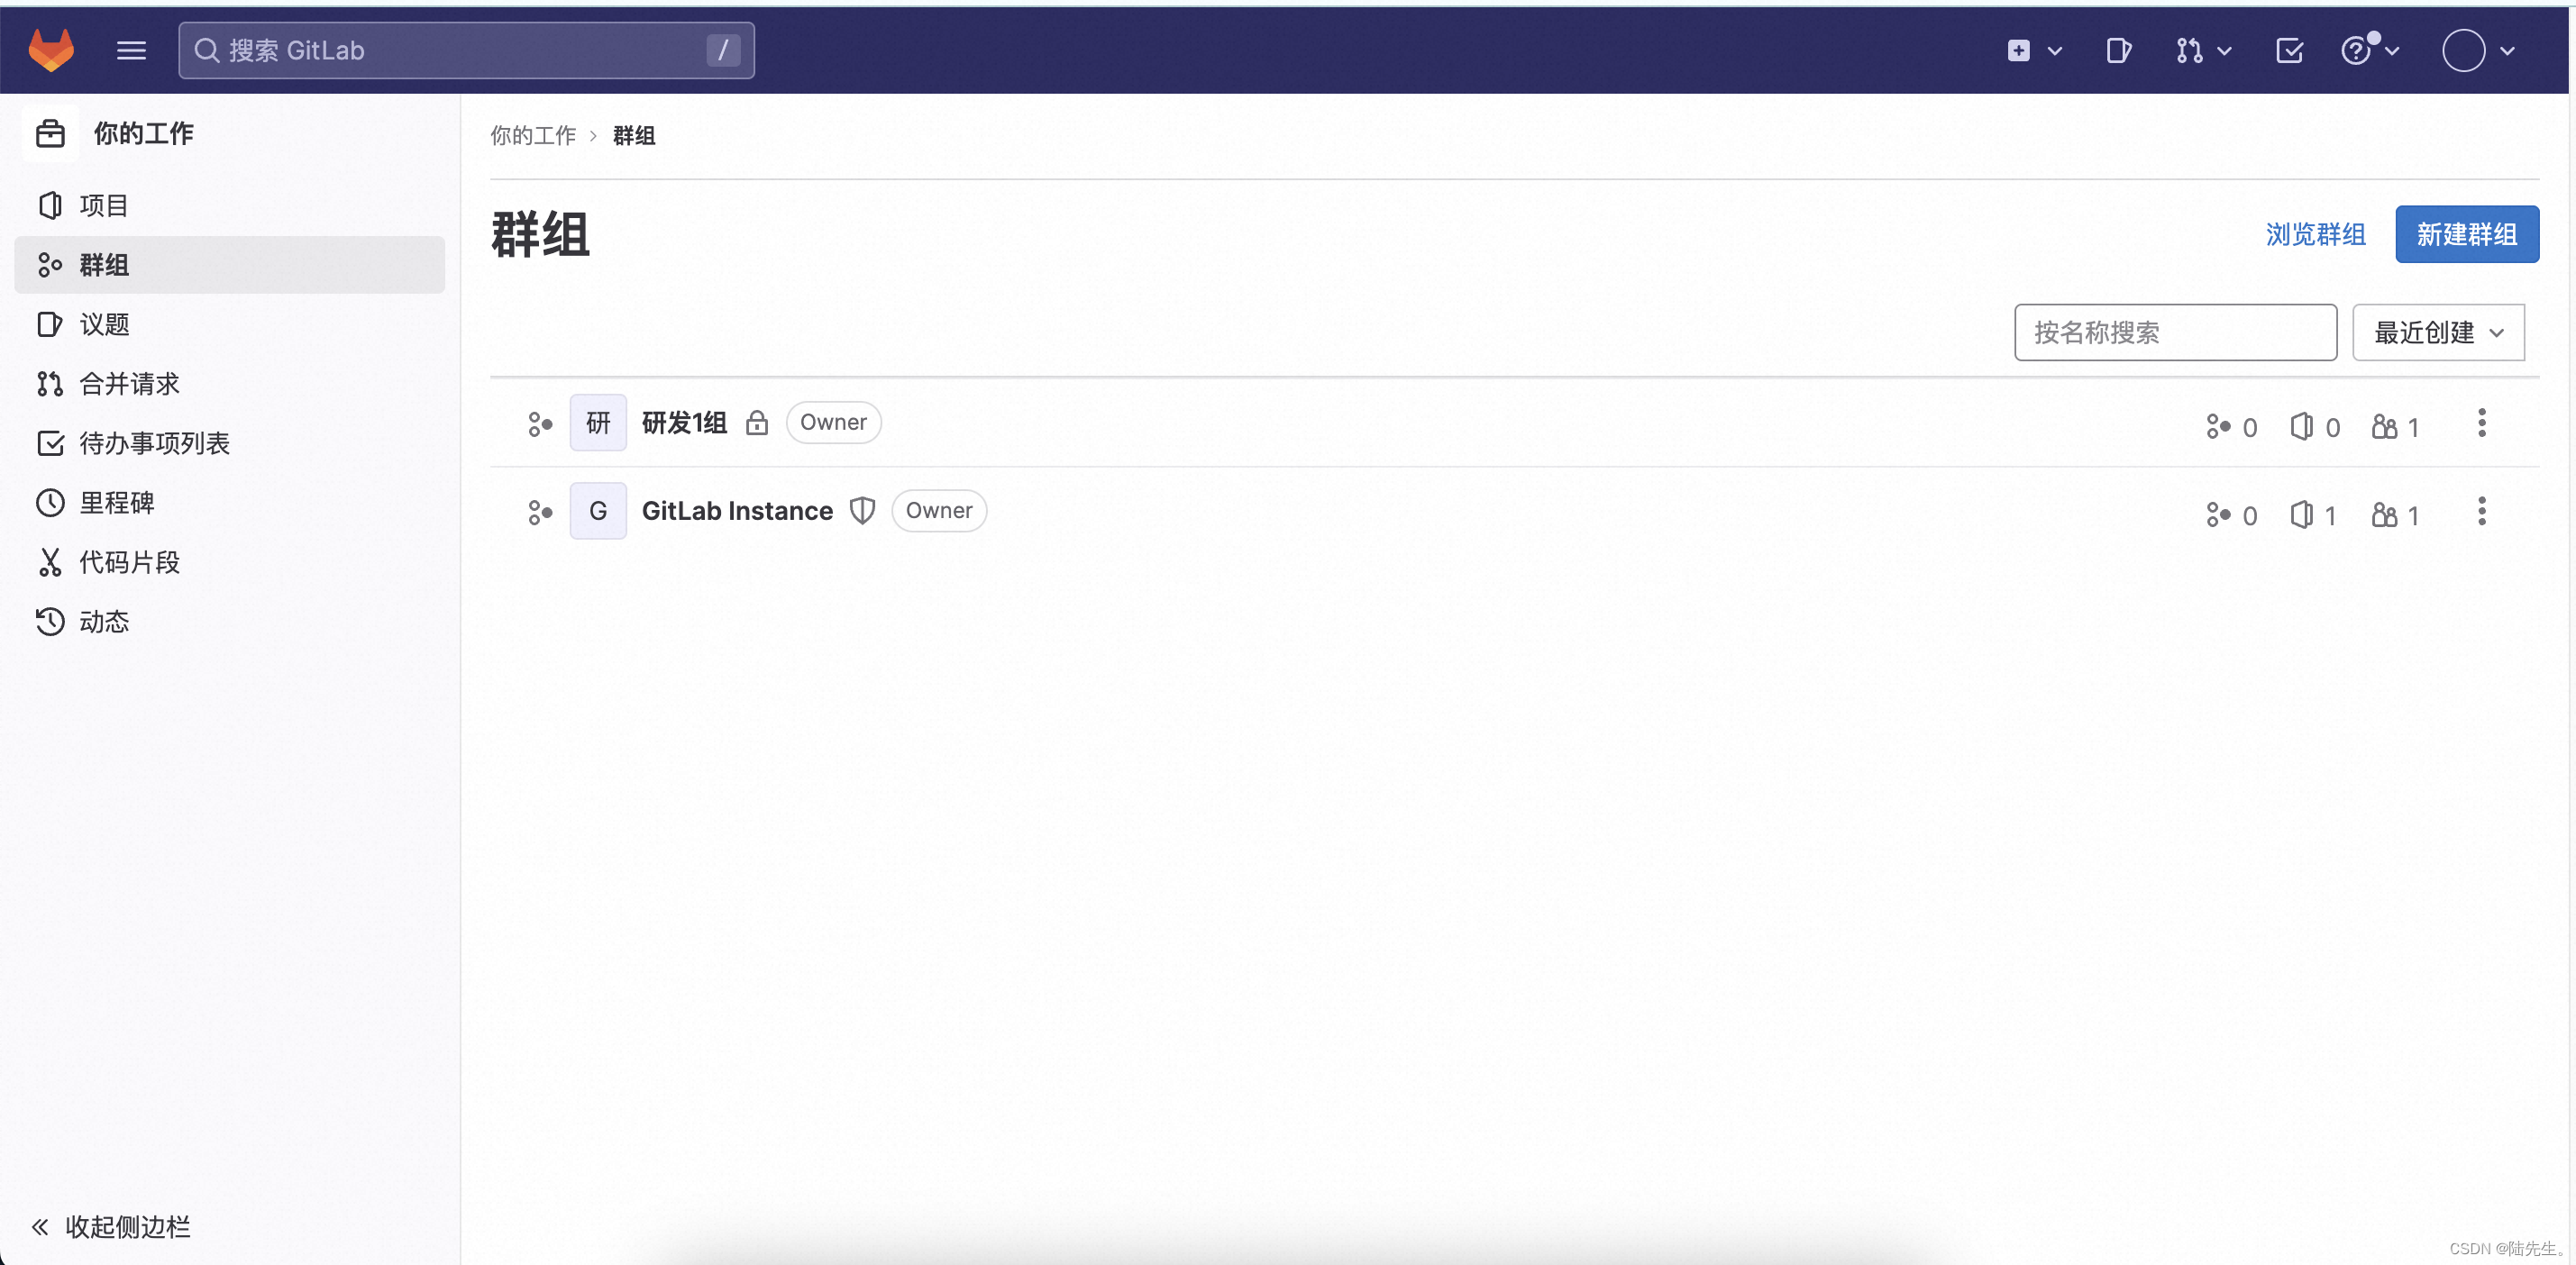
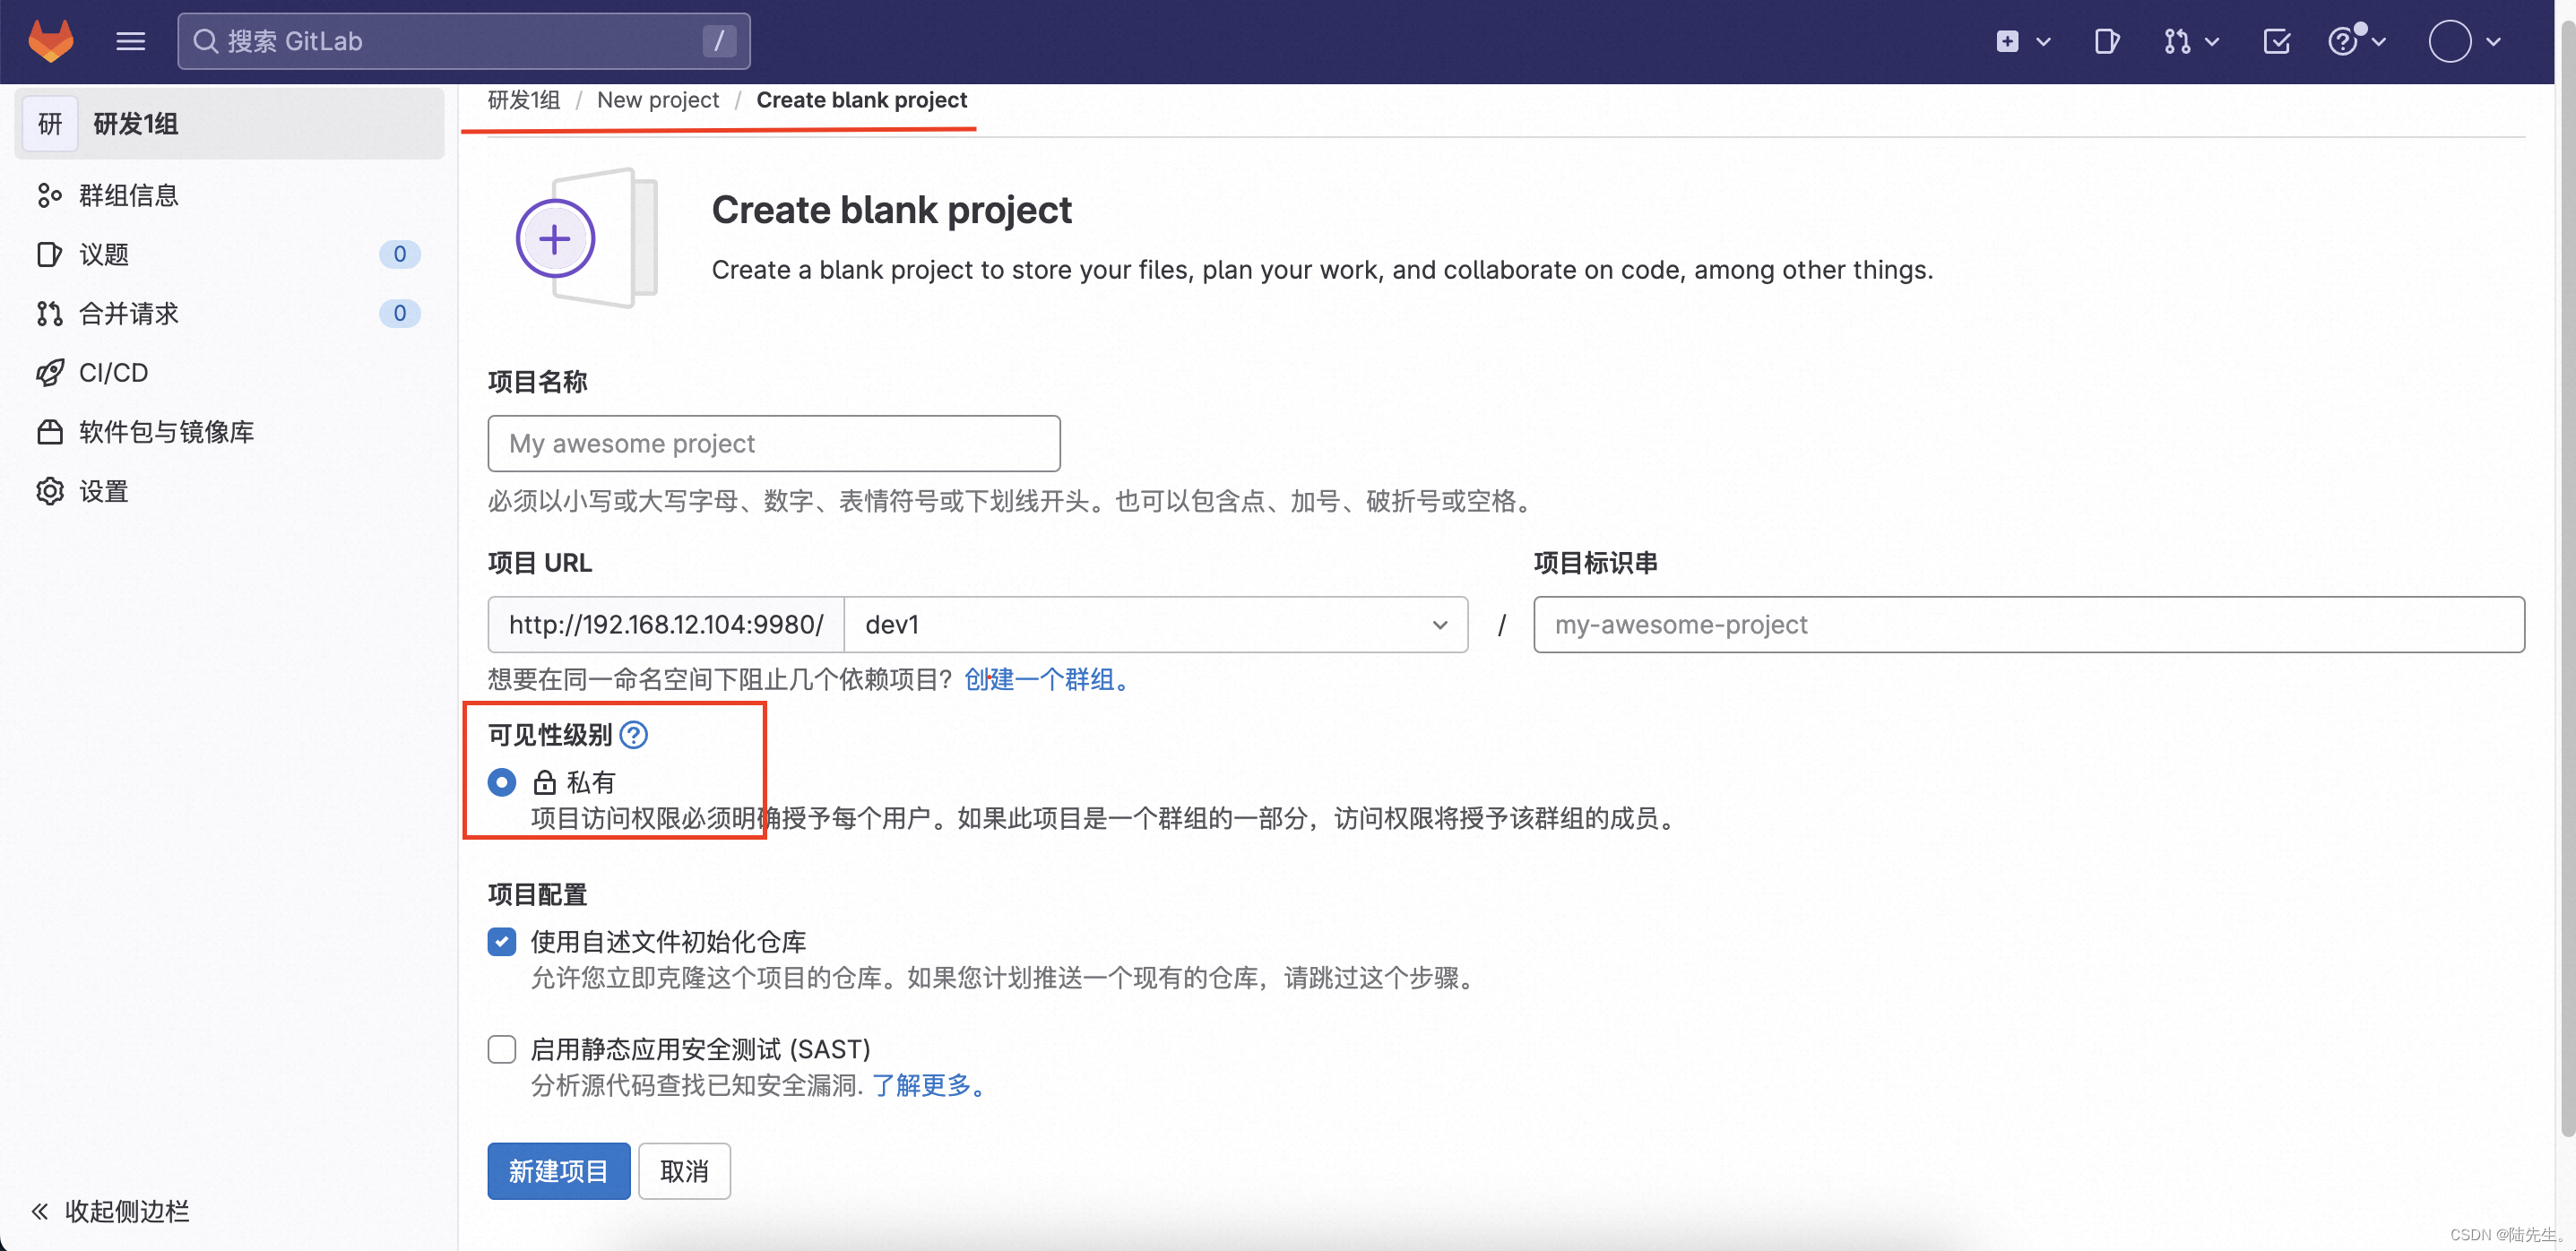
1、新建群组–新建项目
群组:研发1组
项目:demo01,权限私有
2、本地配置连接gitlab项目
2.1、新建本地代码目录
> cd /opt
> sudo mkdir gitlab_demo
> cd gitlab_demo	# 假设如下是代码目录
> sudo touch test.txt
> sudo mkdir demo_test
> sudo touch demo_test/234.txt
> sudo echo 123 > demo_test/234.txt
2.2、初始化代码目录
> sudo git init .
> ls -la
total 0
drwxr-xr-x  5 root  wheel  160  6  3 18:50 .
drwxr-xr-x  8 root  wheel  256  6  3 18:47 ..
drwxr-xr-x  9 root  wheel  288  6  3 18:50 .git		#刚初始化时所建
drwxr-xr-x  2 root  wheel   64  6  3 18:49 demo_test
-rw-r--r--  1 root  wheel    0  6  3 18:49 test.txt
> cat .git/config
[core]
	repositoryformatversion = 0
	filemode = true
	bare = false
	logallrefupdates = true
	ignorecase = true
	precomposeunicode = true
2.3、添加gitlab的邮箱地址和用户名
> sudo git config --local user.email "123@163.com"
> sudo git config --local user.name "root"
查看刚刚添加的配置信息
cat .git/config
[core]
	repositoryformatversion = 0
	filemode = true
	bare = false
	logallrefupdates = true
	ignorecase = true
	precomposeunicode = true
[user]
	email = 123@163.com
	name = root
2.4、添加到暂存区
> sudo git add ./*
查看状态
> sudo git status
On branch main

No commits yet

Changes to be committed:
  (use "git rm --cached <file>..." to unstage)
	new file:   demo_test/234.txt
	new file:   test.txt
2.5、提交到本地版本库
> sudo git commit -m "demo1-1"
[main (root-commit) 5c7d82c] demo1-1
 Committer: System Administrator <root@U-0L9MWW31-2040.local>
Your name and email address were configured automatically based
on your username and hostname. Please check that they are accurate.
You can suppress this message by setting them explicitly:

    git config --global user.name "Your Name"
    git config --global user.email you@example.com

After doing this, you may fix the identity used for this commit with:

    git commit --amend --reset-author

 2 files changed, 1 insertion(+)
 create mode 100755 demo_test/234.txt
 create mode 100755 test.txt
> sudo git status
On branch main
nothing to commit, working tree clean
查看版本库
> sudo git ls-files
demo_test/234.txt
test.txt
3、第一次推送,push到远程库
3.1、在gitlab页面上查看远程仓库地址
刚刚新建的项目中有远程仓库地址:
git remote add origin http://192.168.12.104/dev1/demo01.git
实际上仓库为ip:端口,192.168.12.104:9980
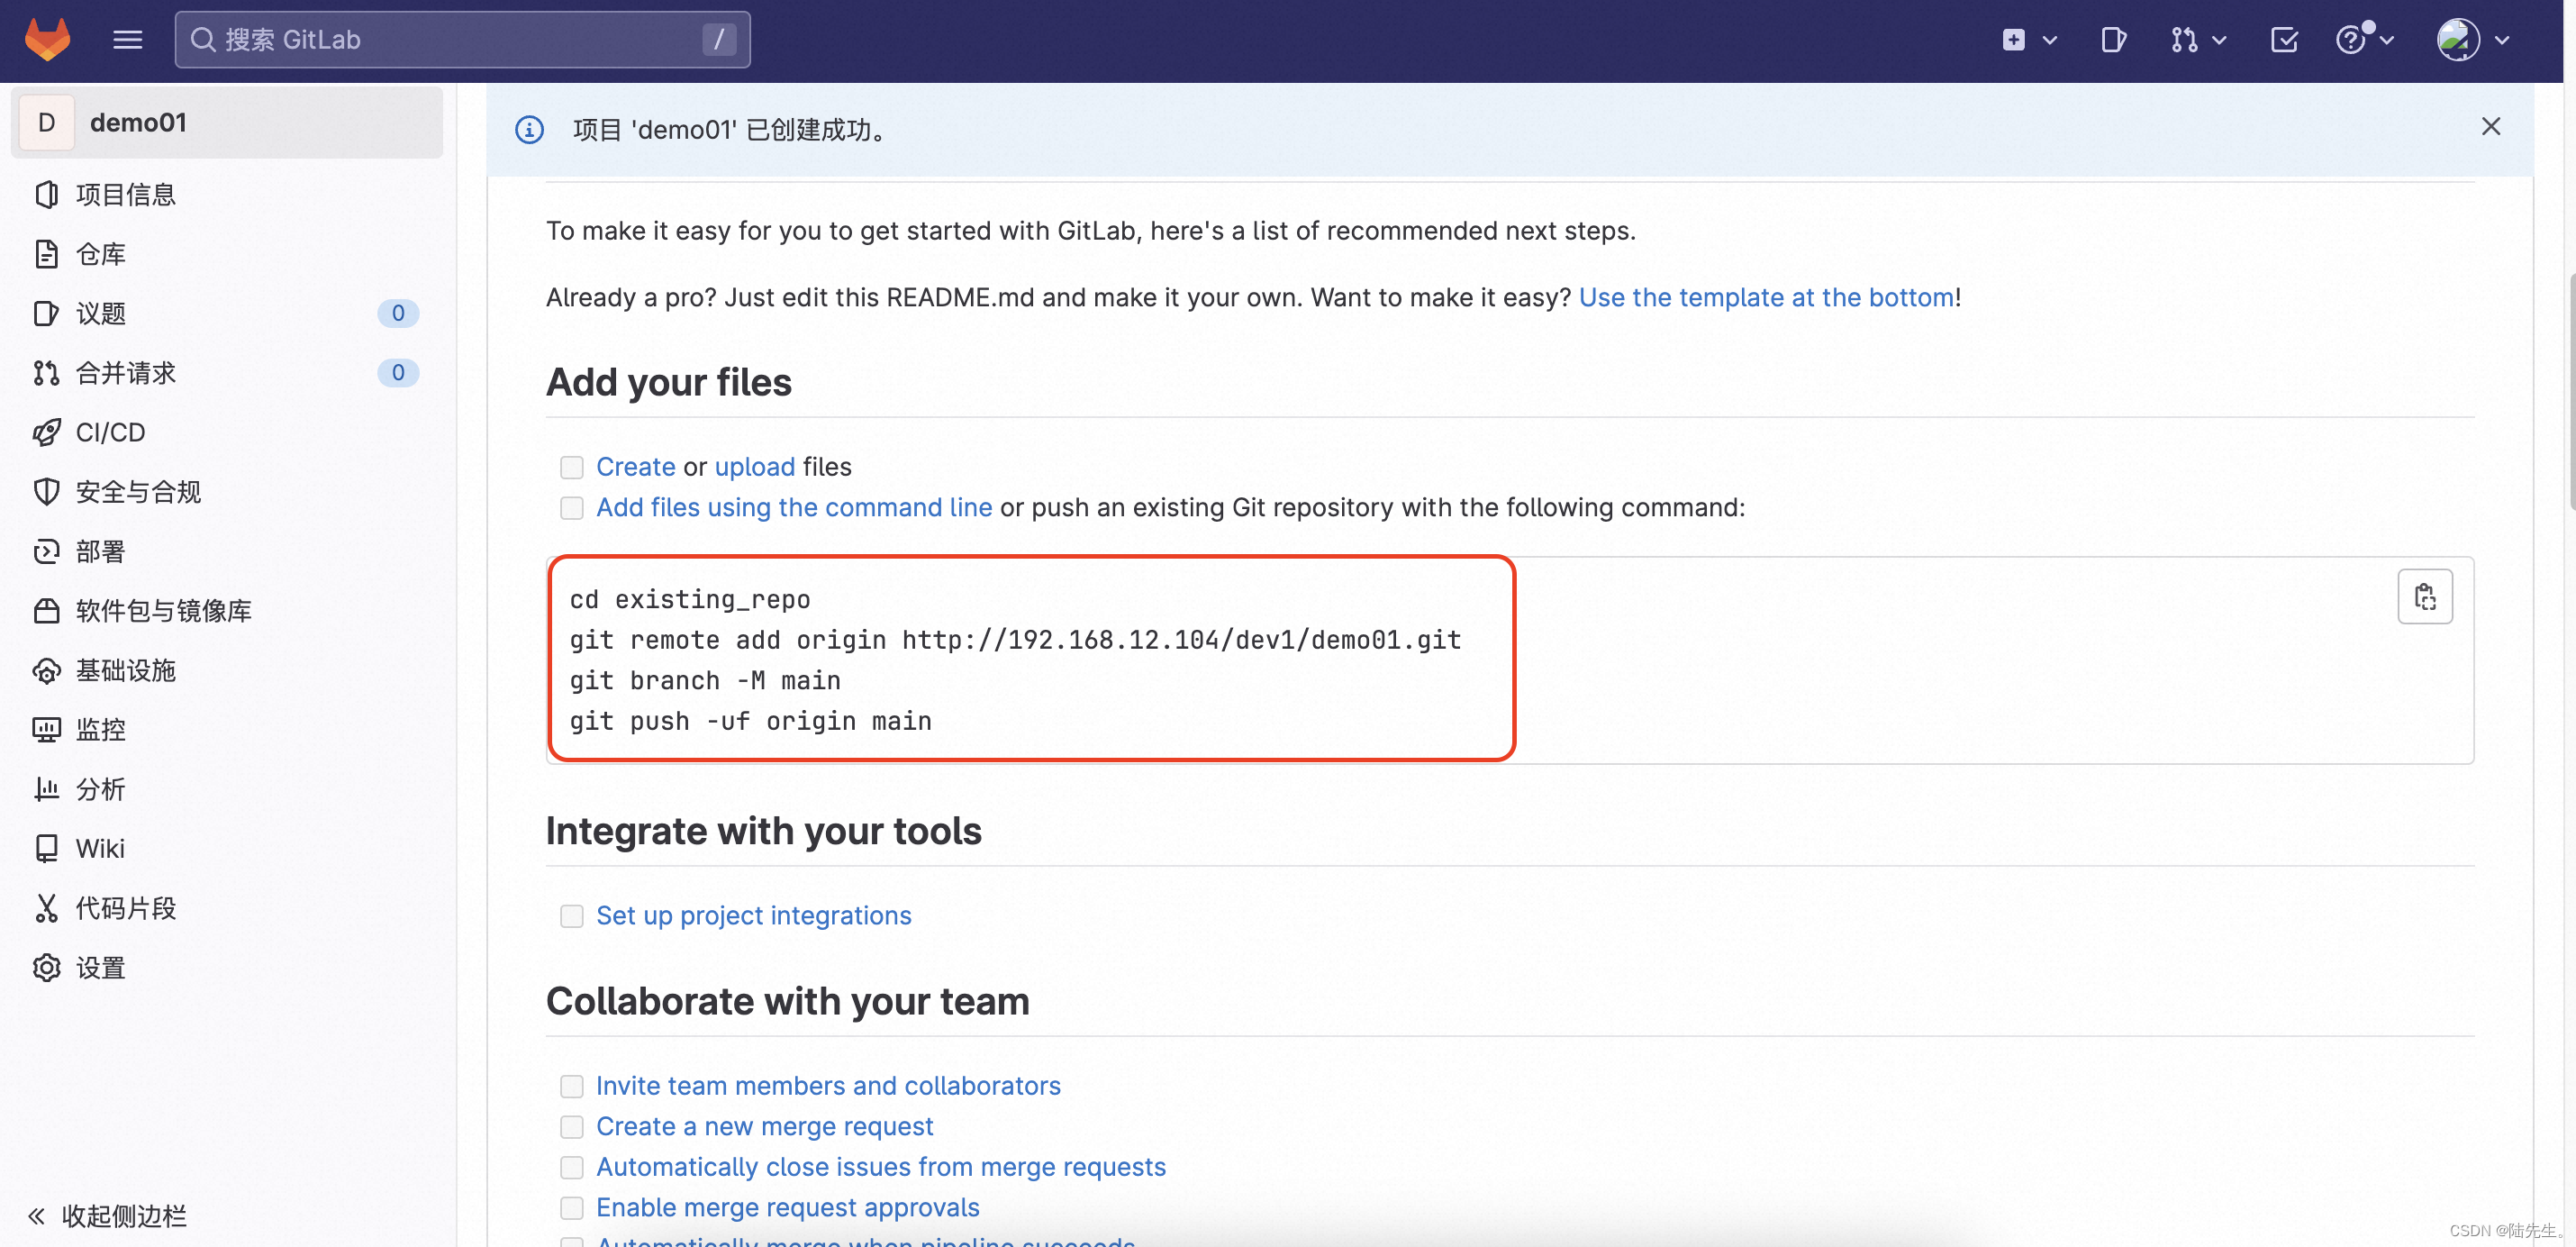
3.2、添加远程仓库
> sudo git remote add origin http://192.168.12.104:9980/dev1/demo01.git

> cat .git/config
[core]
	repositoryformatversion = 0
	filemode = true
	bare = false
	logallrefupdates = true
	ignorecase = true
	precomposeunicode = true
[user]
	email = 123@163.com
	name = root
[remote "origin"]
	url = http://192.168.12.104:9980/dev1/demo01.git
	fetch = +refs/heads/*:refs/remotes/origin/*
3.3、推送
需要先建立个分支,推送到分支上,然后再合并分支到主干
直接推送到主干的话会报错
- 新建分支,名字为demo-v1
> sudo git branch demo-v1
- 切换到分支
> sudo git checkout demo-v1
Switched to branch 'demo-v1' # 切换成功的提示

sudo git branch	# 查看当前分支
* demo-v1
  main
- 推送
> sudo git push --set-upstream origin demo-v1
- 合并分支到主干
# 先切换到主干
> sudo git cherry-pick 分支名称或者是commit
3.4、相关报错
- 推送到主干时报错
# 执行如下两个命令时报错
> sudo git push
> sudo git push --set-upstream origin main

o http://192.168.12.104:9980/dev1/demo01.git
 ! [rejected]        main -> main (fetch first)
error: failed to push some refs to 'http://192.168.12.104:9980/dev1/demo01.git'
hint: Updates were rejected because the remote contains work that you do
hint: not have locally. This is usually caused by another repository pushing
hint: to the same ref. You may want to first integrate the remote changes
hint: (e.g., 'git pull ...') before pushing again.
hint: See the 'Note about fast-forwards' in 'git push --help' for details.


# 解决方法,推送到分支,然后分支合并到主干上
4、代码更新,push推送
4.1、检查代码是否更新
> sudo git status
On branch main
Changes not staged for commit:
  (use "git add <file>..." to update what will be committed)
  (use "git restore <file>..." to discard changes in working directory)
	modified:   test.txt

no changes added to commit (use "git add" and/or "git commit -a")
4.2、先添加到暂存区
> sudo git add ./*
>
> sudo git status
On branch main
Changes to be committed:
  (use "git restore --staged <file>..." to unstage)
	modified:   test.txt
4.3、添加到本地仓库
> sudo git commit -m "demo1-2"
[main 5dc91f0] demo1-2
 1 file changed, 1 insertion(+)
4.4、先合并到主干,后push到gitlab
> sudo git checkout main
> sudo git cherry-pich [commit] # 合并一个版本的内容到当前分支(主干),commit也可以换成 分支名称
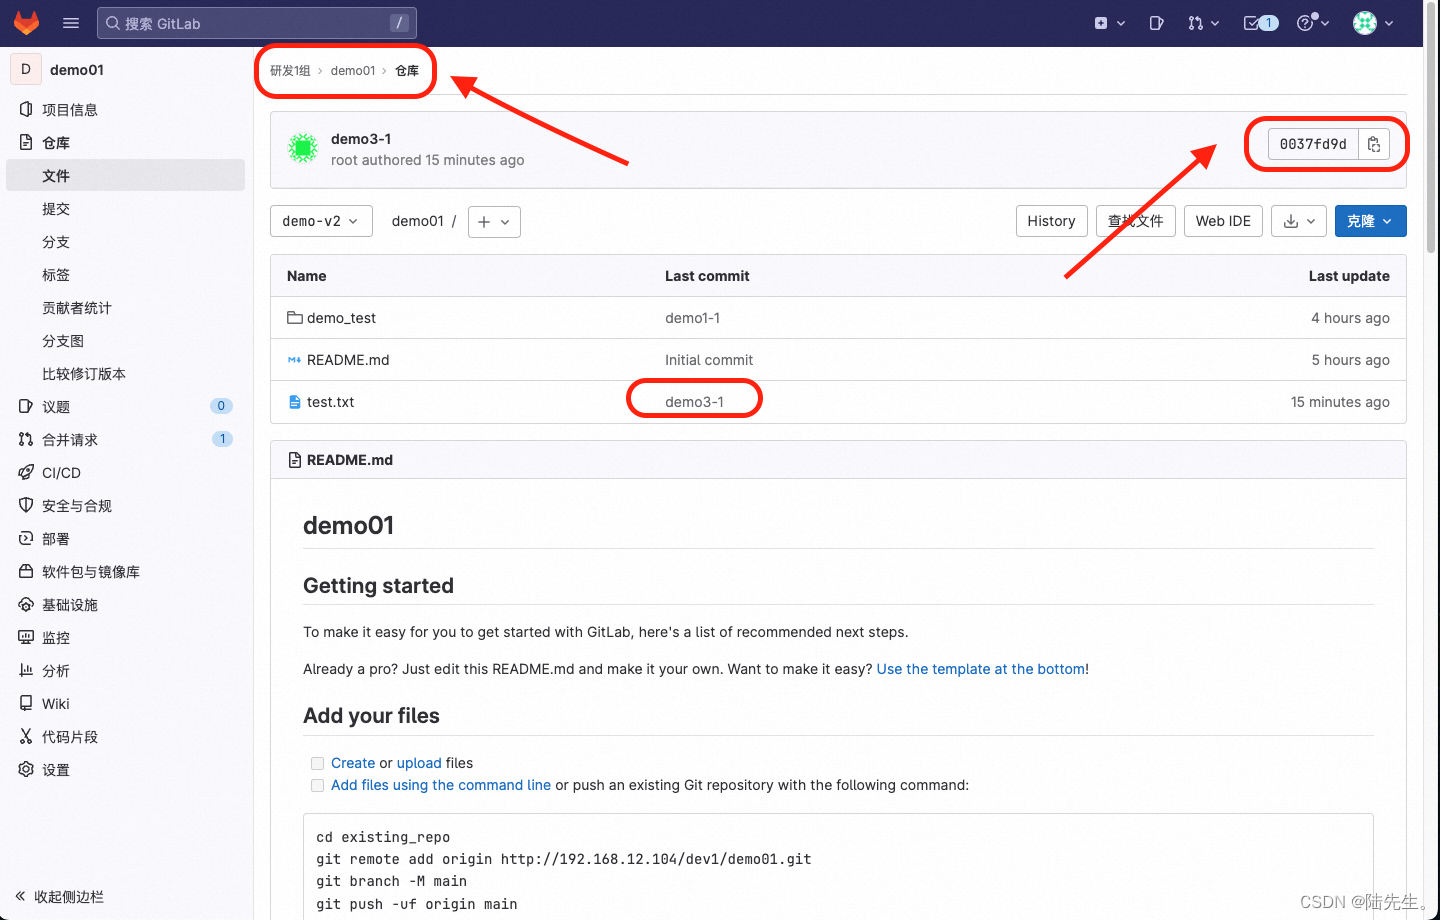
> sudo git push
- 拷贝commit,参考下图
4.5、相关报错
在分支中提交时遇到这个问题
> sudo git push
fatal: The upstream branch of your current branch does not match
the name of your current branch.  To push to the upstream branch
on the remote, use

    git push origin HEAD:main

To push to the branch of the same name on the remote, use

    git push origin HEAD

To choose either option permanently, see push.default in 'git help config'.

To avoid automatically configuring an upstream branch when its name
won't match the local branch, see option 'simple' of branch.autoSetupMerge
in 'git help config'.
解决办法:
执行git push origin HEAD:main,提交代码到主干
然后主干改动的代码,提交到分支
再然后合并代码到主干
合并方法:
1、先切换到主干:sudo git checkout main
2、合并代码:sudo git cherry-pick [commit] # commit参考上图
合并代码或者是:sudo git merge [branch] # 合并指定分支到当前分支
5、clone代码到本地
5.1、clone到本地,一个新的目录
> sudo git clone http://192.168.12.104:9980/dev1/demo01.git
> cd demo01
>
> ls -a
.		.git		demo_test
..		README.md	test.txt

> cat .git/config
[core]
	repositoryformatversion = 0
	filemode = true
	bare = false
	logallrefupdates = true
	ignorecase = true
	precomposeunicode = true
[remote "origin"]
	url = http://192.168.12.104:9980/dev1/demo01.git
	fetch = +refs/heads/*:refs/remotes/origin/*
[branch "main"]
	remote = origin
	merge = refs/heads/main
5.2、添加邮件地址和用户名
> sudo git config --local user.email "123@163.com"
> sudo git config --local user.name "root"
5.3、新建分支,并在分支目录下更新代码
- 新建分支
> sudo git branch
* main

# 新建分支
> sudo git branch demo-v2
> sudo git checkout demo-v2
- 在分支下更新代码,主干下用系统命令看没有同步
- 将分支下更新的代码,添加到 暂存区+本地仓库
> sudo git add ./test.txt
> sudo git commit -m "demo3-1"
- push提交到远程仓库
# push后,可以在gitlab控制台上看
> sudo git push --set-upstream origin demo-v2
5.4、合并代码到主干
- 合并分支代码到主干
# 先切换到主干
> sudo git checkout main

# 合并分支版本commit,commit见上图
> sudo git cherry-pick 0037fd9de7cfec6a237bb4f3b4a85e6f2b1d78d9
[main 96cdd06] demo3-1
 Date: Sat Jun 3 23:39:44 2023 +0800
 1 file changed, 1 insertion(+)
- push到远程仓库
> sudo git push


 68
68


 被折叠的 条评论
为什么被折叠?
被折叠的 条评论
为什么被折叠?
 到【灌水乐园】发言


