


尝试多次,总是会有一个坑,Maven安装Starters成功,可以在External Libraries看到打包好的jar,也能打开里面源码文件,但是没法在项目中引用的情况。
最后参考https://blog.csdn.net/qq_37934687/article/details/78616079测试成功,原因不得知。
首先创建一个Maven的空工程,什么框架都不用选。
然后工程里的test文件夹删掉,用不到。
打开pom.xml文件,配置如下:
<?xml version="1.0" encoding="UTF-8"?>
<project xmlns="http://maven.apache.org/POM/4.0.0"
         xmlns:xsi="http://www.w3.org/2001/XMLSchema-instance"
         xsi:schemaLocation="http://maven.apache.org/POM/4.0.0 http://maven.apache.org/xsd/maven-4.0.0.xsd">
    <modelVersion>4.0.0</modelVersion>
    <groupId>com.su</groupId>
    <artifactId>spring-boot-starter-su</artifactId>
    <version>1.0.0</version>
    <packaging>jar</packaging>
    <properties>
        <maven.compiler.source>11</maven.compiler.source>
        <maven.compiler.target>11</maven.compiler.target>
    </properties>
    <dependencies>
        <dependency>
            <groupId>org.springframework.boot</groupId>
            <artifactId>spring-boot-autoconfigure</artifactId>
            <version>2.5.0</version>
        </dependency>
    </dependencies>

</project>
修改成自己想要的信息
注:如果想要将自己做的starters贡献给网络,方便学习者使用,请把artifactId的值按标准填入:spring-boot-starter-{name}
<groupId>com.su</groupId>
<artifactId>spring-boot-starter-su</artifactId>
<version>1.0.0</version>
下面引入自动配置的依赖
<dependencies>
<dependency>
<groupId>org.springframework.boot</groupId>
<artifactId>spring-boot-autoconfigure</artifactId>
<version>2.5.0</version>
</dependency>
</dependencies>
业务类HelloService:
package com.su;
public class HelloService {
    private String msg;

    public String getMsg() {
        return msg;
    }

    public void setMsg(String msg) {
        this.msg = msg;
    }

    public String haloHello(){
        return "Hello Starter ===============>>>"+msg;
    }
}
配置类HelloProperties:
package com.su;

import org.springframework.boot.context.properties.ConfigurationProperties;

@ConfigurationProperties(prefix = "hello")
public class HelloProperties {
    private String msg="world";

    public String getMsg() {
        return msg;
    }

    public void setMsg(String msg) {
        this.msg = msg;
    }
}
这个配置类在引入@ConfigurationProperties注解后页面上方会提醒一个Springboot未配置的警告,不用理睬。
有了配置类,还需要一个自动配置类HelloAutoConfiguration来操作配置类
package com.su;


import org.springframework.beans.factory.annotation.Autowired;
import org.springframework.boot.autoconfigure.condition.ConditionalOnClass;
import org.springframework.boot.autoconfigure.condition.ConditionalOnMissingBean;
import org.springframework.boot.autoconfigure.condition.ConditionalOnProperty;
import org.springframework.boot.context.properties.EnableConfigurationProperties;
import org.springframework.context.annotation.Bean;
import org.springframework.context.annotation.Configuration;

@Configuration
@EnableConfigurationProperties(HelloProperties.class)
@ConditionalOnClass(HelloService.class)
@ConditionalOnProperty(prefix = "hello",value = "enabled",matchIfMissing = true)
public class HelloAutoConfiguration {
    @Autowired
    private HelloProperties helloProperties;

    @Bean
    @ConditionalOnMissingBean(HelloService.class)
    public HelloService helloService() {
        System.out.println("Execute Create New Bean");
        HelloService helloService=new HelloService();
        helloService.setMsg(helloProperties.getMsg());
        return helloService;
    }


}
在resources下自定义 META-INF/spring.factories文件
里面填入如下代码:
org.springframework.boot.autoconfigure.EnableAutoConfiguration=\
  com.su.HelloAutoConfiguration
第一行固定不变,指定工作是自动配置,第二行是自动配置类的包名及类名
org.springframework.boot.autoconfigure.EnableAutoConfiguration=\
包名.类名
完成上述操作后
使用maven工具将制作好的starters安装到本地maven仓库
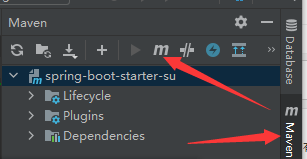
在这里搜索mvn install,点击安装,控制台会提示构建完成

然后就可以测试了。
创建个基础的springboot项目,pom.xml文件中引入依赖
这里值得注意的一个问题是,idea上的maven工具好像会缓存本地仓库表,因此添加了新的starters并不能被直接识别到,需要现在IDEA的setting中Build,Execution,Deployment ------->Build Tools------>Maven-------->Repositories,选择本地仓库,进行update。
然后在pom.xml中引入自定义的starters就会自动识别并提示,
<dependency>
    <groupId>com.su</groupId>
    <artifactId>spring-boot-starter-su</artifactId>
    <version>1.0.0</version>
</dependency>
更新pom.xml,
就可以在自己的代码中引入starters并使用了。如下方测试用例
package com.example.demo;

import com.su.HelloService;
import org.springframework.beans.factory.annotation.Autowired;
import org.springframework.boot.SpringApplication;
import org.springframework.boot.autoconfigure.SpringBootApplication;
import org.springframework.web.bind.annotation.RequestMapping;
import org.springframework.web.bind.annotation.RestController;

@RestController
@SpringBootApplication
public class DemoApplication {

    @Autowired
    HelloService helloService;
    @RequestMapping("/test")
    public String hello(){
        return helloService.haloHello();
    }


    public static void main(String[] args) {
        SpringApplication.run(DemoApplication.class, args);
    }

}
这里引用自定义starters中的HelloService自动装配时会出现报错,是idea的检测问题,不影响直接运行。
测试结果:
Hello Starter ===============>>>world


 858
858


 被折叠的 条评论
为什么被折叠?
被折叠的 条评论
为什么被折叠?
 到【灌水乐园】发言


