


上一篇我们介绍了Dao接口的配置(标签的使用及含义),以及如何如何使用mybatis给Dao接口创建代理对象
这篇我们来讲讲如何动态拼接sql语句和mybatis一对一、一对多、多对多的实现
if标签
首先在userDao增加一个方法
	 /**
     * 根据传入参数条件
     * @param user 查询的条件 有可能有用户名 有可能有性别 也有可能有地址 还有可能是都有
     * @return
     */
    List<User> findUserByCondition(User user);
在UserDao配置文件如下配置
<select id="findUserByCondition" resultType="com.lyl.entity.User" parameterType="com.lyl.entity.User">
        select * from user where 1=1
        <if test="userName!=null">
            and username=#{userName}
        </if>
</select>-->
可以很容易理解
if标签能判断userName这个条件(也即传进的参数中这个值)是否存在,如果存在就将 and username=#{userName} 拼接到 where语句上面
where标签
<select id="findUserByCondition" resultType="com.lyl.entity.User" parameterType="com.lyl.entity.User">
        select * from user
        <where>
        <if test="userName!=null">
            and username=#{userName}
        </if>
        </where>
    </select>
对比一下,和上面个例子的区别只在于where标签,可以看到我们少了一句where 1=1,也就是说我们配置了这个where标签之后,就不用自己写where 1=1了
foreach标签
<!--根据queryvo中的id集合实现查询用户列表 test中用的是and不是&&-->
    <select id="findUserInIds" resultType="com.lyl.entity.User" parameterType="com.lyl.entity.QueryVo">
        select * from user
        <where>
            <if test="ids!=null and ids.size()>0" >
                <foreach collection="ids" open="and id in (" close=")" item="uid" separator=",">
                    #{uid}
                </foreach>
            </if>
        </where>
    </select>
在这个例子中,传入的参数中包括一个ids的集合,如果我们想进行子查询,看上面的代码我们可以理解,foreach标签中 collection定义的就是参数中集合名字,open的含义是要拼接sql语句是的开头部分,name自然而然close就是闭合部分,item是指定遍历ids这个集合时的名字,seseparator指定了分隔符,最后标签里的内容自然就是集合中的每个值了
Mybatis一对一、一对多、多对多查询
一对一查询
1.通过创建account子类进行查询
如果除了一张user表,我们还有一张account账户表
account表中的uid关联user表的id

并且我们想实现,查询账户的同时,查询对应用户的名字和地址
首先我们再创建多一个Account实体类
图中声明的user类可以暂时不用声明

并创建一个AccountDao接口

并且为其创建一个配置文件

<!--一对一操作实现查关联表数据-->
    <select id="findAllAccount" resultType="com.lyl.entity.AccountUser">
        select a.* ,u.username,u.address from account a,user u where u.id=a.uid;
    </select>
对应方法的配置如上,我们从语句开始分析,语句中涉及到的类有User类也有Account类,且我们要查询的除了Account的信息还有对应user的名字和地址,所以我们很容易想到我们的结果对应的类应该包含这些内容,所以我们创建多一个类AccountUser类来帮助我们查询

让这个类继承Account,并声明需要查询的另外两个字段。是否还记得我们在创建Accout类的时候,声明了User类,所以我们再回头看看上面select的标签中写的sql语句,就能明白了
最后得到的结果

1.通过建立实体类关系进行查询
首先在刚刚的Account类声明一个user类,并自动生成get和set方法

然后我们在Account增加一个新的方法命名为findAll功能是查询所有账单且附加每个账单的对应用户信息
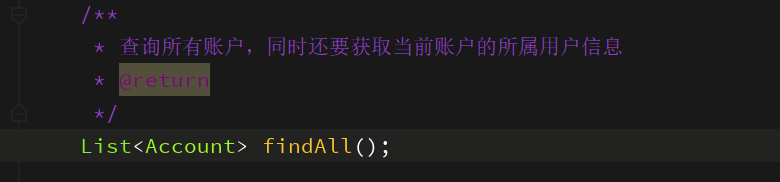
然后去对应的配置文件做如下配置
<resultMap id="accountUserMap" type="account">
        <id property="id" column="aid"></id>
        <result property="uid" column="uid"></result>
        <result property="money" column="money"></result>
        <!--一对一的关系映射,配置封装user的内容
        这里account的id的别名是aid-->
        <association property="user" column="uid" javaType="com.lyl.entity.User">
            <id property="id" column="id"></id>
            <result column="username" property="userName"></result>
            <result column="address" property="address"></result>
            <result column="sex" property="sex"></result>
            <result column="birthday" property="birthday"></result>
        </association>
    </resultMap>
sql语句配置
<select id="findAll" resultMap="accountUserMap">
        select u.*,a.id as aid,a.uid,a.money from account a,user u where u.id=a.uid;
</select>
在这里出现了新的标签< association >,用来配置user类的字段
 <association property="user" column="uid" javaType="com.lyl.entity.User">
            <id property="id" column="id"></id>
            <result column="username" property="userName"></result>
            <result column="address" property="address"></result>
            <result column="sex" property="sex"></result>
            <result column="birthday" property="birthday"></result>
</association>
最后在test测试

结果如下

一对多查询
看完了一对一查询,那一对多查询呢
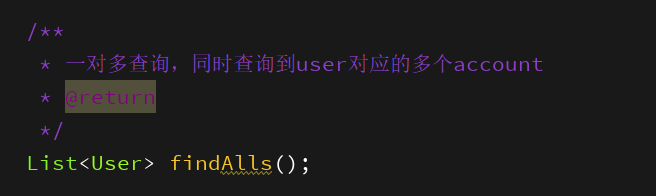
我们想实现一个功能,查询用户的同时将用户下的所有账单也查询了
首先在userDao声明方法
然后去user实体类声明Account类的集合

接下来就是userDao的配置
<!-- 一对多关系映射 -->
    <resultMap id="userAccountMap" type="com.lyl.entity.User">
        <!--主键的配置-->
        <id property="id" column="id"></id>
        <!--非主键的配置-->
        <result property="userName" column="username"></result>
        <result property="birthday" column="birthday"></result>
        <result property="sex" column="sex"></result>
        <result property="address" column="address"></result>
        <!--配置user对象中accounts集合的映射-->
        <collection property="accounts" ofType="com.lyl.entity.Account">
            <id column="aid" property="id"></id>
            <result column="uid" property="uid"></result>
            <result column="money" property="money"></result>
        </collection>
 </resultMap>
sql语句配置
<select id="findAlls" resultMap="userAccountMap">
        select * from user u left outer join account a on u.id=a.uid
 </select>
在test中运行就能得到想要的结果了

多对多查询
实现多对多查询前的准备
1.建立两张表:用户表、角色表
让用户和角色具有多对多的关系,需要使用中间表,中间表中包含各自的主键,在中间表中是外键
2.建立两个实体类:用户实体类和角色实体类
让用户和角色的实体类能体现出来多对多的关系
各自包含对方的一个集合引用
3.建立两个配置文件
用户的配置文件
角色的配置文件
4.实现配置:
当我们查询用户,可以同时得到用户所包含的角色信息
当我们查询角色,可以同时得到角色的所属用户信息
1.首先,因为之前已经建立过user表,所以现在要创建的是role表和一张中间表role_user表,并插入数据
create table `learn`.`role`(
	`ID` int(11) not null comment'编号',
    `ROLE_NAME` varchar(30) default null comment'角色名字',
    `ROLE_DESC` varchar(60) default null comment'角色描述',
    primary key(`ID`)
)ENgine =InnoDB default charset=utf8;
insert into `learn`.`role`(`ID`,`ROLE_NAME`,`ROLE_DESC`)values(1,'院长','管理整个学院'),(2,'总裁','管理整个公司'),(3,'院长','管理整个学校');
create table `learn`.`user_role`(
	`UID` int(11) not null comment'用户编号',
    `RID` int(11) not null comment'角色编号',
    primary key(`UID`,`RID`),
    key `FK_Reference_10`(`RID`),
    constraint `FK_Reference_10` foreign key(`RID`) references `learn`.`role`(`ID`),
    constraint `FK_Reference_9` foreign key(`UID`) references `learn`.`user`(`id`)
)Engine=InnoDB default charset=utf8;
insert into `learn`.`user_role`(`UID`,`RID`) values(1,1),(3,1),(1,2);
其中learn是我的数据库名字
2.建立Role实体类

声明各字段并且生成get和set方法以及重写toString方法,需要注意的是这里需要声明一个user的List集合,很容易理解,一个角色身份可以被多个用户占有
然后我们创建对应的Dao接口,声明findAll方法返回Role集合
package com.lyl.dao;

import com.lyl.entity.Role;
import java.util.List;

public interface RoleDao {
    /**
     * 返回所有角色
     * @return
     */
    List<Role> findAll();
}
然后再写对应的配置文件(配置文件不要忘了添加在主配置文件的mapper标签里面)
<?xml version="1.0" encoding="UTF-8" ?>
<!DOCTYPE mapper
        PUBLIC "-//mybatis.org//DTD Mapper 3.0//EN"
        "http://mybatis.org/dtd/mybatis-3-mapper.dtd">
<mapper namespace="com.lyl.dao.RoleDao">
    <resultMap id="roleMap" type="com.lyl.entity.Role">
        <id property="roleId" column="rid"></id>
        <result property="roleName" column="role_name"></result>
        <result property="roleDesc" column="role_desc"></result>
        <collection property="users" ofType="com.lyl.entity.User">
            <id column="id" property="id"></id>
            <result column="username" property="userName"></result>
            <result column="address" property="address"></result>
            <result column="sex" property="sex"></result>
            <result column="birthday" property="birthday"></result>
        </collection>
    </resultMap>
    <!--查询所有-->
<select id="findAll" resultMap="roleMap">
    select u.*,r.id as rid,r.role_name,r.role_desc from role r
     left outer join user_role ur on r.id=ur.rid
     left outer join user u on u.id = ur.uid
</select>
</mapper>
到了这一步,可能你会恍然大悟,我们实现多对多功能,其实和一对多功能并没有多大的区别,最大的区别在于我们建立了一个中间表利用了两次左外连接,共同点是实体类下要包括可能具有多个映射关系的另一个实体类的集合,并且在配置文件里用collection进行配置,另一个查询用户并且附加角色的在这里就不啰嗦了
结果如下


 1568
1568


 被折叠的 条评论
为什么被折叠?
被折叠的 条评论
为什么被折叠?
 到【灌水乐园】发言


