


Windows系统安装flume并配置测试
一. 安装
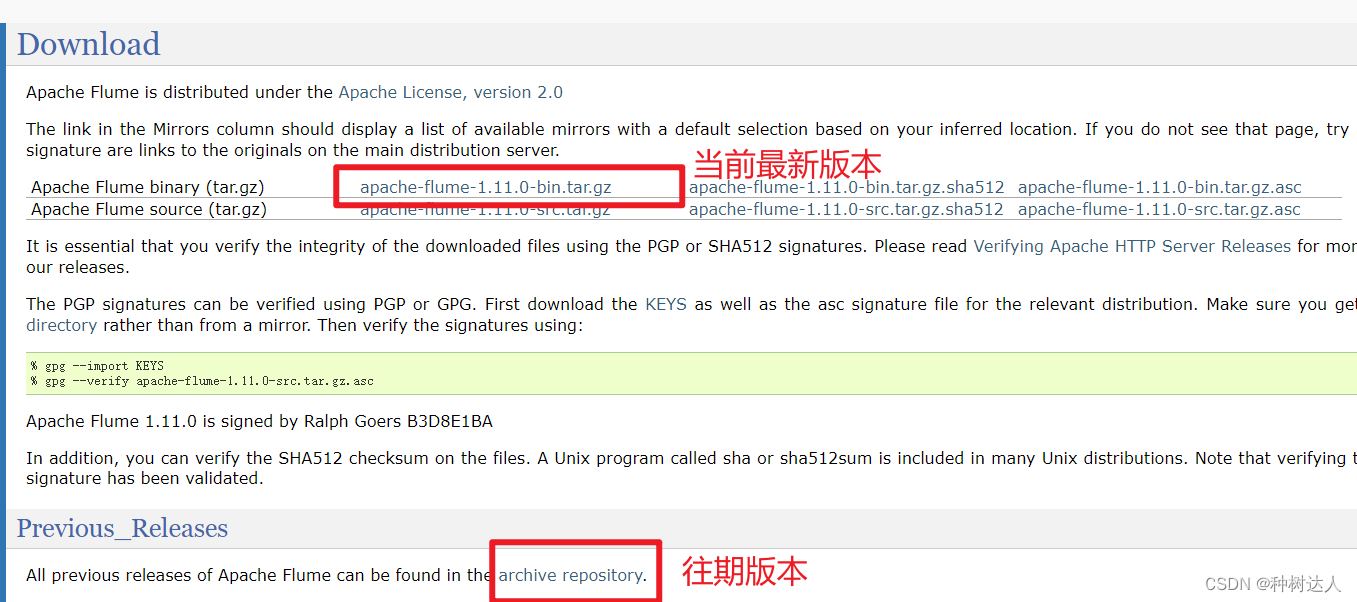
1. 下载
官网下载:下载连接
flume1.8及以上版本需要jdk1.8支持
2. 安装
解压缩下载得到的 .tar.gz 文件,并记住文件的解压目录,如我的 D:\software\ZZ\apache-flume-1.9.0-bin
3. 配置环境变量
在Windows环境变量配置中新建FLUME_HOME变量,并填写flume解压目录D:\software\ZZ\apache-flume-1.9.0-bin(填你自己的)。

之后在系统环境变量 PATH 中添加 %FLUME_HOME%\conf 和 %FLUME_HOME%\bin。

复制 D:\software\ZZ\apache-flume-1.9.0-bin\conf 目录中带有 .template 的三个文件,复制后去掉 .template 后缀。

编辑 flume-env.sh文件,在文本最后添加:export JAVA_HOME=安装的jdk路径,要确保环境变量中有一条JAVA_HOME的环境变量。
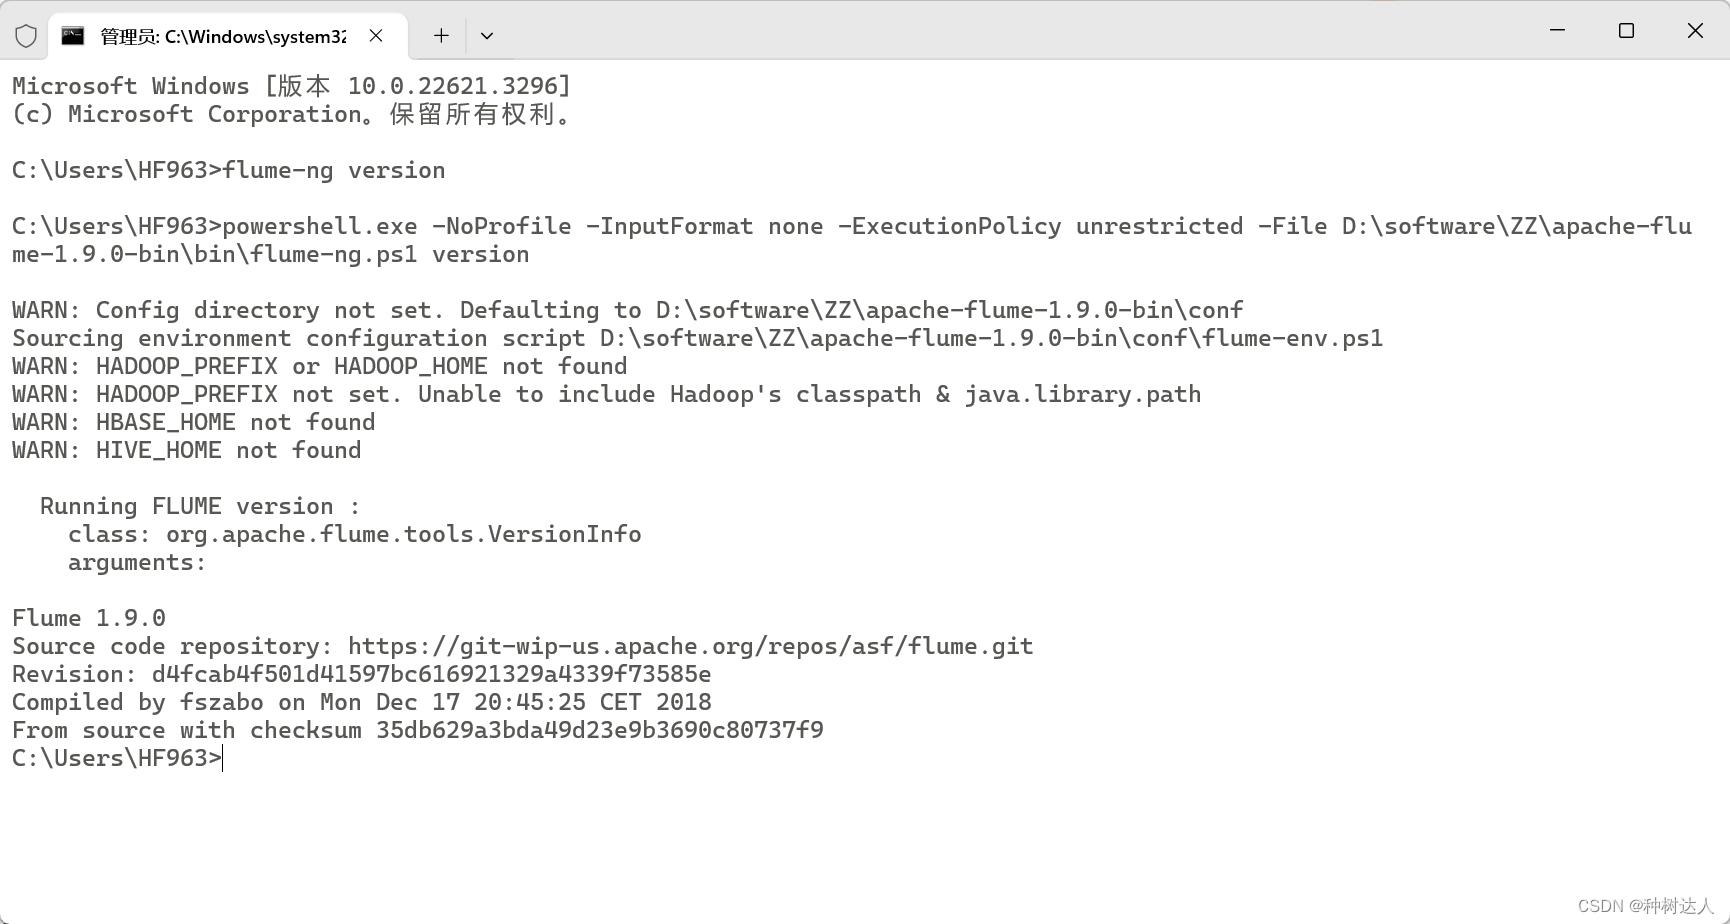
4. 测试安装成功
在cmd命令行中,输入flume-ng version命令,输出如下即为成功。
二. 配置接收单个端口
根据官方文档quickStart,解压文件中打开docs文件夹下的index.html即可本地查看文档。
1. 配置文件
在apache-flume-1.9.0-bin\conf目录下创建一个example.conf配置文件,然后下边的接收tcp日志配置复制到example.conf文件中,内容如下:
# 配置agent
a1.sources = r1
a1.sinks = k1
a1.channels = c1

# Describe/configure the  source
a1.sources.r1.type =  syslogudp
a1.sources.r1.port =  514
a1.sources.r1.host =  localhost
a1.sources.r1.channels  = c1

# Describe the sink
a1.sinks.k1.type = logger

# Use a channel which  buffers events in memory
a1.channels.c1.type =  memory
a1.channels.c1.capacity =  1000
a1.channels.c1.transactionCapacity  = 100

# Bind the source and sink  to the channel
a1.sources.r1.channels = c1
a1.sinks.k1.channel = c1
2. 打开cmd执行命令
进入bin目录中,打开cmd,执行命令启动flume:
flume-ng.cmd agent -conf ../conf --conf-file ../example.conf -name a1 -Dflume.root.logger=INFO,console
如果报如下错误:

原因是命令参数有误,Windows与Linux命令格式有些区别
更换执行命令:
flume-ng.cmd agent -conf ../conf -conf-file ../conf/example.conf -name a1 -property flume.root.logger=INFO,console
参数说明:指明conf文件路径、指明conf文件、指定agent、指明log打印信息级别和位置
参数的详细使用可以打开bin目录下的flume-ng.ps1进行查看,有详细说明(是一个可执行程序,可以调试)
执行命令后效果:
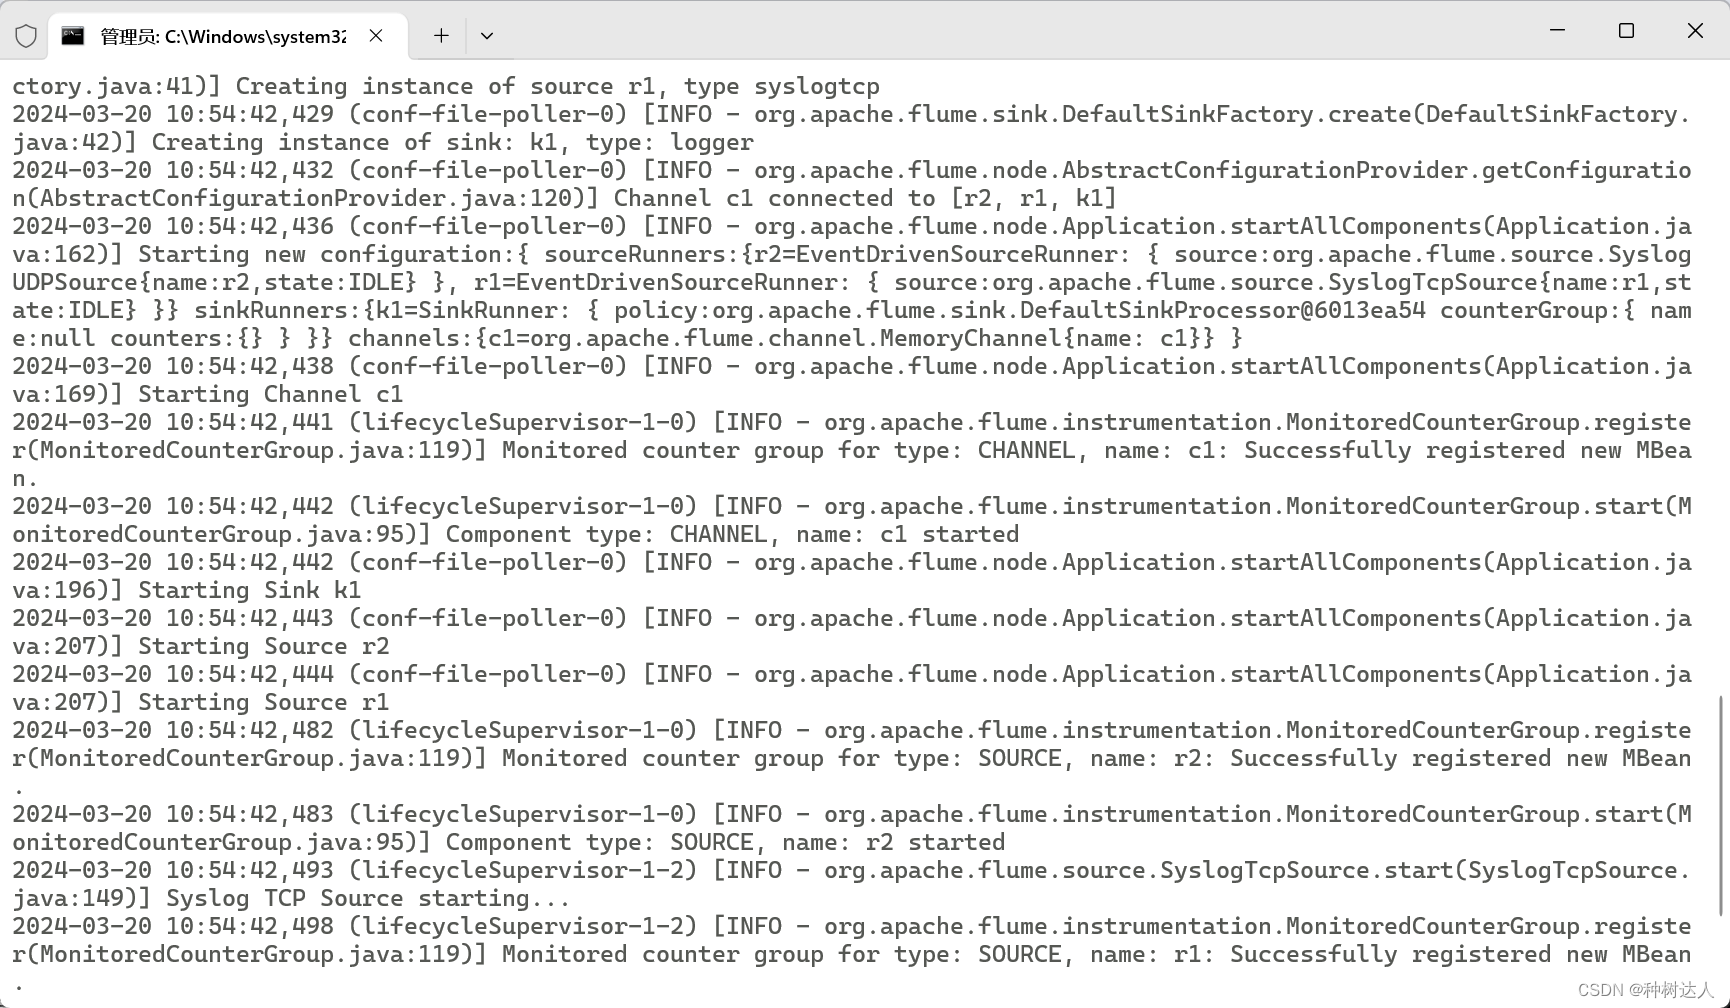
说明启动成功。
三. 配置接收多个端口
如果希望在一个agent中接收多个端口的日志信息,可以采用如下配置方式,a1.sources设置接收多个源,下边配置接收不同源的信息。
# 配置agent
a1.sources = r1 r2
a1.sinks = k1
a1.channels = c1

# Describe/configure the  source
a1.sources.r1.type =  syslogtcp
a1.sources.r1.port =  514
a1.sources.r1.host =  localhost
a1.sources.r1.channels  = c1

a1.sources.r2.type =  syslogudp
a1.sources.r2.port =  514
a1.sources.r2.host =  localhost
a1.sources.r2.channels  = c1


# Describe the sink
a1.sinks.k1.type = logger

# Use a channel which  buffers events in memory
a1.channels.c1.type =  memory
a1.channels.c1.capacity =  1000
a1.channels.c1.transactionCapacity  = 100

# Bind the source and sink  to the channel
a1.sources.r1.channels = c1
a1.sinks.k1.channel = c1
参考文章:
https://blog.csdn.net/maoyuanming0806/article/details/79367607
https://blog.csdn.net/dianchiqq/article/details/124084976
https://blog.csdn.net/u012613903/article/details/53022989


 被折叠的 条评论
为什么被折叠?
被折叠的 条评论
为什么被折叠?
 到【灌水乐园】发言


