


开发环境
JDK8+Gradle4+Spring Boot 2.0.0.M3Spring Cloud Starter Netflix Eureka Client Finchley.M2
创建项目
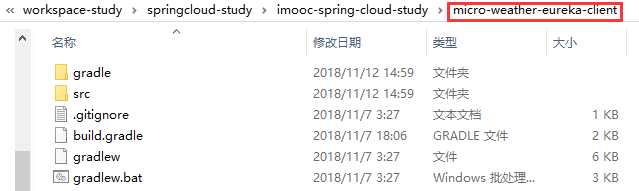
新建项目文件夹:

将hello-world项目中的源码文件复制粘贴到新项目文件夹中:
修改源码
修改build.gradle配置,修改Spring Boot版本、指定Spring Cloud版本、添加Eureka Client依赖、添加Spring Cloud依赖管理:
//buildscript代码块中脚本优先执行
buildscript {

    //ext用于定义动态属性
	ext {
		springBootVersion = '2.0.0.M3'
	}

    //使用了Maven的中央仓库及Spring自己的仓库(也可以指定其他仓库)
	repositories {
		//mavenCentral()
        maven{ url "https://repo.spring.io/snapshot" }
        maven{ url "https://repo.spring.io/milestone" }
        maven{ url "http://maven.aliyun.com/nexus/content/groups/public/" }
	}

    //依赖关系
	dependencies {
        //classpath声明了在执行其余的脚本时,ClassLoader可以使用这些依赖项
		classpath("org.springframework.boot:spring-boot-gradle-plugin:${springBootVersion}")
	}
}

//使用插件
apply plugin: 'java'
apply plugin: 'eclipse'
apply plugin: 'org.springframework.boot'
apply plugin: 'io.spring.dependency-management'

//指定了生成的编译文件的版本,默认是打成了jar包
group = 'com.study.spring.cloud'
version = '1.0.0'

//指定编译.java文件的JDK版本
sourceCompatibility = 1.8

//使用了Maven的中央仓库及Spring自己的仓库(也可以指定其他仓库)
repositories {
    //mavenCentral()
    maven{ url "https://repo.spring.io/snapshot" }
    maven{ url "https://repo.spring.io/milestone" }
    maven{ url "http://maven.aliyun.com/nexus/content/groups/public/" }
}

ext {
    springCloudVersion = 'Finchley.M2'
}

//依赖关系
dependencies {

    //Eureka Client
    compile('org.springframework.cloud:spring-cloud-starter-netflix-eureka-client')

    //该依赖用于测试阶段
    testCompile('org.springframework.boot:spring-boot-starter-test')
}

//Spring Cloud依赖管理
dependencyManagement{
    imports{
        mavenBom "org.springframework.cloud:spring-cloud-dependencies:${springCloudVersion}"
    }
}
修改com.study.spring.cloud.weather包下的Application类,加入@EnableDiscoveryClient注解:
package com.study.spring.cloud.weather;

import org.springframework.boot.SpringApplication;
import org.springframework.boot.autoconfigure.SpringBootApplication;
import org.springframework.cloud.client.discovery.EnableDiscoveryClient;

/*
 * @SpringBootApplication注解声明Spring Boot应用
 * 作用等同于@Configuration, @EnableAutoConfiguration, @ComponentScan,
 * 简化Spring配置
*/
@SpringBootApplication
//启用可发现的客户端
@EnableDiscoveryClient
//Application类一定要处于整个工程的根目录下,这样它才能根据配置去扫描子节点下的Spring的Bean
public class Application {

	public static void main(String[] args) {
		SpringApplication.run(Application.class, args);
	}
}
修改application.properties配置文件:
#应用名称
spring.application.name=micro-weather-eureka-client

#注册服务器的URL
eureka.client.service-url.defaultZone=http://localhost:8761/eureka/
运行
注意一定要先运行micro-weather-eureka-server
运行micro-weather-eureka-client应用:

运行结果如下:

访问http://localhost:8761页面,可以看到Eureka的管理页面:

将客户端关闭:

刷新Eureka的管理页面(需要一定时间才能监控到客户端的变化):

可以在application.properties配置文件中添加:
#关闭自我防护功能
eureka.server.enable-self-preservation=false
再进行关闭客户端的实验,Eureka的管理页面显示:


 282
282


 被折叠的 条评论
为什么被折叠?
被折叠的 条评论
为什么被折叠?
 到【灌水乐园】发言


