


Django基本知识
01. 什么是Django
Django是一个开放源代码的Web应用框架,由Python写成。采用了MVT的软件设计模式,即模型Model,视图View和模板Template。
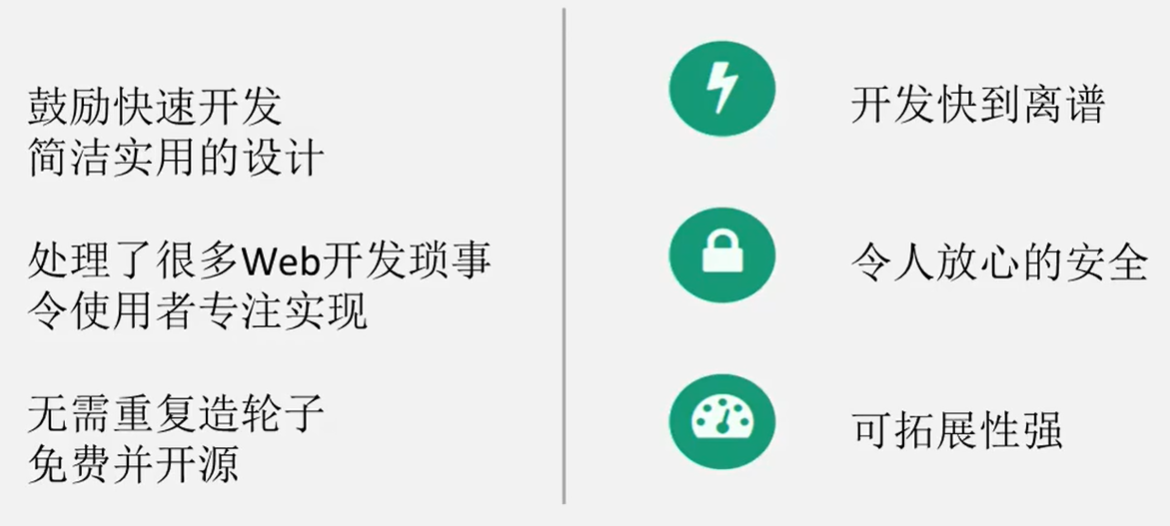
Django的特点如下所示:
02 入门仪式:Hello world
1、新建Django项目
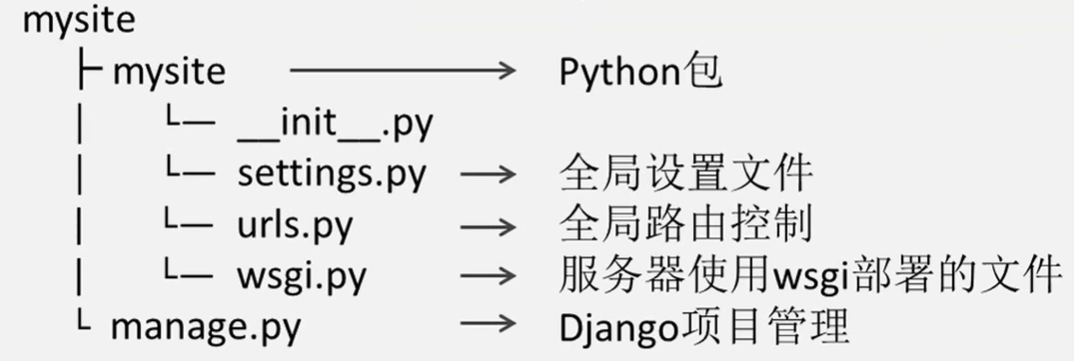
新建一个Django项目,名称为mysite
django-admin startproject mysite
相关的文件目录结构如下所示:
接着,在urls.py中编写 Hello, world 的请求响应
from django.contrib import admin
from django.urls import path, re_path
from . import views

#urlpatterns会自动解析路径,处理相应的请求
urlpatterns = [
    path('admin/', admin.site.urls),
    path('', views.index),	#空字符串代表一进入localhost就打开的页面,类似index.html
    re_path('^$', views.index) #re_path代表使用正则表达式解析路径
]
编写相应的 views.py,使用 HttpResponse 方法进行响应
from django.http import HttpResponse

def index(request):
    return HttpResponse("Hello, world")
在cmd中输入以下命令启动服务器:
python manage.py runserver
在浏览器中打开 127.0.0.1:8000 ,即可看到Hello, world
2、创建超级管理员
若想要创建超级管理员,则需要先初始化数据库
python manage.py migrate
可以在 mysite 根目录下看到 db.sqlite3 的数据库文件
然后在 cmd 输入命令进行创建:
python manage.py createsuperuser
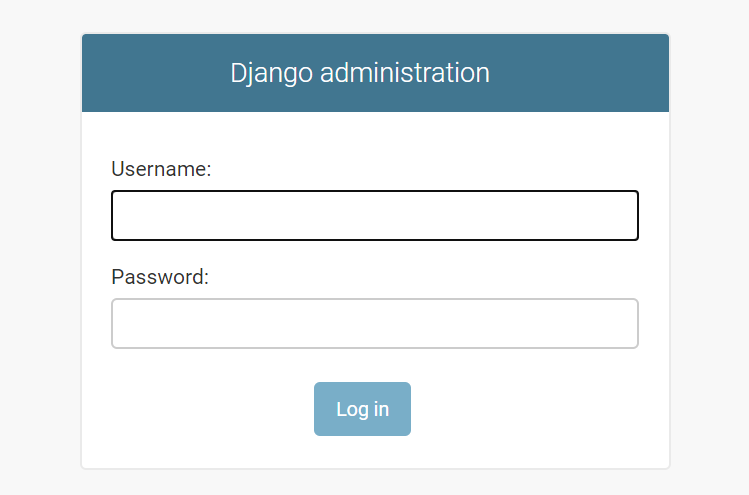
输入用户名、邮箱、密码即可创建完成,然后再启动本地服务,进入 /admin 路径,打开相应页面
python manage.py runserver

-> enter 127.0.0.1/admin
03 Django基本应用结构
假设有多个文章页面,类似以下情形,那我们需要如何去处理?
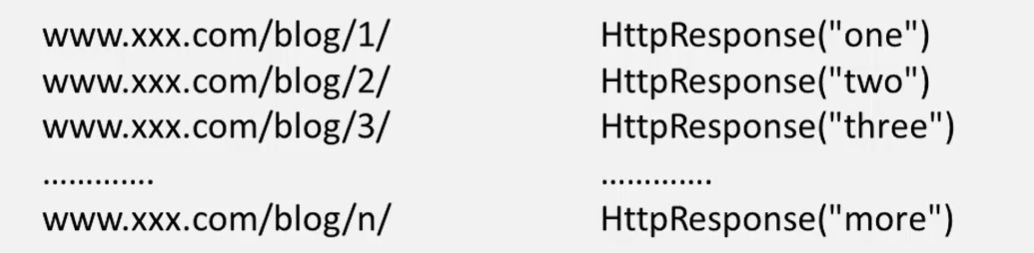
如果每个页面有相似的内容,且文章排版结构类似,则我们可以将数据和模板分别提取出来
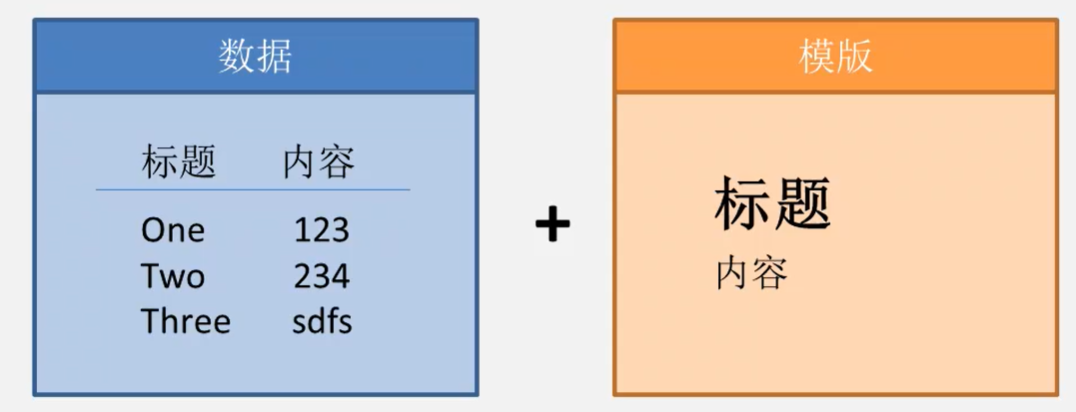
在这里我们通过使用Django的 app 达到上述效果
1、创建app
首先在mysite根目录下创建一个名为 article 的app
python manage.py startapp article
接着在 article 目录下的 models.py 文件内创建一个模型 Article,这个类需要继承 models.Model类
from django.db import models

# Create your models here.
class Article(models.Model):
    title = models.CharField(max_length = 30)
    content = models.TestField()
为了使用这个 app ,我们需要在 mysite 项目的 settings.py 文件中注册该 app
....
# Application definition

INSTALLED_APPS = [
    'django.contrib.admin',
    'django.contrib.auth',
    'django.contrib.contenttypes',
    'django.contrib.sessions',
    'django.contrib.messages',
    'django.contrib.staticfiles',
    'article', #在此处进行注册
]
....
2、同步数据库
然后我们需要进行数据库的同步,在命令行输入以下两条命令:
#生成数据库迁移文件
python manage.py makemigrations
#根据迁移文件打表
python manage.py migrate
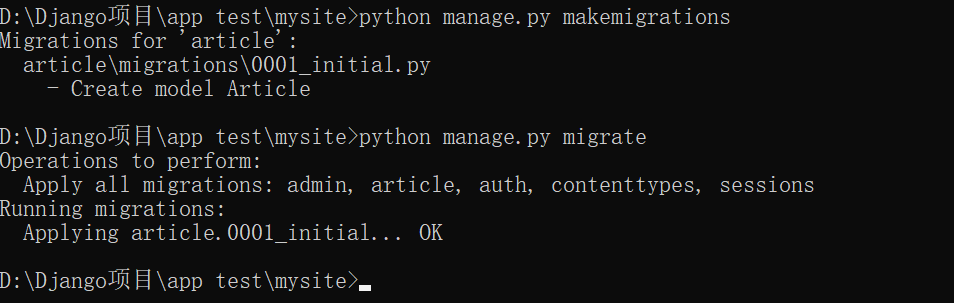
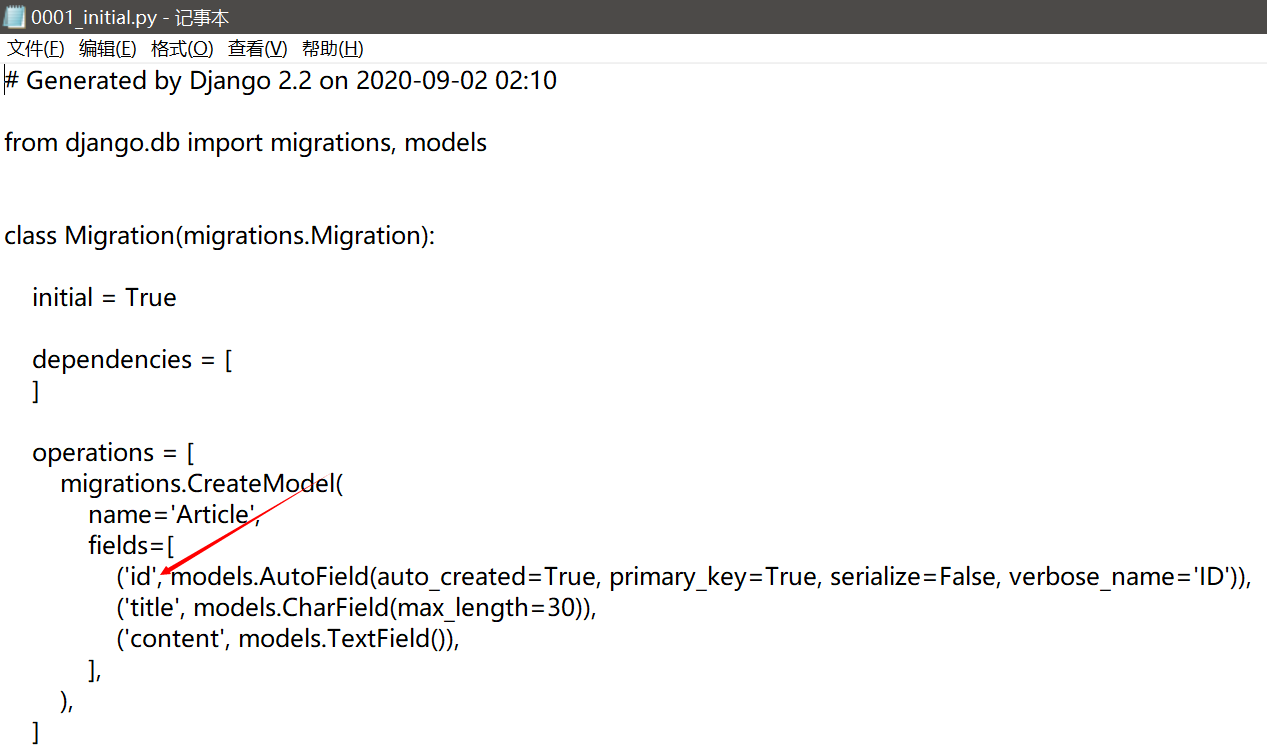
在输入第一条命令后,在 migrations 目录下可以发现新增了一个文件夹和一个 00001_initial.py 文件,这个文件实际上是Django的一套机制,如果这套代码放在另外一个服务器,则可以通过这个文件迅速创建数据库表的结构,方便数据库的迁移

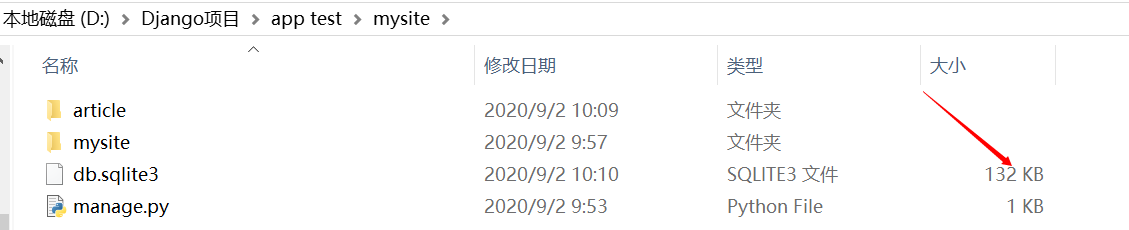
在输入第二条命令后,可以发现数据库文件 db.sqlite3 发生了改变,我们可以通过后台管理界面去查看这个数据库,并进行增加、删除的操作
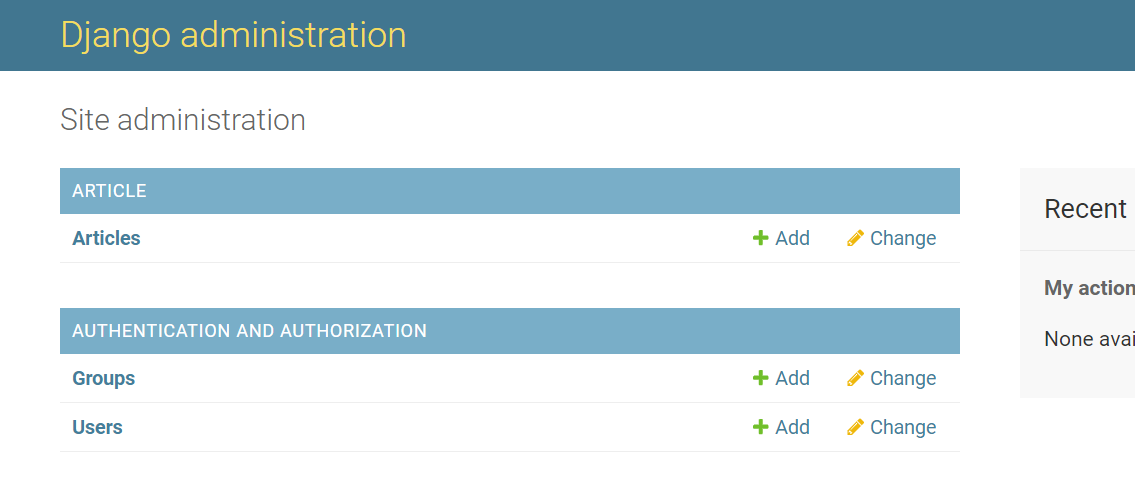
为了让应用在后台管理界面中展现,需要修改 article 目录下的 admin.py 文件,注册模型 Article
from django.contrib import admin
from .models import Article

# Register your models here.
admin.site.register(Article)
然后 runserver 启动服务器,就可以在后台管理界面看到效果,可以进行数据的添加或删除
此外,若想要修改语言为中文,可以在 mysite 中的 settings.py 文件中进行修改
LANGUAGE_CODE = 'zh-Hans'
04 使用模板显示内容
1、获取唯一标识
因为要处理许多文章,我们需要编写一个处理方法,那么如何通过处理方法获取文章的唯一标识呢?
使用记事本打开 00001_initial.py文件,可以看到 Django 已经为我们自动创建了一个字段id作为唯一标识
进入 article 目录下的 views.py 编写处理方法
from django.shortcuts import render
from django.http import HttpResponse

# Create your views here.
def article_detail(request, article_id):
    return HttpResponse("文章id:%s" % article_id)
然后在 mysite 目录下的 urls.py 文件中编写解析路径的代码
from django.contrib import admin
from django.urls import path
from . import views
from article.views import article_detail #导入上面编写的路径处理方法

urlpatterns = [
    path('admin/', admin.site.urls),
    path('', views.index),
    #编写解析路径,<>内的article_id对应article_detail函数的参数,name代表别名
    path('article/<int:article_id>', article_detail, name = "article_detail"),
]
这时重新启动服务,在地址栏输入localhost:8000/article/1,服务器成功响应相关页面
2、显示文章标题和内容
如果我们想在服务器响应文章对应的标题和内容,则需要在article目录下的 views.py中引用 models.py 中的模型,通过id找到具体的文章记录
from django.shortcuts import render
from django.http import HttpResponse
from .models import Article

# Create your views here.
def article_detail(request, article_id):
    article = Article.objects.get(id = article_id)	#通过文章id获得文章对象
    return HttpResponse("文章标题:%s <br> 文章内容:%s" % (article.title,
                        article.content))	#返回文章标题和内容
在这里使用了 Article.objects.get(xx)方法获取文章对象,模型的objects通常用来获取或操作模型的对象
3、404处理
为了防止用户输入错误的链接地址而产生404错误,我们需要在 views.py 中对这种情况进行处理
from django.shortcuts import render
from django.http import HttpResponse, Http404
from .models import Article

# Create your views here.
def article_detail(request, article_id):
    try:
        article = Article.objects.get(id = article_id)
    except:
        raise Http404("not exist")
    return HttpResponse("文章标题:%s <br> 文章内容:%s" % (article.title, article.content))
这样,当用户输入错误地址时,就会出现如下页面:

4、使用模板
在 views.py 中,出现了前端 http 代码和后端代码混合的情形,为了将前端页面和后端代码分离,降低代码的耦合程度,我们需要使用模板功能
首先,在 article 目录下创建一个文件夹,Django规定了其目录名称必须为 templates ,我们可以在 mysite目录下的 settings 文件里查看关于模板的设置

其次,在 templates 文件夹下创建一个 html 页面,代码如下:
<html>
<head>
</head>
<body>
    <h2>{{ article_obj.title }}</h2>
    <p>{{article_obj.content}}</p>
</body>
</html>
然后,在 views.py 文件中通过 render 模块将获得的 article 对象返回给该网页,其中,render 函数的三个参数分别为:请求request ,html 文件名,包含 article 对象的context 字典
from django.shortcuts import render
from django.http import HttpResponse, Http404
from .models import Article

# Create your views here.
def article_detail(request, article_id):
    try:
        article = Article.objects.get(id = article_id)
        context = {}
        context['article_obj'] = article
        return render(request, 'article_detail.html', context)
    except Article.DoesNotExist:
        raise Http404("not exist")
如此一来,倘若需要修改前端页面的样式,修改 templates 文件夹下的 html代码即可,降低了代码的耦合度
此外,我们可以通过使用另外两个模块:render_to_response,get_object_or_404 进行代码的优化
- 使用
get_object_or_404替换try catch和文章对象的获取,其中参数pk代表组件的缩写 render_to_response替换render,只需要html文件名和字典两个参数即可
from django.shortcuts import render_to_response, get_object_or_404
from .models import Article

# Create your views here.
def article_detail(request, article_id):
    article = get_object_or_404(Article, pk = article_id)
    context = {}
    context['article_obj'] = article
    return render_to_response('article_detail.html', context)
5、文章列表
为了更好地查看文章,我们需要有一个文章列表用来定位到每篇文章
首先在 views.py 内编写方法,获取到所有文章对象,并返回一个 html 页面
from django.shortcuts import render_to_response, get_object_or_404
from .models import Article

# Create your views here.
.....

def article_list(request):
    articles = Article.objects.all()
    context = {}
    context['articles'] = articles
    return render_to_response('article_list.html', context)
接着在 templates.html 目录内编写 html 页面,这里注意 for循环 和绝对路径的写法
<html>
<head>
</head>
<body>
	{% for article in articles %}
    	<a href = "/article/{{ article.pk }}">{{ article.title }}</a>
    	<!--此外,还可以采用别名的写法-->
    	<a href = "{% url 'article_detail' article.pk %}">{{ article.title }}</a>
    {% endfor %}
</body>
</html>
然后再在 urls.py 文件中编写相对应的路径
from django.contrib import admin
from django.urls import path
from . import views
from article.views import article_list

urlpatterns = [
    ......
    path('article/', article_list, name = 'article_list'),
]
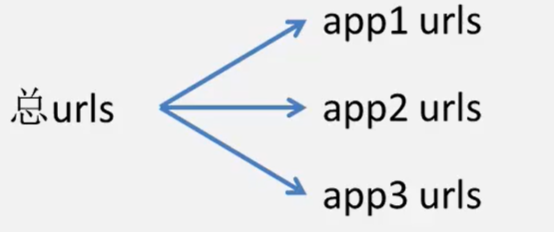
6、总urls包含app的urls
因为在一个项目中,会出现很多app,这时候为了方便路由管理,则需要在各个app下设置路由,再在项目的总路由下面包含各个app下的路由,如下图所示:
假设我们要管理 article 的路由,我们先在 article 目录下创建 urls.py 文件
from django.urls import path
from . import views

urlpatterns = [
    #localhost:8000/article/1
    path('<int:article_id>', article_detail, name = "article_detail"),
    #localhost:8000/article/
    path('', article_list, name = 'article_list'),
]
然后再对 mysite 目录下的 urls.py 进行修改,这里需要引入 include 模块,且设置 article 模块下的路径统一以 article/ 开头
from django.contrib import admin
from django.urls import path, include
from . import views

urlpatterns = [
    ......
    path('article/', include('article.urls')),
]
05 定制后台和修改模型
1、定制admin后台
假如我们想要修改http://localhost:8000/admin/article/article/页面上显示的样式,展现更多信息

我们可以在 article 目录下的 admin.py 中新增一个类 ArticleAdmin
from django.contrib import admin
from .models import Article

# Register your models here.
class ArticleAdmin(admin.ModelAdmin):
    list_display = ("id", "title", "content")
    ordering = ("id", ) #需要是一个元组,所以加上逗号

admin.site.register(Article, ArticleAdmin) #需要注册ArticleAdmin
然后刷新页面,可以发现页面显示内容的变化

其中,Django增加了装饰器的写法,可以在定制类前加上模型的注册语句,以表明该类是该模型的定制类
from django.contrib import admin
from .models import Article

# Register your models here.
@admin.register(Article)
class ArticleAdmin(admin.ModelAdmin):
    list_display = ("id", "title", "content"),
    ordering = ("id", )
2、修改模型
注意:修改模型要更新数据库!
假如我们想要修改 Article 模型,增添新的字段,则首先修改 models.py 文件,这里新增一个时间字段
from django.db import models

# Create your models here.
class Article(models.Model):
    title = models.CharField(max_length = 30)
    content = models.TextField()
    create_time = models.DateTimeField()
然后更新数据库,输入命令 python manage.py makemigrations,由于数据库之前存在记录,系统不知道旧的记录如何填充新出现的字段,出现两个选项:
- 选项1:当场手动输入一个默认值
- 选项2:退出,并在
models.py中提供默认值
假设按下1,由于新增字段是时间格式,输入 timezone.now 命令即可

假设按下2,则在 models.py 中修改默认值,并导入相关头文件
from django.db import models
from django.utils import timezone

# Create your models here.
class Article(models.Model):
    title = models.CharField(max_length = 30)
    content = models.TextField()
    create_time = models.DateTimeField(default = timezone.now)
此外,对于时间这一特定格式的字段,还有第三种方法自动添加时间,也就是按照创建 article 的时间进行填充
from django.db import models

# Create your models here.
class Article(models.Model):
    title = models.CharField(max_length = 30)
    content = models.TextField()
    create_time = models.DateTimeField(auto_now_add = True)
    last_updated_time = models.DateTimeField(auto_now = True)
参数 auto_now_add 表示创建时间,auto_now 表示最后一次修改的时间
修改后记得更新数据库,并在 admin.py 文件中将新增字段添加上去,最后效果如下:

假如我们要添加一个作者 author 字段,而且该字段作为外键关联其它模型,那我们修改 models.py 如下:
from django.db import models
from django.contrib.auth.models import User

# Create your models here.
class Article(models.Model):
    ...
    author = models.ForeignKey(User, on_delete = models.DO_NOTHING, default = 1)
    ...
- User 代表关联Django的
User模型 on_delete = models.DO_NOTHING表示在删除所关联模型的记录时,不会将本模型的author字段删除default = 1表示之前旧记录的字段值为管理员名称
然后更新数据库,修改 admin.py,重启服务,最终效果如下:

假设我们要添加一个字段 is_deleted 用来标识该 article 是否被删除,而实际上并未删除其数据库的数据
from django.db import models

# Create your models here.
class Article(models.Model):
    ...
    is_deleted = models.BooleanField(default = False)
    readed_num = models.IntegerField()
更新数据库和 admin.py,显示效果如下,可以在详情页修改 article 是否被删除


这样,我们就可以联系之前的文章列表,让其不显示已被删除的文章标题
修改 article 目录的 views.py,将Article.objects.all修改为filter,并输入相应条件
def article_list(request):
    articles = Article.objects.filter(is_deleted = False)
    ...
这样文章列表就只会显示没有被 “逻辑删除” 的文章


 714
714

 被折叠的 条评论
为什么被折叠?
被折叠的 条评论
为什么被折叠?
 到【灌水乐园】发言


