


工作需要一个简单的考勤日历,参考了一个博主的博客,最后在闲暇时间满足了自己的少女心。
参考的博主博客:https://blog.csdn.net/TiAmo_Lyj/article/details/105164437
先推荐一个配色网站,渐变色超级美:https://uigradients.com
再上效果图:

此次实践收获:
1.加深了对Flex布局理解
2.收获了一个日期处理类库,Monent.js(http://momentjs.cn/)
3.使用预处理器
4.从零建项目
Flex布局
/* 此次用到最多的Flex布局 */
.flex-center {
    display: flex; /* 块元素可使用flex,行内元素使用inline-flex */
    flex-direction: row; /* 主轴为水平方向,起点在左端 */
    flex-wrap: wrap; /* 项目主轴总尺寸超出容器时换行,第一行在上方 */
    justify-content: center; /* 居中 */
    align-items: center; /* 项目在交叉轴终点对齐 */
  }
Monent.js: 文档丰富使用感极佳
// 安装Monent.js
npm install moment --save
//在需要的地方引入
import moment from 'moment';
//获取当前时间
moment().format('YYYY-MM-DD')
//时间的比较,返回值为布尔型。isAfter()、isSame()...
moment('2010-10-20').isBefore('2010-10-21')
scss
/* 移动端适配,rem响应式设计 */
/* 把px转成rem */
$max-rem: 16;
@function px2rem($px) {
  @return $px / 750 * $max-rem+rem;  /* 750为设计稿宽度*/
}

/* 使用方式
   首先引入.scss文件*/
@import "~@/mixin.scss";
.content {
	width: px2rem(220);
	height: px2rem(220);
}
如何在日历中显示三种不同打卡状态
//绘制日历表格
 calendarTable(date) {
   const _this = this;
   _this.dateArr = [];
   _this.newDate = date;
   // 当月的第一天
   let curr = _this.newDate.substring(0,8) + '01';
   //当月天数
   _this.thisMonthDays = moment(date).daysInMonth();
   //当月一号是星期几
   _this.thisDateWeek = moment(date).date(1).weekday();
   //往日历数组装每天的日期
   let calendarArr = [];
   //当前日期是否需要打卡
   let flag = false;
   //已打卡数组下标
   let index = 0;
   //checkArr为已打卡数组
   let checkLen = _this.checkArr.length;
   for (let i = 1; i < _this.thisMonthDays + 1; i++) {
     let obj = {};
     // startTime为需要打卡的起始时间,endTime为需要打卡的结束时间
     if (moment(curr).isSameOrAfter(moment(_this.startTime).format('YYYY-MM-DD')) &&
         moment(curr).isSameOrBefore(moment(_this.endTime).format('YYYY-MM-DD'))) {
       flag = true;
     } else {
       flag = false;
     }
     if (flag) {
     	//与已打卡数组进行对比
       if (checkLen != 0) {
         if (curr == _this.checkArr[index].date) {
           obj = {
             currDate : curr,
             checked: 'checked-green'
           }
           if (index < checkLen-1) {
             index ++;
           }
         } else {
         	//已打卡数组为0时,_this.checkArr[index].date会报错,所以需要单独谈论
           if (moment(curr).isBefore(moment('2020-08-18').format('YYYY-MM-DD'))) {
             obj = {
               currDate : curr,
               checked: 'checked-red'
             }
           } else {
             obj = _this.checkCurr(curr);
           }
         }
       } else {
         if (moment(curr).isBefore(moment('2020-08-18').format('YYYY-MM-DD'))) {
           obj = {
             currDate : curr,
             checked: 'checked-red'
           }
         } else {
           obj = _this.checkCurr(curr);
         }
       }
     } else {
       obj = {
         currDate : curr,
         checked: ''
       }
     }
     // obj.checked为不同打卡状态的css
     calendarArr.push(obj);
     // 日期向后移一天
     curr = moment(curr).add(1, 'days').format('YYYY-MM-DD');
   }
   // 有当月一号是星期几根据规则往前面补空位
   for (let j = 0; j < _this.thisDateWeek; j++) {
     calendarArr.unshift('')
   }
   // 表格列数固定为7列,获取最大行数
   let len = calendarArr.length;
   let arrRow = Math.ceil(len / 7);
   _this.maxTableRow = arrRow;
   // 获取整个表格的格子个数,给多余的格子补空
   for (let k = 0; k < arrRow * 7 - len; k++) {
     calendarArr.push('')
   }
   _this.dateArr = calendarArr;
 },
如何实时显示时间
beforeDestroy() {
  if (this.timer) {
    clearInterval(this.timer);
   }
 },
mounted() {
  let that = this;
  this.timer = setInterval(function() {
    that.curTime = new Date().toISOString().replace("T", " ").substring(0,19);
  })
}
如何循环月份
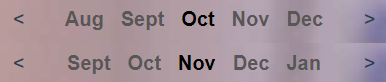
<!-- 通过flex布局,最多显示5个月份-->
<div class="layout-side">
<div class="flex-center left-right-btn" @click="prevMonth"><</div>
<div class="layout-center-top">
<div class="flex-center time-title">
<span>{{monthList[indexMon%12]}}</span>
<span>{{monthList[(indexMon+1)%12]}}</span>
<span class="time-title-active">{{monthList[(indexMon+2)%12]}}</span>
<span>{{monthList[(indexMon+3)%12]}}</span>
<span>{{monthList[(indexMon+4)%12]}}</span>
</div>
</div>
<div class="flex-center left-right-btn" @click="nextMonth">></div>
</div>
//因为日期的变动是通过moment.js调用,所以年份也会随日期变化,不需要考虑年份
 // 下个月
 nextMonth() {
   const _this = this;
   let date = moment(_this.newDate).add(1, 'months').format('YYYY-MM-DD');
   //返回当前月份是第几个月份,即可变换顶部日期
   _this.indexMon = moment(date).get('month');
   _this.calendarTable(date)
 }
最后附上完整代码:https://github.com/zzh0701/clockin


 1415
1415


 被折叠的 条评论
为什么被折叠?
被折叠的 条评论
为什么被折叠?
 到【灌水乐园】发言


