


在 CentOS 8 上实现PXE自动化安装 CentOS 7,8
1、安装前准备
1、关闭防火墙
systemctl stop firewalld.service
2、关闭SELINUX
sed -i '/^SELINUX=/s@enforcing@disabled@g' /etc/selinux/config
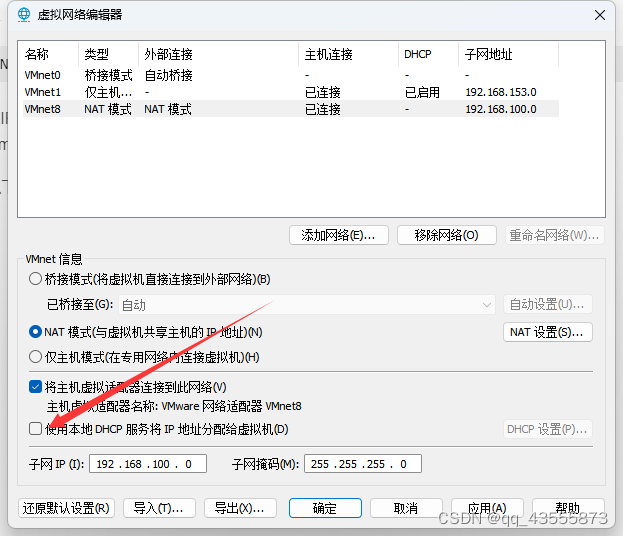
3、关闭Vmware软件中的DHCP服务,基于NAT模式
注意:使用 1G 以下内存的主机安装CentOS 7,8 会提示空间不足,建议2G以上,同时设置静态ip地址
2、安装相关软件包并启动
1、安装相关软件
dnf -y install dhcp-server tftp-server httpd syslinux-nonlinux
2、配置DHCP服务
打开dhcpd.conf配置文件并修改
vim /etc/dhcp/dhcpd.conf
option domain-name "example.org";
option domain-name-servers ns1.example.org, ns2.example.org;

default-lease-time 600;
max-lease-time 7200;

log-facility local7;

subnet 192.168.100.0 netmask 255.255.255.0 {
        range 192.168.100.130 192.168.100.150;#自动分配的地址范围
        option routers 192.168.100.1;
        next-server 192.168.100.101;#TFTP服务器地址
        filename "pxelinux.0"; #bootloader启动文件的名称
}
3、最后启动 httpd tftp dhcpd
systemctl enable --now httpd tftp dhcpd
3、准备yum 源和相关目录
新建文件夹并挂载镜像(可以查看往期详细挂载教程)
mkdir -pv /var/www/html/centos/{7,8}/os/x86_64/
mount /dev/sr0 /var/www/html/centos/8/os/x86_64/
mount /dev/sr1 /var/www/html/centos/7/os/x86_64/
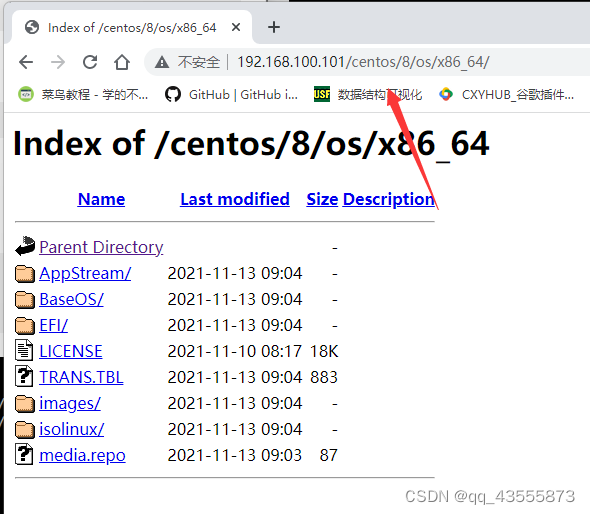
打开浏览器进行验证

4、准备kickstart文件
centos7上可以通过安装system-config-kickstart图形化生成kickstart文件,centos上没有这个软件,可以通过已经安装的系统的kickstart文件进行修改,/root下有anaconda-ks.cfg就行安装此系统的kickstart文件

下面是我的kickstart文件,这两个kickstart文件做了如下配置:关闭防火墙、关闭SELINUX、设置阿里、腾讯、清华、华为镜像源、更改网卡名为eth0、添加centos用户、安装了常用软件,同时选择的是text安装方式,系统最小化安装等,具体参考kickstart文件,可以跟据需求自行修改
centos7.cfg
#platform=x86, AMD64, 或 Intel EM64T
#version=DEVEL
# Install OS instead of upgrade
install
# Keyboard layouts
keyboard 'us'
# Root password 123456
rootpw --iscrypted $1$eSOoSZOZ$305BQEZYJW4vwKXpskOkS/
# System language
lang en_US
# System authorization information
auth  --useshadow  --passalgo=sha512
# Use text mode install
text
# SELinux configuration
selinux --disabled
# Do not configure the X Window System
skipx
# Firewall configuration
firewall --disabled
# Network information
network  --bootproto=dhcp --device=ens33
# Reboot after installation
reboot
# System timezone
timezone Asia/Shanghai
# Use network installation
url --url="http://192.168.100.101/centos/7/os/x86_64/"
# System bootloader configuration
bootloader --append="net.ifnames=0" --location=mbr
# Clear the Master Boot Record
zerombr
# Partition clearing information
clearpart --all --initlabel
# Disk partitioning information
part / --fstype="xfs" --size=102400
part /boot --fstype="xfs" --size=1024
part /data --fstype="xfs" --size=51200
part swap --fstype="swap" --size=2048
%post
#sed -i 's/^SELINUX=enforcing/SELINUX=disabled/' /etc/selinux/config
#systemctl disable firewalld
mkdir /etc/yum.repos.d/backup
mv /etc/yum.repos.d/*.repo /etc/yum.repos.d/backup
cat > /etc/yum.repos.d/base.repo <<EOF
[base]
name=CentOS
baseurl=https://mirrors.aliyun.com/centos/7/os/x86_64/
gpgcheck=0
[extras]
name=extras
baseurl=http://mirrors.aliyun.com/centos/7/extras/x86_64/
gpgcheck=0
[epel]
name=epel
baseurl=https://mirrors.cloud.tencent.com/epel/7/x86_64
	https://mirrors.aliyun.com/epel/7/x86_64
	https://mirrors.huaweicloud.com/epel/7/x86_64
gpgcheck=0
EOF
useradd centos
echo 123456 | passwd --stdin centos
sed -i '/GRUB_CMDLINE_LINUX=/s#quiet#& net.ifnames=0 biosdevname=0#' /etc/default/grub
mv /etc/sysconfig/network-scripts/ifcfg-ens33 /etc/sysconfig/network-scripts/ifcfg-eth0
sed -i  's/ens33/eth0/g' /etc/sysconfig/network-scripts/ifcfg-eth0
grub2-mkconfig -o /boot/grub2/grub.cfg
%end
%packages
@^minimal
vim-enhanced
wget
curl
tree
%end
centos8.cfg
#version=RHEL8
# Use graphical install
text
reboot
selinux --disabled
firewall --disabled
url --url="http://192.168.100.101/centos/8/os/x86_64"#根据自己的地址进行修改
%packages
@^minimal-environment
kexec-tools
vim
curl
wget
tree
%end
# Keyboard layouts
keyboard --xlayouts='us'
# System language
lang en_US.UTF-8
# Network information
network --bootproto=dhcp --device=ens160 --ipv6=auto --activate
network --hostname=localhost.localdomain
skipx
# System services
services --disabled="chronyd"
# Run the Setup Agent on first boot
firstboot --enable
zerombr
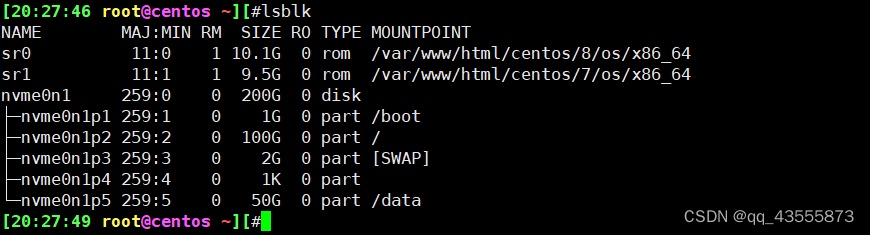
ignoredisk --only-use=nvme0n1
# Partition clearing information
clearpart --all --initlabel
# Disk partitioning information
part pv.155 --fstype="lvmpv" --ondisk=nvme0n1 --size=155652
part /boot --fstype="xfs" --ondisk=nvme0n1 --size=1024
volgroup cl --pesize=4096 pv.155
logvol /data --fstype="xfs" --size=51200 --name=data --vgname=cl
logvol swap --fstype="swap" --size=2048 --name=swap --vgname=cl
logvol / --fstype="xfs" --size=102400 --name=root --vgname=cl
# System timezone
timezone Asia/Shanghai --isUtc
# Root password
rootpw --plaintext 123456
%post
mkdir /etc/yum.repos.d/backup
mv /etc/yum.repos.d/*.repo /etc/yum.repos.d/backup
cat > /etc/yum.repos.d/base.repo <<EOF
[base]
name=BaseOS
baseurl=https://mirrors.huaweicloud.com/centos/8/BaseOS/x86_64/os/
https://mirror.tuna.tsinghua.edu.cn/centos/8/BaseOS/x86_64/os/
https://mirrors.cloud.tencent.com/centos/8/BaseOS/x86_64/os/
https://mirrors.aliyun.com/centos/8/BaseOS/x86_64/os/
gpgcheck=0
[epel]
name=EPEL
baseurl=https://mirror.tuna.tsinghua.edu.cn/epel/8/Everything/x86_64
https://mirrors.cloud.tencent.com/epel/8/Everything/x86_64
https://mirrors.huaweicloud.com/epel/8/Everything/x86_64
https://mirrors.aliyun.com/epel/8/Everything/x86_64
gpgcheck=0
[AppStream]
name=AppStream
#failovermethod=priority
baseurl=https://mirror.tuna.tsinghua.edu.cn/centos/8/AppStream/x86_64/os/
https://mirrors.huaweicloud.com/centos/8/AppStream/x86_64/os/
https://mirrors.cloud.tencent.com/centos/8/AppStream/x86_64/os/
https://mirrors.aliyun.com/centos/8/AppStream/x86_64/os/
gpgcheck=0
[extras]
name=Extras
#failovermethod=priority
baseurl=https://mirror.tuna.tsinghua.edu.cn/centos/8/extras/x86_64/os
https://mirrors.cloud.tencent.com/centos/8/extras/x86_64/os
https://mirrors.huaweicloud.com/centos/8/extras/x86_64/os
https://mirrors.aliyun.com/centos/8/extras/x86_64/os
gpgcheck=0
EOF
useradd centos
echo 123456 | passwd --stdin centos
sed -i '/GRUB_CMDLINE_LINUX=/s#quiet#& net.ifnames=0 biosdevname=0#' /etc/default/grub
mv /etc/sysconfig/network-scripts/ifcfg-ens160 /etc/sysconfig/network-scripts/ifcfg-eth0
sed -i 's/ens160/eth0/g' /etc/sysconfig/network-scripts/ifcfg-eth0
grub2-mkconfig -o /boot/grub2/grub.cfg
%end
%addon com_redhat_kdump --enable --reserve-mb='auto'
%end
%anaconda
pwpolicy root --minlen=6 --minquality=1 --notstrict --nochanges --notempty
pwpolicy user --minlen=6 --minquality=1 --notstrict --nochanges --emptyok
pwpolicy luks --minlen=6 --minquality=1 --notstrict --nochanges --notempty
%end
将kickstart文件放到/var/www/html/ks/目录下
mkdir /var/www/html/ks/
vim /var/www/html/ks/centos7.cfg

vim /var/www/html/ks/centos8.cfg
5、准备PXE启动相关文件
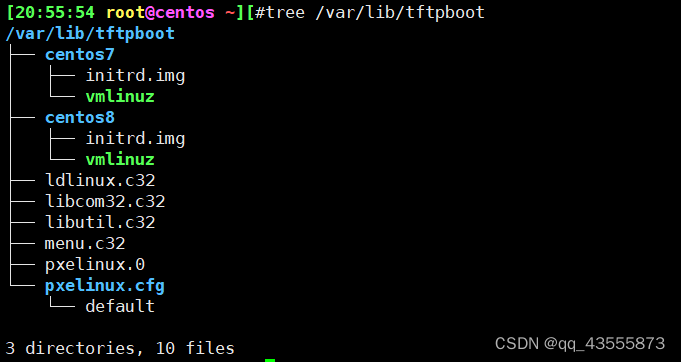
mkdir /var/lib/tftpboot/centos{7,8} #准备CentOS7,8各自的内核相关文件
cp /var/www/html/centos/7/os/x86_64/isolinux/{vmlinuz,initrd.img} /var/lib/tftpboot/centos7
cp /var/www/html/centos/8/os/x86_64/isolinux/{vmlinuz,initrd.img} /var/lib/tftpboot/centos8
cp /usr/share/syslinux/{pxelinux.0,menu.c32} /var/lib/tftpboot/
#以下三个文件是CentOS8安装所必须文件,CentOS6,7则不需要
cp /var/www/html/centos/8/os/x86_64/isolinux/{ldlinux.c32,libcom32.c32,libutil.c32} /var/lib/tftpboot/
#生成安装菜单文件
mkdir /var/lib/tftpboot/pxelinux.cfg/
cp /var/www/html/centos/8/os/x86_64/isolinux/isolinux.cfg /var/lib/tftpboot/pxelinux.cfg/default
#最终目录结构如下
6、准备启动菜单文件
编辑启动菜单文件
vim /var/lib/tftpboot/pxelinux.cfg/default
添加以下内容:
default menu.c32
timeout 600
menu title Install CentOS Linux
label linux8
 menu label Auto Install CentOS Linux ^8
 kernel centos8/vmlinuz
 append initrd=centos8/initrd.img ks=http://192.168.100.101/ks/centos8.cfg
label linux7
 menu label Auto Install CentOS Linux ^7
 kernel centos7/vmlinuz
 append initrd=centos7/initrd.img ks=http://192.168.100.101/ks/centos7.cfg
 label linux6
 menu label Auto Install CentOS Linux ^6
 kernel centos6/vmlinuz
 append initrd=centos6/initrd.img ks=http://192.168.100.101/ks/centos6.cfg
label manual
 menu label ^Manual Install CentOS Linux 8.0
 kernel centos8/vmlinuz
 append initrd=centos8/initrd.img
inst.repo=http://192.168.100.101/centos/8/os/x86_64/

label rescue
 menu label ^Rescue a CentOS Linux system 8
 kernel centos8/vmlinuz
 append initrd=centos8/initrd.img
inst.repo=http://192.168.100.101/centos/8/os/x86_64/ rescue

label local
 menu default
 menu label Boot from ^local drive
 localboot 0xffff
~
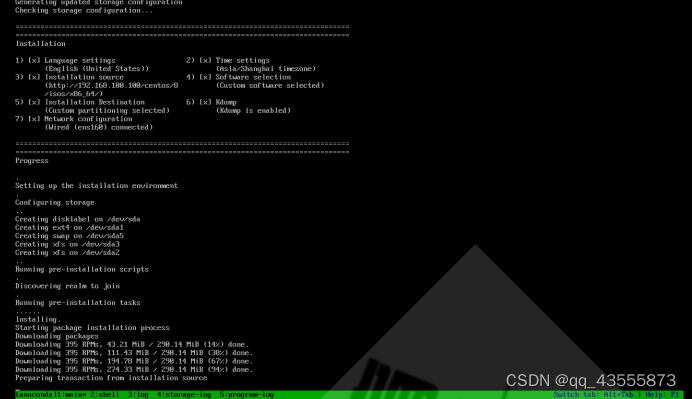
7、测试客户端基于PXE实现自动安装
新准备一台主机,设置网卡引导,可看到看启动菜单,并实现自动安装

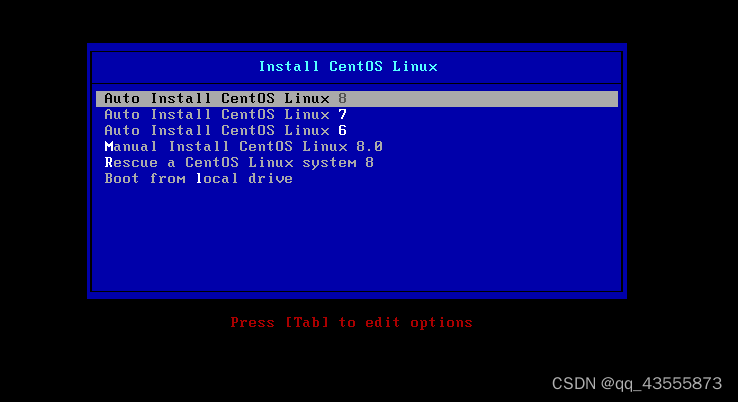
回车等待安装即可


 2497
2497


 被折叠的 条评论
为什么被折叠?
被折叠的 条评论
为什么被折叠?
 到【灌水乐园】发言


