


Android开发系列
前言
在日常生活中,最平常不过的就是拍照发朋友圈了,那么这个功能是如何实现的呢?
在QQ、微信、微博等社交软件都是给出一个按钮,点击这个按钮可以获取手机的拍摄权限。在通过拍摄之后,将所拍摄的照片再上传到服务器端。
在阿里云的VOD模块中有关于使用AndroidSDK的使用,使用并开发在客户端直接上传照片到阿里云
如图所示:
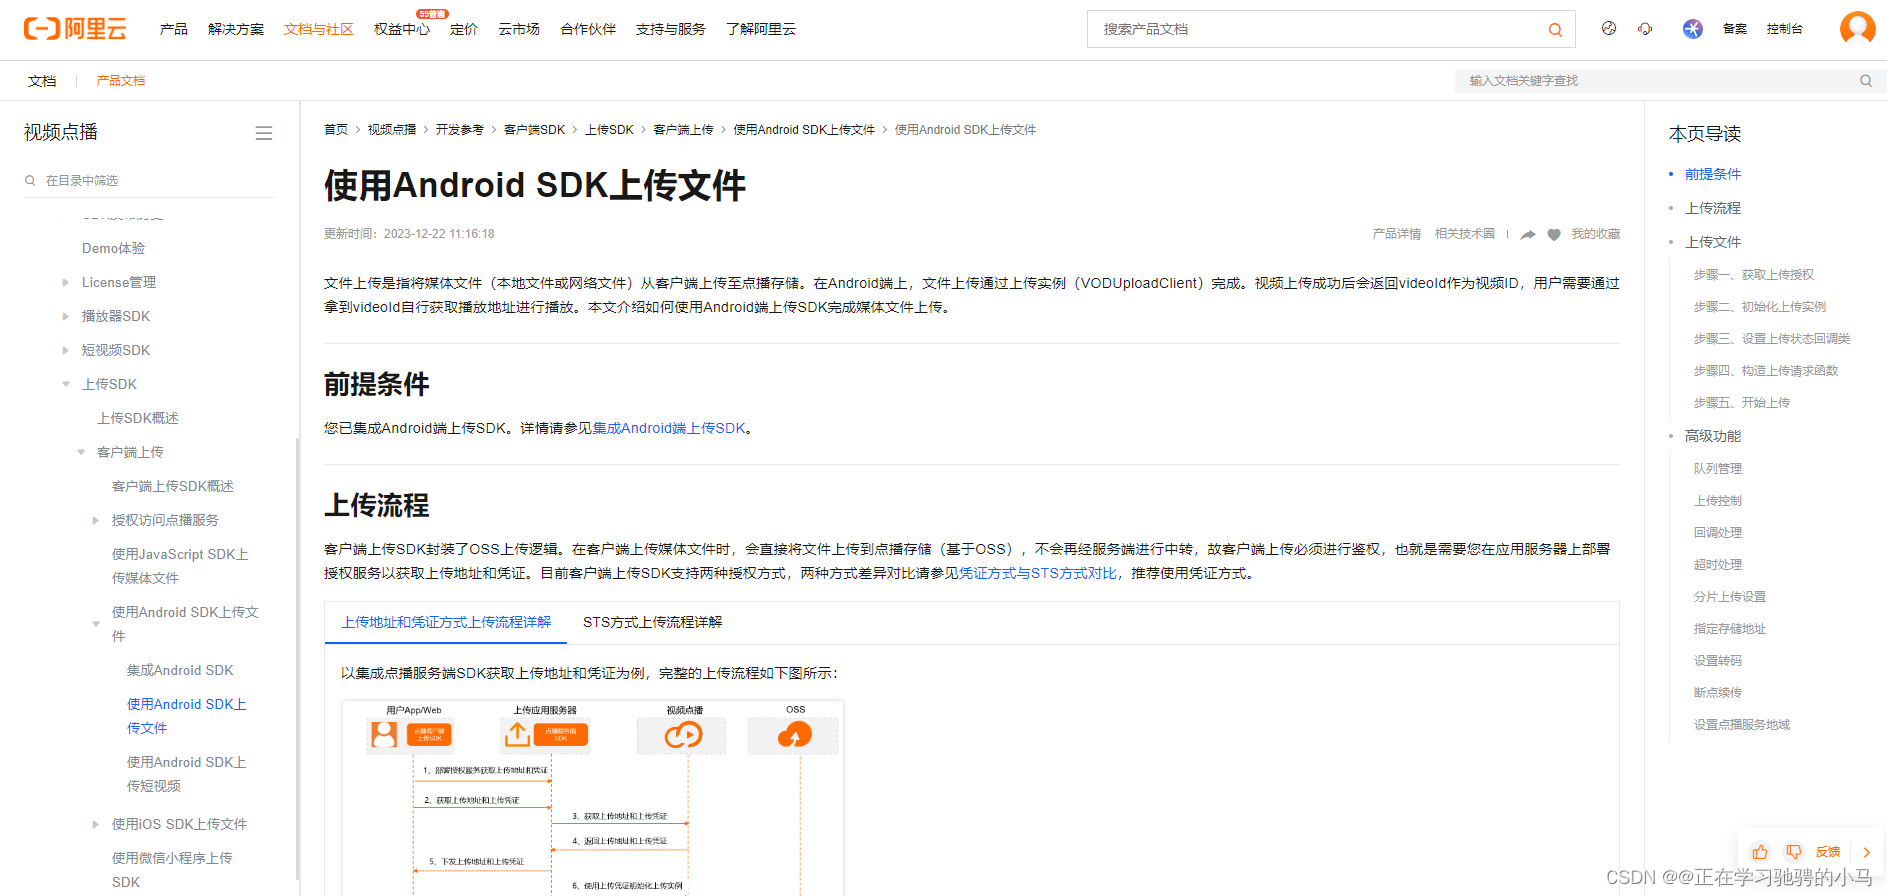
根据上述的流程包括导入SDK 获取授权 上传可以实现上传的功能
然而本文开发一个Spring Boot的接口 Android手机端通过OKhttp发送请求到这个服务端接口后,由服务端进行文件上传。
提示:按照上述说法,这里的Android等价于前端 再搭建了另外一个Java后端进行一部分网络请求的处理。 缺点:同步响应时间会更长一些(我采用的一些解决方法是异步响应、Android本地数据库Sqlite作为缓存 )。 优点:可以使用所有SpringBoot、MySqL数据库的相关操作,大幅度拓展了Android的功能
一、阿里云对象存储是什么?
阿里云对象存储服务(Object Storage Service,简称OSS),是阿里云提供的一种海量、安全、低成本、高可靠的云存储服务。它以对象为单位来处理、存储和检索数据,每个对象都包含了数据本身、元数据以及一个全局唯一的标识符。这种独特的存储方式使得对象存储在处理大量、非结构化的数据时具有明显优势。
阿里云对象存储服务通过API(应用程序编程接口)调用进行数据的读写,通常基于HTTP或HTTPS协议。此外,它还具有与平台无关的RESTful API接口,可以在任何应用、任何时间、任何地点存储和访问任意类型的数据。
阿里云对象存储服务提供了多种存储类型,如标准、低频访问、归档等,以全面覆盖从热到冷的各种数据存储场景。用户可以使用阿里云提供的API、SDK接口或者OSS迁移工具轻松地将海量数据移入或移出阿里云OSS。
在实际应用中,用户可以在阿里云控制台中创建存储空间,并配置自动备份规则,实现数据的自动备份和恢复。这使得阿里云对象存储服务在大数据存储、备份和容灾等领域具有广泛的应用前景。
总之,阿里云对象存储服务是一种高效、可靠、灵活的云存储解决方案,适用于各种规模的企业和个人用户。
OSS(Object Storage Service)作为阿里云提供的一种云存储服务,具有一系列优势和劣势。
优势:
可扩展性:OSS可以根据业务需求灵活扩展存储容量和性能,无需预先购买硬件设备。这种弹性扩展的特性使得OSS能够轻松应对数据的快速增长和存储需求的变化。
高可靠性:OSS具备高度可靠的数据备份和恢复能力,能在多个数据中心之间自动复制数据,确保数据不丢失。此外,OSS还提供了99.999999999%的数据持久性保证,即数据不会意外丢失。
安全性:OSS采用多种安全机制来保护用户数据的安全性,包括数据加密、访问控制、安全传输等。用户可以通过配置访问权限策略和使用访问密钥来限制对存储桶和对象的访问,从而确保数据的安全。
低成本:OSS提供了灵活的计费方式,根据实际使用量来计费,无需预先购买存储空间。此外,OSS还支持多种存储类型,用户可以根据数据的访问频率来选择合适的存储类型,从而降低存储成本。
方便的管理和操作:OSS提供了丰富的管理和操作功能,包括数据上传下载、文件夹管理、批量操作等。用户可以通过阿里云控制台、API接口、命令行工具等方式进行操作和管理,使得数据的存储和访问变得更加便捷。
劣势:
适用场景有限:
虽然OSS适用于多种应用场景,但并不适用于所有场景。例如,对于需要实时共享和访问数据的应用,OSS可能不是最佳选择。这是因为OSS的数据传输速度相对较慢,可能会影响实时数据的访问性能。
架构要求高:OSS的架构对网络和硬件要求较高,需要具备一定的技术实力才能成功部署和运维。此外,对于未经授权的访问和数据安全性的保护也需要用户具备相应的安全意识和技能。
综上所述,OSS作为一种云存储服务,在可扩展性、可靠性、安全性、低成本和方便的管理操作等方面具有显著优势。然而,其适用场景有限和架构要求高等劣势也需要用户在使用时注意。因此,在选择是否使用OSS时,用户需要根据自己的实际需求和场景进行综合考虑。
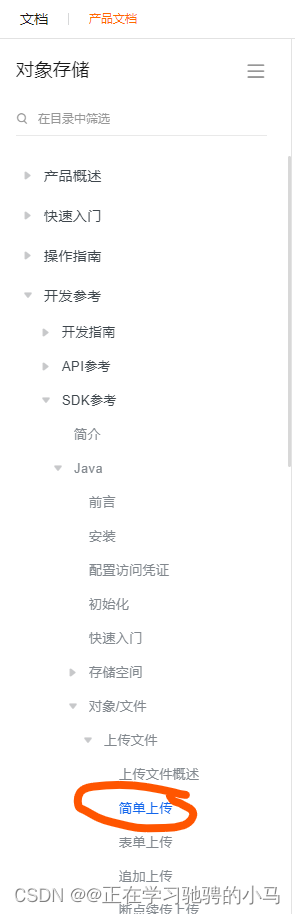
在阿里云的官方文档中有关于文件上传的方法
文档连接: 简单上传
二、使用步骤
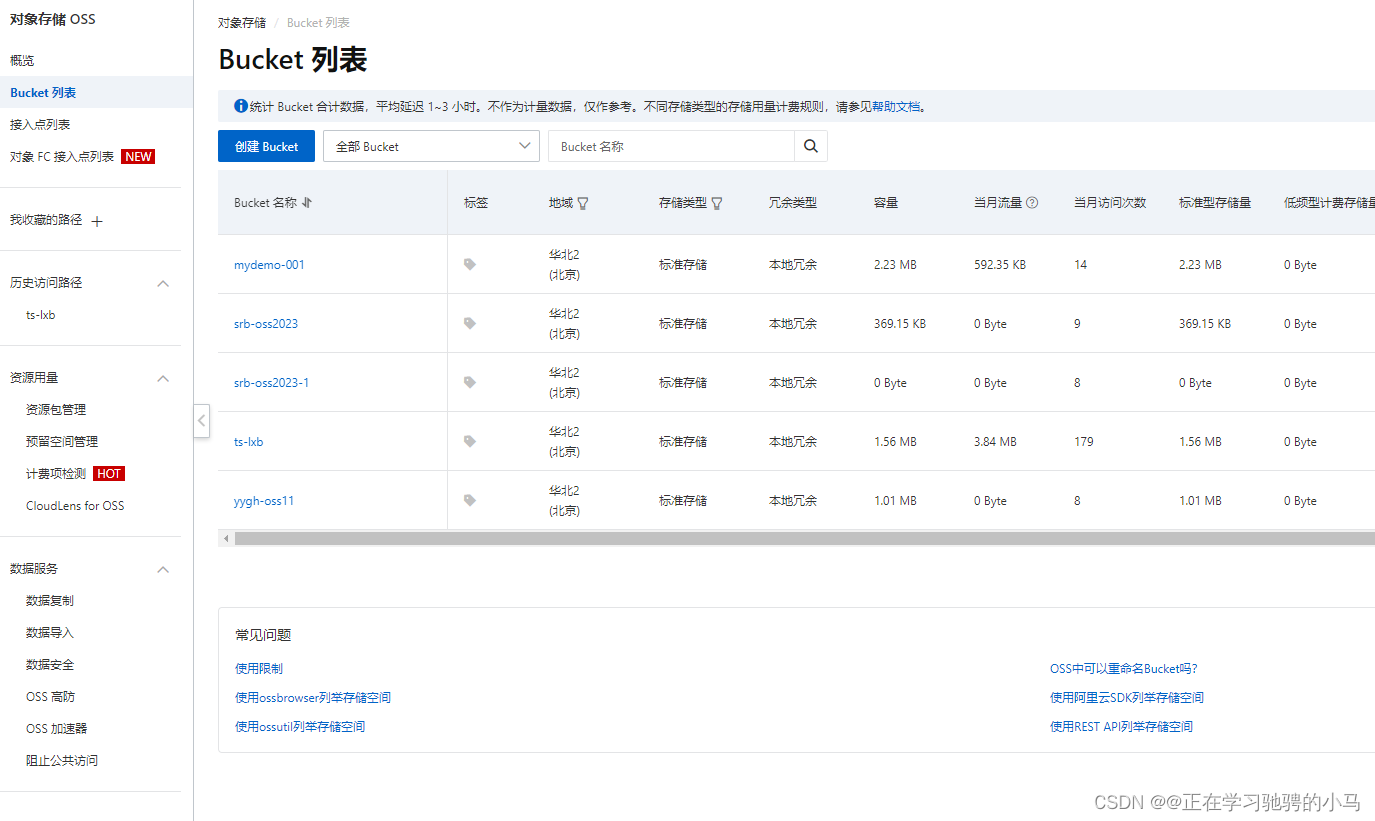
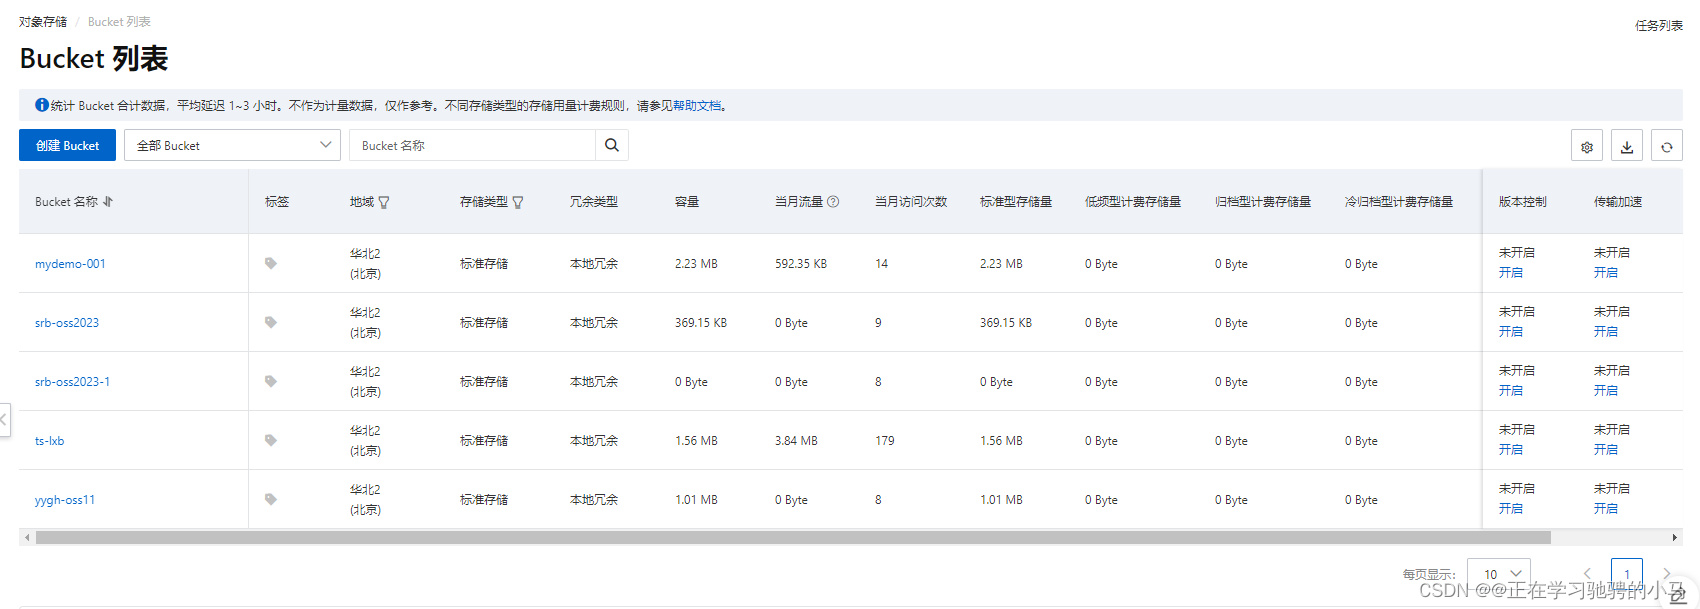
1.创建Bucket:
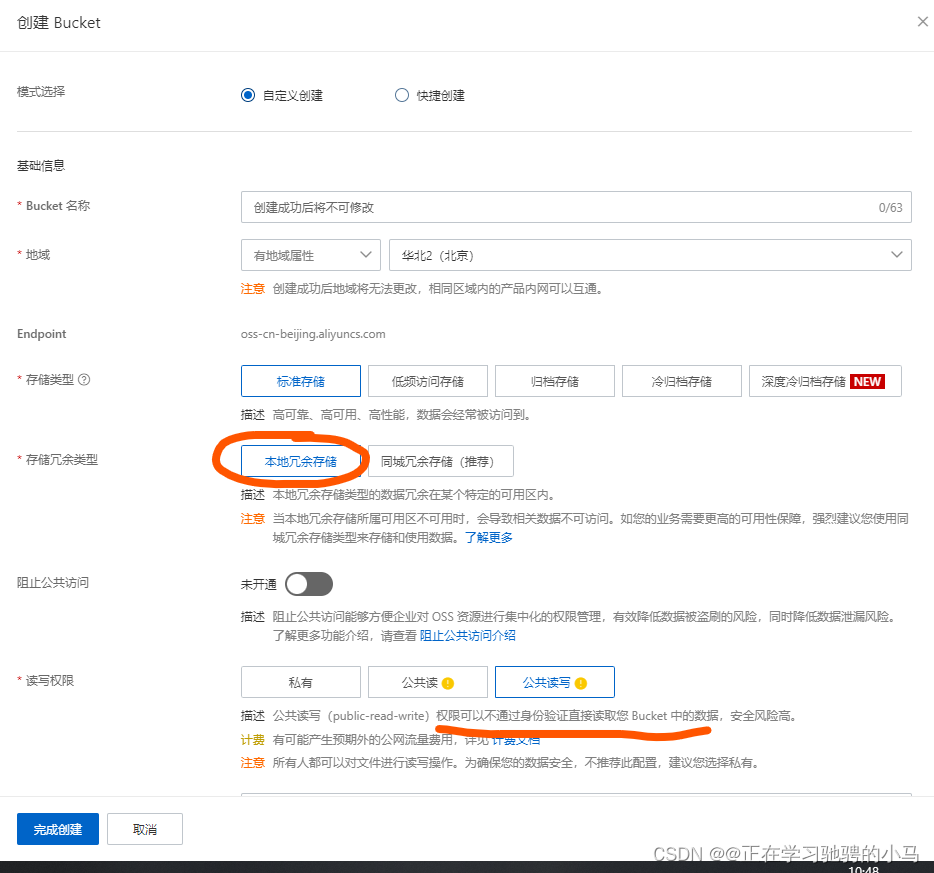
提示:创建时自定义一个名字其他的选线按照下图所选(公共读写 安全性会低一些但更加方便操作)
创建之后如下
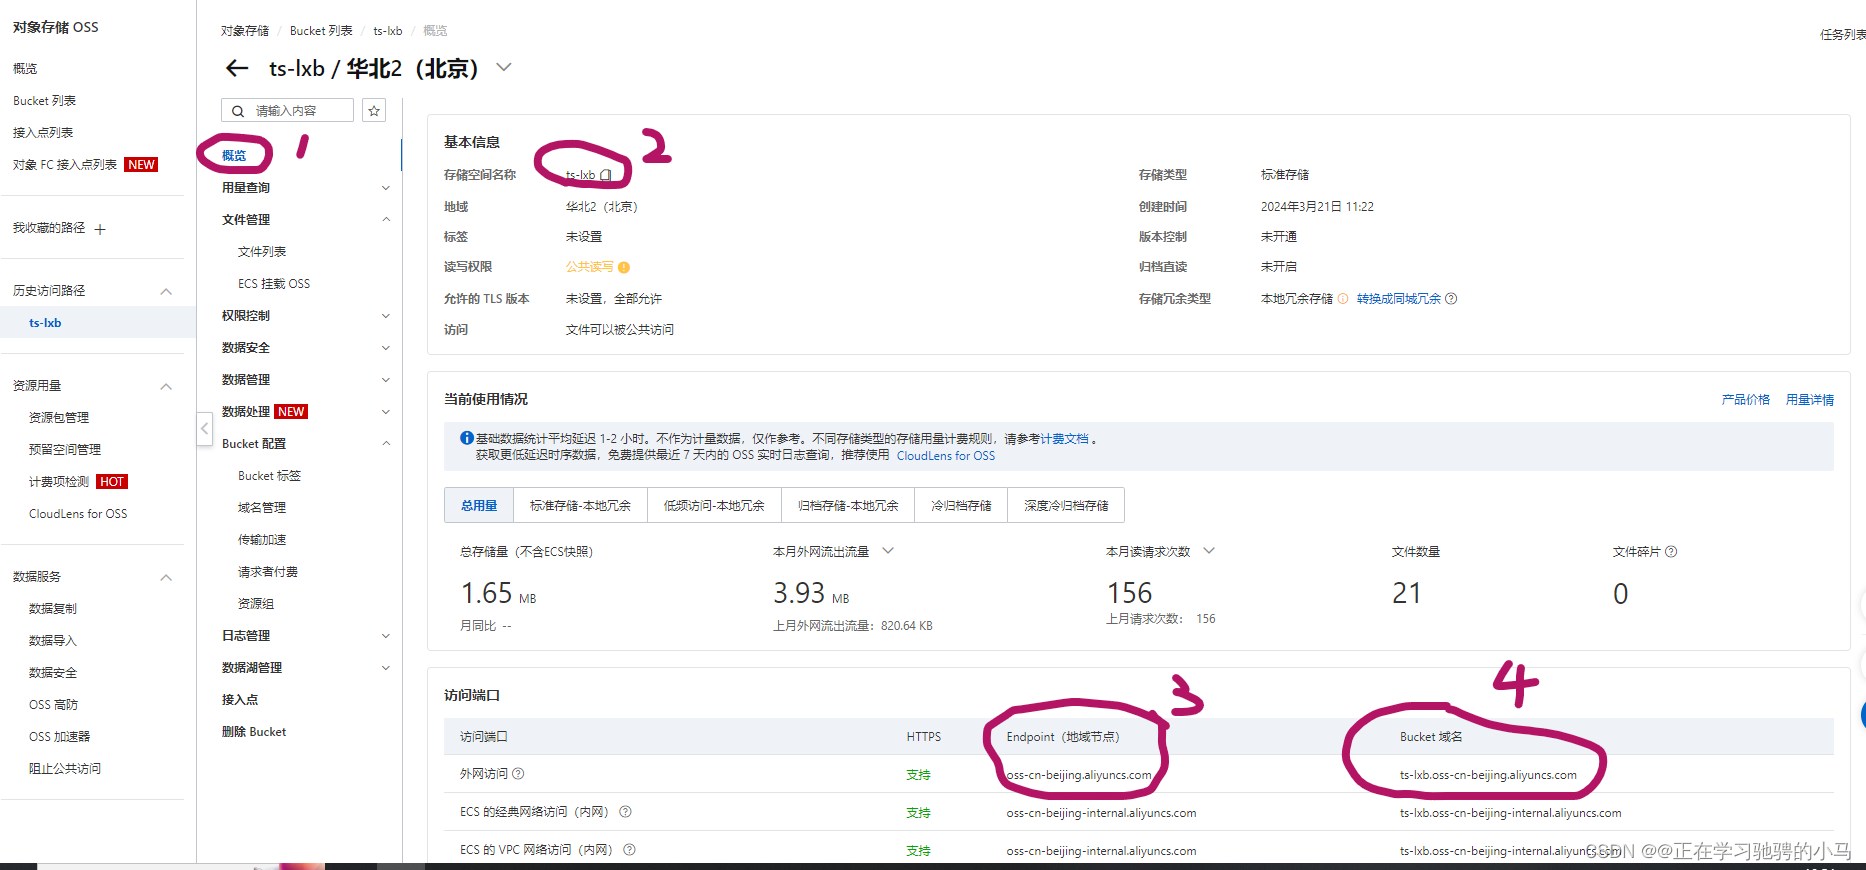
点击进入可以查看其详细信息:
点击概览(标红色圈1)可以看到这个Bucket的信息
标红色圈2的是自定义的名称
标红色圈3和圈4 是后续需要上传重要的信息在这个位置可以查看到
Bucket创建完成之后可以进行后续的代码准备:
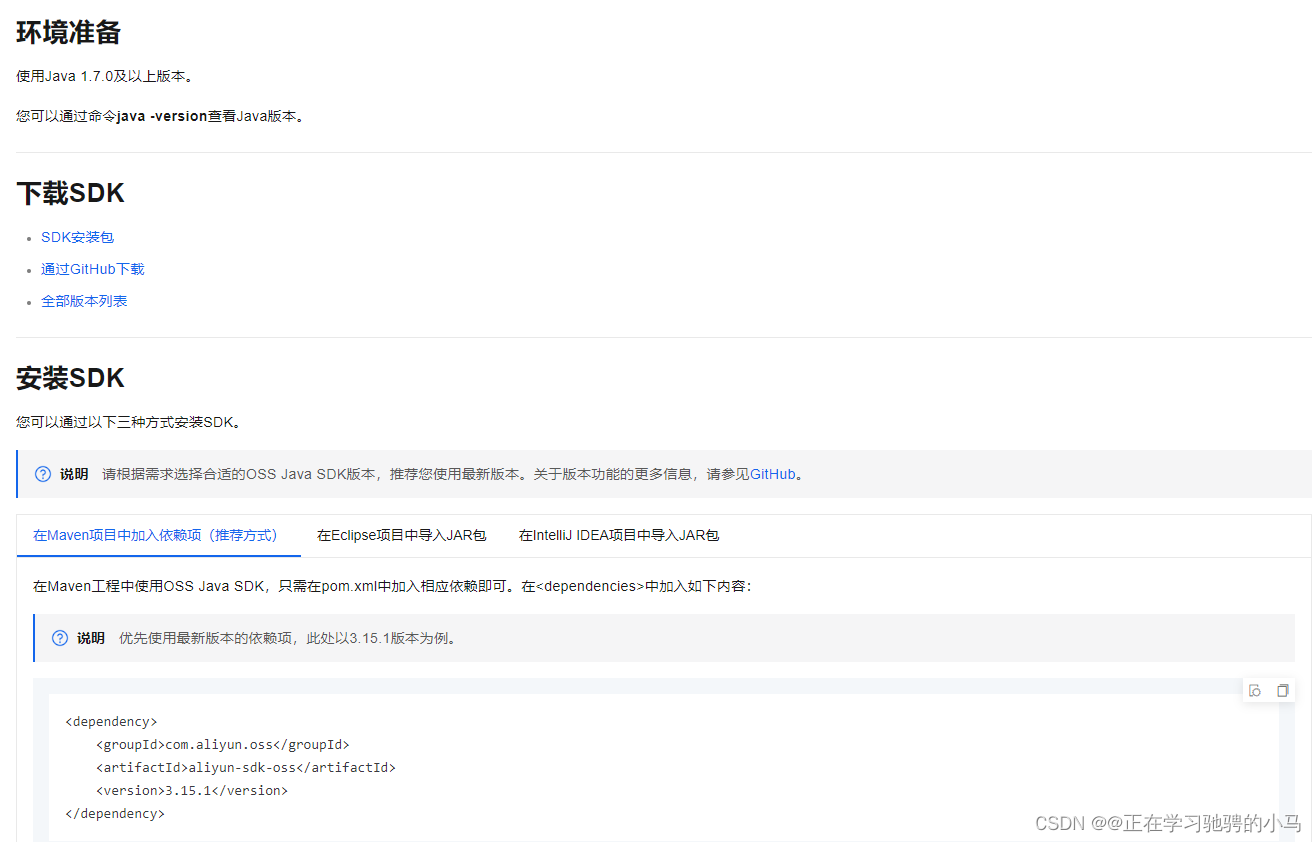
引入依赖:
<dependency>
    <groupId>com.aliyun.oss</groupId>
    <artifactId>aliyun-sdk-oss</artifactId>
    <version>3.15.1</version>
</dependency>
选择简单上传中的上传文件流:
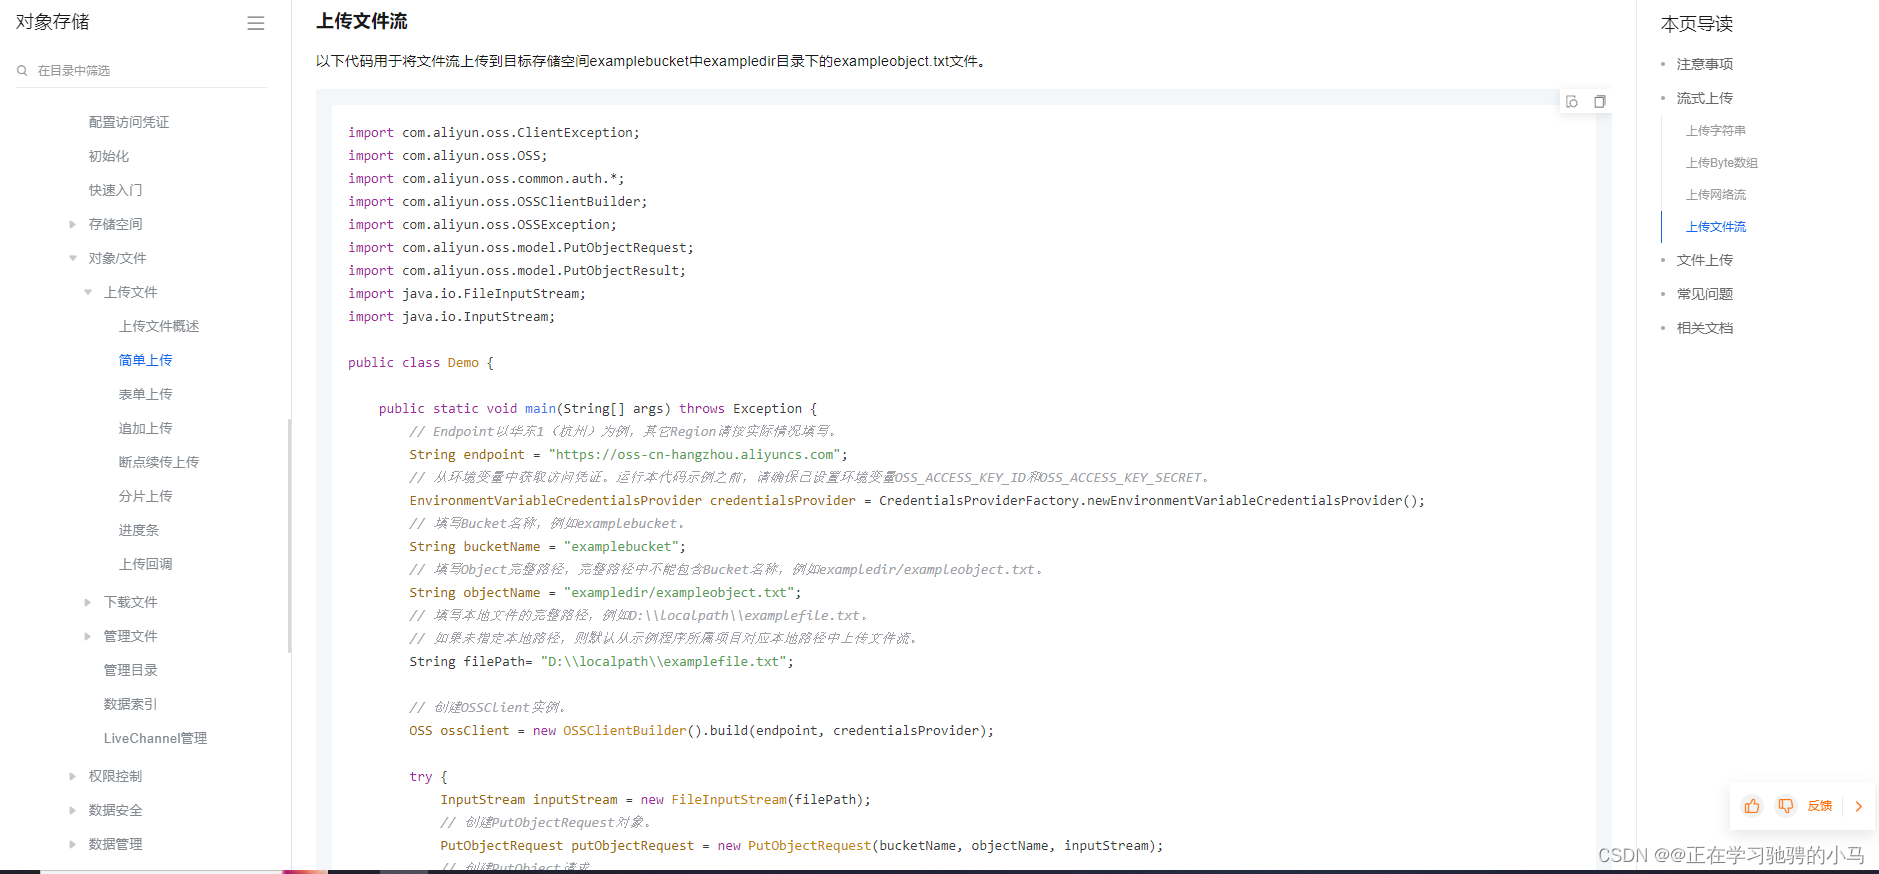
通过观察发现这段代码需要提供四个常量
1.endpoint
2.bucketName
这两个常量在上述的标红圈3和标红圈2可以获得
3.OSS_ACCESS_KEY_ID
4.OSS_ACCESS_KEY_SECRET
3、4两个常量可以在下图方式中获取

目前阿里云官方文档对KEY_ID、KEY_SECRET都是以环境变量的方式存储和使用,这样更加的安全
原始的方式如下:
OSS ossClient = new OSSClientBuilder().build(endpoint,accessKeyId,accessKeySecret);
在创建Oss客户端时放入相关的常量
代码如下(示例):
public String uploadFileAvatar(MultipartFile file) {

        String endpoint= ConstantPropertiesUtils.END_POINT;
        String accessKeyId=ConstantPropertiesUtils.KEY_ID;
        String accessKeySecret=ConstantPropertiesUtils.KEY_SECRET;
        String bucketName= ConstantPropertiesUtils.BUCKETNAME;
        //创建OSSClient实例
        OSS ossClient = new OSSClientBuilder().build(endpoint,accessKeyId,accessKeySecret);
        try {

            InputStream inputStream = file.getInputStream();
            // 创建PutObjectRequest对象。
            //objectName 上传到oss文件路径和文件名称
            //获取文件名称
            String filename = file.getOriginalFilename();
            //修改文件名称 +随机值 防止被覆盖
            String s = UUID.randomUUID().toString().replaceAll("-","");
            filename=s+filename;
            //把文件按照日期进行分类
            //2019/11/12/0.1.jpg
            //获取当前的日期
            String s1 = new DateTime().toString("yyyy/MM/dd");
            //拼接
            filename=s1+"/"+filename;
            PutObjectRequest putObjectRequest = new PutObjectRequest(bucketName, filename, inputStream);
            // 创建PutObject请求。
            PutObjectResult result = ossClient.putObject(putObjectRequest);
            //https://mydemo-001.oss-cn-beijing.aliyuncs.com/123.jpg
            String url="https://"+bucketName+"."+endpoint+"/"+filename;
            return url;
        } catch (Exception e) {

            System.out.println("Caught an OSSException, which means your request made it to OSS, "
                    + "but was rejected with an error response for some reason.");
            return null;
        } finally {

            if (ossClient != null) {

                ossClient.shutdown();
            }
        }


    }
在Spring boot工程下放入到实现类中
Controller中的代码:
@Api(tags = "文件上传")
@CrossOrigin
@RestController
@RequestMapping("/oss/files")
public class OssController {

    @Resource
    private OssFileService ossService;


    //上传头像的方法
    @PostMapping("/upload")
    public Map<String,Object> uploadOssFile(@RequestParam("file") MultipartFile file)
    {

        //获取上传文件
        //返回上传到oss路径
        String s = ossService.uploadFileAvatar(file);
        HashMap<String, Object> map = new HashMap<>();
        map.put("code",0);
        map.put("messsage","成功");


        HashMap<String, Object> data = new HashMap<>();
        data.put("url",s);
        map.put("data",data);
        return map;

    }

}
以上一个服务端上传图片到阿里云Bucket的接口就算完成了
接下来实现Android相机拍摄以及文件上传
2.Android实现拍照上传
1.获取权限 在AndroidManifest.xml中加入以下代码
<uses-permission android:name="android.permission.INTERNET" />
<uses-permission android:name="android.permission.READ_EXTERNAL_STORAGE" />
<uses-permission android:name="android.permission.WRITE_EXTERNAL_STORAGE" />
<uses-permission android:name="android.permission.CAMERA" />
<uses-feature android:name="android.hardware.camera" />
<uses-feature android:name="android.hardware.camera.autofocus" />
2.AndroidUI样式的绘制
代码如下(示例):
<?xml version="1.0" encoding="utf-8"?>
<androidx
最低0.47元/天 解锁文章


 被折叠的 条评论
为什么被折叠?
被折叠的 条评论
为什么被折叠?
 到【灌水乐园】发言


