


下载安装包
解压

mysql操作
将MySQL的驱动包放到该文件下的lib中,其中版本得大于5.1.47

修改目录权限
在MySQL中建立dolphinscheduler数据库
CREATE DATABASE dolphinscheduler DEFAULT CHARACTER SET utf8 DEFAULT COLLATE utf8_general_ci;

GRANT ALL PRIVILEGES ON dolphinscheduler.* TO 'root'@'%' IDENTIFIED BY '123456789';
GRANT ALL PRIVILEGES ON dolphinscheduler.* TO 'root'@'localhost' IDENTIFIED BY '123456789';
flush privileges;

修改配置文件/usr/dolphin/apache-dolphinscheduler-1.3.6-bin/conf/datasource.properties
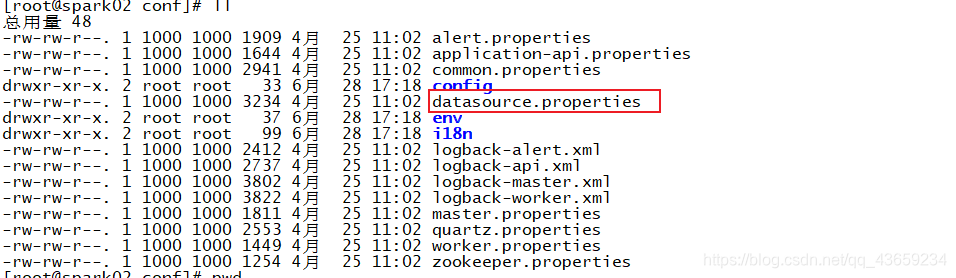
将数据库改成mysql
将默认开启的数据库注释并打开下面的mysql配置

配置以下ip和账号密码

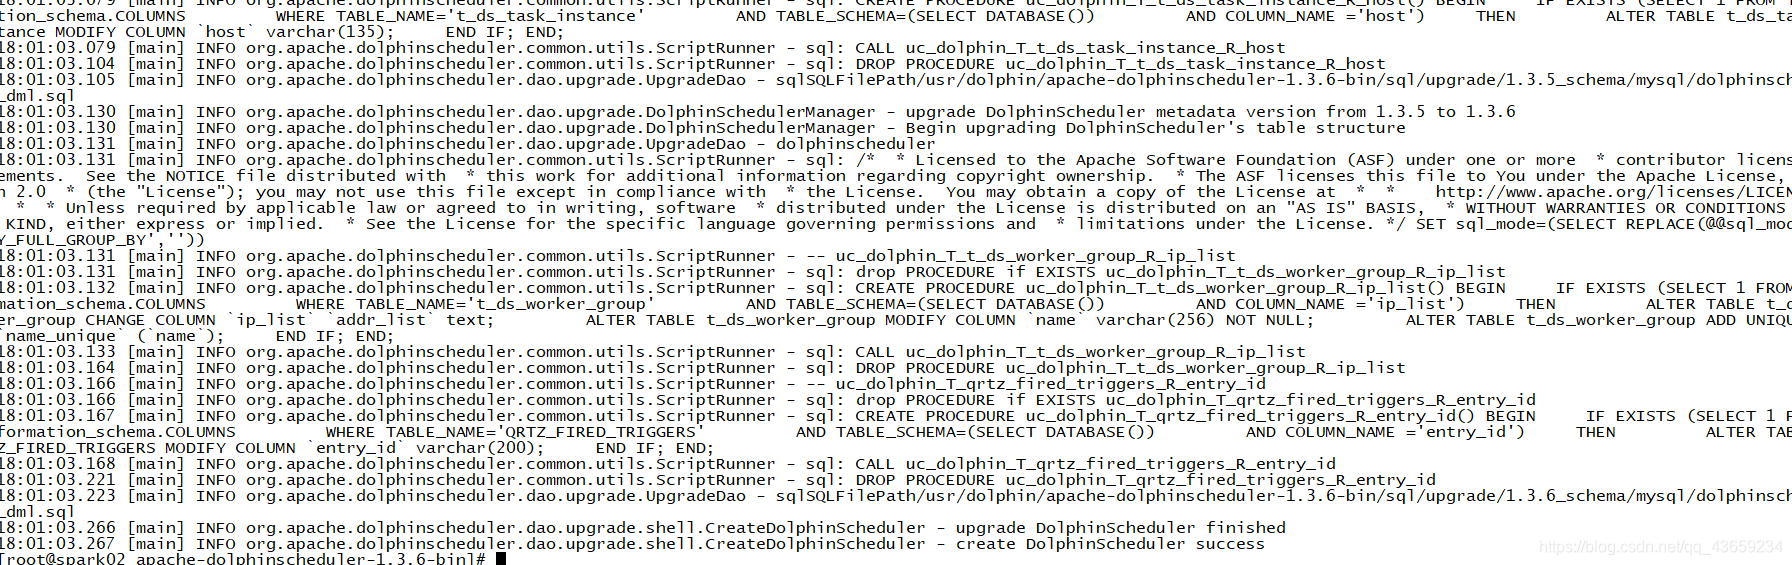
赋予权限chmod +x script/create-dolphinscheduler.sh

运行 MySQL 初始化脚本

报错

解决办法
查看Value是否为OFF
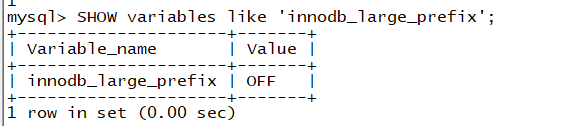
如果是OFF执行 SET GLOBAL INNODB_LARGE_PREFIX = ON;
查看Value是否为BARRACUDA
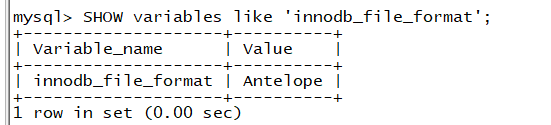
不是的话执行SET GLOBAL innodb_file_format = BARRACUDA;
修改一键部署配置文件 /usr/dolphin/apache-dolphinscheduler-1.3.6-bin/conf/config

修改路径为/usr/dolphin/apache-dolphinscheduler-1.3.6-bin/conf/env下的文件

根据自己情况修改
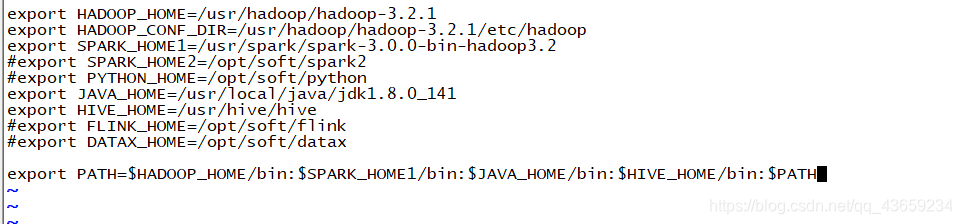
将jdk软链到/usr/bin/java下

照着英文提示来填就行
# NOTICE :  If the following config has special characters in the variable `.*[]^${}\+?|()@#&`, Please escape, for example, `[` escape to `\[`
# postgresql or mysql
dbtype="mysql"

# db config
# db address and port
dbhost="192.168.237.151:3306"

# db username
username="root"

# database name
dbname="dolphinscheduler"

# db passwprd
# NOTICE: if there are special characters, please use the \ to escape, for example, `[` escape to `\[`
password="123456789"

# zk cluster
zkQuorum="192.168.237.149:2181,192.168.237.151:2181,192.168.237.150:2181"

# Note: the target installation path for dolphinscheduler, please not config as the same as the current path (pwd)
installPath="/usr/dolphin/dolphinscheduler"

# deployment user
# Note: the deployment user needs to have sudo privileges and permissions to operate hdfs. If hdfs is enabled, the root directory needs to be created by itself
deployUser="root"


# alert config
# mail server host
mailServerHost="smtp.exmail.qq.com"
# note: Different protocols and encryption methods correspond to different ports, when SSL/TLS is enabled, make sure the port is correct.
mailServerPort="25"
mailSender="xxxxxxxxxx"

# user
mailUser="xxxxxxxxxx"

# sender password
# note: The mail.passwd is email service authorization code, not the email login password.
mailPassword="xxxxxxxxxx"

# TLS mail protocol support
starttlsEnable="true"

# SSL mail protocol support
# only one of TLS and SSL can be in the true state.
sslEnable="false"

#note: sslTrust is the same as mailServerHost
sslTrust="smtp.exmail.qq.com"


# resource storage type: HDFS, S3, NONE
resourceStorageType="HDFS"

# if resourceStorageType is HDFS,defaultFS write namenode address,HA you need to put core-site.xml and hdfs-site.xml in the conf directory.
# if S3,write S3 address,HA,for example :s3a://dolphinscheduler,
# Note,s3 be sure to create the root directory /dolphinscheduler
defaultFS="hdfs://spark01:9000"

# if resourceStorageType is S3, the following three configuration is required, otherwise please ignore
s3Endpoint="http://192.168.xx.xx:9010"
s3AccessKey="xxxxxxxxxx"
s3SecretKey="xxxxxxxxxx"

# if resourcemanager HA is enabled, please set the HA IPs; if resourcemanager is single, keep this value empty
yarnHaIps="192.168.237.149,192.168.237.151,192.168.237.150"

singleYarnIp="yarnIp1"

resourceUploadPath="/dolphinscheduler"

# who have permissions to create directory under HDFS/S3 root path
# Note: if kerberos is enabled, please config hdfsRootUser=
hdfsRootUser="root"

# kerberos config
# whether kerberos starts, if kerberos starts, following four items need to config, otherwise please ignore
kerberosStartUp="false"
# kdc krb5 config file path
krb5ConfPath="$installPath/conf/krb5.conf"
# keytab username
keytabUserName="hdfs-mycluster@ESZ.COM"
# username keytab path
keytabPath="$installPath/conf/hdfs.headless.keytab"


# api server port
apiServerPort="12345"


# install hosts
# Note: install the scheduled hostname list. If it is pseudo-distributed, just write a pseudo-distributed hostname
ips="spark01,spark02,spark03"

# ssh port, default 22
# Note: if ssh port is not default, modify here
sshPort="22"

# run master machine
# Note: list of hosts hostname for deploying master
masters="spark01,spark02"

# run worker machine
# note: need to write the worker group name of each worker, the default value is "default"
workers="spark01:default,spark02:default,spark03:default"

# run alert machine
# note: list of machine hostnames for deploying alert server
alertServer="spark02"

# run api machine
# note: list of machine hostnames for deploying api server
apiServers="spark02"
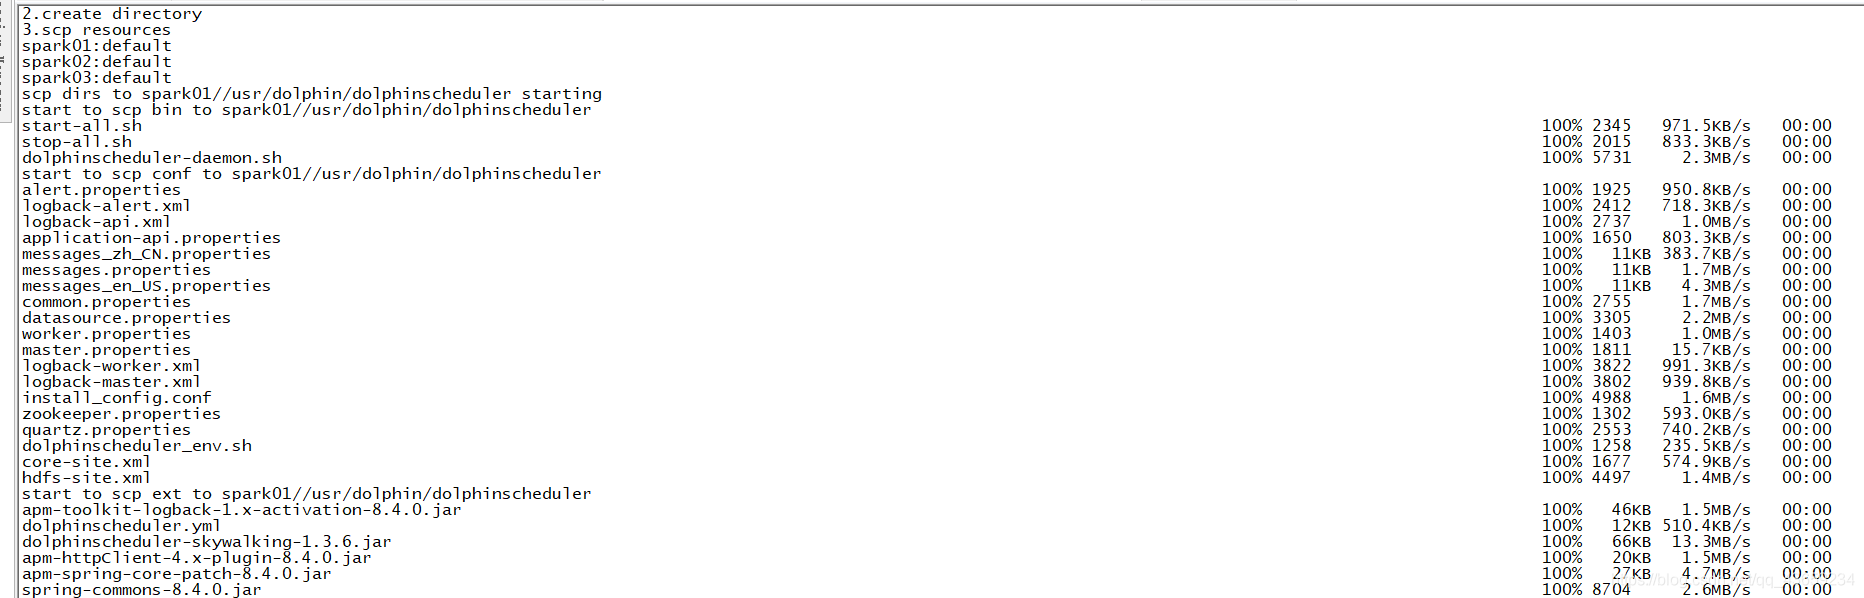
将Hadoop集群下的core-site.xml和hdfs-site.xml复制到/usr/dolphin/apache-dolphinscheduler-1.3.6-bin/conf/下

给install.sh脚本添加权限

执行安装./install.sh
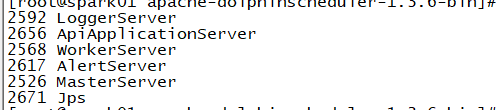
访问UI界面
http://spark01:12345/dolphinscheduler
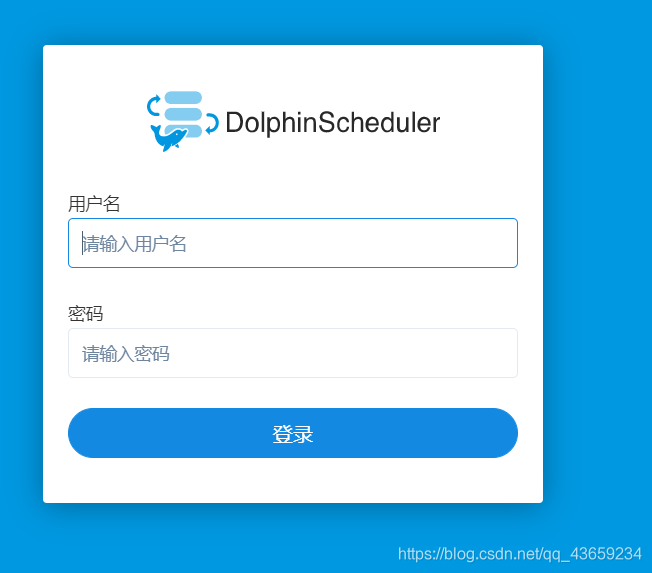
初始账号密码:
账号:admin
密码:dolphinscheduler123
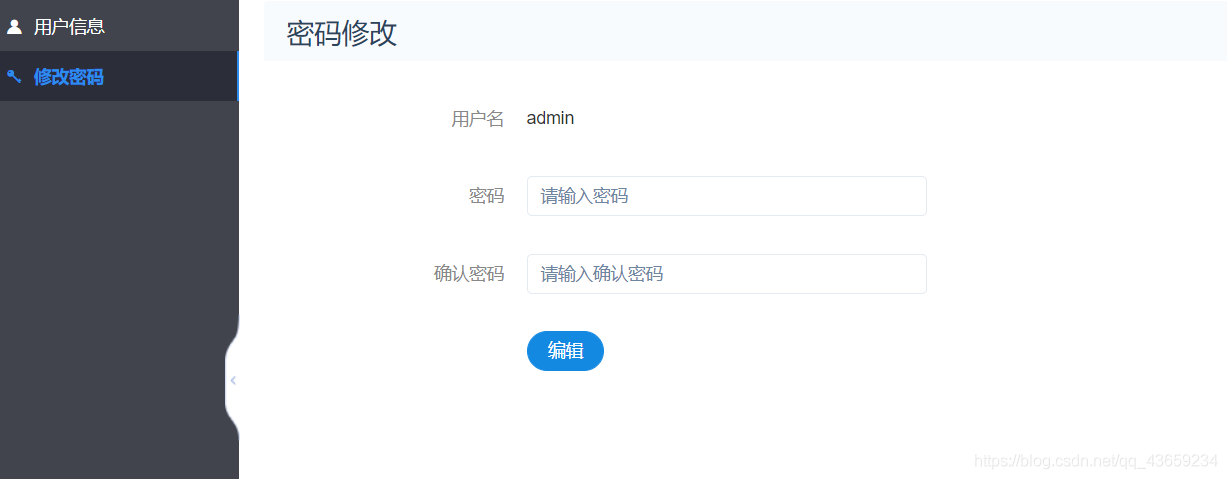
进入后可以自己修改登入密码
admin
q1234567890


 5304
5304


 被折叠的 条评论
为什么被折叠?
被折叠的 条评论
为什么被折叠?
 到【灌水乐园】发言


