


Centos7VM 部署 Apache atlas 2.1.0
一、环境部署
- centos 7
- python 2.7.5(centos自带)
- maven 3.8.2
- java zulu8.56.0.21-ca-jdk8.0.302-linux_x64
- atlas 2.1.0
- kafka 2.12-2.7.0
- hbase 2.0.2
- zookeeper Hbase2.0.2内置
- solr 7.5.0
二、步骤
-
准备一台干净的centos7的VM环境.
-
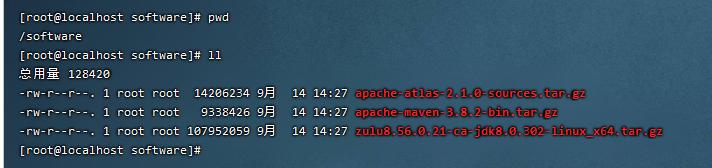
创建 /software 目录,并上传 java、maven、atlas、kafka的安装包

-
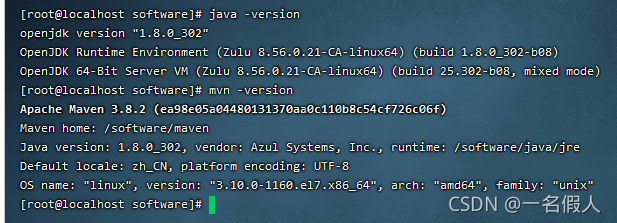
安装java环境和maven环境,并测试
-
配置maven镜像,方便下载
<?xml version="1.0" encoding="UTF-8"?>
<settings xmlns="http://maven.apache.org/SETTINGS/1.2.0"
          xmlns:xsi="http://www.w3.org/2001/XMLSchema-instance"
          xsi:schemaLocation="http://maven.apache.org/SETTINGS/1.2.0 http://maven.apache.org/xsd/settings-1.2.0.xsd">
  <pluginGroups>
  </pluginGroups>
  <proxies>
  </proxies>

  <servers>
  </servers>

  <mirrors>
    <!-- 阿里云仓库 -->
       <mirror>
        <id>nexus-aliyun</id>
        <mirrorOf>central</mirrorOf>
        <name>Nexus aliyun</name>
        <url>https://maven.aliyun.com/nexus/content/groups/public</url>
      </mirror>
      <mirror>
          <id>CN</id>
          <name>OSChina Central</name>
          <url>http://maven.oschina.net/content/groups/public/</url>
          <mirrorOf>central</mirrorOf>
          </mirror>
      <mirror>
         <id>alimaven</id>
         <name>aliyun maven</name>
         <url>https://maven.aliyun.com/mvn/view</url>
         <mirrorOf>central</mirrorOf>
      </mirror>
      <mirror>
         <id>jboss-public-repository-group</id>
         <mirrorOf>central</mirrorOf>
         <name>JBoss Public Repository Group</name>
         <url>http://repository.jboss.org/nexus/content/groups/public</url>
      </mirror>
  </mirrors>
  <profiles>
  </profiles>
  <activeProfiles>
    <activeProfile>dev</activeProfile>
    <activeProfile>default</activeProfile>
  </activeProfiles>
</settings>
- 解压atlas
tar -zxvf apache-atlas-2.1.0-sources.tar.gz
- 修改/software/apache-atlas-sources-2.1.0/distro下的pom.xml中的<solr.tar>和<hbase.tar>镜像地址
<!-- HBASE镜像云 -->
<hbase.tar>https://mirrors.huaweicloud.com/apache/hbase/${hbase.version}/hbase-${hbase.version}-bin.tar.gz</hbase.tar>

<!-- 华为云镜像 -->
<solr.tar>https://mirrors.huaweicloud.com/apache/lucene/solr/${solr.version}/solr-${solr.version}.tgz</solr.tar>
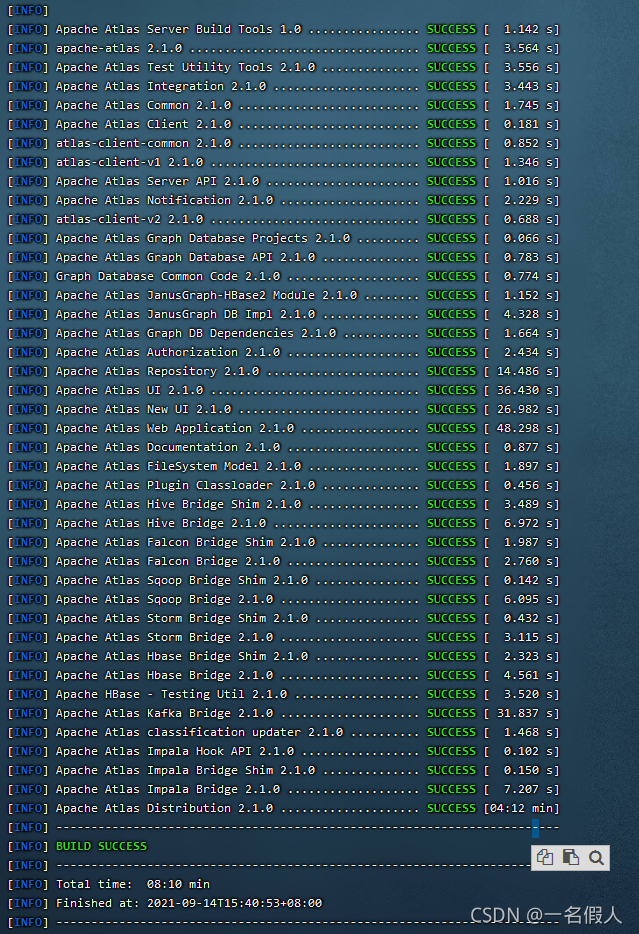
- 编译/software/apache-atlas-sources-2.1.0目录下面的pom.xml。因为我们使用的solr和hbase需要通过atlas进行下载,所以执行下述命令。
mvn clean -DskipTests package -Pdist,embedded-hbase-solr -e
# -e 会打印报错的日志(如果mvn编译出现问题)
注意本阶段时间花费较长.... 最终编译成功的结果如下
如果出现 OutOfMemoryError: Java heap space,说明 maven分配的大小有问题。因为本项目需要编译的文件包较大。
vim /etc/profile
# 在里面添加一条重新编译
export MAVEN_OPTS="-Xms1024m -Xmx2048m"
- 安装kafka(这一步最好新建一个ssh连接,因为启动kafka不是是一个后台进程)
tar -zxvf kafka_2.12-2.7.0.tgz
mv kafka_2.12-2.7.0 kafka
kafka/bin/kafka-server-start.sh kafka/config/server.properties
-
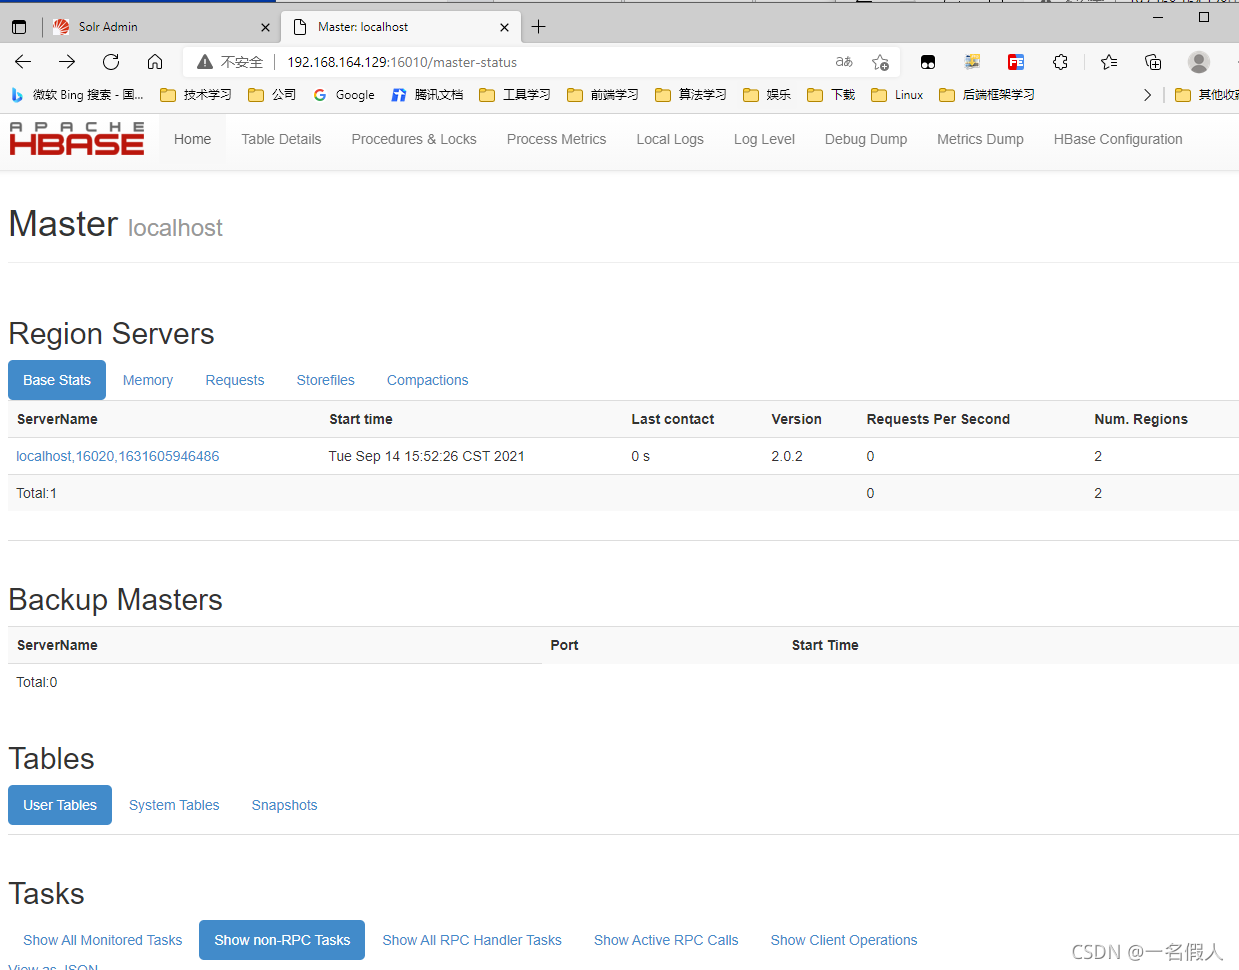
进入/software/apache-atlas-sources-2.1.0/distro/target/apache-atlas-2.1.0-bin/apache-atlas-2.1.0目录。我们接下来的操作也都会在这个目录下面去做。
-
关闭防护墙方便测试
systemctl stop firewalld.service
结果如下

浏览器访问测试
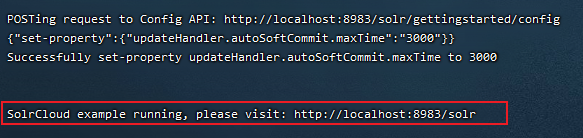
11. 启动solr
- 先执行 solr/bin/solr -e cloud -force -z 127.0.0.1:2181
会出现让你选择的选项,除了一开始的node选择1,其他都无脑回车即可。
结果如下:
- 创建初始节点
solr/bin/solr create -c vertex_index -shards 3 -replicationFactor 2 -force
solr/bin/solr create -c edge_index -shards 3 -replicationFactor 2 -force
solr/bin/solr create -c fulltext_index -shards 3 -replicationFactor 2 -force
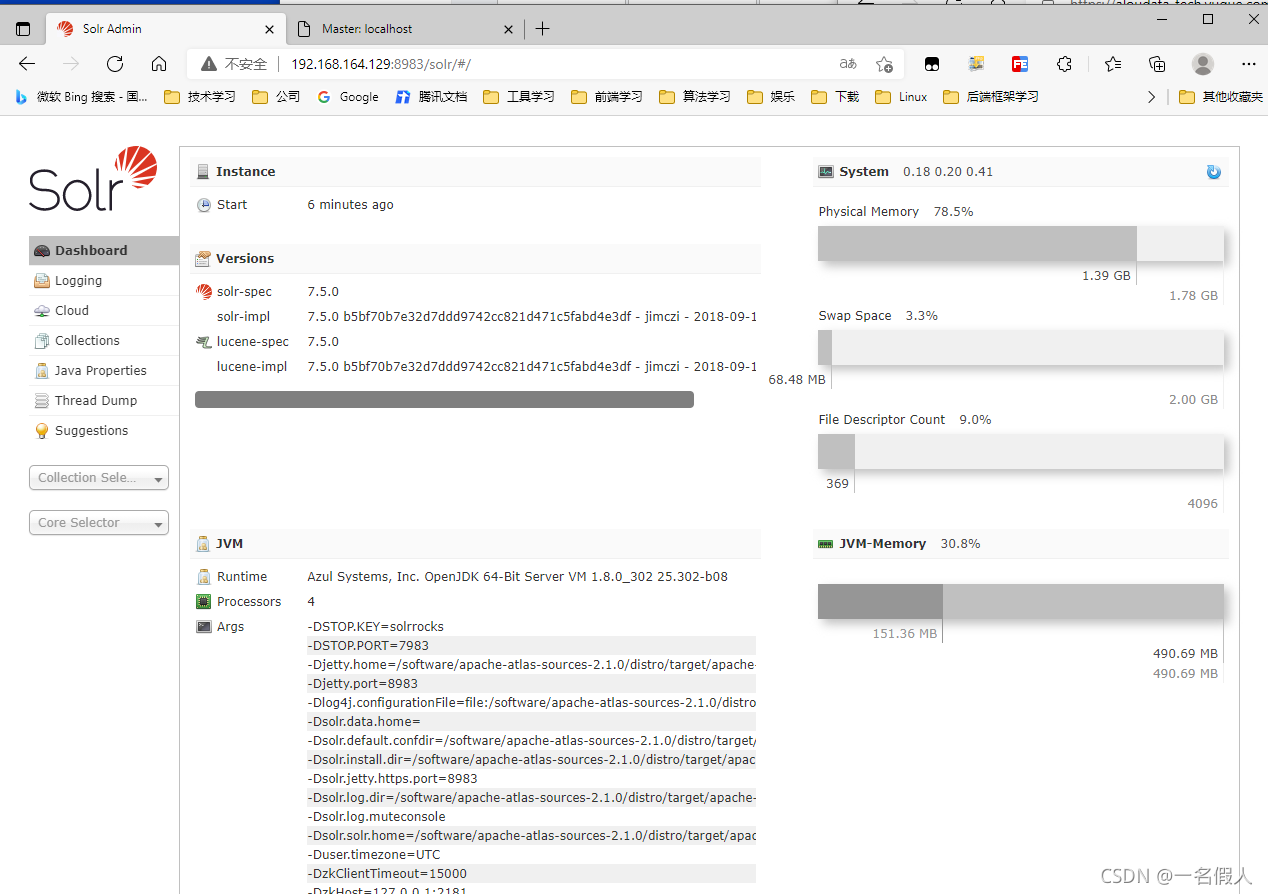
- 访问浏览器
- 最后启动atlas
因为solr、Hbase、kafka、都不是内置的。因为启动atlas需要改变一些参数。
- 修改 conf/atlas-env.sh
vim conf/atlas-env.sh

# 将下面两个改为false,原本为true
# indicates whether or not a local instance of HBase should be started for Atlas
export MANAGE_LOCAL_HBASE=false

# indicates whether or not a local instance of Solr should be started for Atlas
export MANAGE_LOCAL_SOLR=false
- 修改 conf/atlas-application.properties
vim conf/atlas-application.properties

# 修改下面四条参数
# 1. 改为false
# 2. 注释掉  atlas.kafka.data=${sys:atlas.home}/data/kafka
# 3. zookeeper改为2021
# 4. kafka的server改为9092
#########  Notification Configs  #########
atlas.notification.embedded=false
# atlas.kafka.data=${sys:atlas.home}/data/kafka
atlas.kafka.zookeeper.connect=localhost:2181
atlas.kafka.bootstrap.servers=localhost:9092
- 运行测试
# 此步骤需要centos内置的python环境支持
bin/atlas_start.py
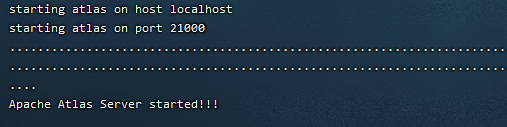
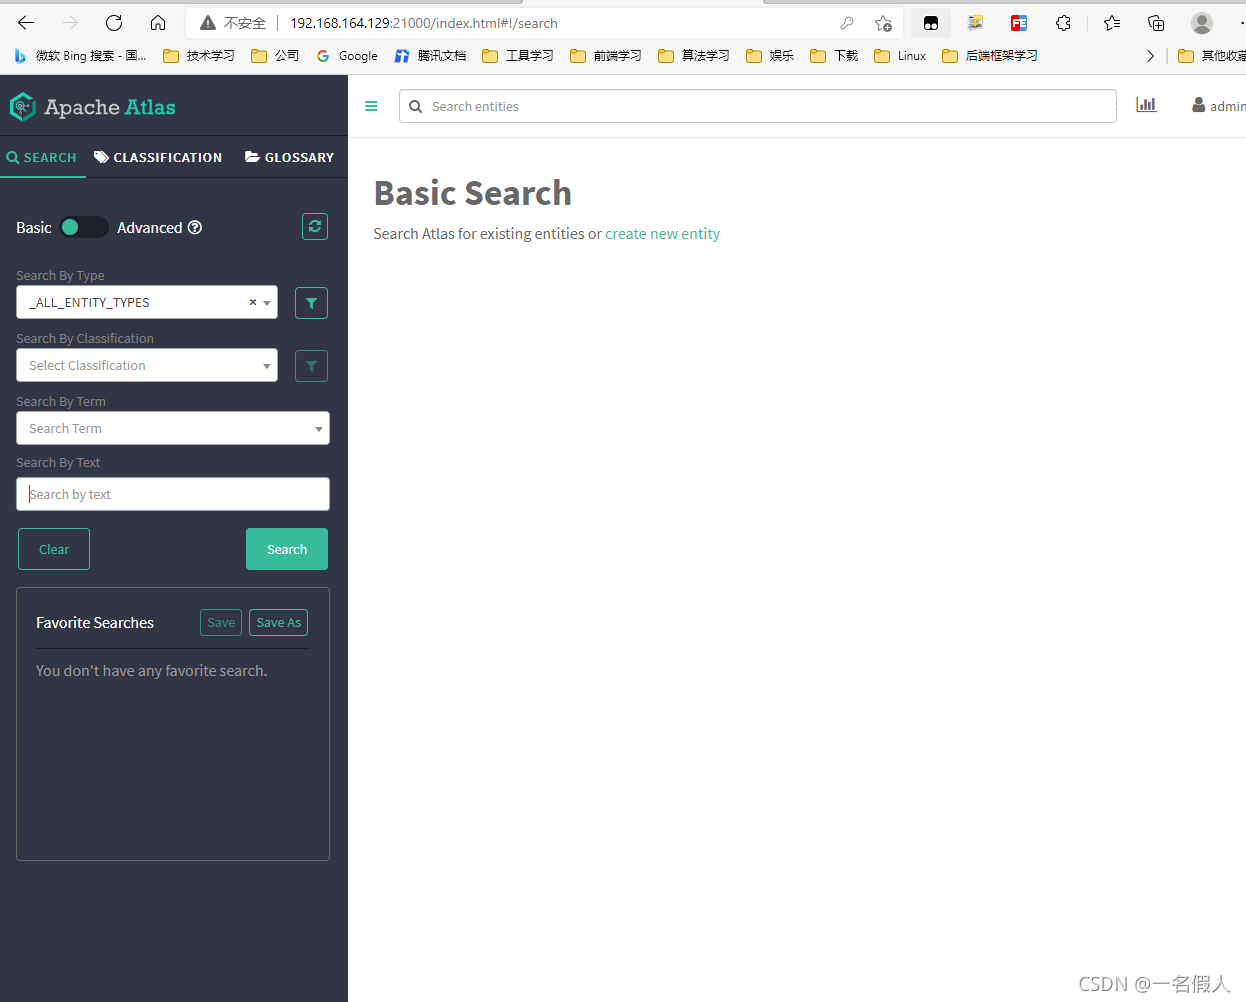
打开浏览器输入虚拟机地址:21000,输入账号密码admin/admin,看到下界面即可
三、踩坑环节
-
- 在执行bin/atlas_start.py过程中,会在atlas的目录下创建logs文件夹,里面的application.log是atlas启动的实际日志,如果出现启动失败可以在这里寻找答案。


 2483
2483


 被折叠的 条评论
为什么被折叠?
被折叠的 条评论
为什么被折叠?
 到【灌水乐园】发言


