


 文章描述了在使用NVIDIA的Apex库进行PyTorch项目中的混合精度和分布式训练时遇到的`ModuleNotFoundError`,特别提到缺少`packaging`模块。提供了解决方案链接,指向GitHubissue中的讨论。
git clone https://github.com/NVIDIA/apex
cd apex
# if pip >= 23.1 (ref: https://pip.pypa.io/en/stable/news/#v23-1) which supports multiple `--config-settings` with the same key...
pip install -v --disable-pip-version-check --no-cache-dir --no-build-isolation --config-settings "--build-option=--cpp_ext" --config-settings "--build-option=--cuda_ext" ./
# otherwise
pip install -v --disable-pip-version-check --no-cache-dir --no-build-isolation --global-option="--cpp_ext" --global-option="--cuda_ext" ./
NVIDIA/apex: A PyTorch Extension: Tools for easy mixed precision and distributed training in Pytorch (github.com)按照官方安装步骤报错如下:
ModuleNotFoundError: No module named 'packaging'
  error: subprocess-exited-with-error

  × Getting requirements to build wheel did not run successfully.
  │ exit code: 1
  ╰─> See above for output.

  note: This error originates from a subprocess, and is likely not a problem with pip.
  full command: /home/huiwei/miniconda3/envs/earthformer/bin/python3 /home/huiwei/miniconda3/envs/earthformer/lib/python3.9/site-packages/pip/_vendor/pyproject_hooks/_in_process/_in_process.py get_requires_for_build_wheel /tmp/tmpuel1iqe5
  cwd: /tmp/pip-req-build-7az4lcr7
  Getting requirements to build wheel ... error
error: subprocess-exited-with-error

× Getting requirements to build wheel did not run successfully.
│ exit code: 1
╰─> See above for output.

note: This error originates from a subprocess, and is likely not a problem with pip.
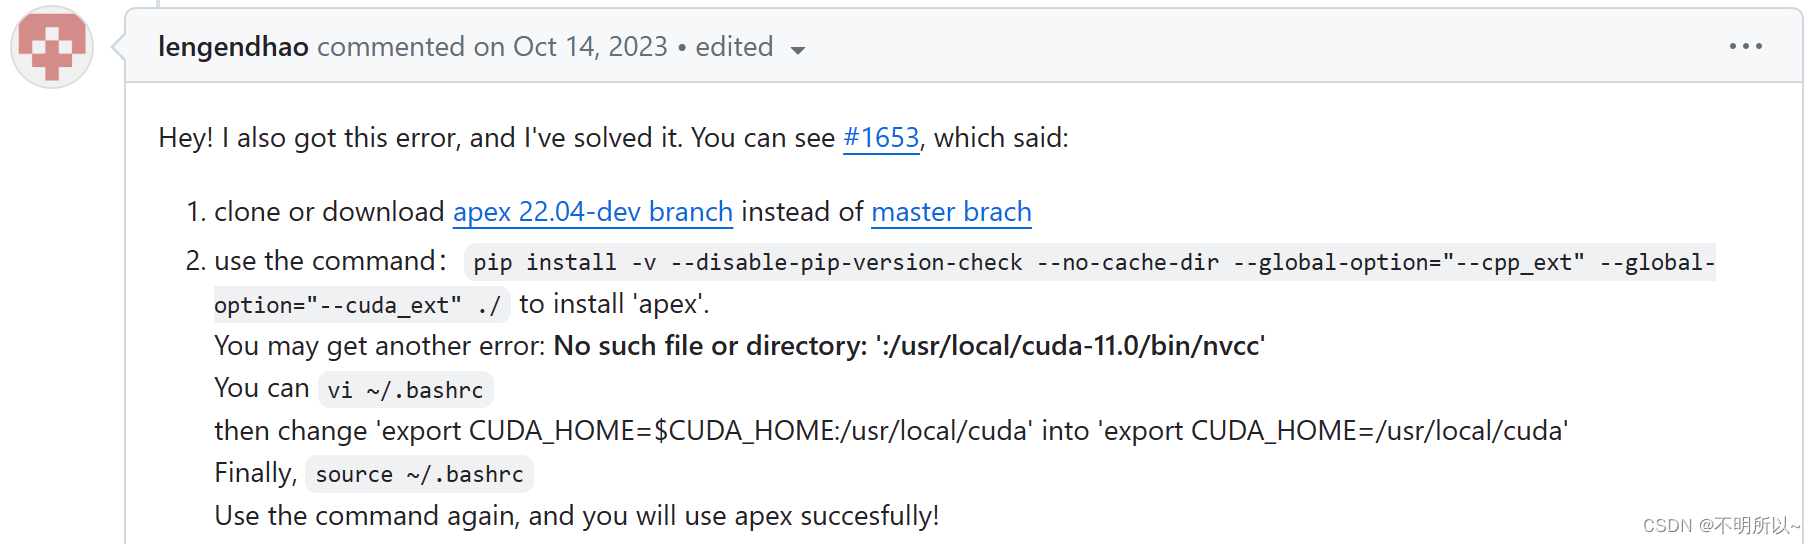
解决办法:
https://github.com/NVIDIA/apex/issues/1737#issuecomment-1762662648


 1082
1082


 被折叠的 条评论
为什么被折叠?
被折叠的 条评论
为什么被折叠?
 到【灌水乐园】发言


