


Spring Security
入门案例
-
创建springboot项目
-
在pom.xml文件添加依赖
<dependency> <groupId>org.springframework.boot</groupId> <artifactId>spring-boot-starter-web</artifactId> </dependency> <dependency> <groupId>org.springframework.boot</groupId> <artifactId>spring-boot-starter-security</artifactId> </dependency> -
创建controller包并创建TestController类
import org.springframework.web.bind.annotation.GetMapping; import org.springframework.web.bind.annotation.RequestMapping; import org.springframework.web.bind.annotation.RestController; @RestController @RequestMapping("/test") public class TestController { @GetMapping("/add") public String add(){ return "hello"; } } -
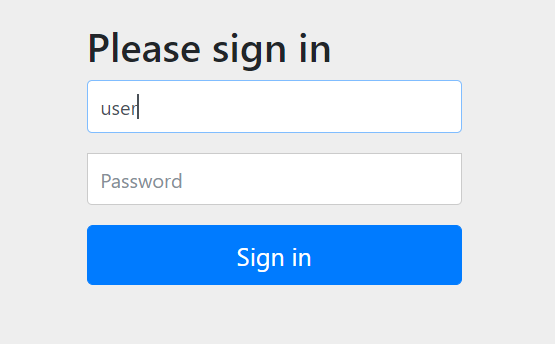
启动后输入http://localhost:8080/test/add会出现登录页面
-
输入账户名为:user,密码在控制台里面找:Using generated security password: 5bc472f4-65d4-4db5-9ae6-2c6a078dfbba后才能访问页面。
用户认证
设置登录的用户名和密码
- 第一种方式:通过配置文件
在application.properties写入配置
#spring.security.user.name=root
#spring.security.user.password=123456
#spring.security.user.roles=admin
- 第二种方式:通过配置类
在config包创建SecurityConfig配置类
@Configuration
public class SecurityConfig {

    @Bean
    UserDetailsService userDetailsService() {
        InMemoryUserDetailsManager users = new InMemoryUserDetailsManager();
        //因为security不支持明文密码格式,在这里给密码加密。
        BCryptPasswordEncoder bCryptPasswordEncoder=new BCryptPasswordEncoder();
        String password=bCryptPasswordEncoder.encode("123");
        users.createUser(User.withUsername("root").password(password).roles("admin").build());
        //不加密写法
        //users.createUser(User.withUsername("root").password("{noop}123").roles("admin").build());
        return users;
    }
    @Bean
    PasswordEncoder password(){
        return new BCryptPasswordEncoder();
    }
}
-
第三种方式:自定义编写实现类
-
第一步:编写配置类
import org.springframework.context.annotation.Bean; import org.springframework.context.annotation.Configuration; import org.springframework.security.crypto.bcrypt.BCryptPasswordEncoder; import org.springframework.security.crypto.password.PasswordEncoder; @Configuration public class SecurityConfigTest { @Bean PasswordEncoder password(){ return new BCryptPasswordEncoder(); } } -
第二步:编写实现类,返回User对象,User对象有用户名密码和权限操作
import org.springframework.beans.factory.annotation.Autowired;
import org.springframework.security.core.GrantedAuthority;
import org.springframework.security.core.authority.AuthorityUtils;
import org.springframework.security.core.userdetails.User;
import org.springframework.security.core.userdetails.UserDetails;
import org.springframework.security.core.userdetails.UserDetailsService;
import org.springframework.security.core.userdetails.UsernameNotFoundException;
import org.springframework.security.crypto.password.PasswordEncoder;
import org.springframework.stereotype.Service;

import java.util.List;

@Service("UserDetailsService")
public class MyUserDetailService implements UserDetailsService {
    @Autowired
    private PasswordEncoder passwordEncoder;
    @Override
    public UserDetails loadUserByUsername(String username) throws UsernameNotFoundException {
        List<GrantedAuthority> auths= AuthorityUtils.commaSeparatedStringToAuthorityList("admin");
        String password=passwordEncoder.encode("123");
        return new User("root",password,auths);
    }
}
-
通过数据库查询来实现用户登录
-
引入依赖
<dependency> <groupId>com.baomidou</groupId> <artifactId>mybatis-plus-boot-starter</artifactId> <version>3.0.5</version> </dependency> <dependency> <groupId>mysql</groupId> <artifactId>mysql-connector-java</artifactId> <version>8.0.23</version> </dependency> <dependency> <groupId>org.projectlombok</groupId> <artifactId>lombok</artifactId> <version>1.18.18</version> </dependency> -
创建实体类
import lombok.Data; @Data public class Users { private Integer id; private String name; private String pwd; } -
整合mp
import com.baomidou.mybatisplus.core.mapper.BaseMapper; import com.springsecurity.security.entity.Users; @Repository @Mapper public interface UsersMapper extends BaseMapper<Users> { } -
在MyUserDetailService调用mapper里面的方法
@Service("UserDetailsService")
public class MyUserDetailService implements UserDetailsService {
    @Autowired
    private PasswordEncoder passwordEncoder;
    @Autowired
    private UsersMapper usersMapper;
    @Override
    public UserDetails loadUserByUsername(String username) throws UsernameNotFoundException {
        //调用usersmapper方法查询数据库
        QueryWrapper<Users> wrapper=new QueryWrapper<>();
        wrapper.eq("name",username);
        Users users=usersMapper.selectOne(wrapper);
        //判断
        if (users==null){
            throw new UsernameNotFoundException("用户名不存在");
        }
        List<GrantedAuthority> auths= AuthorityUtils.commaSeparatedStringToAuthorityList("admin");
        String password=passwordEncoder.encode(users.getPwd());
        return new User(users.getName(),password,auths);
    }
}
自定义登录页面
配置类实现相关配置
import org.springframework.context.annotation.Bean;
import org.springframework.context.annotation.Configuration;
import org.springframework.security.config.annotation.web.builders.HttpSecurity;
import org.springframework.security.crypto.bcrypt.BCryptPasswordEncoder;
import org.springframework.security.crypto.password.PasswordEncoder;
import org.springframework.security.web.SecurityFilterChain;

@Configuration
public class SecurityConfigTest {

    @Bean
    PasswordEncoder password(){
        return new BCryptPasswordEncoder();
    }
    @Bean
    SecurityFilterChain securityFilterChain(HttpSecurity http) throws Exception{

        http.formLogin() //自定义登录页面
                .loginPage("/login.html")  //设置登录页面
                .loginProcessingUrl("/user/login")  //登录访问路径
                .defaultSuccessUrl("/test/index").permitAll()  //登录成功后跳转路径
                .and().authorizeRequests()
                .antMatchers("/","/test/hello","/user/login").permitAll()  //设置哪些路径可以直接访问,不需要认证
                .anyRequest().authenticated()
                .and().csrf().disable();  //关闭csrf防护
        return http.build();
    }
}
修改controller类
@RestController
@RequestMapping("/test")
public class TestController {
    @GetMapping("/hello")
    public String hello(){
        return "hello security";
    }
    @GetMapping("/index")
    public String index(){
        return "hello index";
    }

}
添加静态页面
在resources目录新建static包,创建login.html页面
该页面下,name="username"和name="password"中username和password是固定的写法
<!DOCTYPE html>
<html lang="en">
<head>
    <meta charset="UTF-8">
    <title>Title</title>
</head>
<body>
<form action="/user/login" method="post">
    用户名:<input type="text" name="username"/>
    <br/>
    密码:<input type="text" name="password"/>
    <br/>
    <input type="submit" value="登录"/>
</form>
</body>
</html>
基于权限访问控制
方法一:hasAuthority方法(一个权限)
-
在配置类设置当前 访问地址有哪些权限
//当前登录用户只有具有admins权限才可以访问这个路径 .antMatchers("/test/index").hasAuthority("admins") -
在UserDetailsService,对返回User设置权限
List<GrantedAuthority> auths= AuthorityUtils.commaSeparatedStringToAuthorityList("admins");
方法二:hasAnyAuthority方法(可以设置多个权限)
.antMatchers("/test/index").hasAnyAuthority("admins","manager")
基于角色访问控制
方法一:hasRole方法(一个角色)
-
在配置类设置当前 访问地址有哪些权限
.antMatchers("/test/index").hasRole("sale") -
在UserDetailsService,对返回User设置权限
List<GrantedAuthority> auths= AuthorityUtils.commaSeparatedStringToAuthorityList("admins,ROLE_sale");
方法二:hasAnyRole方法(可以设置多个角色)
类似
自定义403页面
创建没有权限访问的页面
<!DOCTYPE html>
<html lang="en">
<head>
    <meta charset="UTF-8">
    <title>Title</title>
</head>
<body>
<h1>没有权限!</h1>
</body>
</html>
在配置类中配置
        //配置没有权限访问跳转自定义页面
        http.exceptionHandling().accessDeniedPage("/unauth.html");
注解使用
@Secured
用户具有某个角色才可以访问该方法
-
在启动类或者配置类添加下面注解(开启注解功能)
@EnableGlobalMethodSecurity(securedEnabled =true) -
在controller的方法上面使用注解,设置角色
@GetMapping("/update") @Secured({"ROLE_sale","ROLE_admin"}) public String update(){ return "hello update"; } -
在MyUserDetailService设置角色
List<GrantedAuthority> auths= AuthorityUtils.commaSeparatedStringToAuthorityList("admins,ROLE_sale");
@PreAuthorize
进入方法前验证权限
-
在启动类或者配置类添加下面注解(开启注解功能)
@EnableGlobalMethodSecurity(securedEnabled =true,prePostEnabled = true) -
在controller的方法上面使用注解,设置角色
@GetMapping("/update") //@Secured({"ROLE_sale","ROLE_admin"}) @PreAuthorize("hasAnyAuthority('admins')") public String update(){ return "hello update"; } -
在MyUserDetailService设置角色
List<GrantedAuthority> auths= AuthorityUtils.commaSeparatedStringToAuthorityList("admins,ROLE_sale");
@PostAuthorize
在方法执行之后校验
-
在启动类或者配置类添加下面注解(开启注解功能)
@EnableGlobalMethodSecurity(securedEnabled =true,prePostEnabled = true) -
在controller的方法上面使用注解,设置角色
@GetMapping("/update") @PostAuthorize("hasAnyAuthority('admins')") public String update(){ System.out.println("没有权限"); return "hello update"; } -
在MyUserDetailService设置角色
List<GrantedAuthority> auths= AuthorityUtils.commaSeparatedStringToAuthorityList("noadmin");使用该注解会先执行完方法里面的内容,然后再校验权限
@PostFilter
对方法返回的数据进行过滤
在controller的方法上面使用注解
    @GetMapping("/getall")
    @PostAuthorize("hasAnyAuthority('admins')")
    @PostFilter("filterObject.name=='admin6'")
    public List<Users> getAllUser(){
        ArrayList<Users> list=new ArrayList<>();
        list.add(new Users(6,"admin7","654321"));
        list.add(new Users(7,"admin6","123456"));
        System.out.println(list);
        return list;
    }
访问该方法后控制台输出
[Users(id=6, name=admin7, pwd=654321), Users(id=7, name=admin6, pwd=123456)]
浏览器页面显示
[{"id":7,"name":"admin6","pwd":"123456"}]
@PreFilter
对传入的数据进行过滤
和上面类似
用户注销
-
创建success.html页面
<!DOCTYPE html> <html lang="en"> <head> <meta charset="UTF-8"> <title>Title</title> </head> <body> <h1>登陆成功</h1> <a href="/logout">退出登录</a> </body> </html> -
在配置类配置注销页面
//配置注销页面地址 http.logout().logoutUrl("/logout").logoutSuccessUrl("/test/hello").permitAll(); -
修改登录跳转页面
.defaultSuccessUrl("/success.html").permitAll() //登录成功后跳转路径
自动登录实现
-
在配置类注入数据源和配置操作数据库对象
//注入数据源 @Autowired private DataSource dataSource; //配置对象 @Bean public PersistentTokenRepository persistentTokenRepository(){ JdbcTokenRepositoryImpl jdbcTokenRepository=new JdbcTokenRepositoryImpl(); jdbcTokenRepository.setDataSource(dataSource); return jdbcTokenRepository; } -
配置自动登录
.and().rememberMe().tokenRepository(persistentTokenRepository()) .tokenValiditySeconds(600)//设置有效时常 -
在login.html页面添加自动登录按钮(name值必须为"remember-me")
<input type="checkbox" name="remember-me" />记住我该功能可以让我们在关闭浏览器后再次打开还能访问登录后才能访问的页面
JdbcTokenRepositoryImpl jdbcTokenRepository=new JdbcTokenRepositoryImpl();
jdbcTokenRepository.setDataSource(dataSource);
return jdbcTokenRepository;
} -
配置自动登录
.and().rememberMe().tokenRepository(persistentTokenRepository()) .tokenValiditySeconds(600)//设置有效时常 -
在login.html页面添加自动登录按钮(name值必须为"remember-me")
<input type="checkbox" name="remember-me" />记住我该功能可以让我们在关闭浏览器后再次打开还能访问登录后才能访问的页面


 7233
7233


 被折叠的 条评论
为什么被折叠?
被折叠的 条评论
为什么被折叠?
 到【灌水乐园】发言


