from mmdet.apis import init_detector, inference_detector

config_file = 'configs/faster_rcnn/faster_rcnn_r50_fpn_1x_coco.py'
# download the checkpoint from model zoo and put it in `checkpoints/`
# url: http://download.openmmlab.com/mmdetection/v2.0/faster_rcnn/faster_rcnn_r50_fpn_1x_coco/faster_rcnn_r50_fpn_1x_coco_20200130-047c8118.pth
checkpoint_file = 'checkpoints/faster_rcnn_r50_fpn_1x_coco_20200130-047c8118.pth'
device = 'cuda:0'
# init a detector
model = init_detector(config_file, checkpoint_file, device=device)
# inference the demo image
inference_detector(model, 'demo/demo.jpg')
print("finish")
加了最后一行print来看看是否程序结束,我运行的结果为:
Use load_from_local loader
/home/ws/wmyProjects/a-seg/mm-test/mmdetection/mmdet/datasets/utils.py:68: UserWarning: "ImageToTensor" pipeline is replaced by "DefaultFormatBundle" for batch inference. It is recommended to manually replace it in the test data pipeline in your config file.
  'data pipeline in your config file.', UserWarning)
finish
出现了一个警告,然后我去mmdetection官方文档查了一下,具体解释为这个,于是我修改了mmdetection->configs->base->datasets->coco_detection.py中的代码,按照官方文档进行修改,于是就没有警告了。https://mmdetection.readthedocs.io/en/latest/1_exist_data_model.html?highlight=ImageToTensor
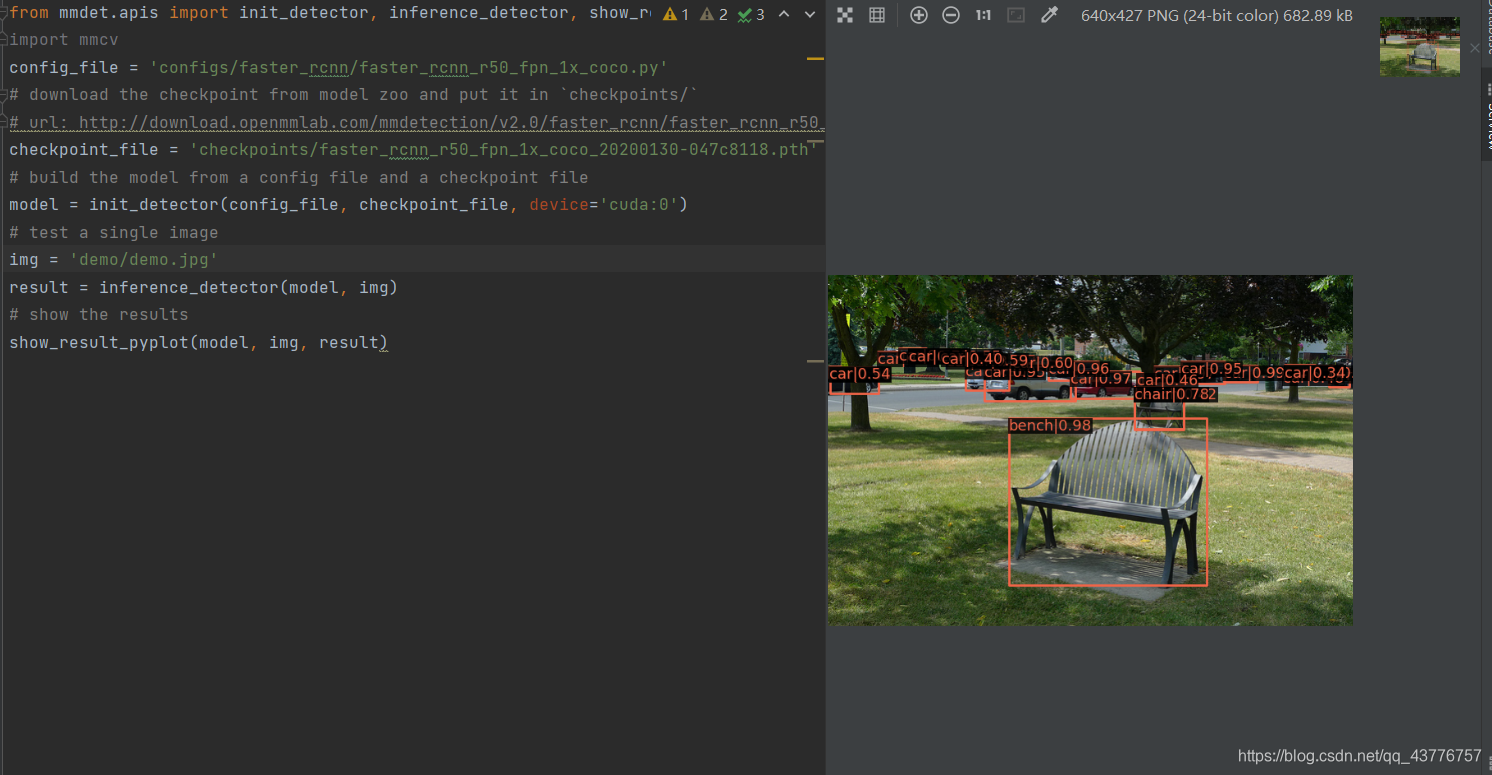
但是没有警告也没有弹出图片,然后又找到了它的官方的inference_demo.ipynb文件,跟着它用jupyter notebook走了一下,发现弹出图片效果了,然后查看代码如下:
from mmdet.apis import init_detector, inference_detector, show_result_pyplot
import mmcv
config_file = 'configs/faster_rcnn/faster_rcnn_r50_fpn_1x_coco.py'
# download the checkpoint from model zoo and put it in `checkpoints/`
# url: http://download.openmmlab.com/mmdetection/v2.0/faster_rcnn/faster_rcnn_r50_fpn_1x_coco/faster_rcnn_r50_fpn_1x_coco_20200130-047c8118.pth
checkpoint_file = 'checkpoints/faster_rcnn_r50_fpn_1x_coco_20200130-047c8118.pth'
# build the model from a config file and a checkpoint file
model = init_detector(config_file, checkpoint_file, device='cuda:0')
# test a single image
img = 'demo/demo.jpg'
result = inference_detector(model, img)
# show the results
show_result_pyplot(model, img, result)
发现它多导入了show_result_pyplot ,并且用这个展示了结果图片show_result_pyplot(model, img, result)。
最后在jupyternotebook 或pycharm中运行都能得到预测的图片了。效果图如下:我是远程连学校的服务器,然后用pycharm的专业版连接服务器,并且mapping好地址,再配置解释器环境就能远程运行了。


 712
712


 被折叠的 条评论
为什么被折叠?


