


目录
mysql仓库安装
1.部署linux环境配置本地yum源
验证环境
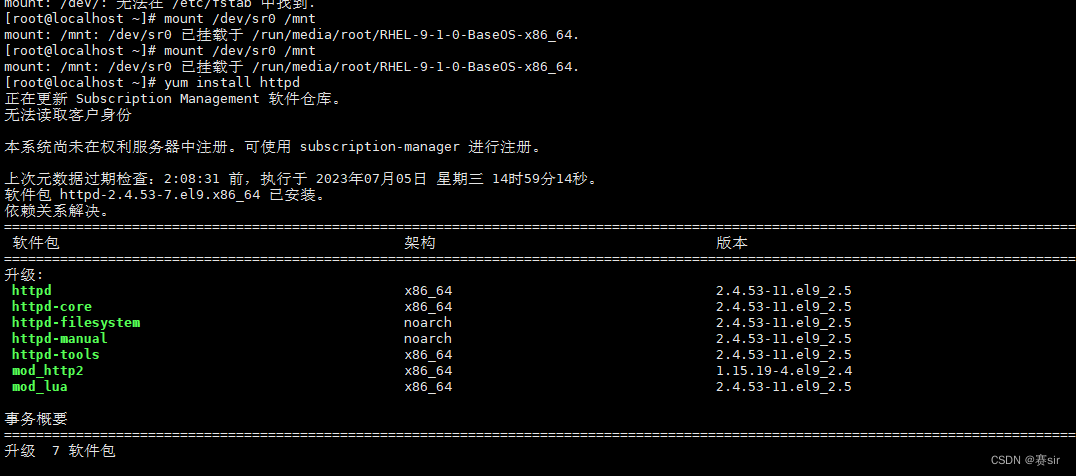
[root@localhost ~]# mount /dev/
mount: /dev/: 无法在 /etc/fstab 中找到.
[root@localhost ~]# mount /dev/sr0 /mnt
mount: /mnt: /dev/sr0 已挂载于 /run/media/root/RHEL-9-1-0-BaseOS-x86_64.
[root@localhost ~]# mount /dev/sr0 /mnt
mount: /mnt: /dev/sr0 已挂载于 /run/media/root/RHEL-9-1-0-BaseOS-x86_64.
[root@localhost ~]# 验证是否可以使用本地yum仓库进行安装
以安装httpd为例
[root@localhost ~]# yum install httpd
下面就是本地yum可以正常安装服务。
下面是本地yum源不正常的界面
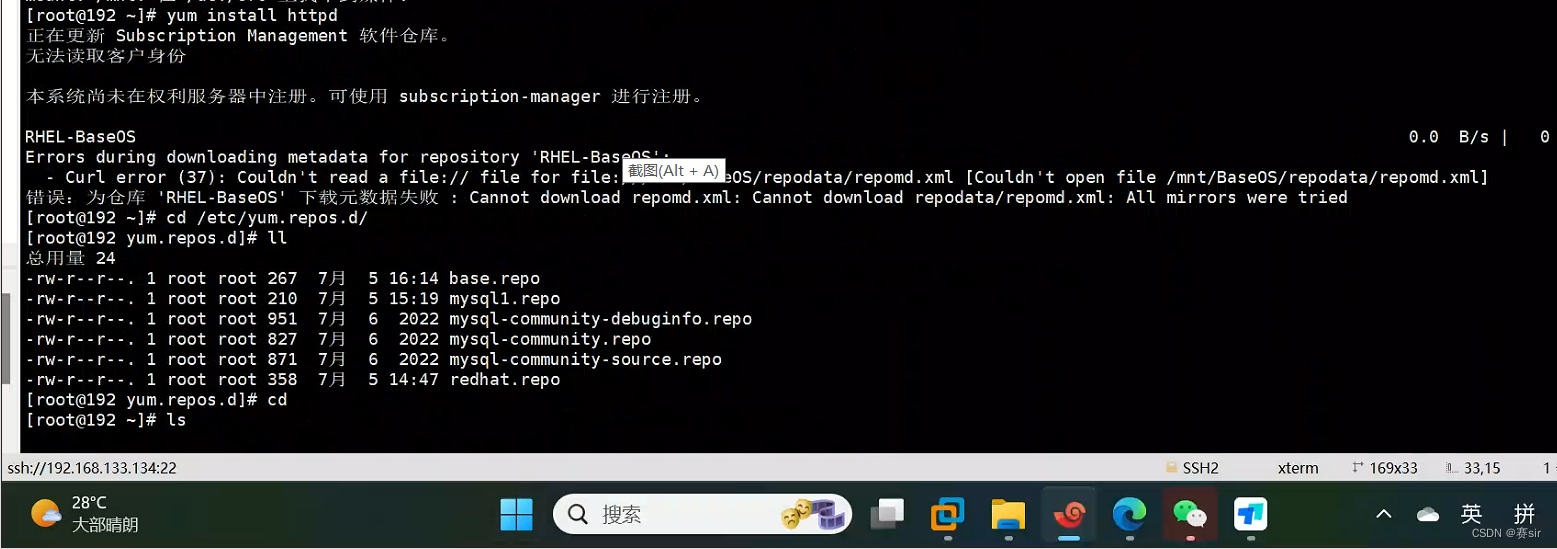
这种情况需要重新配置本地yum源
配置本地yum源步骤
vim /etc/yum.repos.d/base.repo
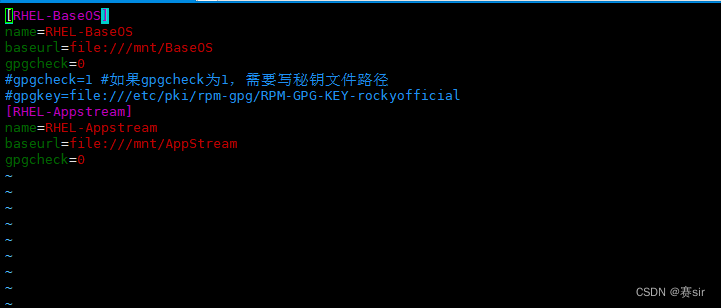
进入vim文本编译器里面按i进入插入模式把下面的配置复制覆盖内容
[RHEL-BaseOS]name=RHEL-BaseOSbaseurl=file:///mnt/BaseOSgpgcheck=0#gpgcheck=1 #如果gpgcheck为1,需要写秘钥文件路径#gpgkey=file:///etc/pki/rpm-gpg/RPM-GPG-KEY-rockyofficial[RHEL-Appstream]name=RHEL-Appstreambaseurl=file:///mnt/AppStreamgpgcheck=0
接下来按esc键之后输入:qw
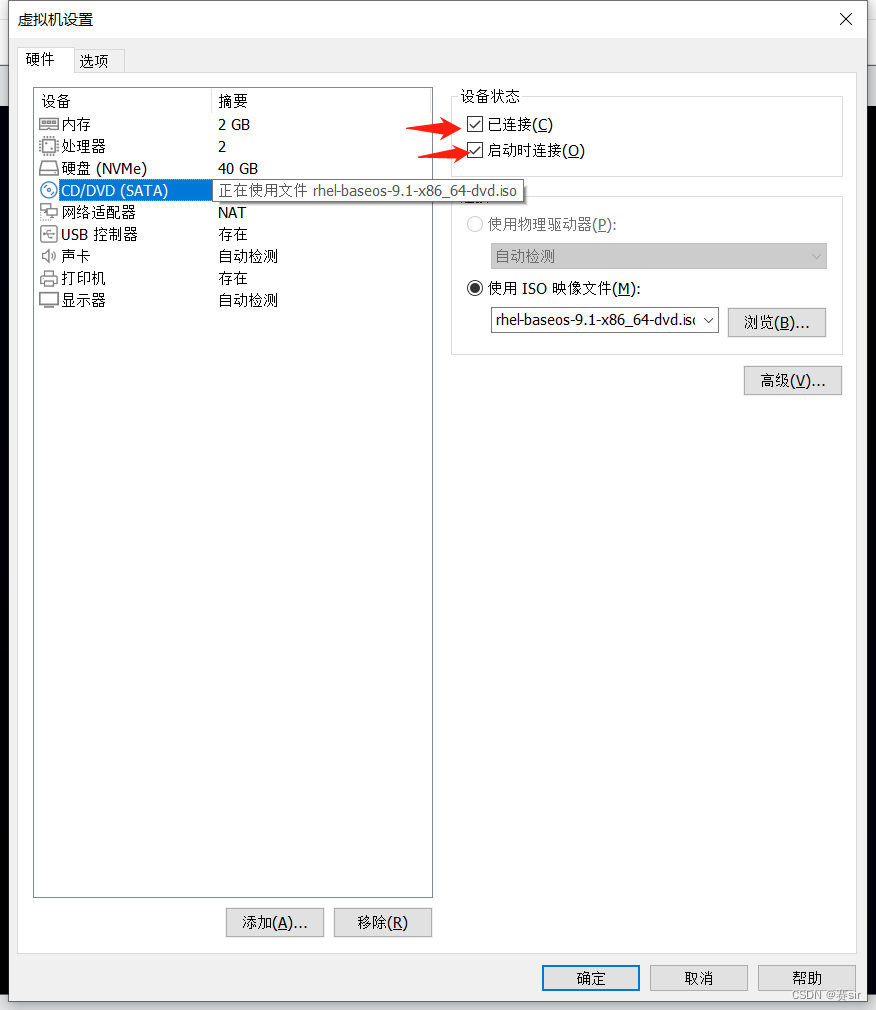
在安装之前需要挂在
mount /dev/sr0 /mnt
如果挂载不成功要检查虚拟机设置
2.安装
分为两步一个是mysqlrpm包安装
rpm安装
#rpm -i example.rpm 安装 example.rpm 包;

上图证明你安装完成,警告不是报错
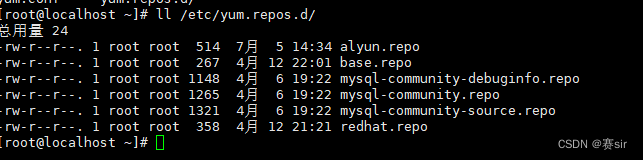
# ll /etc/yum.repos.d/
查询下面是不是多了三个mysql文件证明你的安装过程没有问题
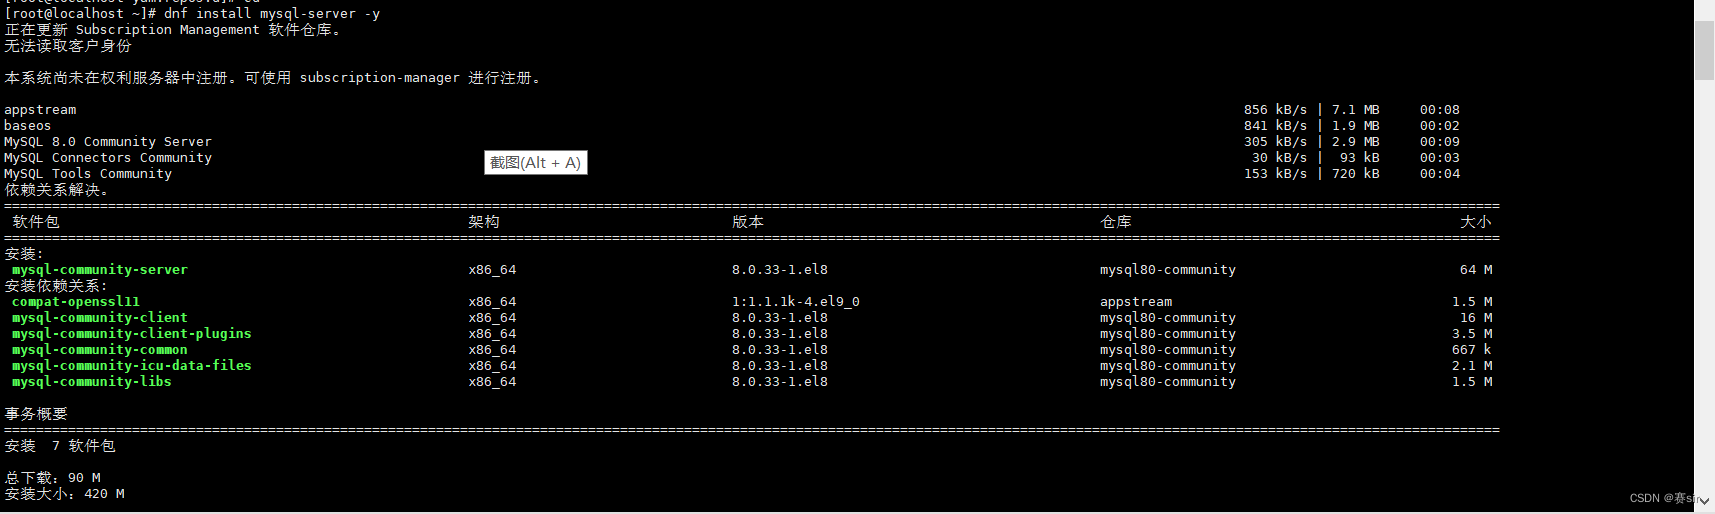
dnf安装
dnf install mysql-server#mysql安装
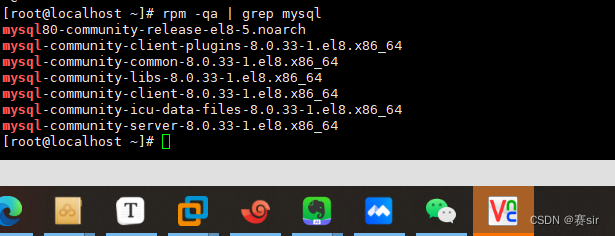
rpm -qa | grep mysql
#查询当前系统中安装的名称带mysql的软件
我这个版本有七个
3.mysql初始化
第一步重启mysql服务
[root@localhost ~]# systemctl restart mysqld.service
[root@localhost ~]# systemctl restart mysqld.service
[root@localhost ~]#
第二步查询mysql状态
[root@localhost ~]# systemctl status mysqld.service
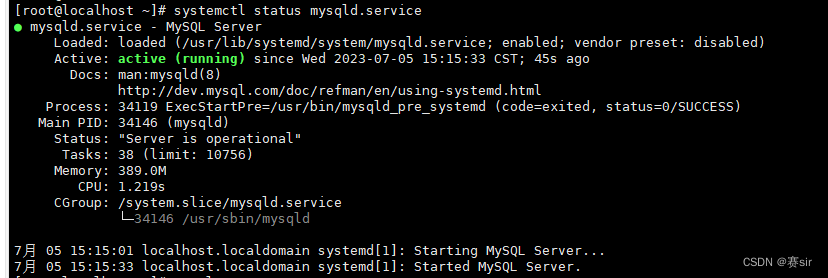
从图中可以看出状态正常active(running)
第三步进入数据库前进行密码查询
(安装好后数据库会随机生成进入密码)
[root@localhost ~]# sudo grep 'temporary password' /var/log/mysqld.log
2023-07-05T07:14:50.594709Z 6 [Note] [MY-010454] [Server] A temporary password is generated for root@localhost: tgSV*<ugT2&L
冒号后面就是密码
[root@localhost ~]# sudo grep 'temporary password' /var/log/mysqld.log
2023-07-05T07:14:50.594709Z 6 [Note] [MY-010454] [Server] A temporary password is generated for root@localhost: tgSV*<ugT2&L
[root@localhost ~]# mysql -uroot -p #
Enter password:
Welcome to the MySQL monitor.  Commands end with ; or \g.
Your MySQL connection id is 9
Server version: 8.0.33


Copyright (c) 2000, 2023, Oracle and/or its affiliates.


Oracle is a registered trademark of Oracle Corporation and/or its
affiliates. Other names may be trademarks of their respective
owners.


Type 'help;' or '\h' for help. Type '\c' to clear the current input statement.


mysql>
第四步进入MySQL更改密码
mysql> ALTER USER 'root'@'localhost' IDENTIFIED BY 'Root123456';引号中间就是密码
mysql> ALTER USER 'root'@'localhost' IDENTIFIED BY 'Root123456';
ERROR 1819 (HY000): Your password does not satisfy the current policy requirements
mysql> ALTER USER 'root'@'localhost' IDENTIFIED BY 'Root@123456';
Query OK, 0 rows affected (0.00 sec
第五步查询现有数据库
show datebases;
mysql> show datebases;
ERROR 1064 (42000): You have an error in your SQL syntax; check the manual that corresponds to your MySQL server version for the right syntax to use near 'datebases' at line 1
mysql> show databases;
+--------------------+
| Database |
+--------------------+
| information_schema |
| mysql |
| performance_schema |
| sys |
+--------------------+
上面就是初始自带的加个数据库


 644
644


 被折叠的 条评论
为什么被折叠?
被折叠的 条评论
为什么被折叠?
 到【灌水乐园】发言


