


前言
在当今数字时代,随着科技的不断发展,用户敏感信息尤为重要。从指纹到面部识别,再到虹膜扫描,生物识别技术为我们带来了便捷性和安全性。本次将构建一个简易的账户信息应用,运用生物识别技术来提高信息的安全性。
什么是 Biometric ?
Biometric 是一组 API 和框架,旨在为 Android
应用程序提供生物识别功能,以提高用户安全性和便利性。这些生物识别技术通常包括指纹识别、面部识别和虹膜扫描等。
三种不同的生物识别身份验证类型:
- BIOMETRIC_STRONG :强类型识别验证它要求用户提供强大的生物识别信息,例如指纹和虹膜扫描,这使得难以伪造和绕过验证。它提供了高级别安全性,适合处理敏感数据和交易类型的应用。
- BIOMETRIC_WEAK :弱类型识别验证使用人脸识别等不太安全的验证方法,与强类型相比可能更容易欺骗或绕过验证,此方式适合安全性较低的应用。
- DEVICE_CREDENTIAL :此验证方式不涉及生物识别,而是依赖于手机设备的安全性,例如 PIN、密码或图案。当手机不具备生物识别技术时,可使用此方式。
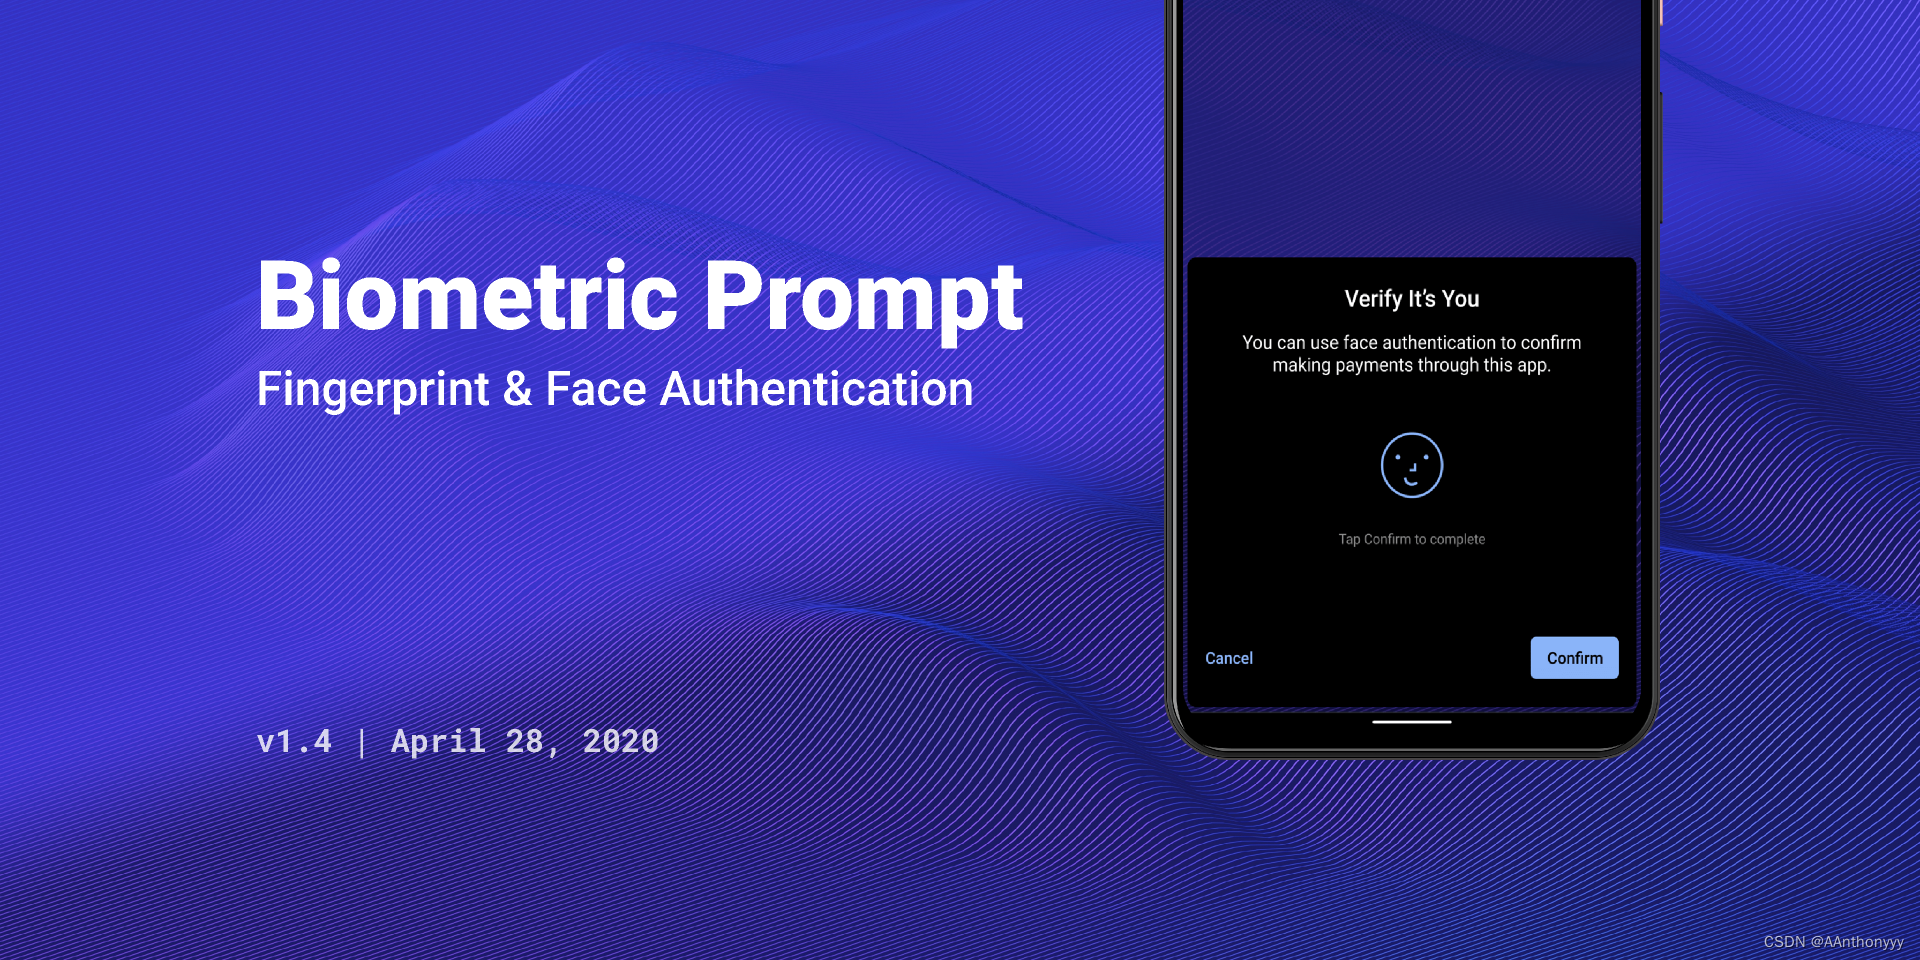
示例
在开始之前先来看看成品效果如何,当我们启动应用之后会立马弹出验证弹窗进行识别身份,在未完成识别之前,应用内部的信息都是无法查看的。

添加依赖库
在模块级别的 build.gradle 文件中添加以下依赖:
buildscript {
    dependencies {
        classpath "com.google.dagger:hilt-android-gradle-plugin:2.38.1"
    }
}
plugins {
    ...
}
在项目级别的 build.gradle 文件中添加以下依赖:
plugins {
    ...
    id 'dagger.hilt.android.plugin'
    id 'kotlin-kapt'
}

android {
    ...
}

dependencies {
    ...

    // Room
    implementation "androidx.room:room-runtime:2.4.3"
    kapt "androidx.room:room-compiler:2.4.3"
    implementation "androidx.room:room-ktx:2.4.3"
    annotationProcessor "androidx.room:room-compiler:2.4.3"

    // Dagger + Hilt
    implementation "com.google.dagger:hilt-android:2.38.1"
    kapt "com.google.dagger:hilt-compiler:2.38.1"
    implementation "androidx.hilt:hilt-navigation-compose:1.0.0"
    implementation "androidx.hilt:hilt-lifecycle-viewmodel:1.0.0-alpha03"
    kapt "androidx.hilt:hilt-compiler:1.0.0"

    //生物识别
    implementation "androidx.biometric:biometric:1.1.0"
}
编写数据库部分
创建存储账户信息实体类 AccountEntity 、数据访问对象 AccountDao 以及 Room 数据库文件 AccountDatabase 。
@Entity(tableName = "account")
data class AccountEntity(
      @PrimaryKey(autoGenerate = true)
      val id: Int? = null,
      val type: String,
      val account: String,
      val password: String
)
//------------------------------

@Dao
interface AccountDao {
      @Insert
      suspend fun addAccount(account: AccountEntity)

      @Query("SELECT * FROM account")
      fun getAccounts():Flow<List<AccountEntity>>

      @Delete
      suspend fun deleteAccount(account: AccountEntity)
}
//------------------------------

@Database(
      entities = [AccountEntity::class],
      version = 1
)
abstract class AccountDatabase : RoomDatabase() {
      abstract fun getDao(): AccountDao

      companion object{
            const val DATABASE_NAME = "accounts_db"
      }
}
依赖注入
创建 DatabaseModule 单例对象,使用 Hilt
提供的注解标记,它负责管理全局应用中的单例对象,里面有一个提供数据库实例的方法,在需要的地方直接在构造器声明即可,它会自动注入该对象。
@Module
@InstallIn(SingletonComponent::class)
object DatabaseModule {

      @Provides
      @Singleton
      fun provideAccountDatabase(@ApplicationContext context: Context): AccountDatabase {
            return Room.databaseBuilder(
                  context,
                  AccountDatabase::class.java,
                  AccountDatabase.DATABASE_NAME
            ).build()
      }

}
编写业务逻辑
在 MainViewModel 中使用特有注解 HiltViewModel 并注入数据库实例对象。注意:一般操作数据库是在 Repository
中进行的,这里为了演示就简化了,直接在 ViewModel 中操作。
@HiltViewModel
class MainViewModel @Inject constructor(
      private val db:AccountDatabase
) : ViewModel() {
      //账户列表
      private val _accounts = mutableStateOf<List<AccountEntity>>(emptyList())
      val accounts: State<List<AccountEntity>> = _accounts

      init {
          getAllAccounts()
      }

      //添加账户
      fun addAccount(
            type: String,
            account: String,
            password: String
      ) {
            viewModelScope.launch {
                  db.getDao().addAccount(
                        AccountEntity(
                              type=type,
                              account=account,
                              password=password
                        )
                  )
            }
      }

      //删除账户
      fun deleteAccount(account: AccountEntity) {
            viewModelScope.launch {
                  db.getDao().deleteAccount(account)
            }
      }

      //获取所有账户
      private fun getAllAccounts() {
            viewModelScope.launch {
                  db.getDao().getAccounts().collect { result ->
                        _accounts.value = result
                  }
            }
      }
}
使用 Biometric API(核心)
创建 BiometricPrompt 实例,它是 AndroidX 中提供的组件,可帮助我们轻松快速的将生物识别添加到应用中。
-
BiometricPrompt.PromptInfo.Builder():用于创建提示信息,提示框的标题和描述以及配置身份验证的方式。 -
BiometricPrompt实例通过 activity, executor, callback 三部分构造,其中 executor 负责主线程上的回调处理,callback 的类型为 BiometricPrompt.AuthenticationCallback ,回调三个身份验证处理的回调方法。 -
biometricPrompt.authenticate(promptInfo)调用身份验证方法,传入提示信息向用户显示身份验证对话框。object BiometricHelper {
  /** 创建提示信息  **/
  private fun createPromptInfo(): BiometricPrompt.PromptInfo =
        BiometricPrompt.PromptInfo.Builder()
              .setTitle("SecretAccountApp")
              .setDescription("使用你的指纹或者面部来验证你的身份")
              .setAllowedAuthenticators(BIOMETRIC_STRONG or BIOMETRIC_WEAK or DEVICE_CREDENTIAL)
              .build()
  //setConfirmationRequired(true)
  //setNegativeButtonText("取消")


  /** 创建生物识别提示  **/
  fun showBiometricPrompt(
        activity: AppCompatActivity,
        onSuccess: (BiometricPrompt.AuthenticationResult) -> Unit
  ) {
        val executor = ContextCompat.getMainExecutor(activity)
        val callback = object : BiometricPrompt.AuthenticationCallback() {
              override fun onAuthenticationError(
                    errorCode: Int,
                    errString: CharSequence
              ) {
                    super.onAuthenticationError(errorCode, errString)
                    // 处理身份验证错误
                    Log.e("HGM", "onAuthenticationError: $errString")
              }

              override fun onAuthenticationSucceeded(result: BiometricPrompt.AuthenticationResult) {
                    super.onAuthenticationSucceeded(result)
                    // 处理身份验证成功
                    onSuccess(result)
              }

              override fun onAuthenticationFailed() {
                    super.onAuthenticationFailed()
                    // 处理身份验证失败
                    Log.e("HGM", "onAuthenticationFailed: 验证失败")
              }
        }

        return BiometricPrompt(activity, executor, callback).authenticate(createPromptInfo())
  }
}
注意:创建 PromptInfo 实例时不能同时调用 setNegativeButtonText()和 setAllowedAuthenticators()
一旦你设置了否定取消文本按钮,意味着结束身份验证,而后者可以设置使用多个身份验证方法。
编写UI
由于本文得侧重点不在于 UI,所以直接贴上代码。
这里添加一个生命周期的监听者,在应用启动的时候自动执行身份验证,当应用返回到桌面或者重新启动会重置状态,每次进入都需要进行验证。
@Composable
fun OnLifecycleEvent(
      lifecycleOwner: LifecycleOwner = LocalLifecycleOwner.current,
      onEvent: (LifecycleOwner, Lifecycle.Event) -> Unit
) {
      DisposableEffect(lifecycleOwner) {
            val observer = LifecycleEventObserver { source, event ->
                  onEvent(source, event)
            }
            lifecycleOwner.lifecycle.addObserver(observer)

            onDispose {
                  lifecycleOwner.lifecycle.removeObserver(observer)
            }
      }
}
页面由一个简单的列表和按钮组成,代码过长重点部分:
@OptIn(ExperimentalMaterial3Api::class, ExperimentalFoundationApi::class)
@Composable
fun AccountScreen(
      viewModel: MainViewModel = hiltViewModel()
) {
      val activity = LocalContext.current as AppCompatActivity
      // 是否显示账号输入框
      var showDialog by remember {
            mutableStateOf(false)
      }
      // 身份验证的状态
      val authorized = remember {
            mutableStateOf(false)
      }
      // 执行身份验证
      val authorize: () -> Unit = {
            BiometricHelper.showBiometricPrompt(activity) {
                  authorized.value = true
            }
      }
      // 模糊值
      val blurValue by animateDpAsState(
            targetValue = if (authorized.value) 0.dp else 15.dp,
            animationSpec = tween(500)
      )


      // 监听应用的声明周期
      OnLifecycleEvent { _, event ->
            when (event) {
                  Lifecycle.Event.ON_RESUME -> authorize()
                  Lifecycle.Event.ON_PAUSE -> authorized.value = false
                  else -> Unit
            }
      }


      Scaffold(
            floatingActionButton = {
                  Column {
                        FloatingActionButton(onClick = {
                              showDialog = true
                        }) {
                              Icon(
                                    imageVector = Icons.Default.Add,
                                    contentDescription = null
                              )
                        }
                        Spacer(modifier = Modifier.height(12.dp))
                        FloatingActionButton(onClick = {
                              authorize()
                        }) {
                              Icon(
                                    imageVector = Icons.Default.Lock,
                                    contentDescription = null
                              )
                        }
                  }
            }
      ) { innerPadding ->
            Box(
                  modifier = Modifier
                        .fillMaxSize()
                        .padding(innerPadding)
            ) {
                  LazyColumn(
                        modifier = Modifier
                              .fillMaxSize()
                              .padding(12.dp),
                        verticalArrangement = Arrangement.spacedBy(12.dp)
                  ) {
                        items(viewModel.accounts.value) {
                              Box(
                                    modifier = Modifier
                                          .animateItemPlacement(tween(500))
                                          .fillMaxWidth()
                                          .clip(RoundedCornerShape(8.dp))
                                          .background(MaterialTheme.colorScheme.primary)
                                          .padding(16.dp)
                                          .blur(
                                                radius = blurValue,
                                                edgeTreatment = BlurredEdgeTreatment.Unbounded
                                          )
                              ) {
                                    ...
                              }
                        }
                  }
            }

            if (showDialog) {
                  Dialog(
                        onDismissRequest = { showDialog = false }
                  ) {
                        ...
                  }
            }
      }
}
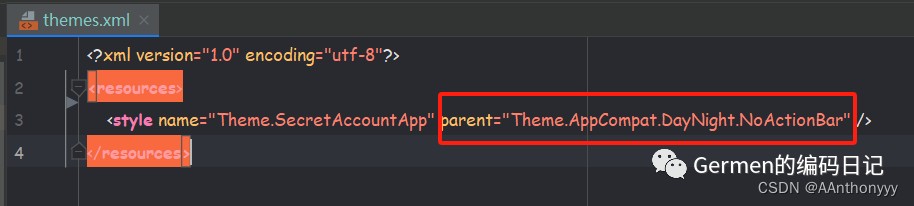
修改 MainActivity 的继承父类为 AppCompatActivity 并且修改主题样式,因为创建 BiometricPrompt 时需要类型为
FragmentActivity 参数,AppCompatActivity 是 FragmentActivity 的子类并扩展了它。
@AndroidEntryPoint
class MainActivity : AppCompatActivity() {
      override fun onCreate(savedInstanceState: Bundle?) {
            super.onCreate(savedInstanceState)
            setContent {
                  SecretAccountAppTheme {
                        Surface(
                              modifier = Modifier.fillMaxSize(),
                              color = MaterialTheme.colorScheme.background
                        ) {
                              AccountScreen()
                        }
                  }
            }
      }
}
自定义 MyApp 继承 Application 程序类,使用 @HiltAndroidApp
注解作为标识应用程序的主类,这里没有初始化工作就不需要写东西,在注册清单中应用它。
<?xml version="1.0" encoding="utf-8"?>
<manifest xmlns:android="http://schemas.android.com/apk/res/android"
    xmlns:tools="http://schemas.android.com/tools">

    <!-- 开启权限 -->
    <uses-permission android:name="android.permission.USE_BIOMETRIC"/>

    <application
        android:name=".MyApp"
        ...
        >
        ....
    </application>

</manifest>
准备测试指纹
如果你使用模拟器,需要打开设置->安全中先添加 PIN 码后,添加一个指纹用于测试。
添加测试指纹
运行效果
使用刚才添加的指纹一进行验证,通过后会显示应用内的信息,如视频中使用指纹二会显示验证失败。并且每次进入应用都需要进行身份验证,保证了数据不会泄露。如果你想使用面容验证,那就需要删除掉你的指纹,添加一个面容数据,它会自动识别你已添加的生物识别数据。
最后这只是一个简易的实例项目,更多内容请结合实际项目,欢迎 Github 提交 Issue。
生物识别运行效果
源码地址:
https://github.com/AAnthonyyyy/SecretAccountApp
官方文档:
https://developer.android.com/training/sign-in/biometric-auth?hl=zh-cn
关注我,与你分享更多技术文章。麻烦右下角区域点个【赞】支持一下吧!更多内容请关注下方微信公众号。

接下来我将给各位同学划分一张学习计划表!
学习计划
那么问题又来了,作为萌新小白,我应该先学什么,再学什么?
既然你都问的这么直白了,我就告诉你,零基础应该从什么开始学起:
阶段一:初级网络安全工程师
接下来我将给大家安排一个为期1个月的网络安全初级计划,当你学完后,你基本可以从事一份网络安全相关的工作,比如渗透测试、Web渗透、安全服务、安全分析等岗位;其中,如果你等保模块学的好,还可以从事等保工程师。
综合薪资区间6k~15k
1、网络安全理论知识(2天)
①了解行业相关背景,前景,确定发展方向。
②学习网络安全相关法律法规。
③网络安全运营的概念。
④等保简介、等保规定、流程和规范。(非常重要)
2、渗透测试基础(1周)
①渗透测试的流程、分类、标准
②信息收集技术:主动/被动信息搜集、Nmap工具、Google Hacking
③漏洞扫描、漏洞利用、原理,利用方法、工具(MSF)、绕过IDS和反病毒侦察
④主机攻防演练:MS17-010、MS08-067、MS10-046、MS12-20等
3、操作系统基础(1周)
①Windows系统常见功能和命令
②Kali Linux系统常见功能和命令
③操作系统安全(系统入侵排查/系统加固基础)
4、计算机网络基础(1周)
①计算机网络基础、协议和架构
②网络通信原理、OSI模型、数据转发流程
③常见协议解析(HTTP、TCP/IP、ARP等)
④网络攻击技术与网络安全防御技术
⑤Web漏洞原理与防御:主动/被动攻击、DDOS攻击、CVE漏洞复现
5、数据库基础操作(2天)
①数据库基础
②SQL语言基础
③数据库安全加固
6、Web渗透(1周)
①HTML、CSS和JavaScript简介
②OWASP Top10
③Web漏洞扫描工具
④Web渗透工具:Nmap、BurpSuite、SQLMap、其他(菜刀、漏扫等)

那么,到此为止,已经耗时1个月左右。你已经成功成为了一名“脚本小子”。那么你还想接着往下探索吗?
阶段二:中级or高级网络安全工程师(看自己能力)
综合薪资区间15k~30k
7、脚本编程学习(4周)
在网络安全领域。是否具备编程能力是“脚本小子”和真正网络安全工程师的本质区别。在实际的渗透测试过程中,面对复杂多变的网络环境,当常用工具不能满足实际需求的时候,往往需要对现有工具进行扩展,或者编写符合我们要求的工具、自动化脚本,这个时候就需要具备一定的编程能力。在分秒必争的CTF竞赛中,想要高效地使用自制的脚本工具来实现各种目的,更是需要拥有编程能力。
零基础入门的同学,我建议选择脚本语言Python/PHP/Go/Java中的一种,对常用库进行编程学习
搭建开发环境和选择IDE,PHP环境推荐Wamp和XAMPP,IDE强烈推荐Sublime;
Python编程学习,学习内容包含:语法、正则、文件、 网络、多线程等常用库,推荐《Python核心编程》,没必要看完
用Python编写漏洞的exp,然后写一个简单的网络爬虫
PHP基本语法学习并书写一个简单的博客系统
熟悉MVC架构,并试着学习一个PHP框架或者Python框架 (可选)
了解Bootstrap的布局或者CSS。
阶段三:顶级网络安全工程师
如果你对网络安全入门感兴趣,那么你需要的话可以点击这里👉网络安全重磅福利:入门&进阶全套282G学习资源包免费分享!

学习资料分享
当然,只给予计划不给予学习资料的行为无异于耍流氓,这里给大家整理了一份【282G】的网络安全工程师从入门到精通的学习资料包,可点击下方二维码链接领取哦。


 351
351


 被折叠的 条评论
为什么被折叠?
被折叠的 条评论
为什么被折叠?
 到【灌水乐园】发言


