


第1步
导入依赖
implementation 'com.github.bumptech.glide:glide:4.9.0'
implementation 'com.youth.banner:banner:1.4.9'
双击 粘贴到里面

第2步
先写布局
				<com.youth.banner.Banner
  				 android:id="@+id/bander"
		 		 android:layout_width="match_parent"
 				  android:layout_height="150dp"/>`
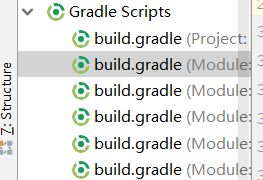
在Android studio找到如图的项目
		**第三步**

			找控件,设置图像加载程序

				//设置图像加载程序
                banner.setImageLoader(new ImageLoader() {
                    @Override
                    public void displayImage(Context context, Object path, ImageView imageView) {
                        Bean2 path1 = (Bean2) path;
                        Glide.with(context).load(path1.getImageUrl()).into(imageView);
                    }
                });
                //设置照片
                //list数据类型为图片http://h.hiphotos.baidu.com/image/pic/item/a6efce1b9d16fdfad03ef192ba8f8c5494ee7b7f.jpg
                //如list.add("http://h.hiphotos.baidu.com/image/pic/item/a6efce1b9d16fdfad03ef192ba8f8c5494ee7b7f.jpg");
                banner.setImages(blist);
                //是否是自动轮播
                banner.isAutoPlay(true);
                //设置延迟时间
                banner.setDelayTime(2000);
                //开始轮播
                banner.start();
效果


 1357
1357


 被折叠的 条评论
为什么被折叠?
被折叠的 条评论
为什么被折叠?
 到【灌水乐园】发言


