


Spring MVC自动配置 重要
SpringBoot 对静态资源的映射规则
@ConfigurationProperties(
    prefix = "spring.resources",
    ignoreUnknownFields = false
)
设置静态资源有关的参数,缓存时间
public class ResourceProperties {

    private static final String[] CLASSPATH_RESOURCE_LOCATIONS = new String[]{"classpath:/META-INF/resources/", "classpath:/resources/", "classpath:/static/", "classpath:/public/"};
/** 访问当前项目的任何资源
 private static final String[] CLASSPATH_RESOURCE_LOCATIONS = new String[]{
 "classpath:/META-INF/resources/",
 "classpath:/resources/",
 "classpath:/static/",
  "classpath:/public/"};
 /:当前项目根路径
 public void addResourceHandlers(ResourceHandlerRegistry registry) {
            if (!this.resourceProperties.isAddMappings()) {
                logger.debug("Default resource handling disabled");
            } else {
                Duration cachePeriod = this.resourceProperties.getCache().getPeriod();
                CacheControl cacheControl = this.resourceProperties.getCache().getCachecontrol().toHttpCacheControl();
                if (!registry.hasMappingForPattern("/webjars/**")) {
                    this.customizeResourceHandlerRegistration(registry.addResourceHandler(new String[]{"/webjars/**"}).addResourceLocations(new String[]{"classpath:/META-INF/resources/webjars/"}).setCachePeriod(this.getSeconds(cachePeriod)).setCacheControl(cacheControl));
                } 都来到这个这个路径找资源 classpath:/META-INF/resources/webjars/

                String staticPathPattern = this.mvcProperties.getStaticPathPattern();
                if (!registry.hasMappingForPattern(staticPathPattern)) {
                    this.customizeResourceHandlerRegistration(registry.addResourceHandler(new String[]{staticPathPattern}).addResourceLocations(WebMvcAutoConfiguration.getResourceLocations(this.resourceProperties.getStaticLocations())).setCachePeriod(this.getSeconds(cachePeriod)).setCacheControl(cacheControl));
                }

            }
        }

欢迎页的映射
//去找到静态文件夹下的所有的index.html页面, 被/**映射
       @Bean
        public WelcomePageHandlerMapping welcomePageHandlerMapping(ApplicationContext applicationContext) {
            WelcomePageHandlerMapping welcomePageHandlerMapping = new WelcomePageHandlerMapping(new TemplateAvailabilityProviders(applicationContext), applicationContext, this.getWelcomePage(), this.mvcProperties.getStaticPathPattern());
            welcomePageHandlerMapping.setInterceptors(this.getInterceptors());
            welcomePageHandlerMapping.setCorsConfigurations(this.getCorsConfigurations());
            return welcomePageHandlerMapping;
        }

        private Optional<Resource> getWelcomePage() {
            String[] locations = WebMvcAutoConfiguration.getResourceLocations(this.resourceProperties.getStaticLocations());
            return Arrays.stream(locations).map(this::getIndexHtml).filter(this::isReadable).findFirst();
        }
-
所有/webjars/**,都去 classpath:/META-INF/resource/webjars/ 找资源
-
制定自己喜欢的图标
  @Configuration
        @ConditionalOnProperty(
            value = {"spring.mvc.favicon.enabled"},
            matchIfMissing = true
        )
        public static class FaviconConfiguration implements ResourceLoaderAware {
            private final ResourceProperties resourceProperties;
            private ResourceLoader resourceLoader;

            public FaviconConfiguration(ResourceProperties resourceProperties) {
                this.resourceProperties = resourceProperties;
            }

            public void setResourceLoader(ResourceLoader resourceLoader) {
                this.resourceLoader = resourceLoader;
            }


**/favicon.ico 也是静态文件下找
            @Bean
            public SimpleUrlHandlerMapping faviconHandlerMapping() {
                SimpleUrlHandlerMapping mapping = new SimpleUrlHandlerMapping();
                mapping.setOrder(-2147483647);
                mapping.setUrlMap(Collections.singletonMap("**/favicon.ico", this.faviconRequestHandler()));
                return mapping;
            }

            @Bean
            public ResourceHttpRequestHandler faviconRequestHandler() {
                ResourceHttpRequestHandler requestHandler = new ResourceHttpRequestHandler();
                requestHandler.setLocations(this.resolveFaviconLocations());
                return requestHandler;
            }

            private List<Resource> resolveFaviconLocations() {
                String[] staticLocations = WebMvcAutoConfiguration.getResourceLocations(this.resourceProperties.getStaticLocations());
                List<Resource> locations = new ArrayList(staticLocations.length + 1);
                Stream var10000 = Arrays.stream(staticLocations);
                ResourceLoader var10001 = this.resourceLoader;
                var10001.getClass();
                var10000.map(var10001::getResource).forEach(locations::add);
                locations.add(new ClassPathResource("/"));
                return Collections.unmodifiableList(locations);
            }
        }
    }
**/favicon.ico 也是静态文件下找
自定义静态资源访问,对以下的文件夹进行授权访问 其他的文件夹得静态资源将不能访问
spring.resources.static-locations=classpath:/hello,classpath:/static,classpath:/atguigu
SpringBoot 模板引擎 Thymeleaf
引入thymeleaf
	    <properties>
	        <java.version>1.8</java.version>
	        <!--切换thymeleaf 版本-->
	        <thymeleaf.version>3.0.2.RELEASE</thymeleaf.version>
	        <thymeleaf-layout-dialect-version>2.1.1</thymeleaf-layout-dialect-version>
	    </properties>

        <dependency>
            <groupId>org.springframework.boot</groupId>
            <artifactId>spring-boot-starter-thymeleaf</artifactId>
        </dependency>
Thymeleaf 的默认规则
@ConfigurationProperties(
    prefix = "spring.thymeleaf"
)
public class ThymeleafProperties {
    private static final Charset DEFAULT_ENCODING;
    public static final String DEFAULT_PREFIX = "classpath:/templates/";
    public static final String DEFAULT_SUFFIX = ".html";
    private boolean checkTemplate = true;
    private boolean checkTemplateLocation = true;

只要我们把页面放在  classpath:/templates/   路径下 thymeleaf就能自动渲染
    private String prefix = "classpath:/templates/";
    private String suffix = ".html";
    private String mode = "HTML";
    }
语法:
官方文档:https://www.thymeleaf.org/
<!DOCTYPE html>
<html xmlns:th="http://www.thymeleaf.org"> // 导入名称空间
	<head>
		<title>Good Thymes Virtual Grocery</title>
		<meta http-equiv="Content-Type" content="text/html; charset=UTF-8" />
	</head>
	<body>
		<p th:text="${home.welcome}">Welcome to our grocery store!</p>
	</body>
</html>
语法规则
<ul>
	<li th:text="${item.description}" th:each="item : ${items}">Item description here...</li>
</ul>
<!-- User info follows -->
<div th:text="${...}">
</div>

遍历取值实例
<table>
	<th:block th:each="user : ${users}">
		<tr>
			<td th:text="${user.login}">...</td>
			<td th:text="${user.name}">...</td>
		</tr>
		<tr>
			<td colspan="2" th:text="${user.address}">...</td>
		</tr>
	</th:block>
</table>
标准表达式语法:
Variable Expressions: ${...}: 获取变量中的值
Selection Variable Expressions: *{...}: 选择表达式 和${}功能一致
配合 th:Object 一起使用
<div th:object="${session.user}">
	<p>Name: <span th:text="*{firstName}">Sebastian</span>.</p>
	<p>Surname: <span th:text="*{lastName}">Pepper</span>.</p>
	<p>Nationality: <span th:text="*{nationality}">Saturn</span>.</p>
</div>
Message Expressions: #{…} :去国际化内容的
Link URL Expressions: @{…}: 定义URlL
案例:
@{/order/process(execId=${execId},execType=‘FAST’)}
Fragment Expressions: ~{…}:引用片段
...
Text literals: 'one text' , 'Another one!' ,…
Number literals: 0 , 34 , 3.0 , 12.3 ,…
Boolean literals: true , false
Null literal: null
Literal tokens: one , sometext , main ,…
String concatenation: +
Literal substitutions: |The name is ${name}|
Binary operators: + , - , * , / , %
Minus sign (unary operator): -
Binary operators: and , or
Boolean negation (unary operator): ! , not
Comparators: > , < , >= , <= ( gt , lt , ge , le )
Equality operators: == , != ( eq , ne )
If-then: (if) ? (then)
If-then-else: (if) ? (then) : (else)
Default: (value) ?: (defaultvalue)
内置的一些工具对象:
#execInfo : information about the template being processed.
#messages : methods for obtaining externalized messages inside variables expressions, in the same way as they would be obtained using
#{…} syntax.
#uris : methods for escaping parts of URLs/URIs
#conversions : methods for executing the configured conversion service (if any).
#dates : methods for java.util.Date objects: formatting, component extraction, etc.
#calendars : analogous to
#dates , but for java.util.Calendar objects. #numbers : methods for formatting numeric objects.
#strings : methods for String objects: contains, startsWith, prepending/appending, etc.
#objects : methods for objects in general.
#bools : methods for boolean evaluation.
#arrays : methods for arrays. #lists : methods for lists. #sets : methods for sets.
#maps : methods for maps. #aggregates : methods for creating aggregates on arrays or collections.
#ids : methods for dealing with id attributes that might be repeated (for example, as a result of an iteration)
Spring Boot 默认的错误机制
浏览器返回的错误页面 浏览器的请求头优先接收 HTML 数据 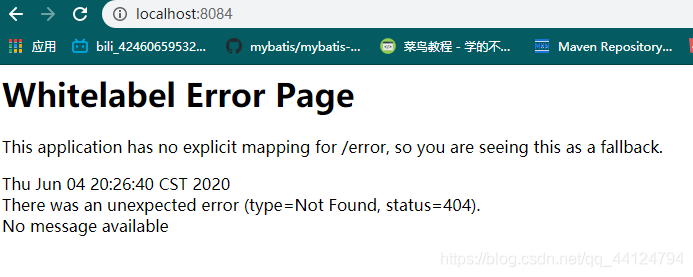 客户端返回的错误页面
客户端返回的是一个JSON数组
 {
    "timestamp": "2020-06-04T12:27:15.402+0000",
    "status": 404,
    "error": "Not Found",
    "message": "No message available",
    "path": "/"
}
原理参照
ErroeMvcAutoConfigruation的错误自动配置给容器中添加了以下组件
- DefaultErrorAttributes
	帮助我们 共享页面信息
   public Map<String, Object> getErrorAttributes(WebRequest webRequest, boolean includeStackTrace) {
        Map<String, Object> errorAttributes = new LinkedHashMap();
        errorAttributes.put("timestamp", new Date());
        this.addStatus(errorAttributes, webRequest);
        this.addErrorDetails(errorAttributes, webRequest, includeStackTrace);
        this.addPath(errorAttributes, webRequest);
        return errorAttributes;
    }


	获取 错误页面的 信息
	private void addStatus(Map<String, Object> errorAttributes, RequestAttributes requestAttributes) {
        Integer status = (Integer)this.getAttribute(requestAttributes, "javax.servlet.error.status_code");
        if (status == null) {
            errorAttributes.put("status", 999);
            errorAttributes.put("error", "None");
        } else {
            errorAttributes.put("status", status);

            try {
                errorAttributes.put("error", HttpStatus.valueOf(status).getReasonPhrase());
            } catch (Exception var5) {
                errorAttributes.put("error", "Http Status " + status);
            }

        }
    }
- BasicErrorController
处理/error请求
浏览器的请求头优先接收 HTML 数据
@Controller
@RequestMapping({"${server.error.path:${error.path:/error}}"})
public class BasicErrorController extends AbstractErrorController {

 @RequestMapping(
        produces = {"text/html"}
    )  产生 HTML 类型数据
    public ModelAndView errorHtml(HttpServletRequest request, HttpServletResponse response) {
        HttpStatus status = this.getStatus(request);
        Map<String, Object> model = Collections.unmodifiableMap(this.getErrorAttributes(request, this.isIncludeStackTrace(request, MediaType.TEXT_HTML)));
        response.setStatus(status.value());

		去哪个页面作为错误页面,包含页面地址和相应内容  resolveErrorView
        ModelAndView modelAndView = this.resolveErrorView(request, response, status, model);

        return modelAndView != null ? modelAndView : new ModelAndView("error", model);
    }

 resolveErrorView
this.resolveErrorView(request, response, status, model);

protected ModelAndView resolveErrorView(HttpServletRequest request, HttpServletResponse response, HttpStatus status, Map<String, Object> model) {
        Iterator var5 = this.errorViewResolvers.iterator();

        ModelAndView modelAndView;

        得到所有的 ModelAndView
        do {
            if (!var5.hasNext()) {
                return null;
            }

            ErrorViewResolver resolver = (ErrorViewResolver)var5.next();
            modelAndView = resolver.resolveErrorView(request, status, model);
        } while(modelAndView == null);

        return modelAndView;
    }

	产生 JSON 数据
    @RequestMapping
    public ResponseEntity<Map<String, Object>> error(HttpServletRequest request) {
        HttpStatus status = this.getStatus(request);
        if (status == HttpStatus.NO_CONTENT) {
            return new ResponseEntity(status);
        } else {
            Map<String, Object> body = this.getErrorAttributes(request, this.isIncludeStackTrace(request, MediaType.ALL));
            return new ResponseEntity(body, status);
        }
    }
- ErrorPageCustomizer
系统出现错误来到error请求
public class ErrorProperties {
    @Value("${error.path:/error}")
    private String path = "/error";
- DefaultErrorViewResolver
  public ModelAndView resolveErrorView(HttpServletRequest request, HttpStatus status, Map<String, Object> model) {
        ModelAndView modelAndView = this.resolve(String.valueOf(status.value()), model);
        if (modelAndView == null && SERIES_VIEWS.containsKey(status.series())) {
            modelAndView = this.resolve((String)SERIES_VIEWS.get(status.series()), model);
        }

        return modelAndView;
    }

    private ModelAndView resolve(String viewName, Map<String, Object> model) {

		默认Spring Boot 可以去找到一个页面
        String errorViewName = "error/" + viewName;


        TemplateAvailabilityProvider provider = this.templateAvailabilityProviders.getProvider(errorViewName, this.applicationContext);
        			如果模板引擎可以解析地址,就用模板引擎解析地址                   不可用,就在静态资源找对应的erroeView
        return provider != null ? new ModelAndView(errorViewName, model) : this.resolveResource(errorViewName, model);
    }

this.resolveResource(errorViewName, model)
  private ModelAndView resolveResource(String viewName, Map<String, Object> model) {
        String[] var3 = this.resourceProperties.getStaticLocations();
        int var4 = var3.length;

        for(int var5 = 0; var5 < var4; ++var5) {
            String location = var3[var5];

            try {
                Resource resource = this.applicationContext.getResource(location);
                resource = resource.createRelative(viewName + ".html");
                if (resource.exists()) {
                    return new ModelAndView(new DefaultErrorViewResolver.HtmlResourceView(resource), model);
                }
            } catch (Exception var8) {
            }
        }

        return null;
    }
步骤 :
系统出现 4xx 或 5xx 来到error请求
public class ErrorProperties {
    @Value("${error.path:/error}")
    private String path = "/error";
就会被 BasicErrorController 处理
@Controller
@RequestMapping({"${server.error.path:${error.path:/error}}"})
public class BasicErrorController extends AbstractErrorController {
给容器中添加了以下组件:四个错误定制的源码
    @Bean
    @ConditionalOnMissingBean(
        value = {ErrorAttributes.class},
        search = SearchStrategy.CURRENT
    )
    public DefaultErrorAttributes errorAttributes() {
        return new DefaultErrorAttributes(this.serverProperties.getError().isIncludeException());
    }

    @Bean
    @ConditionalOnMissingBean(
        value = {ErrorController.class},
        search = SearchStrategy.CURRENT
    )
    public BasicErrorController basicErrorController(ErrorAttributes errorAttributes) {
        return new BasicErrorController(errorAttributes, this.serverProperties.getError(), this.errorViewResolvers);
    }

    一旦出现 4XX 或者 5XX 时 ErrorPageCustomizer 就会生效 采用默认的定制的默认错误页面
    @Bean
    public ErrorMvcAutoConfiguration.ErrorPageCustomizer errorPageCustomizer() {
        return new ErrorMvcAutoConfiguration.ErrorPageCustomizer(this.serverProperties, this.dispatcherServletPath);

    }

	 @Configuration
    static class DefaultErrorViewResolverConfiguration {
        private final ApplicationContext applicationContext;
        private final ResourceProperties resourceProperties;

        DefaultErrorViewResolverConfiguration(ApplicationContext applicationContext, ResourceProperties resourceProperties) {
            this.applicationContext = applicationContext;
            this.resourceProperties = resourceProperties;
        }

        @Bean
        @ConditionalOnBean({DispatcherServlet.class})
        @ConditionalOnMissingBean({ErrorViewResolver.class})
        public DefaultErrorViewResolver conventionErrorViewResolver() {
            return new DefaultErrorViewResolver(this.applicationContext, this.resourceProperties);
        }
    }
总结:
如何定制错误页面?
1. 有模板引擎的情况下 创建一个 error的文件夹,以错误状态码命名
例: error/404.html
2. 我们可以使用 4XX 或 5XX 的方式命名
页面能获取到的信息:
timestamp:时间戳
status:状态码
error:错误提示
exception:异常对象
Message:异常消息
errors:JSR303验证
定制错误 信息 的获取
例:
取出状态码
<h1>status: [[${status}]]</h1>
取时间戳
<h1>timestamp: [[${timestamp}]]</h1>
- 无模板引擎:
. errors:默认在静态资源文件下查找 - 以上都没有错误页面,就默认来到 Spring Boot 的错误提示页面
如何定制错误数据
 @ControllerAdvice
    public class MyExceptionHandler {
        @ResponseBody
        @ExceptionHandler(UserNotExistException.class)
        public Map<String, Object> handleException(Exception e) {
            Map<String, Object> map = new HashMap<>();
            map.put("code", "user.notexist");
            map.put("message", e.getMessage());
            return map;
        }
    }//没有自适应效果...
//给容器中加入我们自己定义的ErrorAttributes
 @Component
 public class MyErrorAttributes extends DefaultErrorAttributes {
    @Override
    public Map<String, Object> getErrorAttributes(RequestAttributes requestAttributes, boolean includeStackTrace) {
        Map<String, Object> map = super.getErrorAttributes(requestAttributes, includeStackTrace);
        map.put("company", "atguigu");

		//从请求域中获取
		//	requestAttributes.getAttribute(name,scope);scope作用域
		 Map<String, Object> map = (Map<String, Object>)requestAttributes.getAttribute("ext",0);
		 map.put("ext",ext);
        return map;
    }
}
最终的效果:响应是自适应的,可以通过定制ErrorAttributes改变需要返回的内容,
Spring Boot 配置嵌入式servlet容器
Spring Boot默认使用的是嵌入式Servlet容器(Tomact)
server.port=8001
server.servlet.context-path=/crud

通用的Servlet容器设置
server.xx
Tomcat 的设置
源码
  public Tomcat() {
            this.uriEncoding = StandardCharsets.UTF_8;
            this.maxConnections = 8192;
            this.acceptCount = 100;
            this.additionalTldSkipPatterns = new ArrayList();
            this.resource = new ServerProperties.Tomcat.Resource();
        }
配置修改Tomact 端口号
    @Bean
    //一定要将这个定制器加入到容器中
    /public EmbeddedServletContainerCustomizer embeddedServletContainerCustomizer(){
        return new EmbeddedServletContainerCustomizer()  {
            //定制嵌入式的Servlet容器相关的规则
            /@Override public void customize(ConfigurableEmbeddedServletContainer container) {
                container.setPort(8083);
            }
        };
    }
注册 Servlet、Filter、Listener
ServletRegistrationBean
FilterRegistrationBean
ServletListenerRegistrationBean


 1061
1061


 被折叠的 条评论
为什么被折叠?
被折叠的 条评论
为什么被折叠?
 到【灌水乐园】发言


