


 本文详细介绍了如何在CentOS系统上配置SFTP服务,包括选择SFTP而非FTP的原因,检查OpenSSH版本和端口,创建专用用户和目录,配置sshd_config以增强安全性,禁用SSH登录并限制用户访问范围,以及重启服务进行测试。
一、场景
原考虑使用FTP对数据文件进行上传,因为FTP明文传输,SFTP传输加密后更加的可靠。同时因为FTP传输会另使用其他端口连接,不管是主动模式还是被动模式都会客户端或服务器端开启部分端口,最后考虑安全性使用SFTP。
tips:FTP也可以加上SSL进行加密
二、检查openSSH及端口
使用ssh -V 命令来查看openssh的版本,版本必须大于4.8p1,低于的这个版本需要升级。
[root@ecs-5036 opt]# ssh -V
OpenSSH_5.3p1, OpenSSL 1.0.1e-fips 11 Feb 2013
确保22端口是否打开
#本机shell命令行执行
telnet hostname 22
如果不通的话参考 CentOS7防火墙及端口设置
CentOS 6 使用 iptables
vim /etc/sysconfig/iptables
#添加下面配置  8080修改为所需要的端口
-A INPUT -m state --state NEW -m tcp -p tcp --dport 8080 -j ACCEPT

# wq保存并退出

#重启服务
/etc/init.d/iptables restart
三、创建SFTP相关用户及目录
useradd -s /sbin/nologin -M sftp_user #创建一个系统用户,并设置成不能登录,按需设置登录的shell和家目录
passwd sftp_user  #设置密码,也是sftp登录的密码,公网上尽可能复杂点

mkdir /var/sftp/sftp_user -pv  #创建sftp的根目录
chown root:root -R  /var/sftp/sftp_user  #将属组和属主都设置为root,必须,这里最容易出错

cd /var/sftp/sftp_user/

mkdir public  #创建共享目录

chown sftp_user:sftp_user -R /var/sftp/sftp_user/public/  #将共享目录的属组属主设为我们的sftp用户
四、编辑ssh配置文件
cp /etc/ssh/sshd_config /etc/ssh/sshd_config.bak  #备份原配置文件

vim /etc/ssh/sshd_config
1.修改sshd_config文件
配置内容如下:
#   $OpenBSD: sshd_config,v 1.80 2008/07/02 02:24:18 djm Exp $

# This is the sshd server system-wide configuration file.  See
# sshd_config(5) for more information.

# This sshd was compiled with PATH=/usr/local/bin:/bin:/usr/bin

# The strategy used for options in the default sshd_config shipped with
# OpenSSH is to specify options with their default value where
# possible, but leave them commented.  Uncommented options change a
# default value.

#Port 22
#AddressFamily any
#ListenAddress 0.0.0.0
#ListenAddress ::
Port 22

# Disable legacy (protocol version 1) support in the server for new
# installations. In future the default will change to require explicit
# activation of protocol 1
Protocol 2 #支持的SSH协议的版本号

# HostKey for protocol version 1
#HostKey /etc/ssh/ssh_host_key
# HostKeys for protocol version 2
#HostKey /etc/ssh/ssh_host_rsa_key
#HostKey /etc/ssh/ssh_host_dsa_key

# Lifetime and size of ephemeral version 1 server key
#KeyRegenerationInterval 1h
#ServerKeyBits 1024

# Logging
# obsoletes QuietMode and FascistLogging
#SyslogFacility AUTH
SyslogFacility AUTHPRIV   #将日志消息通过哪个日志子系统(facility)发送
#LogLevel INFO

# Authentication:

#LoginGraceTime 2m
#PermitRootLogin yes
#StrictModes yes
#MaxAuthTries 6
#MaxSessions 10

#RSAAuthentication yes
#PubkeyAuthentication yes
#AuthorizedKeysFile .ssh/authorized_keys
#AuthorizedKeysCommand none
#AuthorizedKeysCommandRunAs nobody

# For this to work you will also need host keys in /etc/ssh/ssh_known_hosts
#RhostsRSAAuthentication no
# similar for protocol version 2
#HostbasedAuthentication no
# Change to yes if you don't trust ~/.ssh/known_hosts for
# RhostsRSAAuthentication and HostbasedAuthentication
#IgnoreUserKnownHosts no
# Don't read the user's ~/.rhosts and ~/.shosts files
#IgnoreRhosts yes

# To disable tunneled clear text passwords, change to no here!
#PasswordAuthentication yes
#PermitEmptyPasswords no
PasswordAuthentication yes  #允许通过密码进行登录

# Change to no to disable s/key passwords
#ChallengeResponseAuthentication yes
ChallengeResponseAuthentication no  #是否允许质疑-应答(challenge-response)认证。默认值是"yes"。

# Kerberos options
#KerberosAuthentication no
#KerberosOrLocalPasswd yes
#KerberosTicketCleanup yes
#KerberosGetAFSToken no
#KerberosUseKuserok yes

# GSSAPI options
#GSSAPICleanupCredentials yes
GSSAPICleanupCredentials yes  #是否在用户退出登录后自动销毁用户凭证缓存。默认值是"yes"。仅用于SSH-2。
#GSSAPIStrictAcceptorCheck yes
#GSSAPIKeyExchange no

# Set this to 'yes' to enable PAM authentication, account processing,
# and session processing. If this is enabled, PAM authentication will
# be allowed through the ChallengeResponseAuthentication and
# PasswordAuthentication.  Depending on your PAM configuration,
# PAM authentication via ChallengeResponseAuthentication may bypass
# the setting of "PermitRootLogin without-password".
# If you just want the PAM account and session checks to run without
# PAM authentication, then enable this but set PasswordAuthentication
# and ChallengeResponseAuthentication to 'no'.
#UsePAM no
UsePAM yes  #是否启用pam认证

# Accept locale-related environment variables
AcceptEnv LANG LC_CTYPE LC_NUMERIC LC_TIME LC_COLLATE LC_MONETARY LC_MESSAGES  #指定客户端发送的哪些环境变量将会被传递到会话环境中。[注意]只有SSH-2协议支持环境变量的传递,可以设置多个
AcceptEnv LC_PAPER LC_NAME LC_ADDRESS LC_TELEPHONE LC_MEASUREMENT
AcceptEnv LC_IDENTIFICATION LC_ALL LANGUAGE
AcceptEnv XMODIFIERS

#AllowAgentForwarding yes
#AllowTcpForwarding yes
#GatewayPorts no
#X11Forwarding no
X11Forwarding yes  #是否允许进行 X11 转发。默认值是"no",设为"yes"表示允许
#X11DisplayOffset 10
#X11UseLocalhost yes
#PrintMotd yes
#PrintLastLog yes
#TCPKeepAlive yes
#UseLogin no
#UsePrivilegeSeparation yes
#PermitUserEnvironment no
#Compression delayed
#ClientAliveInterval 0
#ClientAliveCountMax 3
#ShowPatchLevel no
#PidFile /var/run/sshd.pid
#MaxStartups 10:30:100
#PermitTunnel no
#ChrootDirectory none

# no default banner path
#Banner none

# override default of no subsystems
#Subsystem  sftp    /usr/libexec/openssh/sftp-server
Subsystem       sftp    internal-sftp    #配置一个外部子系统,仅用于SSH-2协议。值是一个子系统的名字和对应的命令行(含选项和参数)。比如"sftp /usr/libexec/openssh/sftp-server"。,###这里配置为内部的
# Example of overriding settings on a per-user basis
#Match User anoncvs
#   X11Forwarding no
#   AllowTcpForwarding no
#   ForceCommand cvs server
GSSAPIAuthentication no #是否允许使用基于 GSSAPI 的用户认证。默认值为"no"。仅用于SSH-2。
UseDNS no   #是否对远程主机名进行反向解析
AllowTcpForwarding yes   #是否允许TCP转发
Compression yes #是否对通信数据进行加密,还是延迟到认证成功之后再对通信数据加密
MaxAuthTries 6  #指定每个连接最大允许的认证次数。默认值是 6
PermitRootLogin yes  #是否允许 root 登录
PrintMotd yes  #是否在每一次交互式登录时打印 /etc/motd 文件的内容
PubkeyAuthentication yes  #是否允许公钥认证。仅可以用于SSH-2。默认值为"yes"。
RSAAuthentication no  #是否允许使用纯 RSA 公钥认证。仅用于SSH-1。默认值是"yes"


Match User sftp_user  #对特定的用户单独配置,匹配到的用户会强制使用/bin/false shell,只能以sftp登录,无法使用ssh登录服务器,没有匹配到的用户或组可以直接sftp登录,但是根目录为自己的家目录,无法指定具体的根目录。也可以设置为组,例如:Match Group sftp

X11Forwarding no
AllowTcpForwarding yes
ForceCommand internal-sftp  #强制执行这里指定的命令而忽略客户端提供的任何命令
2.修改/etc/selinux/config文件
#将文件/etc/selinux/config中的SELINUX=enforcing修改为SELINUX=disabled,然后保存
vim /etc/selinux/config
SELINUX=enforcing #修改为disabled
五、重启ssh服务
service sshd restart重启成功后即可连接 使用WinSCP连接测试
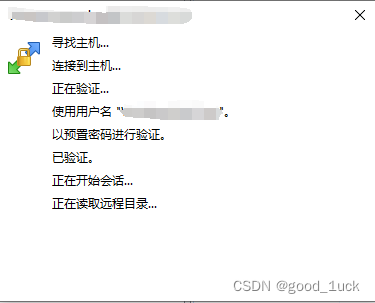
连接成功!
六、设置用户访问地址
前面设置了用户不能使用SSH进行登录,但是通过SFTP登录后,如果不进行单独设置,会让用户可以随意访问你的服务器中所有文件,设置用户访问目录,让用户只能在指定文件夹下进行访问。
修改sshd_config配置
在sshd_config中添加
ChrootDirectory   /var/sftp/sftp_user/  #限定用户的根目录
添加后用户登录根目录则是指定的目录,无法访问其他目录。
安装SFTP结束!


 1688
1688


 被折叠的 条评论
为什么被折叠?
被折叠的 条评论
为什么被折叠?
 到【灌水乐园】发言


