


- 我:ui,这里需要一个水珠效果图
- ui:现在没空,你不能自己在网上找一个或者自己做一个吗?
- 我:啊这…
- 我:行吧,你空了给我做一下
- ui:…哦可
手写就手写,谁怕谁,直接开干。
这里我们在一个新建的html中编写。
新建一个html。
在head标签中新建一个style标签,并去除多余边距。
这里为什么需要去除多余的边距呢?
是因为有些内核的浏览器会默认自带一些边距,为了在所有浏览器中看起来都是一样的效果,我们需要给它去除掉,也就是初始化一次。
<style>
    * {
        margin: 0;
        padding: 0;
    }
</style>
在body中新建一个div盒子用来呈现我们的水珠效果,我们先给他加个class类名为water
<div class="water" ></div>
我们接下来给body加个宽高和颜色,方便看我们的水珠效果
<style>
   body{
        width: 100vw;
        height: 100vh;
        background-color: aquamarine;
    }
</style>
在我们的浏览器中打开我们的html,除了body有颜色之外,其他啥也没有,如下图

我们给刚刚声明的.water类名添加基础样式
    .water{
            width: 100px;
            height: 100px;
            margin: 100px 50px;
            /* 前期使用,方便看效果 */
            border: 1px solid black;
        }
现在就有一个这样黑色的框框了

这啥呀?就一个黑色的框框哪里是水珠了。哎,别急嘛,我们给他加个border-radius看看
    .water{
            width: 100px;
            height: 100px;
            margin: 100px 50px;
            /* 前期使用,方便看效果 */
            border: 1px solid black;
            border-radius: 61% 39% 57% 43% / 46% 67% 33% 54%;
        }

现在看起来是不是有哪个轮廓了。
emmm…还是不像。
还有我之前都没见过border-radius这种写法,啥意思呢?
解释一哈:
这种写法一般很少使用,我们都是使用的简写。
简写:
border-radius: 50%;
转成全写就长这样
border-radius: 50% 50% 50% 50% / 50% 50% 50% 50%;
那你还是没有说是啥意思嘛,诶,解释它来了:
/前的四个数值表示圆角的水平半径
/后的四个数值表示圆角的直角半径
看张图,就知道所以然了。

如果还是不是很明白,我们又来画张图
下面代码中使用的简写方式,转成全写就是这样的border-radius: 50px 50px 50px 50px / 40px 40px 40px 40px;
border-radius: 50px / 40px;

相信你们这样就懂了。
谨记: 不论是圆角矩形、椭圆还是圆形,它所根据的是水平半径和垂直半径的值,根据这个给元素设置圆角的弧度。
所以一定要记住border-radius的完整写法,才能深刻的从根本上知道这“狡猾”的代码是怎么计算生成最终的图形样式的。
补充了一点border-radius的相关知识,我们继续,上面我们实现了一个黑色的框框,下面我们来给它添加内阴影,让它看起来更逼真。并且去掉才开始添加的border,不去掉的话看起来有点丑。
    .water{
            width: 100px;
            height: 100px;
            margin: 100px 50px;
            /* border: 1px solid black; */
            border-radius: 61% 39% 57% 43% / 46% 67% 33% 54%;
            box-shadow: inset 10px 20px 30px rgba(0, 0, 0, 0.5),
                            10px 10px 20px rgba(0, 0, 0, 0.3),
                            15px 15px 30px rgba(0, 0, 0, 0.05),
                        inset -10px -20px 30px rgba(255, 255, 255, 0.8);
        }

这里我就不说box-shadow了,我直接上MDN的链接地址。
为什么不说呢?打字累啊😭
加了box-shadow看起来是不是很nice了,我们现在在给他加两个水滴,看起来更真实一些,这里我使用的是伪类before和after实现。
直接上代码:
before
    .water::before{
            content: '';
            position: absolute;
            top: 15%;
            left: 50%;
            width: 10px;
            height: 10px;
            background-color: rgba(255, 255, 255, 0.8);
            border-radius: 46% 54% 36% 64% / 46% 43% 57% 54%;
        }
切记使用伪类一定要加content,不然不生效
after
    .water::after{
            content: '';
            position: absolute;
            top: 25%;
            left: 30%;
            width: 6px;
            height: 6px;
            background-color: rgba(255, 255, 255, 0.8);
            border-radius: 46% 54% 36% 64% / 46% 43% 57% 54%;
        }
关于这两个伪类的详细解释可以看MDN,这里我把地址给大家奉上: after、before
添加伪类的同时记得给water添加相对定位position: relative;。
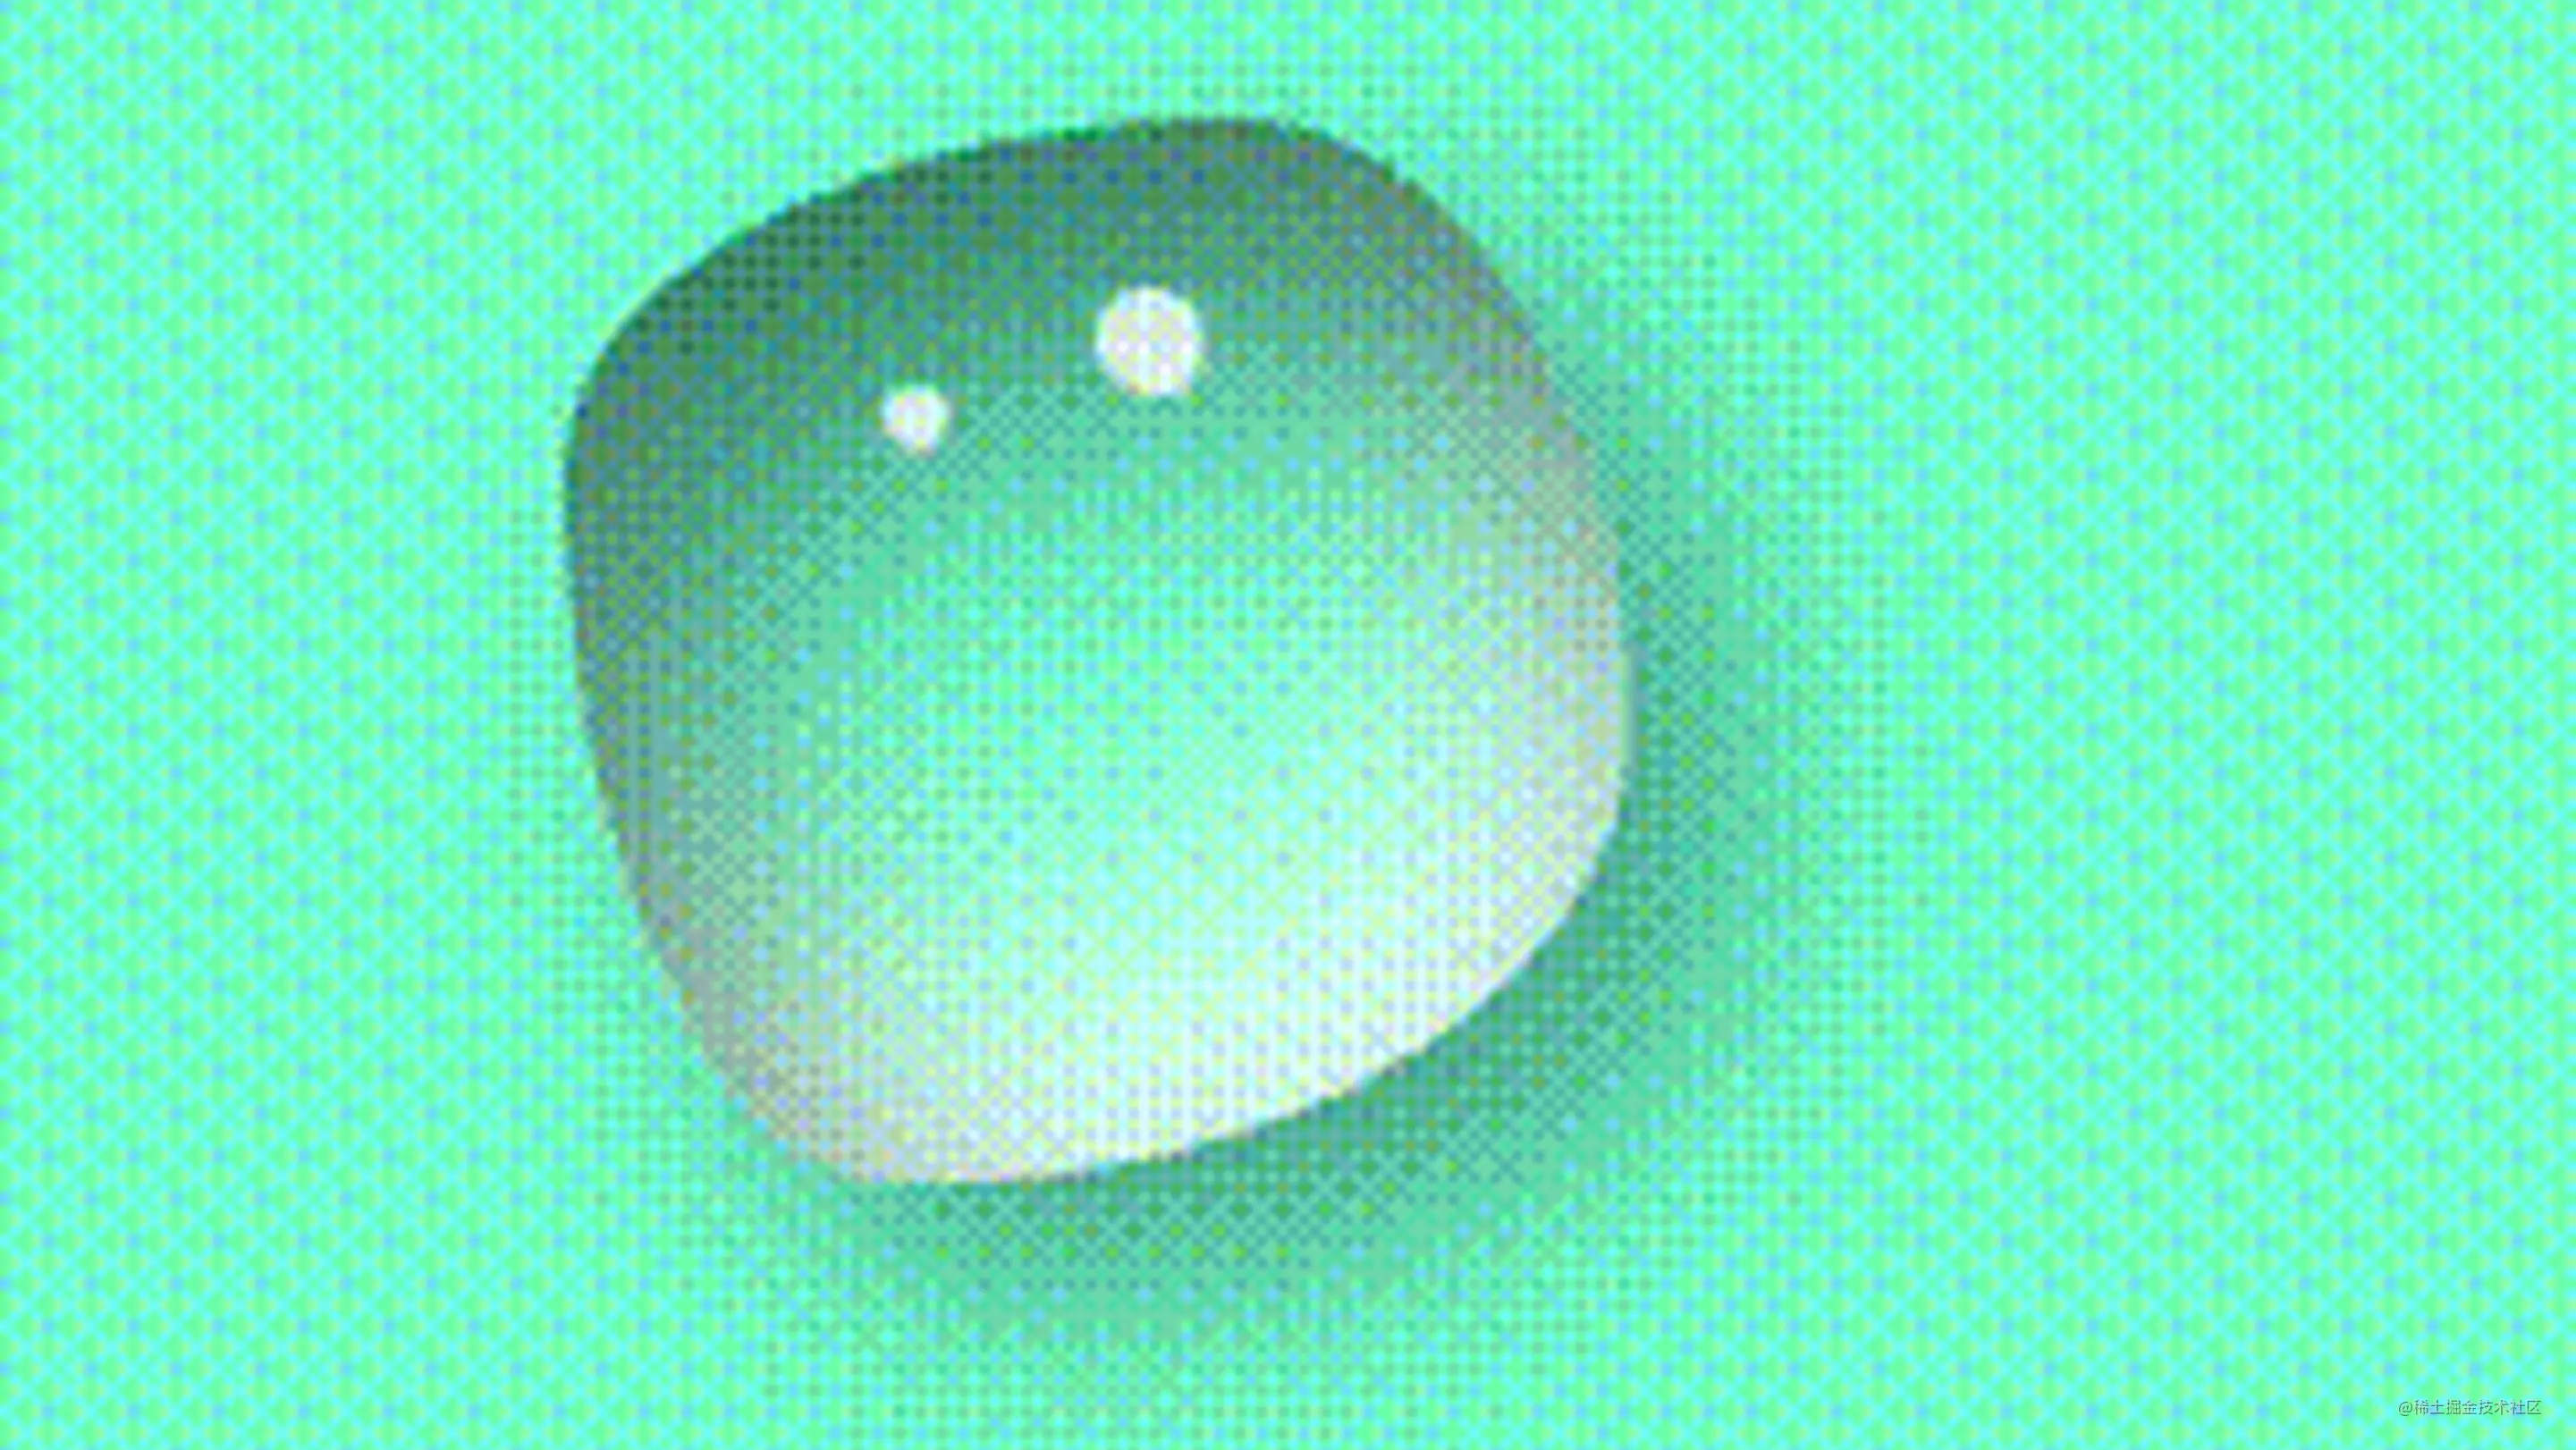
添加完就长这样了。现在还差最后一步,我们的小水珠就完成了。

我们给他加上动画animation属性,让他栩栩如生
给.water添加以下动画属性
animation: water-a 3s linear infinite alternate;
给.water::before添加以下动画
animation: water-b 2s linear infinite alternate;
现在终于到了最后一步了,我们编写两个名为water-a和water-b的动画
    @keyframes water-a {
            25% {
                border-radius: 58% 42% 59% 41% / 52% 56% 54% 48%;
            }
            50% {
                border-radius: 46% 54% 40% 60% / 52% 33% 67% 48%;
            }
            75% {
                border-radius: 65% 35% 71% 29% / 31% 60% 40% 69%;
            }
            100% {
                border-radius: 60% 40% 43% 57% / 45% 51% 49% 55%;
            }
        }
        @keyframes water-b {
            25% {
                top: 17%;
                left: 50%;
            }
            50% {
                top: 20%;
                left: 50%;
            }
            100% {
                top: 22%;
                left: 50%;
            }
        }
好了,搞定收工,我们来看一下完整效果

最后附上完整代码:
<!DOCTYPE html>
<html lang="en">
<head>
    <meta charset="UTF-8">
    <meta http-equiv="X-UA-Compatible" content="IE=edge">
    <meta name="viewport" content="width=device-width, initial-scale=1.0">
    <title>Document</title>
    <style>
        * {
            margin: 0;
            padding: 0;
        }
        body{
            width: 100vw;
            height: 100vh;
            background-color: aquamarine;
        }
        .water{
            width: 100px;
            height: 100px;
            margin: 100px 50px;
            /* border: 1px solid black; */
            border-radius: 61% 39% 57% 43% / 46% 67% 33% 54%;
            box-shadow: inset 10px 20px 30px rgba(0, 0, 0, 0.5),
                            10px 10px 20px rgba(0, 0, 0, 0.3),
                            15px 15px 30px rgba(0, 0, 0, 0.05),
                        inset -10px -20px 30px rgba(255, 255, 255, 0.8);
            position: relative;
            animation: water-a 3s linear infinite alternate;
        }
        .water::before{
            content: '';
            position: absolute;
            top: 15%;
            left: 50%;
            width: 10px;
            height: 10px;
            background-color: rgba(255, 255, 255, 0.8);
            border-radius: 46% 54% 36% 64% / 46% 43% 57% 54%;
            animation: water-b 2s linear infinite alternate;
        }
        .water::after{
            content: '';
            position: absolute;
            top: 25%;
            left: 30%;
            width: 6px;
            height: 6px;
            background-color: rgba(255, 255, 255, 0.8);
            border-radius: 46% 54% 36% 64% / 46% 43% 57% 54%;
        }
        @keyframes water-a {
            25% {
                border-radius: 58% 42% 59% 41% / 52% 56% 54% 48%;
            }
            50% {
                border-radius: 46% 54% 40% 60% / 52% 33% 67% 48%;
            }
            75% {
                border-radius: 65% 35% 71% 29% / 31% 60% 40% 69%;
            }
            100% {
                border-radius: 60% 40% 43% 57% / 45% 51% 49% 55%;
            }
        }
        @keyframes water-b {
            25% {
                top: 17%;
                left: 50%;
            }
            50% {
                top: 20%;
                left: 50%;
            }
            100% {
                top: 22%;
                left: 50%;
            }
        }
    </style>
</head>
<body>
    <div class="water" ></div>
</body>
</html>
终于搞定了。
还是 假巴意思(直译成普通话差不多就是故意的意思)的总结一下子,本篇的难点在于调试border-radius的圆角比例,怎么让他看起来更真实。
哦可,总结完了。
散会。
本篇使用css实现水珠/水滴效果的文章到此结束。


 被折叠的 条评论
为什么被折叠?
被折叠的 条评论
为什么被折叠?
 到【灌水乐园】发言


