


使用 react-markdown 实现 markdown 的渲染,使用 @tailwindcss/typography 实现好看的样式。
项目基于 Vite + React + TypeScript搭建,包管理工具使用的是 pnpm,需要安装 TailwindCSS。
首先安装 react-markdown、rehype-highlight 和 highlight.js:
pnpm install react-markdown rehype-highlight highlight.js
react-markdown 用于解析 markdown 语法,rehype-highlight 和 highlight.js 用于突出高亮显示代码块。
Markdown 渲染
封装 markdown 组件。新建 src/components/Markdown.tsx 文件:
import ReactMarkdown from "react-markdown";
import rehypeHighlight from "rehype-highlight";

import "highlight.js/styles/atom-one-dark.css";

const Markdown = ({ content }: { content: string }) => {
  return (
    <ReactMarkdown rehypePlugins={[rehypeHighlight]}>{content}</ReactMarkdown>
  );
};

export default Markdown;
在 App.tsx 文件中引入:
import React, { useState } from "react";
import Markdown from "@/components/Markdown";

function App() {
  const [content, setContent] = useState("");

  const handleInput = (e: React.FormEvent<HTMLTextAreaElement>) => {
    setContent(e.currentTarget.value);
  };

  return (
    <div className="mx-auto max-w-2xl space-y-4 py-4">
      <textarea
        value={content}
        onInput={handleInput}
        rows={8}
        className="block w-full rounded-md border-0 bg-zinc-100 py-1.5 text-zinc-900 shadow-sm ring-1 ring-inset ring-gray-300 focus:ring-inset dark:bg-zinc-900 dark:text-zinc-100 dark:ring-zinc-700 sm:text-sm sm:leading-6"
      />
      <Markdown content={content} />
    </div>
  );
}

export default App;
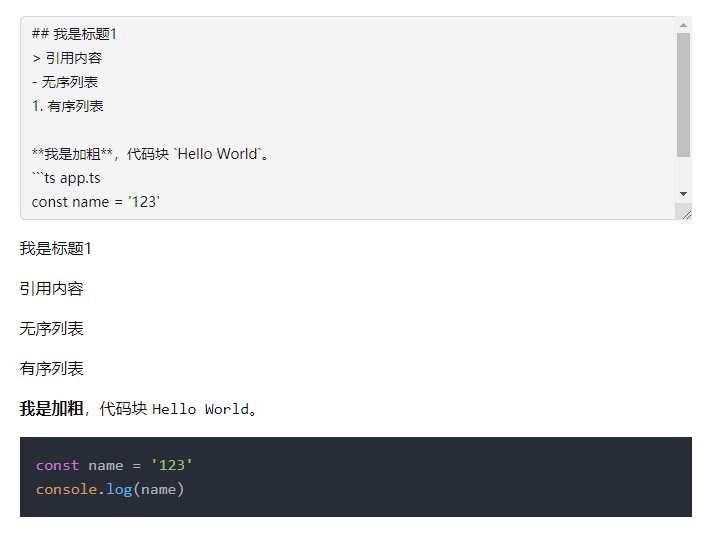
此时已经完成了最基本的渲染功能,但是没有任何样式。
样式美化
安装 @tailwindcss/typography:
pnpm install -D @tailwindcss/typography
在 tailwind.config.js 中配置插件:
/** @type {import('tailwindcss').Config} */
import Form from "@tailwindcss/forms";
import Typography from "@tailwindcss/typography";
export default {
  darkMode: "class",
  content: ["./index.html", "./src/**/*.{js,ts,jsx,tsx}"],
  theme: {
    extend: {},
  },
  plugins: [Form, Typography],
};
此外我还安装了 @tailwindcss/forms 插件,只是为了让上面那个 textarea 更好看一些。
修改 src/components/Markdown.tsx文件:
import ReactMarkdown from "react-markdown";
import rehypeHighlight from "rehype-highlight";

import "highlight.js/styles/atom-one-dark.css";

const Markdown = ({ content }: { content: string }) => {
  return (
    <ReactMarkdown
      rehypePlugins={[rehypeHighlight]}
      className="prose prose-zinc max-w-none dark:prose-invert"
    >
      {content}
    </ReactMarkdown>
  );
};

export default Markdown;
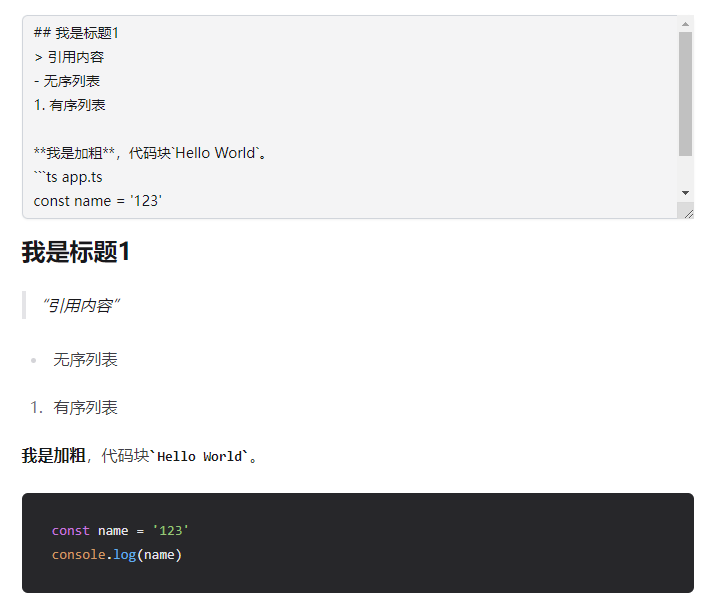
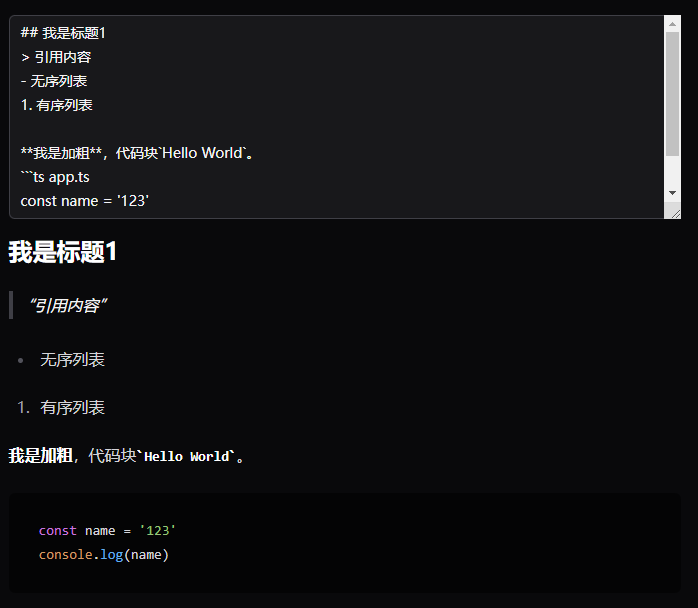
添加 class:prose prose-zinc max-w-none dark:prose-invert,然后就实现了样式的美化,并且适配暗黑模式。
代码块复制
安装 lucide-react 图标库:
pnpm install lucide-react
新建 src/components/CopyButton.tsx 文件:
import { Copy, Check } from "lucide-react";
import { useState } from "react";

const CopyButton = ({ id }: { id: string }) => {
  const [copied, setCopited] = useState(false);

  const onCopy = async () => {
    try {
      setCopited(true);
      const text = document.getElementById(id)!.innerText;
      await navigator.clipboard.writeText(text);
      setTimeout(() => {
        setCopited(false);
      }, 1000);
    } catch (error) {
      console.log(error);
    }
  };

  return (
    <button
      onClick={onCopy}
      className="inline-flex rounded-md p-2 hover:bg-zinc-200 dark:hover:bg-zinc-800"
    >
      <Copy
        size={16}
        className={`transition-all
        ${copied ? "scale-0" : "scale-100"}
      `}
      />
      <Check
        size={16}
        className={`absolute transition-all ${
          copied ? "scale-100" : "scale-0"
        }`}
      />
    </button>
  );
};

export default CopyButton;
修改 src/components/Markdown.tsx 文件:
import ReactMarkdown from "react-markdown";
import rehypeHighlight from "rehype-highlight";
import { Terminal } from "lucide-react";

import "highlight.js/styles/atom-one-dark.css";
import CopyButton from "./CopyButton";

const Markdown = ({ content }: { content: string }) => {
  return (
    <ReactMarkdown
      rehypePlugins={[rehypeHighlight]}
      components={{
        pre: ({ children }) => <pre className="not-prose">{children}</pre>,
        code: ({ node, className, children, ...props }) => {
          const match = /language-(\w+)/.exec(className || "");
          if (match?.length) {
            const id = Math.random().toString(36).substr(2, 9);
            return (
              <div className="not-prose rounded-md border">
                <div className="flex h-12 items-center justify-between bg-zinc-100 px-4 dark:bg-zinc-900">
                  <div className="flex items-center gap-2">
                    <Terminal size={18} />
                    <p className="text-sm text-zinc-600 dark:text-zinc-400">
                      {node?.data?.meta}
                    </p>
                  </div>
                  <CopyButton id={id} />
                </div>
                <div className="overflow-x-auto">
                  <div id={id} className="p-4">
                    {children}
                  </div>
                </div>
              </div>
            );
          } else {
            return (
              <code
                {...props}
                className="not-prose rounded bg-gray-100 px-1 dark:bg-zinc-900"
              >
                {children}
              </code>
            );
          }
        },
      }}
      className="prose prose-zinc max-w-2xl dark:prose-invert"
    >
      {content}
    </ReactMarkdown>
  );
};

export default Markdown;

此时就实现了代码块复制的功能,并且点击复制按钮还会有一个动画效果。


 1186
1186

 被折叠的 条评论
为什么被折叠?
被折叠的 条评论
为什么被折叠?
 到【灌水乐园】发言


