


概述
Redux的核心思想很简单,就是一个发布订阅监听数据的变化,再限定只能通过dispatch去更改数据。redux的三大特性这里再提一下:
- 数据来源唯一
- 数据只读,只能通过dispatch修改数据
- reducer是一个纯函数
文章将按照下面的步骤进行:
- 实现一个发布订阅
- 实现combineReducers对reducer进行切片
- 实现react-redux的connect函数,将发布订阅和视图渲染关联到一起
- 实现applyMiddleware
一、发布订阅
import { useEffect, useState } from 'react';
function createStore(reducer, initState) {
function dispatch(action) {
const newState = reducer(this.state, action);
this.state = newState;
this.listeners.forEach(fn => fn());
};
function getState() {
return this.state;
};
function subscribe(fn) {
this.listeners.push(fn);
};
const store = {
listeners: [],
state: initState,
dispatch,
getState,
subscribe,
};
return store;
};
const reducer = (state = {}, action) => {
const todoList = state?.todoList || [];
switch (action.type) {
case 'ADD': return { ...state, todoList: [...todoList, 'newData'] };
case 'DELETE': return { ...state, todoList: [...todoList].slice(1) };
default: return state;
}
};
// 使用
const initData = {
todoList: ['apple', 'orange', 'banana', 'grape', 'watermelon']
};
const myStore = createStore(reducer, initData);
function App() {
useEffect(() => {
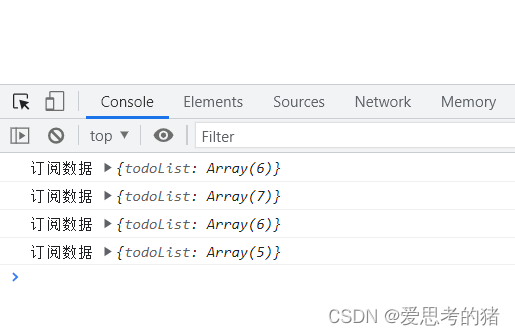
myStore.subscribe(() => {
console.log('订阅数据', myStore.getState());
});
}, []);
return (
<div className="App">
<button onClick={() => myStore.dispatch({type:'ADD'})}>添加</button>
<button onClick={() => myStore.dispatch({type:'DELETE'})}>删除</button>
</div>
);
}
export default App;
点击按钮进行添加和删除操作
二、combineReducers的实现
const combineReducers = (reducers) => (state, action) => {
  const reducerKeys = Object.keys(reducers);
  let finalReducers = {};
  for (let i = 0; i < reducerKeys.length; i++) {
    const key = reducerKeys[i];
    if (typeof reducers[key] === 'function') {
      finalReducers[key] = reducers[key]
    }
  };

  let hasChanged = false;
  const nextState = {};
  const finalReducerKeys = Object.keys(finalReducers);

  for (let i = 0; i < finalReducerKeys.length; i++) {
    const key = finalReducerKeys[i];
    const previousStateForKey = state[key];
    const reducer = finalReducers[key];
    const nextStateForKey = reducer(previousStateForKey, action);
    nextState[key] = nextStateForKey;
    hasChanged = hasChanged || previousStateForKey !== nextStateForKey;
  };
  return hasChanged ? nextState : state;
};
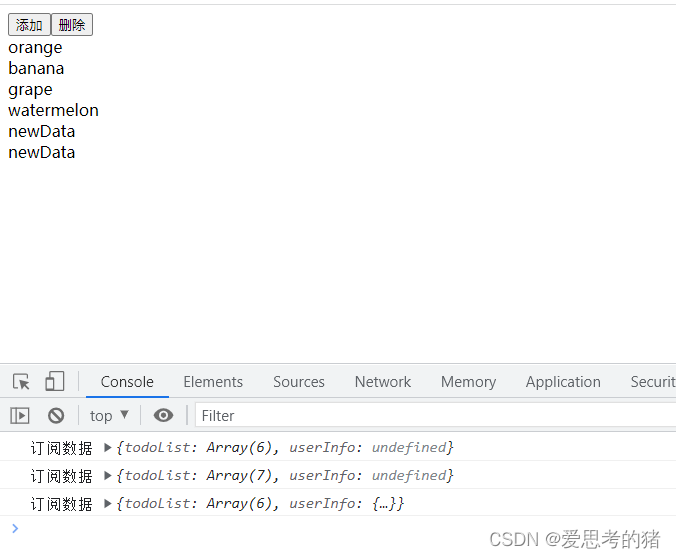
改写reducer,进行分片
const todoListReducer = ( state=[],action)=>{
   switch(action.type){
     case 'ADD': return [...state,'newData'];
     case 'DELETE': return [...state].slice(1);
     default :return state;
   };
};

const userInfoReducer=(state={},action)=>{
 switch(action.type){
  case 'ADD': return action.userInfo;
  case 'DELETE': return {};
  default :return state;
 }
};
引入的地方进行改写
const appReducer = combineReducers({
   todoList:todoListReducer,
   userInfo:userInfoReducer,
});

const myStore = createStore(appReducer, initData);
三、react-redux的实现
前面我们已经实现了发布订阅,接下来需要将数据的变化和store的state关联起来。实现一个connect函数将store中高的state和dispatch映射到组件的props。connect是一个高阶组件,接收store中的state和dispatch并将它们映射到组件的props。
function connect(mapStateToProps, mapDispatchToProps) {
  return function (WrapComponent) {
    return function (props) {

      const [state,setState] = useState(mapStateToProps(myStore.getState()));
      const dispatch = mapDispatchToProps(myStore.dispatch.bind(myStore))

      useEffect(()=>{
        myStore.subscribe(()=>{
           setState(mapStateToProps(myStore.getState()));
        })
      },[]);

      return <WrapComponent {...props}  {...dispatch} {...state} />
    }
  }
};
在组件中使用
const mapStateToProps = (state) => {
  return {
    todoList: state.todoList,
    userInfo: state.userInfo
  };
};

const mapDispatchToProps = (dispatch) => {
  return {
    addTodo: () => dispatch({ type: 'ADD' }),
    deleteToDo: () => dispatch({ type: 'DELETE' }),
  };
};

function List(props) {
  useEffect(() => {
    // store中的数据变化时通过更新组件的state渲染视图
    myStore.subscribe(() => {
      console.log('订阅数据', myStore.getState());
    });
  }, []);

  const renderList = useMemo(() => {
    return props.todoList.map((todo,index) => <div key={index}>{todo}</div>)
  }, [props.todoList]);

  return (
    <div className="List">
      <button onClick={()=> props.addTodo()}>添加</button>
      <button onClick={()=> props.deleteToDo()}>删除</button>
      {renderList}
    </div>
  );
}

export default connect(mapStateToProps, mapDispatchToProps)(List);
现在点击增加和删除,页面视图也会跟着更新
四、applyMiddleware的实现
applyMiddleware的实现上篇文章中讲过了,这里不再多讲直接上代码
const applyMiddleware = middlewares => store=>{
  middlewares.forEach(middleware => {
    store.dispatch = middleware(store)(store.dispatch);
  });
};
在createStore中调用applyMiddleWare
function createStore(reducer, initState, applyMiddleware) {

  function dispatch(action) {
    const newState = reducer(this.state, action);
    this.state = newState;
    this.listeners.forEach(fn => fn());
  };

  function getState() {
    return this.state;
  };

  function subscribe(fn) {
    this.listeners.push(fn);
  };

  const store = {
    listeners: [],
    state: initState,
    dispatch,
    getState,
    subscribe,
  };

  //添加中间件
  if(typeof applyMiddleware ==='function') applyMiddleware(store);
  return store;
};
使用log中间件和thunk中间件,现在可以dispatch一个对象或者函数了。
// 日志中间件
const logger = store => next => action => {
  console.log('获取到日志记录')
  const result = next.bind(store)(action);
  console.log('修改后的值为', store.getState());
  return result;
};

// redux-thunk
const thunk = store => next => action => {
  if (typeof action === 'function') {
    action(store);
  } else {
   return next(action);
  }
};
const myStore = createStore(appReducer, initData, applyMiddleware([logger,thunk]));
codesandbox: 点我查看完整代码
传送门:
1. redux的中间件实现思路
2. redux的概念介绍和基础使用
3. Redux Tool Kit(RTK)的使用


 267
267


 被折叠的 条评论
为什么被折叠?
被折叠的 条评论
为什么被折叠?
 到【灌水乐园】发言


