


前端加密对抗——CDP远程调用Debug断点函数python代码实现
前几天看了看tools推送的前端加密的文章:前端加密对抗Part2-通过CDP远程调用Debug断点函数
觉得这个方法很方便,以前经常遇到开发自己改了加密代码导致同样是AES等加密算法,加密出来不一样,但是用CDP的话就能解决这个问题。上面那篇也没有具体实现的源码,于是自己研究了下,基本实现了,暂时没找到全流程加解密的站,找到了再把返回包解密的代码补上。
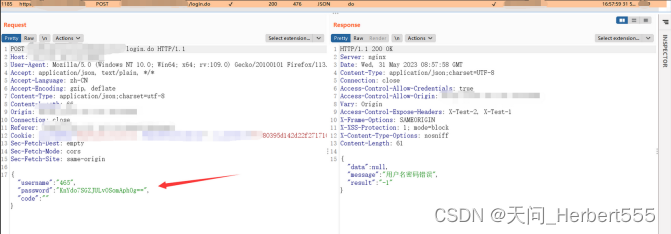
测试网址:某网站的登录接口。
首先设置中开启Protocol Monitor 添加协议监视器
实现请求断点处函数
正常抓登录包,密码是加密的
找到加解密函数,打断点后控制台可以直接调用。 使用cdp调用加解密函数:
代码
import json
import requests
import websocket


def websocket_conn():
    # websocket_conn 连接
    resp = requests.get('http://127.0.0.1:9222/json')
    assert resp.status_code == 200
    ws_url = resp.json()[0].get('webSocketDebuggerUrl')
    return websocket.create_connection(ws_url)


def execute_cdp(conn: websocket, command: dict):
    # 执行  dp
    conn.send(json.dumps(command))
    # 接受websocket的响应,并将字符串转换为 dict()
    return json.loads(conn.recv())


def main():
    conn = websocket_conn()
    # js = "console.log('hello world')" # 控制台打印 hello world
    command = {
        'method': 'Debugger.evaluateOnCallFrame',  # 处理 传进去的 expression
        'id': int(), # id需要传一个整型,否则会报错
        'params': {
            'callFrameId': callFrameId,
            'expression': expression,
            'objectGroup': 'console',
            'includeCommandLineAPI': True,
        }
    }
    resp = execute_cdp(conn, command)
    print(resp["result"]["result"]['value'])


if __name__ == '__main__':
    callFrameId = "5889892333005756436.1.0"
    expression = 'Object(b[\"b\"])(\"123456\")'
    main()
运行发现调用加密函数加密成功!
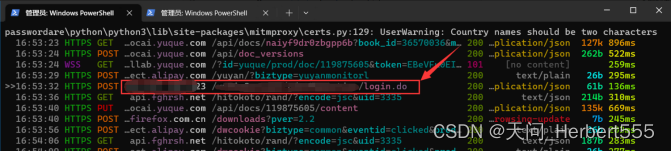
mitmproxy实现加解密
这里分为en_proxy.py和de_proxy.py两个文件
流程为:
浏览器数据包——>de_proxy.py(解密请求包)
——>burp(此时burp为解密的请求包)
——>en_proxy.py(burp再通过User options将请求包发给en_proxy加密,加密后发给服务器)
——>服务端(服务端返回加密的数据)
——>en_proxy.py(en_proxy还负责解密服务端发过来的数据)
首先实现de_proxy.py
from mitmproxy import http, ctx
import json
from tool.cdp3 import *


class DecryptPassword:
    # 解密请求包
    def request(self, flow: http.HTTPFlow) -> None:
        if flow.request.method == 'POST' and 'application/json' in flow.request.headers['Content-Type']:
            # 解析请求体中的JSON数据
            req_data = json.loads(flow.request.text)
            # 判断是否包含password参数
            if 'password' in req_data.keys():
                # 进行解密操作
                data = req_data['password']
                callFrameId = "5889892333005756436.1.0"
                de_expression = f'Object(b[\"a\"])(\"{data}\")'
                # 对参数进行解密
                decrypted_password = EZ_CDP(callFrameId, de_expression).encrypted()
                print(decrypted_password)
                # 修改JSON数据中的password参数值
                req_data['password'] = decrypted_password
                # 将修改后的JSON数据转换成字符串形式
                # 更新请求体中的数据
                flow.request.text = json.dumps(req_data)


addons = [
    DecryptPassword()
]
命令行执行
mitmproxy --mode upstream:http://127.0.0.1:8080 -s de_proxy.py --listen-port 8989 --ssl-insecure

--mode upstream:http://127.0.0.1:8080:设置二级代理,解密请求包后发给burp
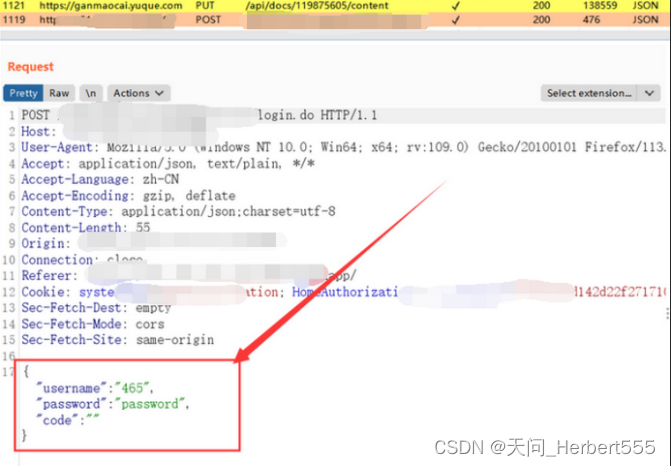
此时,burp收到的请求包是解密的
查看经de_proxy.py处理的数据包:
此时,密码是解密的 burp也是收到解密包
BURP User options设置Upstream Proxy Servers为en_proxy.py的地址,我这里是127.0.0.1:8990
en_proxy.py实现,将burp发过来的请求包再加密发给服务端,这里其实还负责将服务端发过来的数据解密,但是由于这个网址这里只加密了密码,返回包没加密就没加这个功能,添加个response函数使用解密函数再解密一下返回包即可。
from mitmproxy import http, ctx
import json
from tool.cdp3 import *


class EncryptPassword:
    # 解密请求包
    def request(self, flow: http.HTTPFlow) -> None:
        if flow.request.method == 'POST' and 'application/json' in flow.request.headers['Content-Type']:
            # 解析请求体中的JSON数据
            req_data = json.loads(flow.request.text)
            # 判断是否包含password参数
            if 'password' in req_data.keys():
                # 进行加密操作
                data = req_data['password']
                callFrameId = "5889892333005756436.1.0"
                de_expression = f'Object(b[\"b\"])(\"{data}\")'
                # 对参数进行解密
                decrypted_password = EZ_CDP(callFrameId, de_expression).encrypted()
                print(decrypted_password)
                # 修改JSON数据中的password参数值
                req_data['password'] = decrypted_password
                # 将修改后的JSON数据转换成字符串形式
                # 更新请求体中的数据
                flow.request.text = json.dumps(req_data)


addons = [
    EncryptPassword()
]
命令行执行
mitmproxy -s en_proxy.py --listen-port 8990 --ssl-insecure
查看该数据包,可以发现发送给服务器的数据包加密了 此时发登录包
 请求数据是解密的,返回内容也没问题。
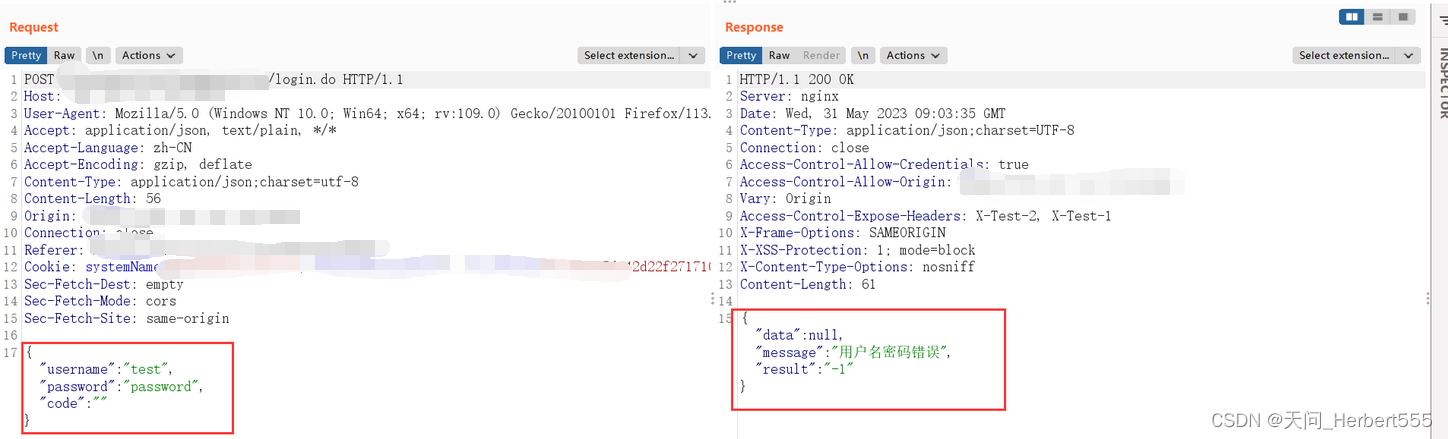


 3699
3699


 被折叠的 条评论
为什么被折叠?
被折叠的 条评论
为什么被折叠?
 到【灌水乐园】发言


