


本文简单介绍下如何在idea项目中运用SpringMVC,
首先是导入依赖:
	<dependency>
        <groupId>org.springframework</groupId>
        <artifactId>spring-webmvc</artifactId>
        <version>${spring.version}</version>
      </dependency>
这里要注意的是,如果你的项目pom.xml依赖中有了如下图的jar包,则把他替换,
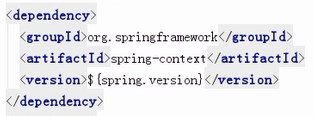
因为spring-webwvc中已经有了这一个,如果不删则可能出现类的冲突。

然后再加上jstl依赖,org.springframework.web.servlet.view.JstlView在视图解析时需要这二个jar包,用于分页标签。
<dependency>
          <groupId>jstl</groupId>
          <artifactId>jstl</artifactId>
          <version>1.2</version>
      </dependency>
      <dependency>
          <groupId>taglibs</groupId>
          <artifactId>standard</artifactId>
          <version>1.1.2</version>
      </dependency>
还需要一个tomcat与jsp集成的一个api:
 <tomcat-jsp-api.version>8.0.47</tomcat-jsp-api.version>
 <dependency>
      <groupId>org.apache.tomcat</groupId>
      <artifactId>tomcat-jsp-api</artifactId>
      <version>${tomcat-jsp-api.version}</version>
    </dependency>
在/WEB-INF创建一个springmvc-servlet.xml:
开启注解以及扫描那些包,并配置视图解析器。
<?xml version="1.0" encoding="UTF-8"?>
<beans xmlns="http://www.springframework.org/schema/beans"
xmlns:xsi="http://www.w3.org/2001/XMLSchema-instance"
xmlns:context="http://www.springframework.org/schema/context"
xmlns:mvc="http://www.springframework.org/schema/mvc" xmlns:aop="http://www.springframework.org/schema/aop"
xsi:schemaLocation="http://www.springframework.org/schema/beans http://www.springframework.org/schema/beans/spring-beans.xsd
http://www.springframework.org/schema/context http://www.springframework.org/schema/context/spring-context-4.3.xsd http://www.springframework.org/schema/mvc http://www.springframework.org/schema/mvc/spring-mvc.xsd http://www.springframework.org/schema/aop http://www.springframework.org/schema/aop/spring-aop.xsd">
<!-- 通过context:component-scan元素扫描指定包下的控制器-->
<!--1) 扫描com.javaxl.zf及子子孙孙包下的控制器(扫描范围过大,耗时)-->
<aop:aspectj-autoproxy/>
<context:component-scan base-package="com.zlk"/>
<!--2) 此标签默认注册DefaultAnnotationHandlerMapping和AnnotationMethodHandlerAdapter -->
<!--两个bean,这两个bean是spring MVC为@Controllers分发请求所必须的。并提供了数据绑定支持,-->
<!--@NumberFormatannotation支持,@DateTimeFormat支持,@Valid支持,读写XML的支持(JAXB),读写JSON的支持(Jackson)-->
<mvc:annotation-driven></mvc:annotation-driven>
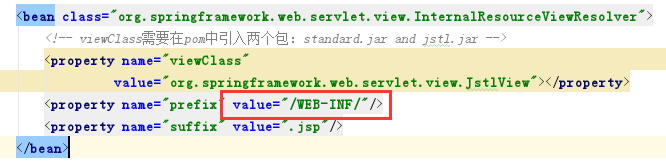
<!--3) ViewResolver -->
<bean class="org.springframework.web.servlet.view.InternalResourceViewResolver">
<!-- viewClass需要在pom中引入两个包:standard.jar and jstl.jar -->
<property name="viewClass"
value="org.springframework.web.servlet.view.JstlView"></property>
<property name="prefix" value="/"/>
<property name="suffix" value=".jsp"/>
</bean>
<!--4) 单独处理图片、样式、js等资源 -->
<!--<mvc:resources location="/css/" mapping="/css/**"/>-->
<!--<mvc:resources location="/images/" mapping="/images/**"/>-->
<!--<mvc:resources location="/js/" mapping="/js/**"/>-->
</beans>
然后在web.xml中配置监听器以及核心中央控制器和处理中文乱码。
<web-app xmlns="http://xmlns.jcp.org/xml/ns/javaee"
         xmlns:xsi="http://www.w3.org/2001/XMLSchema-instance"
         xsi:schemaLocation="http://xmlns.jcp.org/xml/ns/javaee http://xmlns.jcp.org/xml/ns/javaee/web-app_3_1.xsd"
         version="3.1">
  <display-name>Archetype Created Web Application</display-name>
  <context-param>
    <param-name>contextConfigLocation</param-name>
    <param-value>classpath:applicationContext.xml</param-value>
  </context-param>
  <!-- 读取Spring上下文的监听器 -->
  <listener>
    <listener-class>org.springframework.web.context.ContextLoaderListener</listener-class>
  </listener>

  <!-- Spring MVC servlet -->
  <servlet>
    <servlet-name>SpringMVC</servlet-name>
    <servlet-class>org.springframework.web.servlet.DispatcherServlet</servlet-class>
    <!--此参数可以不配置,默认值为:/WEB-INF/springmvc-servlet.xml-->
    <init-param>
      <param-name>contextConfigLocation</param-name>
      <param-value>/WEB-INF/spring-mvc.xml</param-value>
    </init-param>
    <load-on-startup>1</load-on-startup>
    <!--web.xml 3.0的新特性,是否支持异步-->
    <async-supported>true</async-supported>
  </servlet>
  <servlet-mapping>
    <servlet-name>SpringMVC</servlet-name>
    <url-pattern>/</url-pattern>
  </servlet-mapping>
</web-app>
到了这一步就已经整合完了。接下来是测试。
springMVC-Hello
写一个类:
给类添加Controller注解,
然后写个方法,返回值其实会被解析成一个页面,也就是通过springmvc-servlet.xml这个文件,把他变成一个网页地址,例hello就会变成 /hello.jsp,方法的注解Controller就相当于spring中你写的Action,也就是你在地址栏中访问的名字。
package com.zlk.controller;

import org.springframework.stereotype.Controller;
import org.springframework.web.bind.annotation.RequestMapping;

/**
 * @author 大宝
 * @company 太厉害公司
 * @create  2019-09-29 11:20
 */
@Controller
public class HelloController {
    //要被外界访问,返回值可以是String 或者 modelandView

    @RequestMapping("hello")
    public String hello(){
        return "hello";
    }
}
运行tomcat测试:

成功!!!
关于结果集处理是分为五种情况
转发到页面、转发到action请求、重定向到页面、重定向到action、转发到web-inf。
1,转发到页面:
    @RequestMapping("hello")
    public String hello(HttpServletRequest request){
        request.setAttribute("msg","这是转发");
        return "hello";
    }
效果:

2,转发到action:
    @RequestMapping("hello4")
    public String forwardAction(HttpServletRequest request){
        request.setAttribute("msg","这是转发到action");
        return "forward:hello5";
    }

    @RequestMapping("hello5")
    public String Test(HttpServletRequest request){
        Object msg = request.getAttribute("msg");
        System.out.println(msg);
        return "forward:hello";
    }
3,重定向到action:
    @RequestMapping("hello2")
    public String hello2(HttpServletRequest request){
        request.setAttribute("msg","这是转发Action");
        return "redirect:hello";
    }
4,重定向到页面:
@RequestMapping("hello3")
    public String redirectPage2(HttpServletRequest request){
        request.setAttribute("msg","这是重定向到页面");
        return "redirect:/hello.jsp";
    }
5,转发到web-inf:
需要在springmvc-servlet.xml中更改:
随之而来的问题就是其他的不能使用,所以一般不用。
crud测试
这里我使用Book实体类来测试,
Controller:
package com.zlk.controller;

import com.zlk.model.Book;
import com.zlk.sevice.BookSevice;
import com.zlk.util.PageBean;
import com.zlk.util.StringUtils;
import org.springframework.beans.factory.annotation.Autowired;
import org.springframework.stereotype.Controller;
import org.springframework.web.bind.annotation.PathVariable;
import org.springframework.web.bind.annotation.RequestMapping;

import javax.servlet.http.HttpServletRequest;
import java.util.List;
import java.util.Map;

/**
 * @author 大宝
 * @company 太厉害公司
 * @create  2019-09-29 15:54
 */
@Controller
@RequestMapping("book")
public class BookController {

    @Autowired
    private BookSevice bookSevice;

    @RequestMapping("/list")
    public String list(Book book, HttpServletRequest request){
        PageBean pageBean = new PageBean();
        pageBean.setRequest(request);
        if(book.getBname()==null){
            book.setBname("");
        }
        List<Map> list = this.bookSevice.listPager(StringUtils.toLikestr(book.getBname()), pageBean);
        request.setAttribute("bookList",list);
        request.setAttribute("pageBean",pageBean);
        return "bookList";
    }

    @RequestMapping("/preSave")
    public String preSave(Book book, HttpServletRequest request){
        if(book.getBid()!=null){
            Book book1 = this.bookSevice.selectByPrimaryKey(book.getBid());
            request.setAttribute("book",book1);
        }
        return "bookEdit";
    }

    @RequestMapping("/add")
    public String add(Book book, HttpServletRequest request){
        this.bookSevice.insert(book);
        return "redirect:/book/list";
    }

    @RequestMapping("/del/{bid}")
    public String del(@PathVariable(value = "bid") Integer bid, HttpServletRequest request){
        this.bookSevice.deleteByPrimaryKey(bid);
        return "redirect:/book/list";
    }

    @RequestMapping("/edit")
    public String edit(Book book, HttpServletRequest request){
        this.bookSevice.updateByPrimaryKeySelective(book);
        return "redirect:/book/list";
    }

}
页面:
bookList:
<%@ page language="java" contentType="text/html; charset=UTF-8"
pageEncoding="UTF-8"%>
<%@ taglib uri="http://java.sun.com/jsp/jstl/core" prefix="c" %>
<%@ taglib uri="/zking" prefix="z" %>
<!DOCTYPE html PUBLIC "-//W3C//DTD HTML 4.01 Transitional//EN" "http://www.w3.org/TR/html4/loose.dtd">
<html>
<head>
<meta http-equiv="Content-Type" content="text/html; charset=UTF-8">
<title>Insert title here</title>
<script type="text/javascript">
function add(){
// window.location.href = "bookEdit.jsp";
window.location.href="${pageContext.request.contextPath}/book/preSave";
}
function update(bid){
window.location.href = "${pageContext.request.contextPath}/book/preSave?bid="+bid;
}
function del(bid){
window.location.href = "${pageContext.request.contextPath}/book/del/"+bid;
}
</script>
</head>
<body>
<form action="${pageContext.request.contextPath}/book/list"
method="post">
书名:<input type="text" name="bname"> <input type="submit"
value="确定">
</form>
<button onclick="add();">新增</button>
<table border="1" width="100%">
<tr>
<td>编号</td>
<td>名称</td>
<td>价格</td>
<td>操作</td>
</tr>
<c:forEach items="${bookList }" var="b">
<tr>
<td>${b.bid }</td>
<td>${b.bname }</td>
<td>${b.price }</td>
<td>
<button onclick="update(${b.bid });">修改</button>
<button onclick="del(${b.bid });">删除</button>
</td>
</tr>
</c:forEach>
</table>
<z:page pageBean="${pageBean }"></z:page>
</body>
</html>
bookEdit:
<%@ page language="java" contentType="text/html; charset=UTF-8"
    pageEncoding="UTF-8"%>
<!DOCTYPE html PUBLIC "-//W3C//DTD HTML 4.01 Transitional//EN" "http://www.w3.org/TR/html4/loose.dtd">
<html>
<head>
<meta http-equiv="Content-Type" content="text/html; charset=UTF-8">
<title>Insert title here</title>
<script type="text/javascript">
	function doSubmit(bid){
		var bookForm = document.getElementById("bookForm");
		if(bid){
			//修改时候执行
			bookForm.action = '${pageContext.request.contextPath}/book/edit';
		}else{
			//新增时候执行
			bookForm.action = '${pageContext.request.contextPath}/book/add';
		}
		bookForm.submit();
	}
</script>
</head>
<body>
	<form id="bookForm" action="" method="post">
		bid:<input type="text" name="bid" value="${book.bid }"><br>
		bname:<input type="text" name="bname" value="${book.bname }"><br>
		price:<input type="text" name="price" value="${book.price }"><br>
		<input type="submit" value="提交" onclick="doSubmit('${book.bid }');"><br>
	</form>
</body>
</html>
完成。。。


 9020
9020


 被折叠的 条评论
为什么被折叠?
被折叠的 条评论
为什么被折叠?
 到【灌水乐园】发言


