


SpringBoot项目的构建(Mybatis + SpringSecurity)
前言
在这里我们先构建出一个项目出来,我之前写的一篇文章: 第一个SpringBoot程序
当然了,其中还添加了一些新的依赖和配置,我就放在下面了。
<dependencies>

		<dependency>
			<groupId>org.springframework.boot</groupId>
			<artifactId>spring-boot-starter-jdbc</artifactId>
		</dependency>

		<dependency>
			<groupId>org.springframework.boot</groupId>
			<artifactId>spring-boot-starter-security</artifactId>
		</dependency>

		<dependency>
			<groupId>org.springframework.boot</groupId>
			<artifactId>spring-boot-starter-web</artifactId>
		</dependency>

		<dependency>
			<groupId>mysql</groupId>
			<artifactId>mysql-connector-java</artifactId>
			<scope>runtime</scope>
		</dependency>

		<dependency>
			<groupId>org.projectlombok</groupId>
			<artifactId>lombok</artifactId>
			<optional>true</optional>
		</dependency>

		<dependency>
			<groupId>org.mybatis.spring.boot</groupId>
			<artifactId>mybatis-spring-boot-starter</artifactId>
			<version>1.3.0</version>
		</dependency>

		<dependency>
			<groupId>org.springframework.boot</groupId>
			<artifactId>spring-boot-starter-test</artifactId>
			<scope>test</scope>
		</dependency>

		<dependency>
			<groupId>org.springframework.security</groupId>
			<artifactId>spring-security-test</artifactId>
			<scope>test</scope>
		</dependency>

	</dependencies>

	<build>
		<plugins>
			<plugin>
				<groupId>org.springframework.boot</groupId>
				<artifactId>spring-boot-maven-plugin</artifactId>
				<configuration>
					<excludes>
						<exclude>
							<groupId>org.projectlombok</groupId>
							<artifactId>lombok</artifactId>
						</exclude>
					</excludes>
				</configuration>
			</plugin>
		</plugins>

		<!-- 配置资源导出 -->
		<resources>
			<resource>
				<directory>src/main/java</directory>
				<includes>
					<include>**/*.xml</include>
				</includes>
			</resource>

			<resource>
				<directory>src/main/resources</directory>
				<includes>
					<include>**/*.*</include>
				</includes>
			</resource>
		</resources>
	</build>
注释掉SpringSecurity
为了配置日志和Mybatis,先把SpringSecurity框架的依赖注释掉,后续再加。在上述代码中找到SpringSecurity,ctrl + shift + ?注掉。
<!-- 先注释掉 方便后续的其他框架的配置及应用 -->
<!--		<dependency>-->
<!--			<groupId>org.springframework.boot</groupId>-->
<!--			<artifactId>spring-boot-starter-security</artifactId>-->
<!--		</dependency>-->
先配置下日志框架-log4j2
依赖的引入
加一下日志的依赖
		<dependency>
			<groupId>org.springframework.boot</groupId>
			<artifactId>spring-boot-starter-log4j2</artifactId>
		</dependency>
		 <!-- 用于辨认log4j2.yml文件 -->
		<dependency>
			<groupId>com.fasterxml.jackson.dataformat</groupId>
			<artifactId>jackson-dataformat-yaml</artifactId>
		</dependency>
使用log4j2的话,还需要配置下SpringBoot启动器里面的exclusion 标签
<dependency>
			<groupId>org.springframework.boot</groupId>
			<artifactId>spring-boot-starter</artifactId>
			<exclusions>
				<exclusion>
					<groupId>org.springframework.boot</groupId>
					<artifactId>spring-boot-starter-logging</artifactId>
				</exclusion>
			</exclusions>
		</dependency>
创建一个log4j2.yml配置文件
在跟application.ym的同级目录下,创建一个log4j2.yml配置文件。上面的applicatiion.yml,原来是applicatiion.properties。
改成yml文件语法略微不同,但是该文件作用不变。

log4j2.yml文件内容
Configuration:
  status: warn

  Properties: # 定义全局变量
    Property: # 缺省配置(用于开发环境)。其他环境需要在VM参数中指定,如下:
      #测试:-Dlog.level.console=warn -Dlog.level.srm=trace
      #生产:-Dlog.level.console=warn -Dlog.level.srm=info
      - name: log.level.console
        value: trace
      - name: log.level.dvs
        value: trace
      #日志文件存储的目录
      - name: log.path
        value: D://test/logs
      #日志文件存储名称
      - name: project.name
        value: test

  Appenders:
    #输出到控制台
    Console:
      #Appender命名
      name: CONSOLE
      target: SYSTEM_OUT
      ThresholdFilter:
        # “sys:”表示:如果VM参数中没指定这个变量值,则使用本文件中定义的缺省全局变量值
        level: ${sys:log.level.console}
        onMatch: ACCEPT
        onMismatch: DENY
      PatternLayout:
        pattern: "%d{yyyy-MM-dd HH:mm:ss,SSS}:%4p %t (%F:%L) - %m%n"
    # 输出到文件,超过128MB归档
    RollingFile:
      - name: ROLLING_FILE
        ignoreExceptions: false
        fileName: ${log.path}/${project.name}.log
        filePattern: "${log.path}/$${date:yyyy-MM}/${project.name}-%d{yyyy-MM-dd}-%i.log.gz"
        PatternLayout:
          pattern: "%d{yyyy-MM-dd HH:mm:ss,SSS}:%4p %t (%F:%L) - %m%n"
        Policies:
          SizeBasedTriggeringPolicy:
            size: "128 MB"
        DefaultRolloverStrategy:
          max: 1000

  Loggers:
    Root:
      level: info
      AppenderRef:
        - ref: CONSOLE
        - ref: ROLLING_FILE
    # 为包配置特殊的Log级别,方便调试
    Logger:
      - name: com.securityTest #根据自己项目的名称加
        additivity: false #去除重复的log
        level: ${sys:log.level.dvs}
        AppenderRef:
          - ref: CONSOLE #复数加上-
          - ref: ROLLING_FILE #复数加上-
application.yml里面的配置

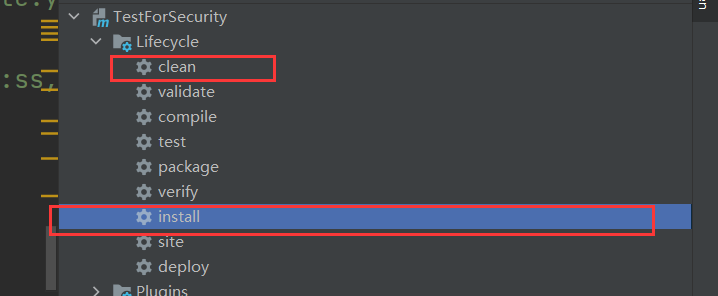
然后更新一下maven,先clean再install
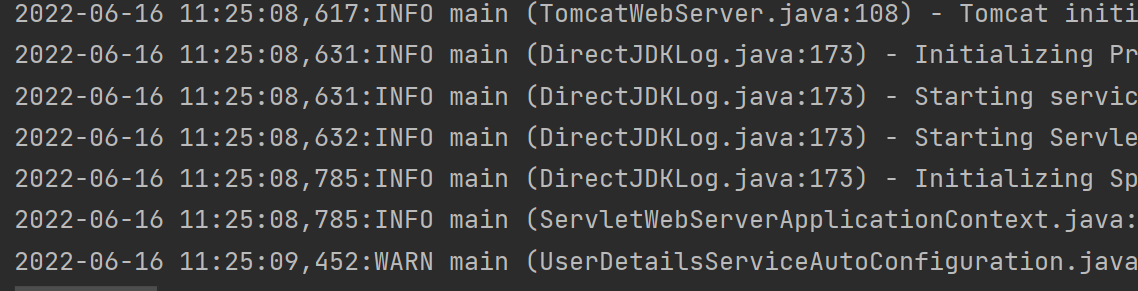
启动项目,看到控制台有输出即可。
配置Mybatis
引入Mybatis
上面的pom.xml文件中 已经引入了Mybatis的启动器。
就是这段代码了。
		<dependency>
			<groupId>org.mybatis.spring.boot</groupId>
			<artifactId>mybatis-spring-boot-starter</artifactId>
			<version>1.3.0</version>
		</dependency>
主要的配置文件更改
这里的classpath*: 后面的东西不要写错,记得多确认几次,写错了后排查起来很麻烦
application.yml
#端口配置
server:
  port: 8088

#读取Mybatis配置文件的地址
mybatis:
  #mybaitis主要的配置文件的位置
  config-locations: classpath*:mybatis/mybatis-config.xml
  #后缀为-sql.xml的单个业务逻辑的mapper文件 注意自己的路径
  mapper-locations: classpath*:com/securityTest/**/mapper/*-sql.xml

#数据库连接信息 注意数据库名称和数据库账号密码
spring:
  datasource:
    url: jdbc:mysql://localhost/test?characterEncoding=utf-8&useSSL=false&serverTimezone=UTC&rewriteBatchedStatements=true&allowMultiQueries=true
    username: root
    password: root
创建mybtais-config.xml
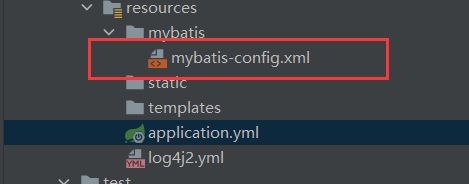
mybatis文件夹是自己创建的,文件也是。记得跟上面application.yml里面配置的config-locations对应
其中的内容呢,可以写一些别名什么的,或者一些其他的配置信息
我这里就放了个User的别名
<?xml version="1.0" encoding="UTF-8" ?>
<!DOCTYPE configuration PUBLIC "-//mybatis.org//DTD Config 3.0//EN" "http://mybatis.org/dtd/mybatis-3-config.dtd">
<configuration>
    <typeAliases>
        <typeAlias type="com.securityTest.demo.work.mybatistest.entity.User" alias="User"></typeAlias>
    </typeAliases>
</configuration>
启动类中配置Mapper扫描
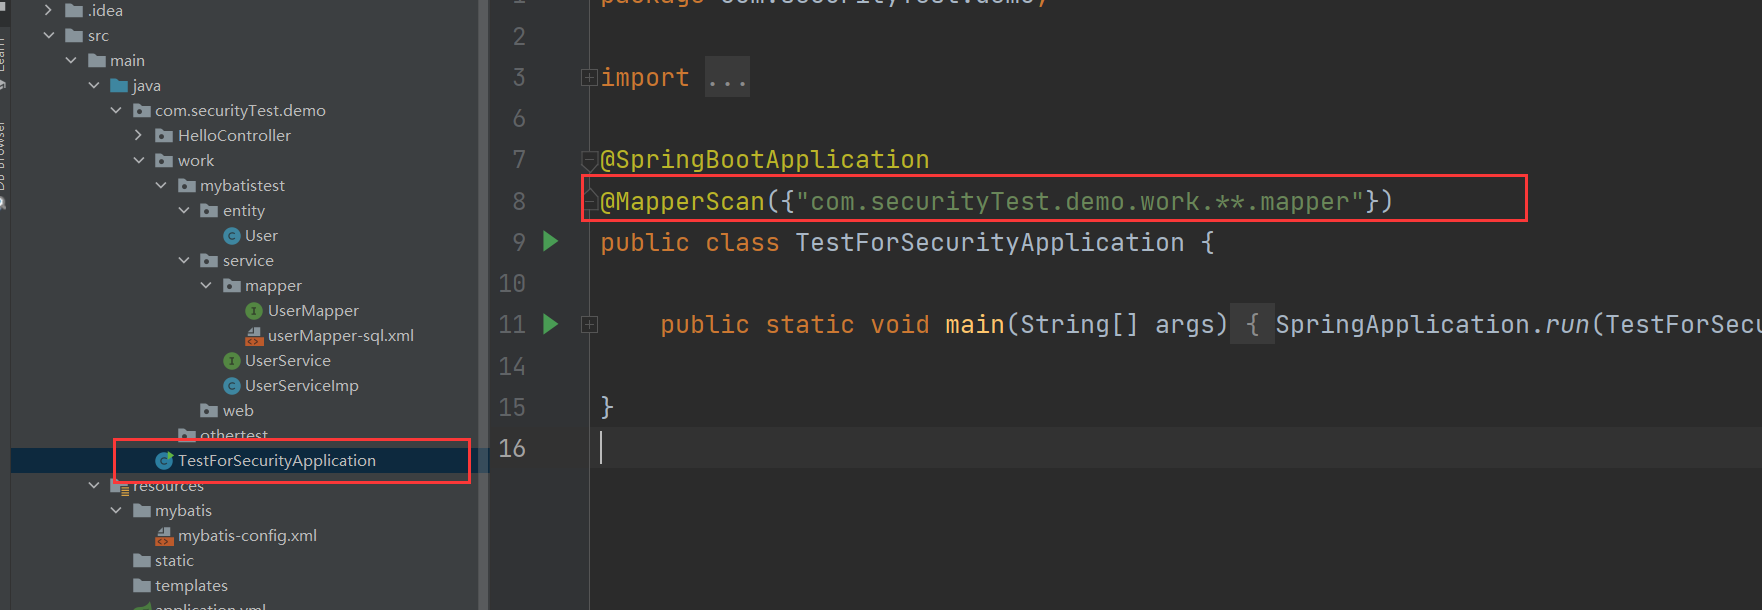
注意路径
@MapperScan({"com.securityTest.demo.work.**.mapper"})
实现及测试
数据库
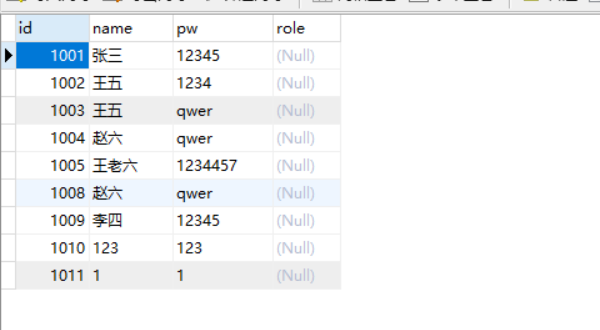
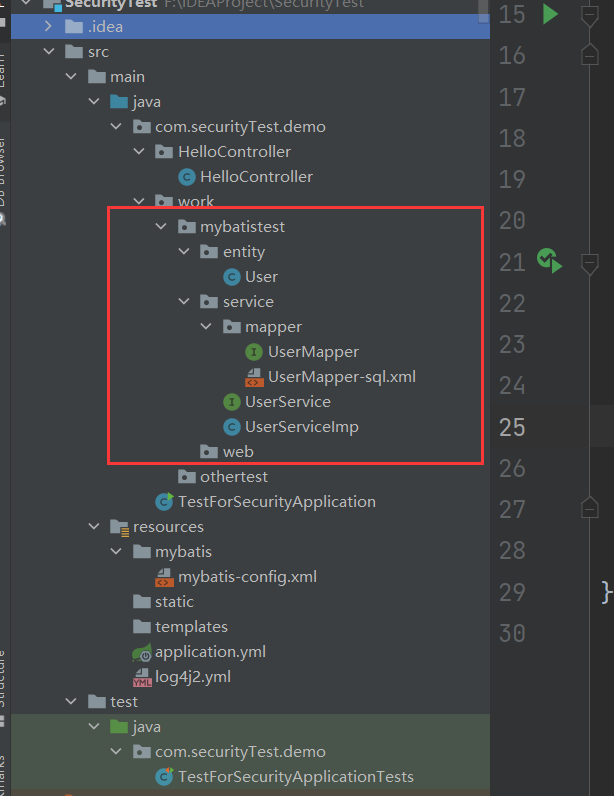
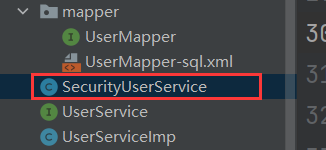
基本流程及目录结构
UserMapper接口中的方法与UserMapper-sql.xml sql语句对应
UserService接口由UserServiceImp实现
而UserServiceImp调用UserMapper来对数据进行操作。
详细内容
User
这里我前面引入了lombok依赖
@Data
public class User {
    int id;
    String name;
    String password;
    String role;
}
UserMapper
public interface UserMapper {
    List<User> getList();

    int checkUser(@Param("id") int id ,@Param("pw") String pw);
}
UserMapper-sql.xml
这里需要注意的是,namespace不要写错,id和type不要写反
<?xml version="1.0" encoding="UTF-8"?>
<!DOCTYPE mapper PUBLIC "-//mybatis.org//DTD Mapper 3.0//EN" "http://mybatis.org/dtd/mybatis-3-mapper.dtd">
<!-- 这里指定接口 -->
<mapper namespace="com.securityTest.demo.work.mybatistest.service.mapper.UserMapper">

    <resultMap id="User" type="com.securityTest.demo.work.mybatistest.entity.User">
        <result column="id" property="id"></result>
        <result column="password" property="pw"></result>
        <result column="name" property="name"></result>
    </resultMap>

    <select id="getList" resultMap="User">
        select id, name ,pw from User
    </select>

    <select id="checkUser" resultType="java.lang.Integer">
        select count(*) from User where id = #{id} and pw = #{pw}
    </select>

</mapper>
UserService
public interface UserService {
    List<User> getList();

    int checkUser(int id , String pw);

}
UserServiceImp
@Service
public class UserServiceImp implements UserService {
    //调用UserMapper实现对数据库的操作
    @Autowired
    UserMapper mapper;

    @Override
    public List<User> getList() {
        return mapper.getList();
    }

    @Override
    public int checkUser(int id, String pw) {
        return mapper.checkUser(id , pw);
    }
}
测试
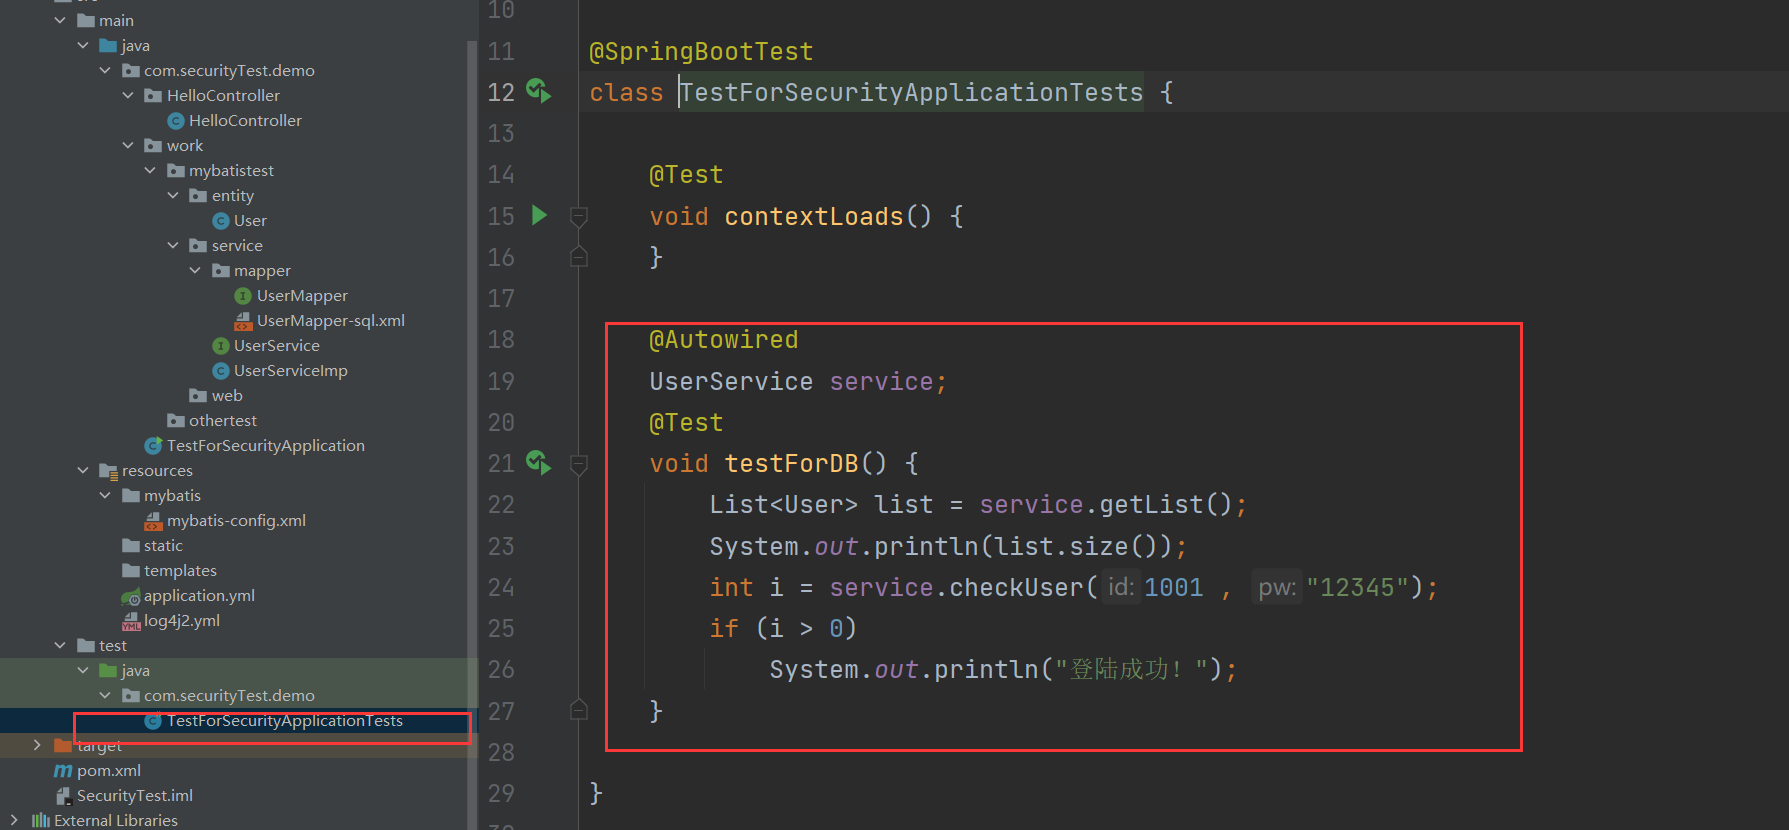
@Autowired
UserService service;
@Test
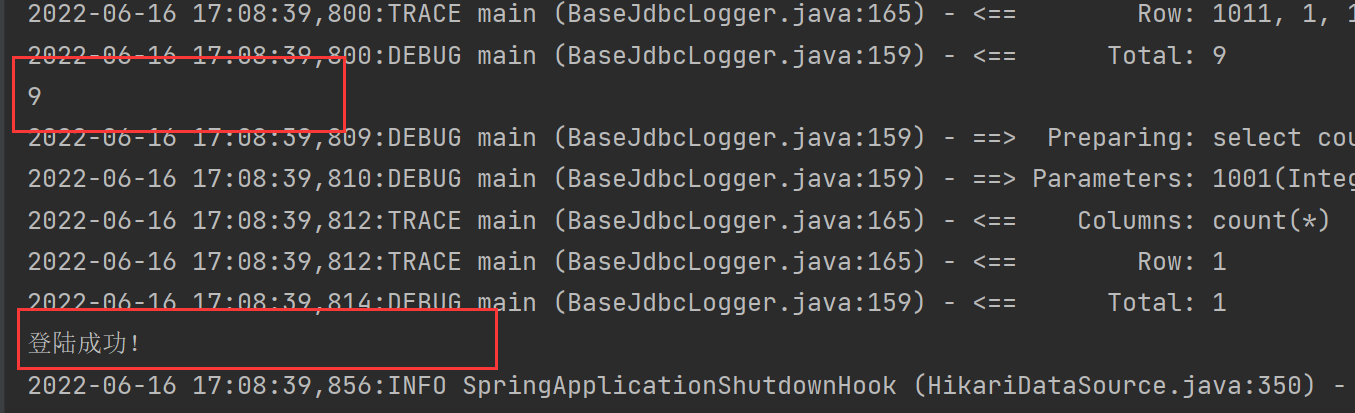
void testForDB() {
List<User> list = service.getList();
System.out.println(list.size());
int i = service.checkUser(1001 , "12345");
if (i > 0)
System.out.println("登陆成功!");
}
其他Mybatis中的操作(比如删除、更新等),以及一些我在使用Mybatis中遇到的一些问题,在我其他的文章里有提及。
第一次使用Mybatis踩过的那些坑
创建第一个Mybatis工程
Mybatis中对数据库的增删改查
Mybatis拾遗(一)
Invalid bound statement (not found)错误的解决
最有用的应该还是官方文档了
Mybatis官网
完成
至此在SpringBoot中配置Mybatis已经完成了。
配置SpringSecurity
引入SpringSecurity框架
我们之前将引入的SpringSecurity框架给注释掉了,我们取消注释,弄回来。
一些必要的SpringScurity配置
新建一个包,并创建一个类SecurityConfig

我们自定义的SpringSecurity的配置继承于WebSecurityConfigurerAdapter类。在这里,记得降低SpringBoot版本 , 一定要记得!!!!否则无法继承WebSecurityConfigurerAdapter,因为高版本的SpingBoot中已经移除了。
@EnableWebSecurity
@EnableGlobalMethodSecurity(prePostEnabled = true)
public class SecurityConfig extends WebSecurityConfigurerAdapter {
    @Autowired
    SecurityUserService service;

    /*
        用于密码加密
     */
    @Bean
    public PasswordEncoder passwordEncoder() {
        return new BCryptPasswordEncoder();
    }

    //在这里添加认证的后台逻辑,以及设置加密模式
    @Override
    protected void configure(AuthenticationManagerBuilder authenticationManagerBuilder)  throws Exception{
        authenticationManagerBuilder
                //设置用户信息以及加密方式
                .userDetailsService(service)
                .passwordEncoder(passwordEncoder());
    }


    //在这里配置基本界面
    @Override
    protected void configure(HttpSecurity security)  throws Exception{
        security.formLogin();
    }

}
设置获取用户具体信息
在SpringSecurity中存在有一个类Uer,该类与我们自定义的User并不一样,具体可自行了解。当然了还有另一个UserDetailsService,用来验证框架的User是否有效。
我这里放的比较乱就把SecurityUserService 放在mapper下了。大家可以自行创建一个包放进去。
@Component
@Service
public class SecurityUserService implements UserDetailsService {
    @Autowired
    UserMapper userMapper;

    //用于加密传递
    @Autowired
    PasswordEncoder passwordEncoder;

    @Override
    public UserDetails loadUserByUsername(String username) throws UsernameNotFoundException {
        //在这里通过对username的验证来判断 是否具有权限
        User user = userMapper.findUser1(username);
        if(user == null)
            throw new UsernameNotFoundException("用户不存在!");

        //用户角色
        String role = user.getRole();
        //当前用户集合
        List<GrantedAuthority> list = new ArrayList<>();
        list.add(new SimpleGrantedAuthority("ROLE_" + role));

        //这里的User是SpringSecurity里面直接代理的需要和我们自定义User区分开来
        return new org.springframework.security.core.userdetails.User(
                user.getName(),
                passwordEncoder.encode(user.getPw()),
                list
        );
    }
}
控制器HelloController
@PreAuthorize(“hasAnyRole(‘user’)”) – 使用该注解进行权限控制,如果每加则表明进入该方法不需要任何权限。
@Controller
@RequestMapping("/hello")
public class HelloController {
    @Autowired
    UserService userService;

    @GetMapping("helloWorld")
    @ResponseBody
    public String hell() {
        return "Hello , World!";
    }

    @PreAuthorize("hasAnyRole('user')")
    @GetMapping("/get-user")
    @ResponseBody
    public User getUser(@RequestParam int id){
        return userService.findUser(id);
    }

    @PreAuthorize("hasAnyRole('user')")
    @RequestMapping("/user")
    @ResponseBody
    public String user() {
        return "用户界面";
    }

    @PreAuthorize("hasAnyRole('admin')")
    @RequestMapping("/admin")
    @ResponseBody
    public String admin() {
        return "管理员界面";
    }
}
数据库中添加权限 方便测试
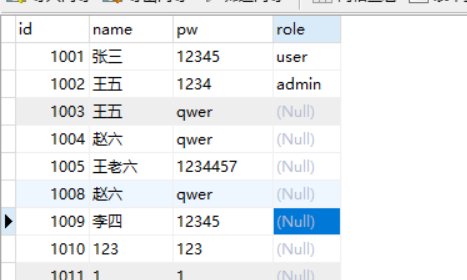
测试
不需要任何权限的测试

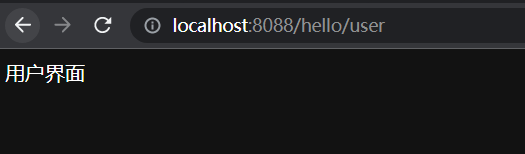
需要用户权限的测试,访问hello/user 会自动转到默认的登陆界面(SpringSecurity自动提供)
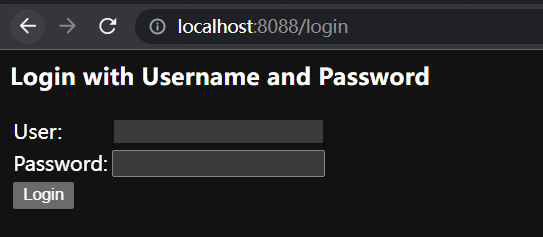
这里转到了默认的登陆界面,用张三(普通用户)账号登陆
账号-张三 密码-12345
用张三(普通用户)账号 访问管理员界面,显示被拒绝
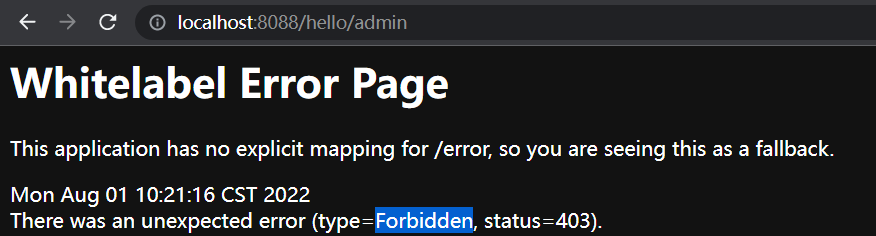 重启项目 再次测试admin界面,登陆后
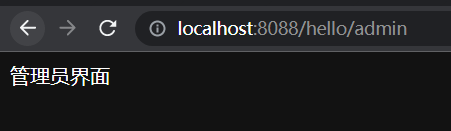
至此,本项目已经实现了权限控制。只有拥有对应的权限,才可以访问对应的接口。
不足
未做到自定义登陆界面
未添加注销功能
没有自定义错误提示信息
权限控制方面未做到兼容,比如:admin用户可以访问user权限的界面
未将权限控制做得更加精细、准确等


 1590
1590


 被折叠的 条评论
为什么被折叠?
被折叠的 条评论
为什么被折叠?
 到【灌水乐园】发言


