


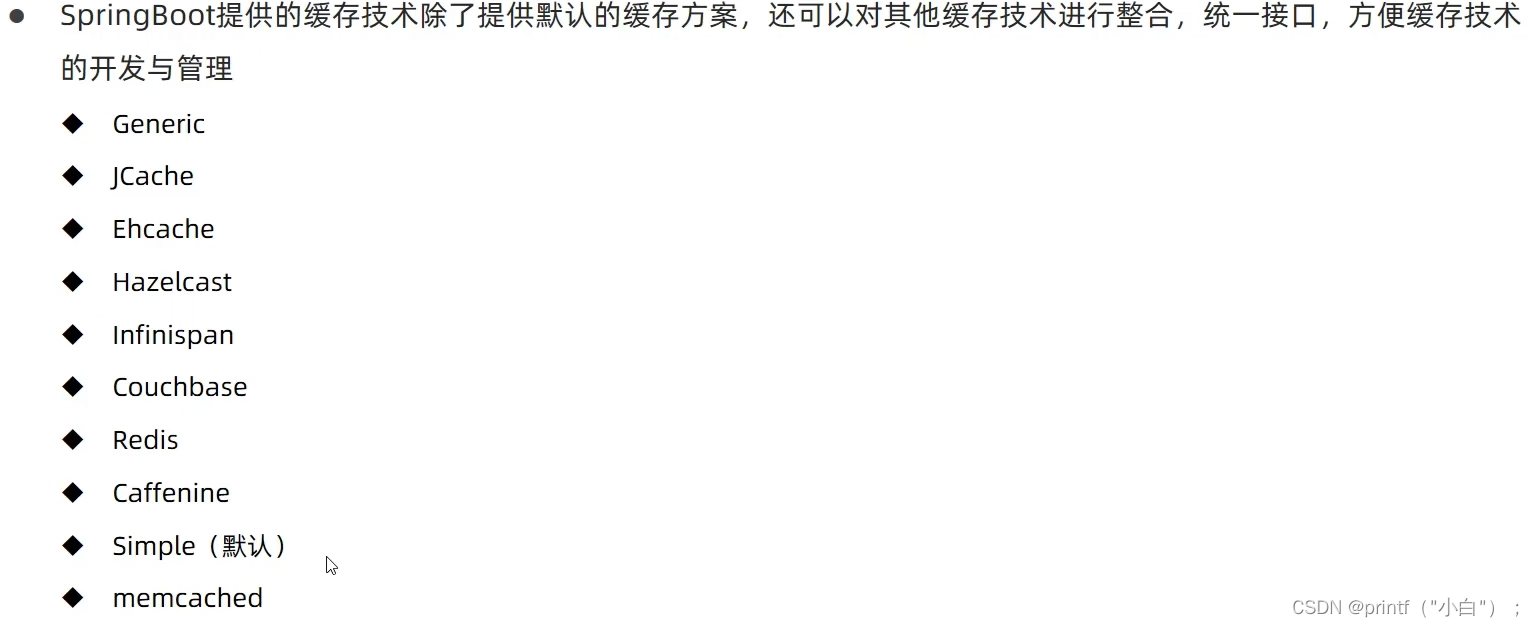
整合常用的第三方技术
缓存
- 介于数据永久存储与数据应用之间的数据临时存储介质
- 可以有效减少低速数据读取过程的次数,提高系统性能
启用spring默认缓存技术
- 导入依赖
 <!--缓存-->
 <dependency>
     <groupId>org.springframework.boot</groupId>
     <artifactId>spring-boot-starter-cache</artifactId>
 </dependency>
- 启动类上添加注解
@SpringBootApplication
// 开启缓存
@EnableCaching
public class CacheApplication {

    public static void main(String[] args) {
        System.out.println(Arrays.toString(args));
        SpringApplication.run(CacheApplication.class, args);
    }
}
- 业务层添加注解(
value相当于一个命名空间,key必须是唯一的变量)
    @Override
    // 使用缓存
    @Cacheable(value = "cacheSpace",key = "#id")
    public Book getById(Integer id) {
        return bookDao.selectById(id);
    }
手机验证码案例(整合其他缓存技术)
Simple缓存
- 工具类验证码加密
@Component
public class CodeUtils {

    private String[] bu = {"00000","0000","000","00","0",""};

    public String generator(String tele){
        int hash = tele.hashCode();
        int encryption = 20206666;
        long result = hash^encryption;
        long nowTime = System.currentTimeMillis();
        result = result^nowTime;
        long code =  result % 1000000;
        code = code<0 ? -code : code;
        String codeStr = code + "";
        int length = codeStr.length();
        return bu[length-1]+codeStr;
    }

    @Cacheable(value = "smsCode",key = "#tele")
    public String get(String tele){
        return null;
    }

    public static void main(String[] args) {
        CodeUtils codeUtils = new CodeUtils();
        String generator = codeUtils.generator("18771496933");
        System.out.println(generator);
    }
}
- domain
@Data
public class SMSCode {
    private String tele;
    private String code;
}
- controller
@RestController
@RequestMapping("/sms")
public class SMSCodeController {

    @Autowired
    private SMSCodeService service;


    @GetMapping
    public String getCode(String tele){
        String s = service.sendCodeToSMS(tele);
        return s;
    }

    @PostMapping
    public boolean checkCode(SMSCode smsCode){
        Boolean code = service.checkCode(smsCode);
        return code;
    }
}
- 业务层
public interface SMSCodeService {

    public String sendCodeToSMS(String tele);

    public Boolean checkCode(SMSCode smsCode);
}
@Service
public class SMSServiceImpl implements SMSCodeService {

    @Autowired
    private CodeUtils codeUtils;

    @Override
    //@Cacheable(value = "smsCode",key = "#tele") 读和写
    @CachePut(value = "smsCode",key = "#tele") // 只写不读
    public String sendCodeToSMS(String tele) {
        String code = codeUtils.generator(tele);
        return code;
    }

    @Override
    public Boolean checkCode(SMSCode smsCode) {
        String code = smsCode.getCode();
        String cacheCode = codeUtils.get(smsCode.getTele());
        return cacheCode.equals(code);
    }
}
Redis
- 导入依赖
        <dependency>
            <groupId>org.springframework.boot</groupId>
            <artifactId>spring-boot-starter-data-redis</artifactId>
        </dependency>
- 配置文件
spring:
  datasource:
    druid:
      driver-class-name: com.mysql.cj.jdbc.Driver
      url: jdbc:mysql://localhost:3306/mybatis?serverTimezone=UTC
      username: root
      password: 123456
  cache:
    type: redis
    redis:
      use-key-prefix: true
      cache-null-values: false
      time-to-live: 10s
      key-prefix: ssm_
ehcache
- 只用加进来技术接口是统一的
<dependency>
    <groupId>net.sf.ehcache</groupId>
    <artifactId>ehcache</artifactId>
</dependency>
- 配置文件
spring:
  datasource:
    druid:
      driver-class-name: com.mysql.cj.jdbc.Driver
      url: jdbc:mysql://localhost:3306/mybatis?serverTimezone=UTC
      username: root
      password: 123456
  cache:
    type: ehcache
    ehcache:
      config: ehcache.xml
- ehcache.xml
<?xml version="1.0" encoding="UTF-8"?>
<ehcache xmlns:xsi="http://www.w3.org/2001/XMLSchema-instance"
         xsi:noNamespaceSchemaLocation="http://ehcache.org/ehcache.xsd"
         updateCheck="false">
    <diskStore path="D:\ehcache" />

    <!--默认缓存策略 -->
    <!-- external:是否永久存在,设置为true则不会被清除,此时与timeout冲突,通常设置为false-->
    <!-- diskPersistent:是否启用磁盘持久化-->
    <!-- maxElementsInMemory:最大缓存数量-->
    <!-- overflowToDisk:超过最大缓存数量是否持久化到磁盘-->
    <!-- timeToIdleSeconds:最大不活动间隔,设置过长缓存容易溢出,设置过短无效果,可用于记录时效性数据,例如验证码-->
    <!-- timeToLiveSeconds:最大存活时间-->
    <!-- memoryStoreEvictionPolicy:缓存清除策略-->
    <defaultCache
        eternal="false"
        diskPersistent="false"
        maxElementsInMemory="1000"
        overflowToDisk="false"
        timeToIdleSeconds="60"
        timeToLiveSeconds="60"
        memoryStoreEvictionPolicy="LRU" />

    <cache
        name="smsCode"
        eternal="false"
        diskPersistent="false"
        maxElementsInMemory="1000"
        overflowToDisk="false"
        timeToIdleSeconds="10"
        timeToLiveSeconds="10"
        memoryStoreEvictionPolicy="LRU" />

</ehcache>
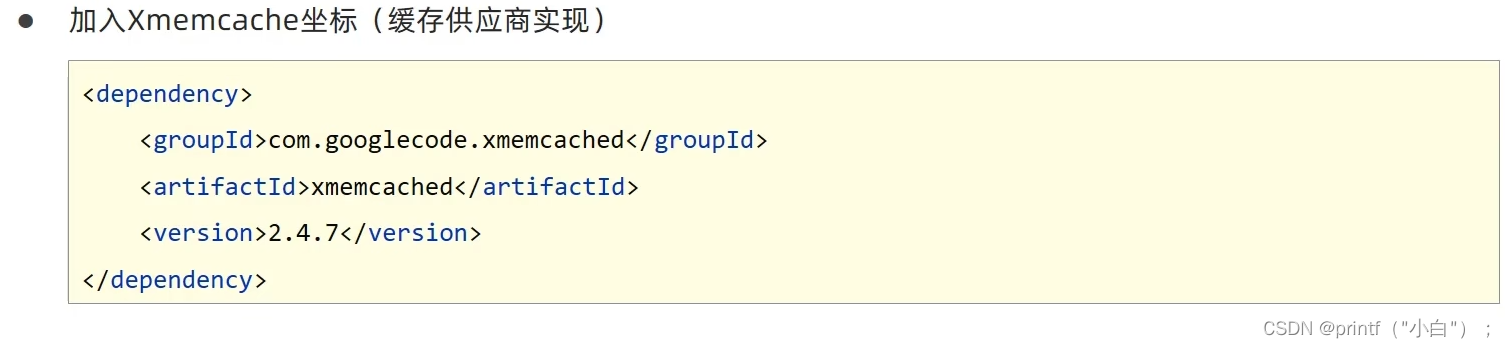
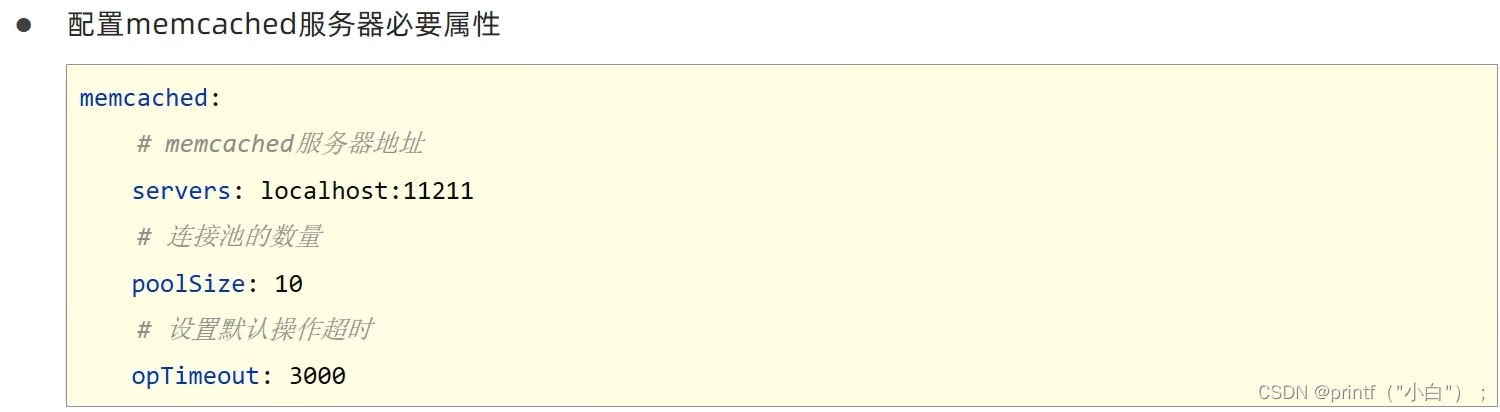
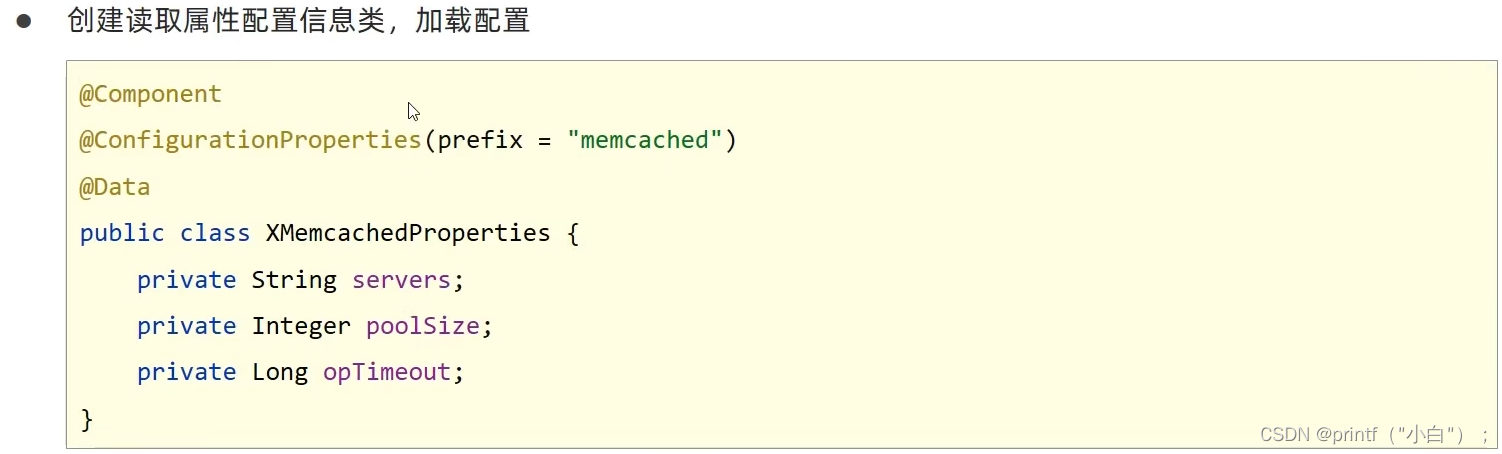
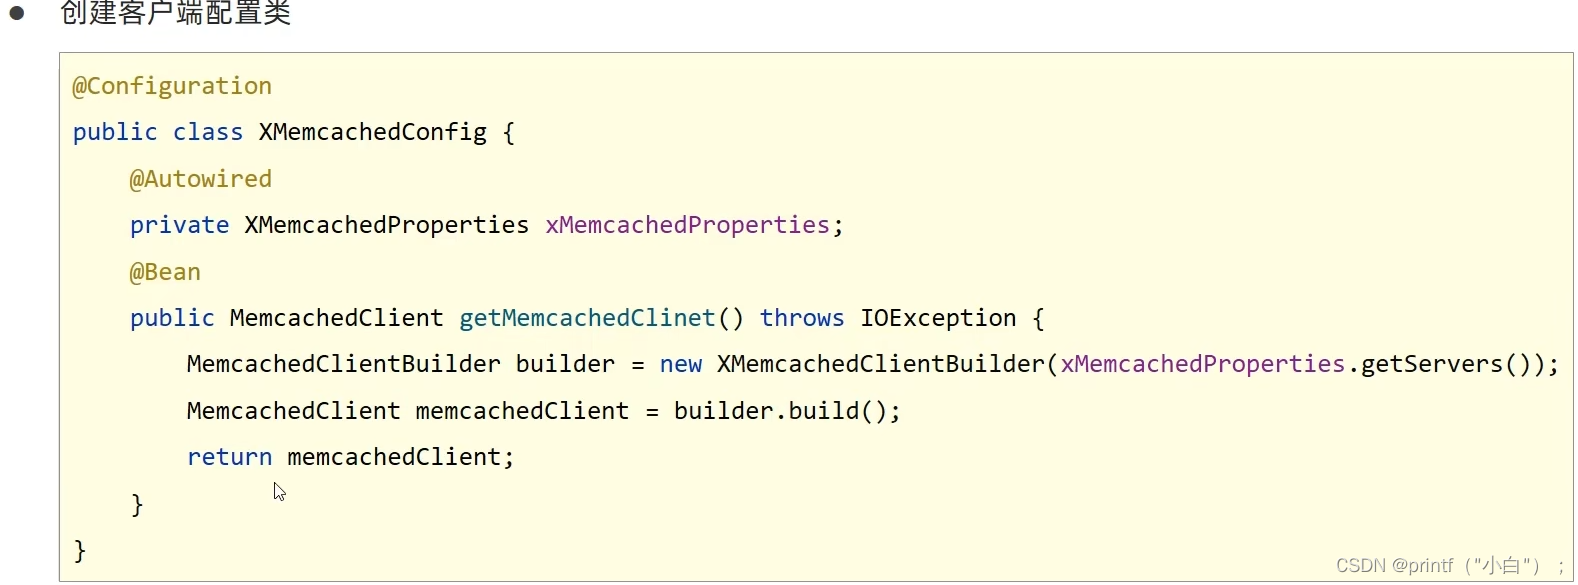
memcached缓存方案

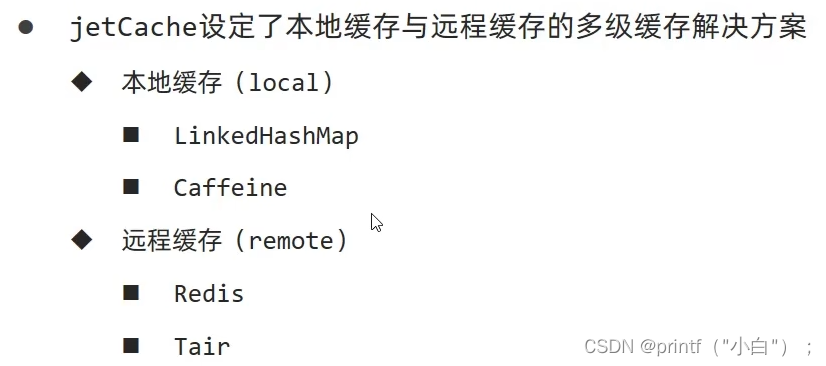
jetcache缓存(阿里方案)
- 对springCache进行了封装,在原有功能基础上实现了
多级缓存,缓存统计,自动刷新,异步调用,数据报表等功能。
-
远程缓存方案
        <dependency>
            <groupId>com.alicp.jetcache</groupId>
            <artifactId>jetcache-starter-redis</artifactId>
            <version>2.6.2</version>
        </dependency>
jetcache:
  remote:
    default:
      type: redis
      host: localhost
      port: 6379
      poolConfig:
        maxTotal: 50
@SpringBootApplication
// 启用主开关
@EnableCreateCacheAnnotation
public class JetCacheApplication {

    public static void main(String[] args) {
        SpringApplication.run(JetCacheApplication.class, args);
    }
}
@Service
public class SMSServiceImpl implements SMSCodeService {

    @Autowired
    private CodeUtils codeUtils;

    @CreateCache(name = "jetCache",expire = 3600,timeUnit = TimeUnit.SECONDS)
    private Cache<String ,String > jetCache;

    @Override
    public String sendCodeToSMS(String tele) {
        String code = codeUtils.generator(tele);
        jetCache.put(tele,code);
        return code;
    }

    @Override
    public Boolean checkCode(SMSCode smsCode) {
        String code = jetCache.get(smsCode.getTele());
        return smsCode.getCode().equals(code);
    }
}
本地缓存
jetcache:
  remote:
    default:
      type: redis
      host: localhost
      port: 6379
      poolConfig:
        maxTotal: 50
  local:
    default:
      type: linkedhashmap
      keyConvertor: fastjson
- 选择远程还是本地缓存
cacheType = CacheType.REMOTE
@CreateCache(name = "jetCache",expire = 3600,timeUnit = TimeUnit.SECONDS,cacheType = CacheType.REMOTE)
方法缓存
- 配置增加几个配置
jetcache:
  remote:
    default:
      type: redis
      host: localhost
      port: 6379
      keyConvertor: fastjson
      valueEncode: java
      valueDecode: java
      poolConfig:
        maxTotal: 50
- 实体类上加入一个实现
Serializable
@Data
public class Book implements Serializable {
    private Integer id;
    private String type;
    private String name;
    private String description;
}
- 方法上面加入注解
    @Override
    @Cached(name = "book",key = "#id",expire = 3600)
    public Book getById(Integer id) {

        return bookDao.selectById(id);
    }
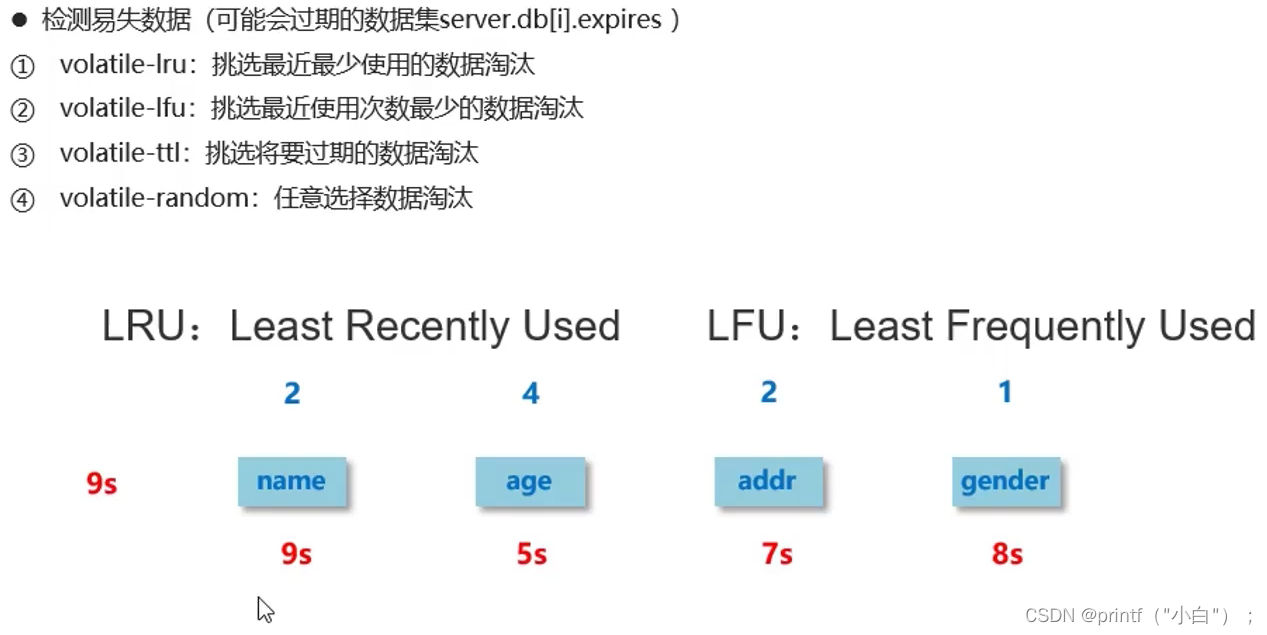
数据淘汰策略
任务
-
-
定时任务,常见操作:
-
年度报表
缓存统计报告
。。。
-
年度报表
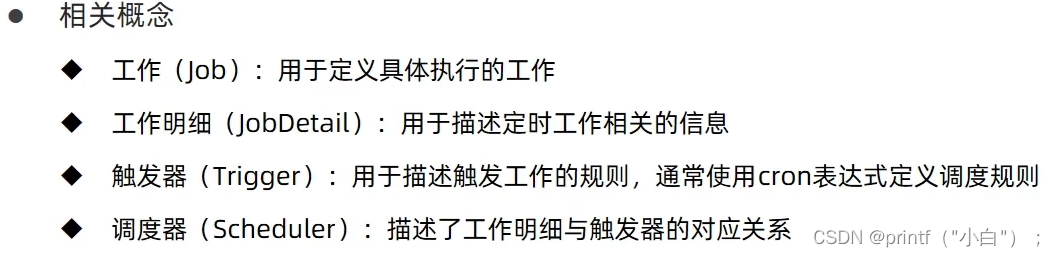
quartz定时技术
相关概念
整合Quartz
- 导入依赖
        <dependency>
            <groupId>org.springframework.boot</groupId>
            <artifactId>spring-boot-starter-quartz</artifactId>
        </dependency>
- 定义任务(继承QuartzJobBean )
public class MyQuartz extends QuartzJobBean {
    @Override
    protected void executeInternal(JobExecutionContext jobExecutionContext) throws JobExecutionException {
        System.out.println("Quartz run ...");
    }
}
- 定义配置类(将任务包装成工作明细,通过触发器绑定工作明细)
@Configuration
public class QuartzConfig {
    @Bean
    public JobDetail printJodDetail(){
        return JobBuilder.newJob(MyQuartz.class).storeDurably().build();
    }

    @Bean
    public Trigger printJobTrigger(){
        ScheduleBuilder scheduleBuilder = CronScheduleBuilder.cronSchedule("0/5 * * * * ?");
        return TriggerBuilder.newTrigger().forJob(printJodDetail()).withSchedule(scheduleBuilder).build();
    }
}
- 启动系统
整合springBoot Task
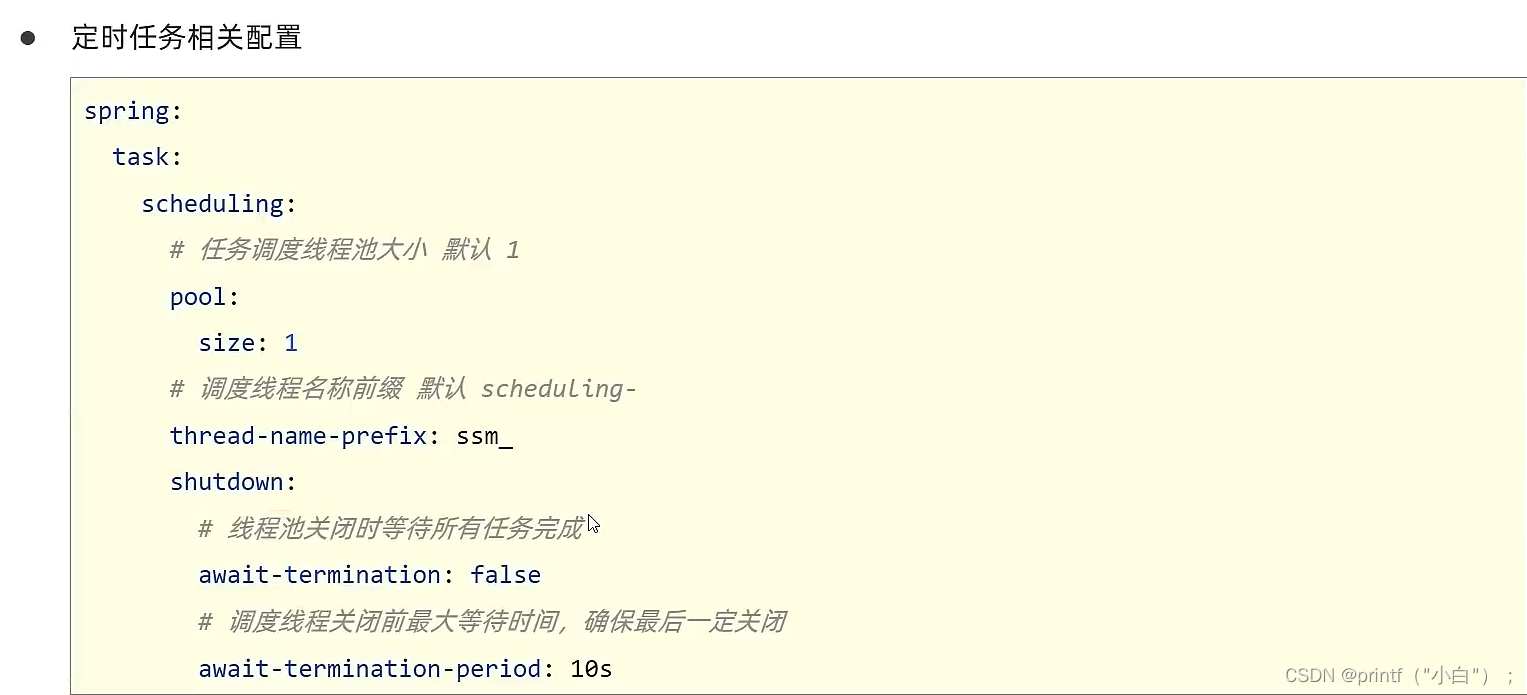
- 启动类加入注解
@EnableScheduling
@SpringBootApplication
// 启用主开关
@EnableCreateCacheAnnotation
@EnableScheduling
@EnableMethodCache(basePackages = "com.ssc.springboot_17_jetcache")
public class JetCacheApplication {

    public static void main(String[] args) {
        SpringApplication.run(JetCacheApplication.class, args);
    }

}
- 在要定时执行的方法上面加注解
@Scheduled(cron = "0/1 * * * * ?")
@Component
public class MyBean {

    @Scheduled(cron = "0/1 * * * * ?")
    public void print(){
        System.out.println("哈哈哈哈。。。");
    }
}
邮件
- SMTP:简单邮件传输协议,用于发送电子邮件的传输协议
- POP3:用于接收电子邮件的标准协议
- IMAP:互联网消息协议,是POP3的替代协议
程序实现
- 配置邮箱
spring:
  mail:
    host: smtp.qq.com
    username: 2683885184@qq.com
    password: wpumbmnpejxddigi # 授权码
    default-encoding: utf-8 #这个是字符集,咱们用utf-8就可以了
- 书写业务层传入mail信息
public interface SendMailService {
    void sendMail();
}
@Service
public class SendMailServiceImpl implements SendMailService {

    @Autowired
    private JavaMailSender javaMailSender;

    // 发送人
    private String from = "2683885184@qq.com";
    // 接收人
    private String to = "1667568637@qq.com";
    // 标题
    private String subject = "测试邮件";
    // 正文
    private String context = "收到这封邮件不要慌张,这是学习过程中的测试邮件,可以忽略。。。爱你mua~!";

    @Override
    public void sendMail() {
        SimpleMailMessage message = new SimpleMailMessage();
        message.setFrom(from);
        message.setTo(to);
        message.setSubject(subject);
        message.setText(context);
        javaMailSender.send(message);
    }
}
- 测试
@SpringBootTest
class MailApplicationTests {

	@Autowired
	private SendMailService service;

	@Test
	void contextLoads() {
		service.sendMail();
	}
}
消息
-
-
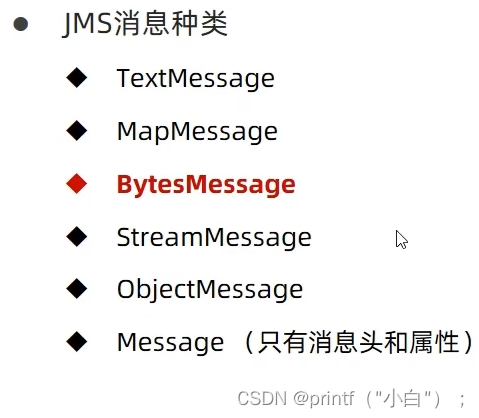
JMS:一个规范,等同于JDBC规范,提供了消息服务相关的API接口
-
peer-2-peer:点对点模型,消息发送到一个队列中,队列保存消息,队列消息只能被一个消费者消费或超时
publish-subscribe:发布订阅模型,消息可以被多个消费者消费,生产者消费者完全独立,不需要感知对方的存在
-
peer-2-peer:点对点模型,消息发送到一个队列中,队列保存消息,队列消息只能被一个消费者消费或超时
- JMS实现:ACtiveMQ,Redis,HornetMQ,RabbitMQ,RocketMQ(没有完全遵循JMS协议)
-
-
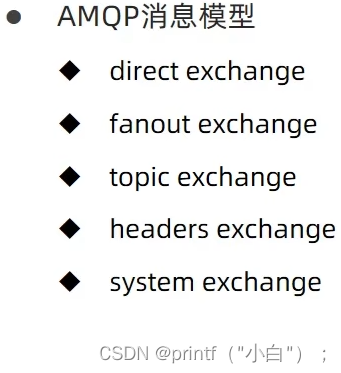
AMQP:一种协议(高级消息队列协议,也是消息代理规范)规范网阔交换的数据格式,兼容JMS
-
优点:具有跨平台性,服务器供应商,生产者,消费者可以使用不同的语言来实现
-
优点:具有跨平台性,服务器供应商,生产者,消费者可以使用不同的语言来实现
- AMQP消息种类:byte[](字节数组形式)
- AMQP实现:RabbitMQ,StormMQ,RocketMQ
-
-
MQTT:
- 消息队列遥测传输,转为小设备,是物联网生态系统中主要成分之一
-
-
Kafka:
- 一种高吞吐量的分布式发布订阅消息系统,提供实时消息功能
监控
监控的意义
- 监控服务是否宕机
- 监控服务运行指标(内存,虚拟机,线程,请求等)
- 监控日志
- 管理服务(服务下线)
可视化监控平台
服务端
- 导入依赖
        <dependency>
            <groupId>de.codecentric</groupId>
            <artifactId>spring-boot-admin-starter-admin</artifactId>
            <version>2.3.1</version>
        </dependency>
- 配置
port: 8080
- 启动类上加上注解
@SpringBootApplication
@EnableAdminServer
public class Springboot19AdminServerApplication {

    public static void main(String[] args) {
        SpringApplication.run(Springboot19AdminServerApplication.class, args);
    }

}
客户端
- 依赖
        <dependency>
            <groupId>de.codecentric</groupId>
            <artifactId>spring-boot-admin-starter-client</artifactId>
            <version>2.3.1</version>
        </dependency>
- 配置
spring:
boot:
admin:
client:
url: http://localhost:8080
server:
port: 80
management:
endpoint:
health:
show-details: always
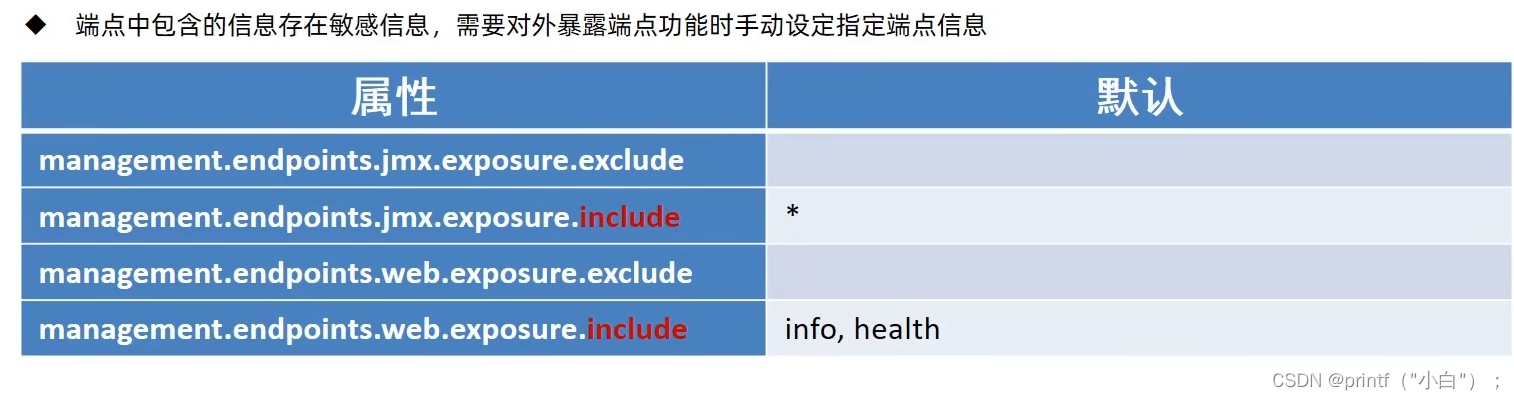
endpoints:
web:
exposure:
include: "*"
监控原理
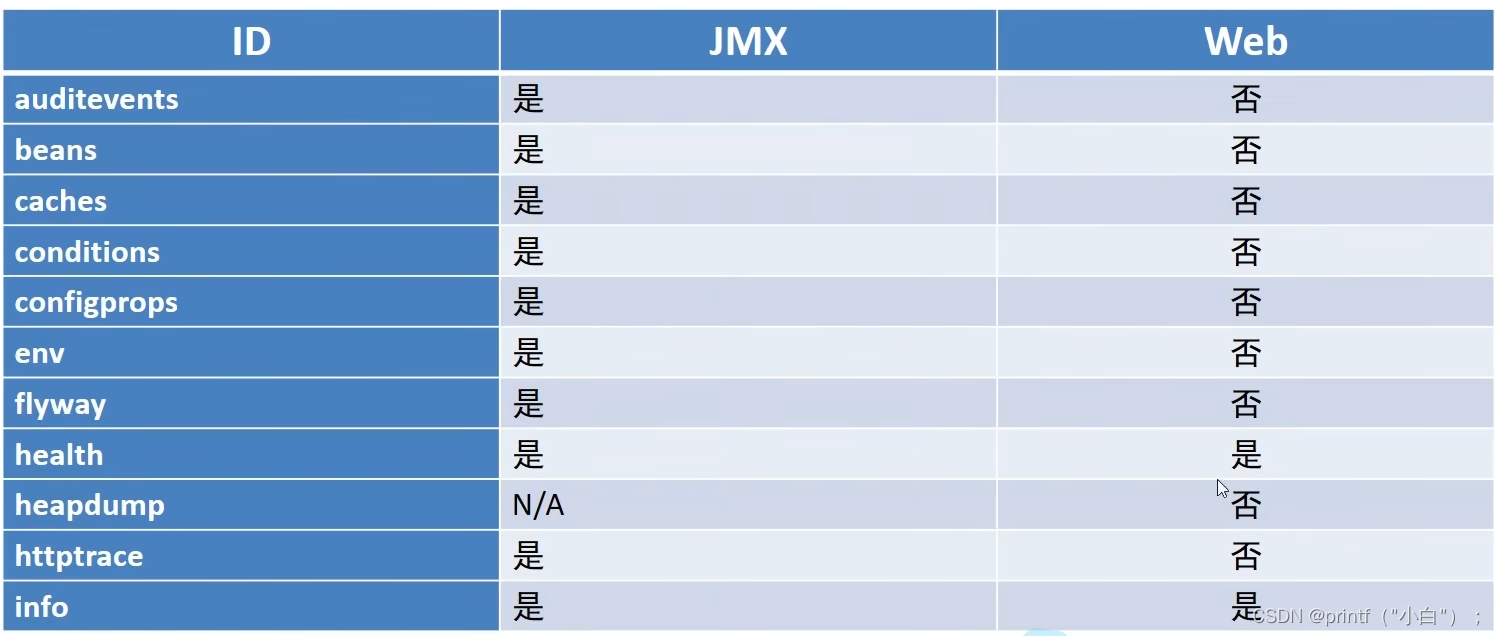
- web程序专用端点
- 客户端配置样例(只是对外暴露信息)
management:
  endpoint:
    health:
      show-details: always
    info: # 单独关闭info信息
      enabled: false
  endpoints:
  	# 开启web访问功能
    web:
      exposure:
        include: "*"
    enabled-by-default: true
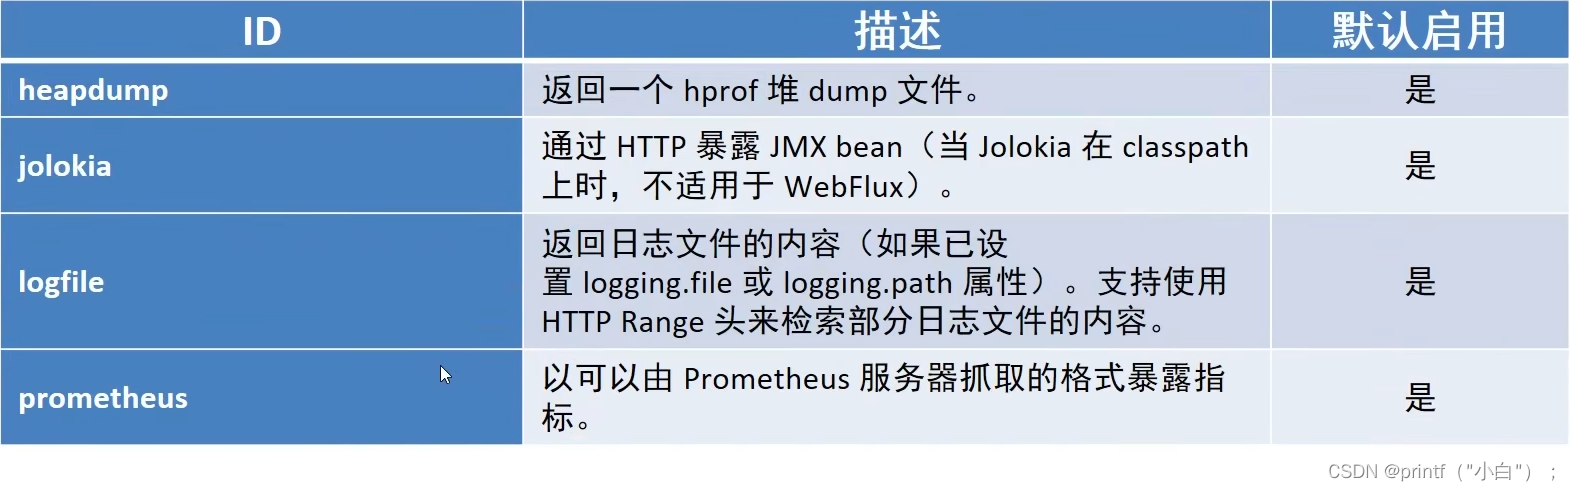
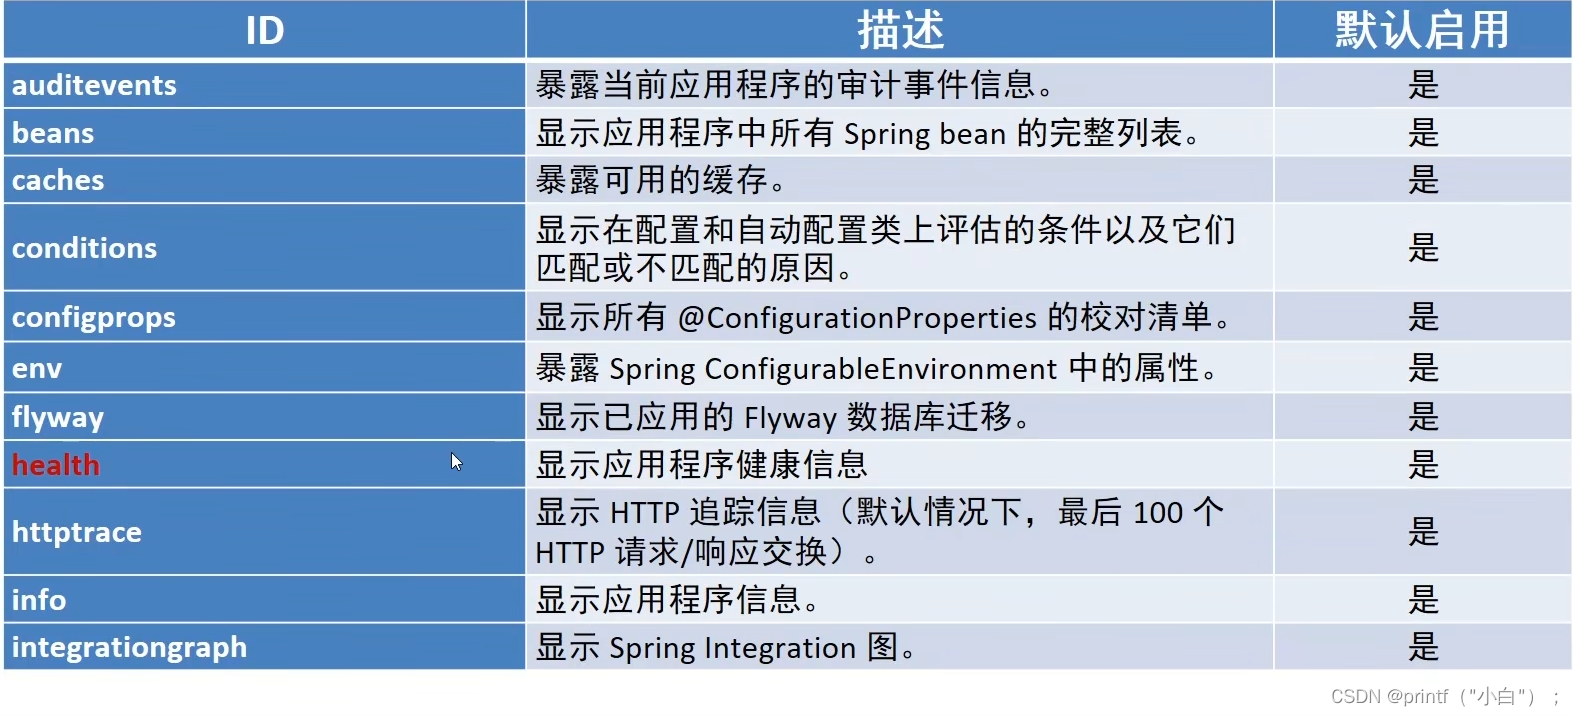
Actuator
- Actuator提供了SpringBoot生产就绪功能,通过端点的配置与访问,获取端点信息
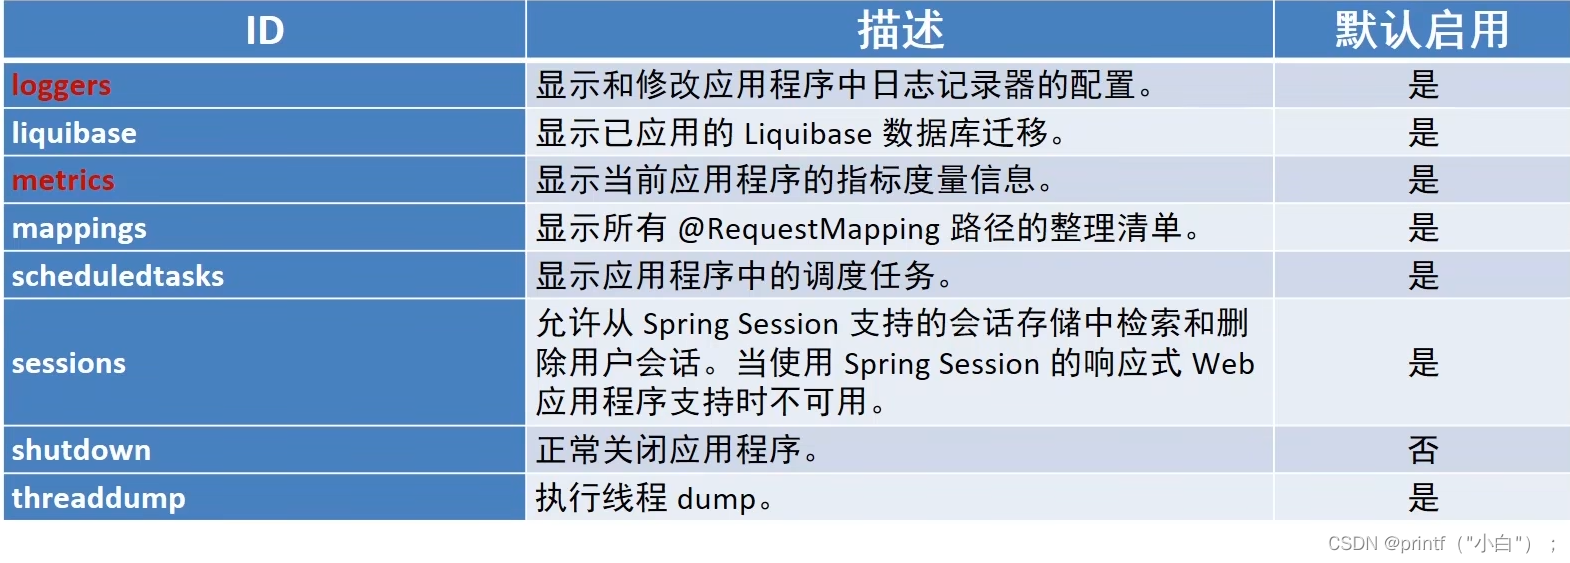
- 端点提供了一组监控信息,SpringBoot提供多个内置端点,也可以根据需要自定义端点信息
- 访问当前应用所有端点信息:
/actuator - 访问端点详细信息:
/actuator/端点名称
- 暴露端点功能
自定义监控指标
info端点指标控制
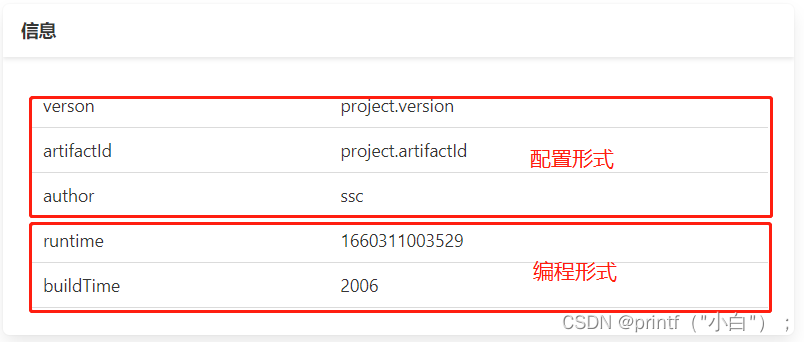
- 配置
info:
  verson: project.version
  artifactId: project.artifactId
  author: ssc
- 编程
@Component
public class InfoConfig implements InfoContributor {
    @Override
    public void contribute(Info.Builder builder) {
        builder.withDetail("runtime",System.currentTimeMillis());
        Map infoMap = new HashMap();
        infoMap.put("buildTime","2006");
        builder.withDetails(infoMap);
    }
}
health端点指标控制
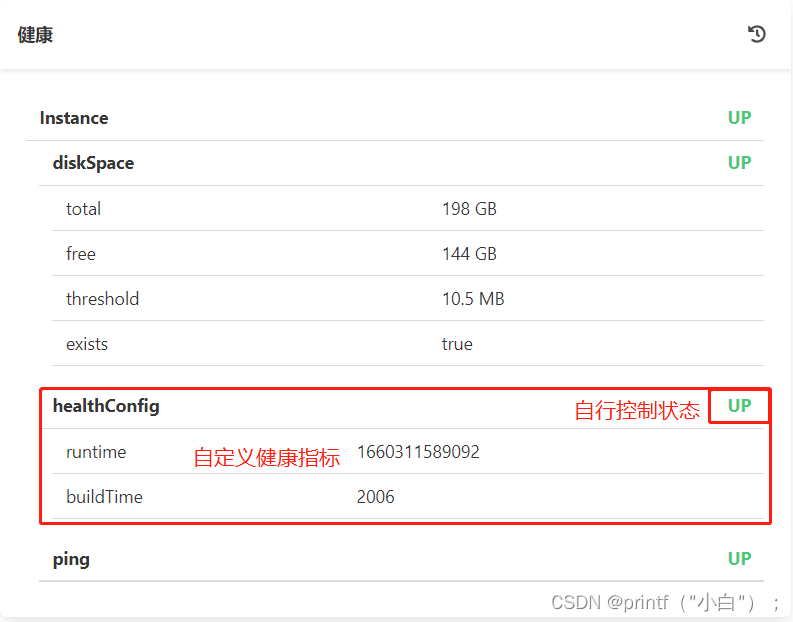
- 编程(
最好加入真实状态,而不是纯文本)
@Component
public class HealthConfig extends AbstractHealthIndicator {
    @Override
    protected void doHealthCheck(Health.Builder builder) throws Exception {
        builder.withDetail("runtime",System.currentTimeMillis());
        Map infoMap = new HashMap();
        infoMap.put("buildTime","2006");
        builder.withDetails(infoMap);
        builder.up();
    }
}
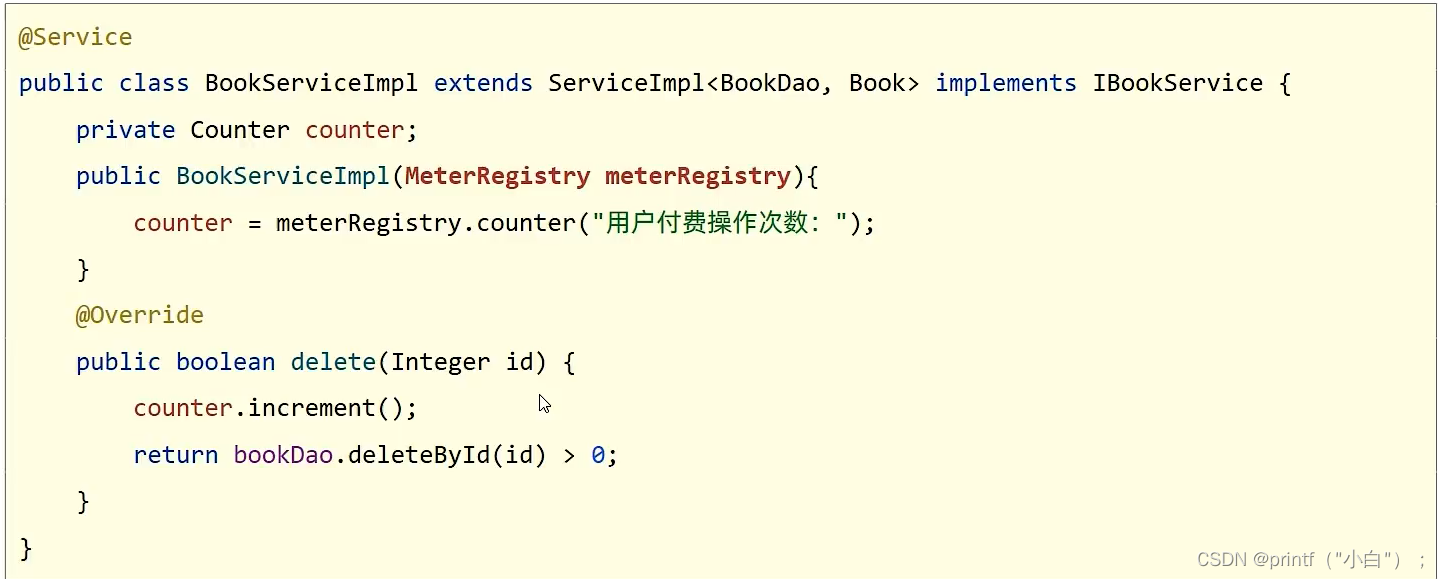
metrics端点指标控制
自定义端点

@Component
@Endpoint(id = "pay",enableByDefault = true)
public class PayEndpoint {

    @ReadOperation
    public void getPay(){
        System.out.println("============");
        System.out.println("============");
        System.out.println("============");
        System.out.println("============");
    }

}


 187
187


 被折叠的 条评论
为什么被折叠?
被折叠的 条评论
为什么被折叠?
 到【灌水乐园】发言


