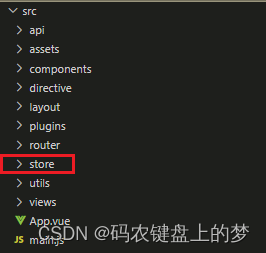
一、Vue 3 项目中集成Pina 状态管理库
要在 Vue 3 项目中使用 Pina(Vue 3 状态管理库),您可以按照以下步骤操作:
1. 安装 Pina 库相应的插件:
yarn add pinia
# 或者使用 npm
npm install pinia
2. 在您的 Vue 3 项目中,创建一个 store 目录(如果不存在)用于存放状态管理相关的文件。

3. 在 store 目录下创建一个 index.ts 文件,并添加以下内容作为起始点来配置和创建 Pinia 实例:
import { createPinia } from 'pinia'

// 创建 Pinia 实例
const pinia = createPinia()

// 导出 Pinia 实例以便将其与您的应用程序实例关联
export default pinia
4.在您的 Vue 应用程序入口文件中(通常是 main.ts 或 main.js),确保将 Pinia 实例与您的应用程序实例关联
// 应用程序入口文件
import { createApp } from 'vue'
import store from './store/index'

const app = createApp(App)
app.use(store)

// 其他插件和设置
app.mount('#app')
5. 使用 defineStore 来定义您的状态存储模块。您可以在 store 目录下创建多个文件以组织不同的状态存储模块,例如 user.ts、settings.ts 等。
// user.ts
import { defineStore } from 'pinia'

export const useUserStore = defineStore({
  id: 'user',//id 是为了更好地区分模块
  state: () => ({
    name: 'John Doe',
    age: 30
  }),
  actions: {
    // 定义操作或者异步请求
  }
})
6.. 在 Vue 组件中使用状态存储:
<template>
  <div>
    <p>{{ name }}</p>
    <p>{{ age }}</p>
  </div>
</template>

<script>
import { defineComponent } from 'vue'
import { useUserStore } from '../store/user'
import { storeToRefs } from 'pinia';

export default defineComponent({
  setup() {
    const userStore = useUserStore()

    // 可以通过 userStore 访问状态和操作
    const { name, age } = storeToRefs(userStore);

  }
})
</script>
通过以上步骤,您就成功地在 Vue 3 项目中集成了 Pina 状态管理库。
二、vue3 使用 pinia发送异步请求
要在 Vue 3 项目中使用 Pinia 发送异步请求,您可以按照以下步骤操作:
1. 首先,确保您已经设置了 Pinia 并创建了状态存储模块(确保项目中已经集成Pina 状态管理库)。可以参考上一个目录的步骤来完成这些准备工作。
2. 在您的状态存储模块中添加 action 来处理异步请求。例如,在 user.ts 文件中:
// user.ts
import { defineStore } from 'pinia'
import axios from 'axios'

export const useUserStore = defineStore({
  id: 'user',
  state: () => ({
    users: []
  }),
  actions: {
    async getUsers() {
      try {
        const response = await axios.get('https://api.example.com/users')
        this.users = response.data
      } catch (error) {
        console.error('Error fetching users:', error)
      }
    }
  }
})
3. 然后,在您的 Vue 组件中,您可以调用定义的 action 来发起异步请求:
<template>
  <div>
    <button @click="getUsers">Get Users</button>
    <ul>
      <li v-for="user in users" :key="user.id">{{ user.name }}</li>
    </ul>
  </div>
</template>

<script>
import { defineComponent } from 'vue'
import { useUserStore } from '../store/user'

export default defineComponent({
  setup() {
    const userStore = useUserStore();
    // 可以通过 userStore 访问状态和操作
    const { users } = storeToRefs(userStore);
    function getUsers() {
         userStore .getUsers()
    }
  }
})
在上述示例中,当用户点击 "Fetch Users" 按钮时,将会调用 fetchUsers 方法来触发异步请求,并将获取到的用户数据展示在页面上。
通过以上步骤,您就成功地在 Vue 3 项目中使用 Pinia 发送了异步请求。


 385
385


 被折叠的 条评论
为什么被折叠?


