


【学习笔记】一个简单的SpringBoot+React项目
一、后台搭建
1、springboot项目用到的依赖
		<dependency>
            <groupId>org.springframework.boot</groupId>
            <artifactId>spring-boot-starter-thymeleaf</artifactId>
        </dependency>
        <dependency>
            <groupId>org.springframework.boot</groupId>
            <artifactId>spring-boot-starter-web</artifactId>
        </dependency>

        <dependency>
            <groupId>org.springframework.boot</groupId>
            <artifactId>spring-boot-devtools</artifactId>
            <scope>runtime</scope>
            <optional>true</optional>
        </dependency>
        <dependency>
            <groupId>org.springframework.boot</groupId>
            <artifactId>spring-boot-starter-test</artifactId>
            <scope>test</scope>
        </dependency>

        <dependency>
            <groupId>mysql</groupId>
            <artifactId>mysql-connector-java</artifactId>
            <version>5.1.47</version><!--$NO-MVN-MAN-VER$-->
       </dependency>
       <dependency>
            <groupId>org.mybatis.spring.boot</groupId>
            <artifactId>mybatis-spring-boot-starter</artifactId>
            <version>1.1.1</version>
        </dependency>
2、application.properties配置
spring.devtools.restart.exclude=static/**,public/**
spring.devtools.restart.enabled=true
spring.datasource.driver-class-name=com.mysql.jdbc.Driver
spring.datasource.url=jdbc:mysql://127.0.0.1:3307/student?useUnicode=true&characterEncoding=UTF-8&serverTimezone=GMT&useSSL=false
spring.datasource.username=root
spring.datasource.password=密码
3、用mybatis逆向工程创建好实体类与Mapper文件
generatorConfig.xml
<?xml version="1.0" encoding="UTF-8"?>
<!DOCTYPE generatorConfiguration
        PUBLIC "-//mybatis.org//DTD MyBatis Generator Configuration 1.0//EN"
        "http://mybatis.org/dtd/mybatis-generator-config_1_0.dtd">

<generatorConfiguration>
    <!-- 引入配置文件 -->
    <!-- <properties resource="test_application.properties"/>-->

    <!-- 指定数据库连接驱动 -->
    <classPathEntry location="C:/Users/T1734/.m2/repository/mysql/mysql-connector-java/5.1.47/mysql-connector-java-5.1.47.jar" />

    <!-- 一个数据库一个context -->
    <context id="student_information" targetRuntime="MyBatis3">
        <!-- 生成的pojo,将implements Serializable -->
        <plugin type="org.mybatis.generator.plugins.SerializablePlugin"></plugin>

        <!-- 注释 -->
        <commentGenerator>
            <property name="suppressAllComments" value="true"/><!-- 是否取消注释 -->
            <!-- <property name="suppressDate" value="true" />  是否生成注释代时间戳 -->
        </commentGenerator>

        <!-- 数据库链接URL、用户名、密码 -->
        <jdbcConnection driverClass="com.mysql.jdbc.Driver"
                        connectionURL="jdbc:mysql://127.0.0.1:3307/student?serverTimeZone=GMT"
                        userId="root"
                        password="密码">
        </jdbcConnection>

        <!-- 类型转换 -->
        <javaTypeResolver>
            <!-- 默认false,把JDBC DECIMAL 和 NUMERIC 类型解析为 Integer true,把JDBC DECIMAL
                和 NUMERIC 类型解析为java.math.BigDecimal -->
            <property name="forceBigDecimals" value="false"/>
        </javaTypeResolver>

        <!-- 生成实体类,对应的包路径,以及文件存放路径(targetProject),targetProject可以指定具体的路径,如./src/main/java,
            也可以使用“MAVEN”来自动生成,这样生成的代码会在target/generatord-source目录下 -->
        <javaModelGenerator targetPackage="com.yss.demothymeleaf.entity" targetProject="src/main/java">
            <!-- 是否在当前路径下新加一层schema,eg:fase路径com.oop.eksp.user.model, true:com.oop.eksp.user.model.[schemaName] -->
            <property name="enableSubPackages" value="false"/>
            <!-- 从数据库返回的值被清理前后的空格 -->
            <property name="trimStrings" value="true"/>
        </javaModelGenerator>

        <!--对应的mapper.xml文件 -->
        <sqlMapGenerator targetPackage="mapper" targetProject="src/main/resources">
            <property name="enableSubPackages" value="false"/>
        </sqlMapGenerator>

        <!-- 对应的Mapper接口类文件 -->
        <javaClientGenerator type="XMLMAPPER" targetPackage="com.yss.demothymeleaf.dao" targetProject="src/main/java">
            <property name="enableSubPackages" value="false"/>
        </javaClientGenerator>


        <!-- 列出要生成代码的所有表,这里配置的是不生成Example文件 -->
        <!-- schema即为数据库名 tableName为对应的数据库表 domainObjectName是要生成的实体类 enable*ByExample
                   是否生成 example类   -->
        <!-- schema="${gererator.schema}" -->
        <!-- 若是数据库里有多张表 tableName="%"  再去掉 domainObjectName="Student" -->
        <table tableName="student_information">
            <!-- 忽略列,不生成bean 字段
            <ignoreColumn column="FRED" />-->
            <!-- 指定列的java数据类型
            <columnOverride column="LONG_VARCHAR_FIELD" jdbcType="VARCHAR" />  -->
            <!-- 用于指定生成实体类时是否使用实际的列名作为实体类的属性名。false是 Camel Case风格-->
            <property name="useActualColumnNames" value="false"/>
        </table>
    </context>
</generatorConfiguration>
4、StudentService
@Service
public class StudentService {

    @Autowired
    private StudentInformationMapper studentInformationMapper;

    @Autowired
    private StudentInformationExample studentExample;


    /**
     * @Description: 查询所有学生
     * @return: java.util.List<com.yss.student.entity.StudentInformation>## 标题
     * @date: 2020/12/31/13:10
     */
    public List<StudentInformation> selectAllStudent() {

        return studentInformationMapper.selectByExample(null);
    }
5、TestController
@RestController
@RequestMapping("/student")
@CrossOrigin(origins = {"http://localhost:3000"},allowCredentials = "true",allowedHeaders = {"X-Custom-Header"},
        maxAge = 3600L, methods={RequestMethod.GET,RequestMethod.POST,RequestMethod.HEAD})//为解决跨域响应问题需加上此注解
public class TestController {
    @Autowired
    private StudentService service;

    @GetMapping
    public List<StudentInformation> selectAllStudent(){

        return service.selectAllStudent();
    }
}
6、application启动类
@SpringBootApplication
@MapperScan("com.yss.demothymeleaf")
public class DemoThymeleafApplication {

	public static void main(String[] args) {
		SpringApplication.run(DemoThymeleafApplication.class, args);
	}

}
后台搭建完毕
二、React前端搭建
1、idea新建react项目,file–>new–>module–>static web–>react app
2、在src目录下新建目录components,在该目录下新建一个js文件
import React, {Component} from 'react';
import 'isomorphic-fetch';

export default class stuList extends Component{
    constructor() {
        super();
        this.state = {}
    }


    async componentDidMount() {

        let students = await (await fetch('http://localhost:8080/student')).json();//主要是从后台拿json数据
        this.setState({students});
    }
    render() {
        let {students = []} = this.state;

        return (
            <div>
                <table className='table'>
                    <thead>
                    <tr>
                        <th>id</th>
                        <th>姓名</th>
                        <th>年龄</th>
                    </tr>
                    </thead>
                    <tbody>
                    {students.map(({id, studentName, studentAge}) =>
                        <tr key={id}>
                            <td>{id}</td>
                            <td>{studentName}</td>
                            <td>{studentAge}</td>
                        </tr>
                    )}
                    </tbody>
                </table>
            </div>
        );
    }
}
由于使用了fetch需自己手动添加
cmd输入npm install isomorphic-fetch
将生成的文件夹保存到node_modules目录下(没有的build一下)
同理缺少其他文件时不妨也试着这样做(虽然我也不知道这样做是不是最好的,但确实有用)
对index.js做一点修改
import React from 'react';
import ReactDOM from 'react-dom';

import {BrowserRouter, Route} from "react-router-dom";

import './index.css';
import stuList from "./components/stuList";

ReactDOM.render((
        <BrowserRouter>
            <div className="container">
                <Route path="/"  exact component={stuList} />
            </div>
        </BrowserRouter>
    ),
    document.getElementById('root'));
最后先启动springboot项目,再在package.json文件中启动React
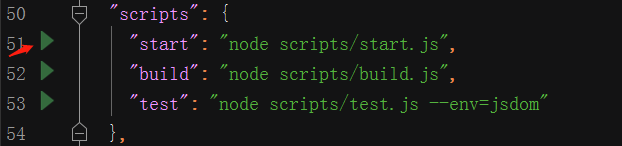
React默认地址http://localhost:3000
结果如下
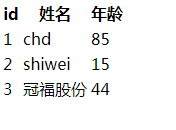
至此项目就完成了


 427
427


 被折叠的 条评论
为什么被折叠?
被折叠的 条评论
为什么被折叠?
 到【灌水乐园】发言


