


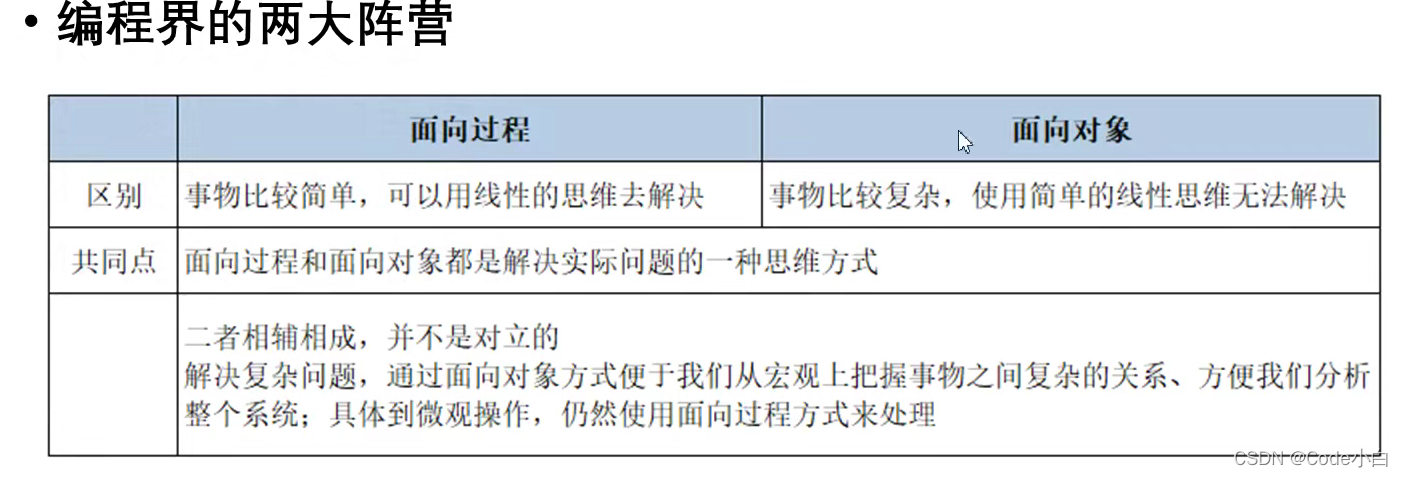
一、两大编程思想
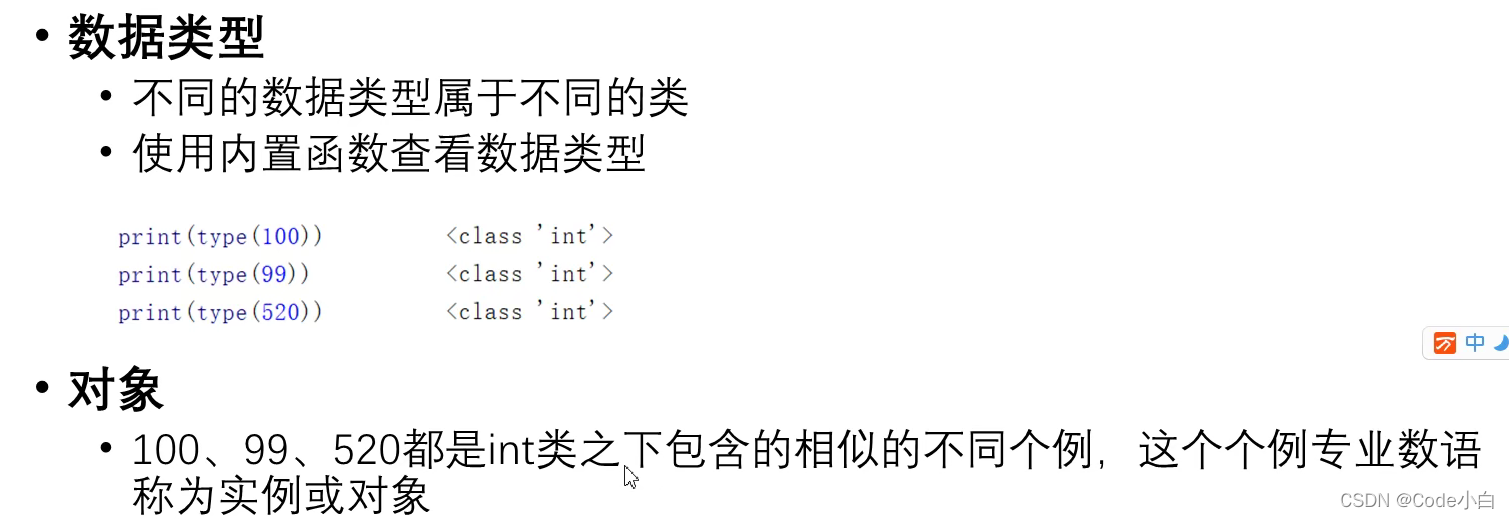
二、类与对象
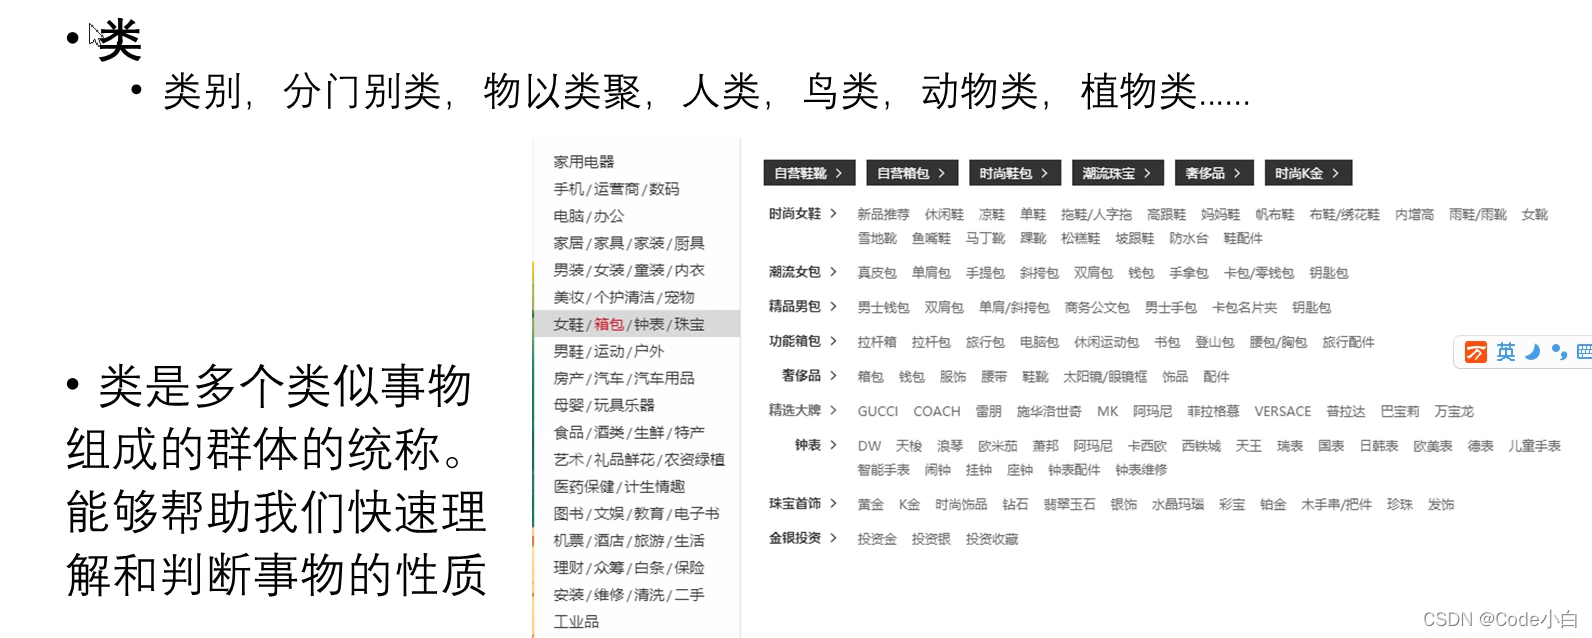
简单举例:
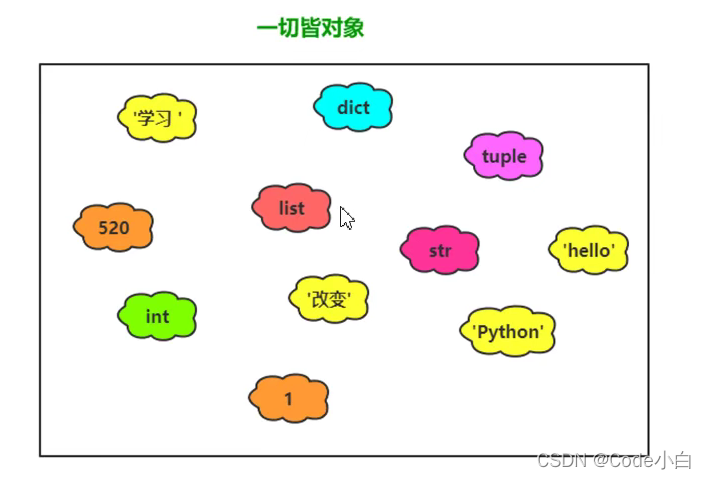
python中一切皆对象,开局一张图:
三、定义Python中的类
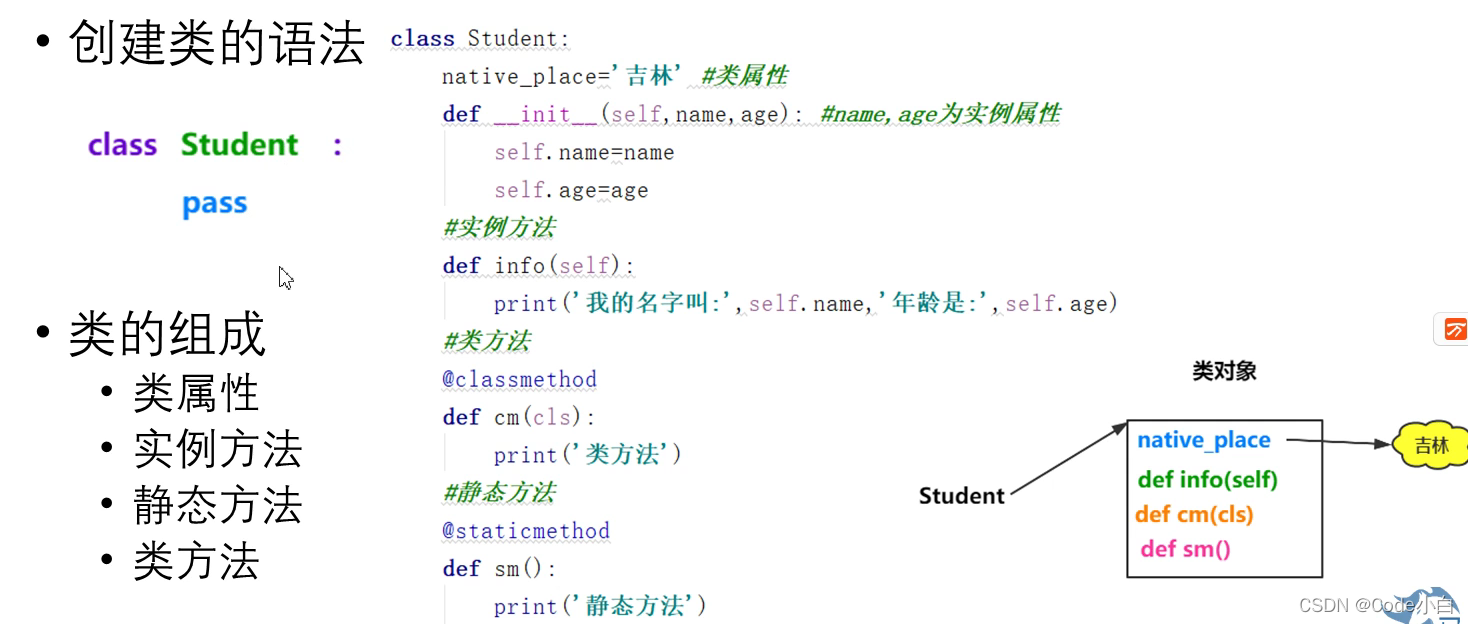
举例1:
class Student:
    pass

print(id(Student)) #1149225945800
print(type(Student)) #<class 'type'>
print(Student) #<class '__main__.Student'>
举例2:
class Student:
    native_place='吉林' #类属性
    def __init__(self,name,age):
        self.name=name
        self.age=age

    #实例方法
    def eat(self):
        print("学生在吃饭")

    #静态方法
    @staticmethod
    def method():
        print("我是静态方法")

    #类方法
    @classmethod
    def cm(cls):
        print("我是类方法")
四、对象创建
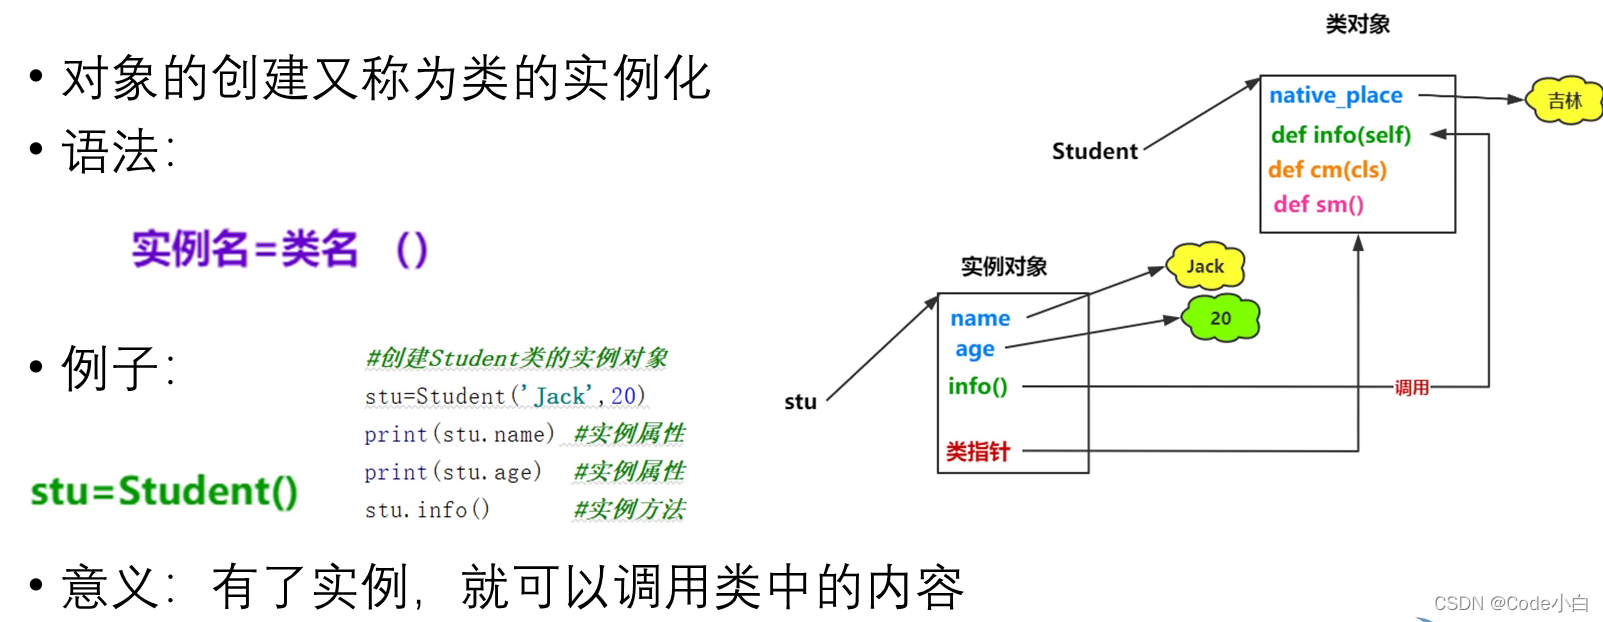
举例1:
#实例对象
student1=Student("张三",18)
print(student1)
print(id(student1))
print(type(student1))
print("-------------------------------------------")
#类对象,代表所在的类
print(Student)
print(id(Student))
print(type(Student))
举例2:
#实例对象
student1=Student("张三",18)

print(student1.name)
print(student1.age)
#实例方法调用有以下两种使用:
print(student1.eat())
print(Student.eat(student1))
五、类属性、类方法、静态方法

举例1:类属性
#类属性
student1=Student("张三",18)
student2=Student("李四",19)
print(Student.native_place) #吉林
print(student1.native_place)#吉林
print(student2.native_place)#吉林
Student.native_place='四川'
print(student1.native_place)#四川
print(student2.native_place)#四川
#---------------------------------------------------------
student1.native_place='广东'
print(student1.native_place)#广东
print(student2.native_place)#四川
举例2:类方法、静态方法
#类方法、静态方法使用
student1=Student("张三",18)

Student.method()#我是静态方法
Student.cm()#我是类方法
六、动态绑定属性和方法
Python是动态语言,在创建对象之后,可以动态的绑定属性和方法
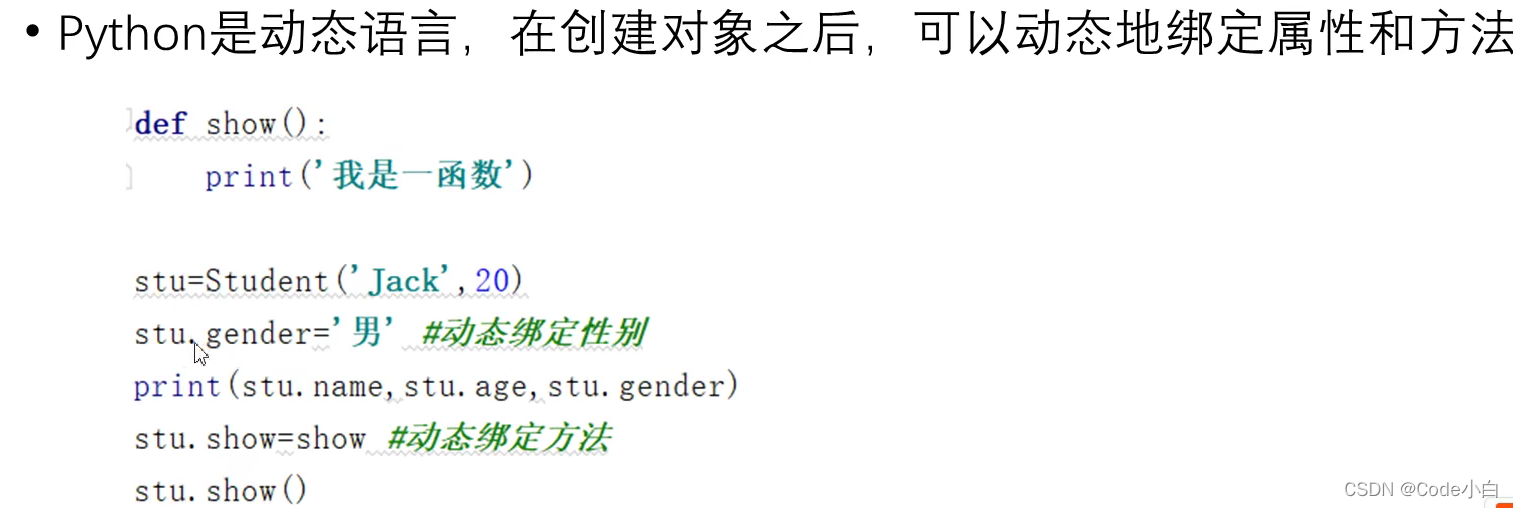
举例:属性绑定
class Student:
    def __init__(self,name,age):
        self.name=name
        self.age=age

    #实例方法
    def eat(self):
        print("学生在吃饭")

student1=Student('张三',19)
student2=Student('李四',20)
print(id(student1)) #2363920157896
print(id(student2)) #2363920157960

print("--------绑定属性-------")
print("绑定属性-----为student2动态的绑定gender属性-------")
student2.gender='男'
print(student1.name,student1.age) #张三 19
#print(student1.gender) 当student1访问其没有的属性时,会报错AttributeError: 'Student' object has no attribute 'gender'
print(student2.name,student2.age,student2.gender) #李四 20 男

print("--------绑定方法-------")
def show():
    print('我是show方法')
student1.show=show
student1.show() #我是show方法
student2.show() #报错AttributeError: 'Student' object has no attribute 'show'
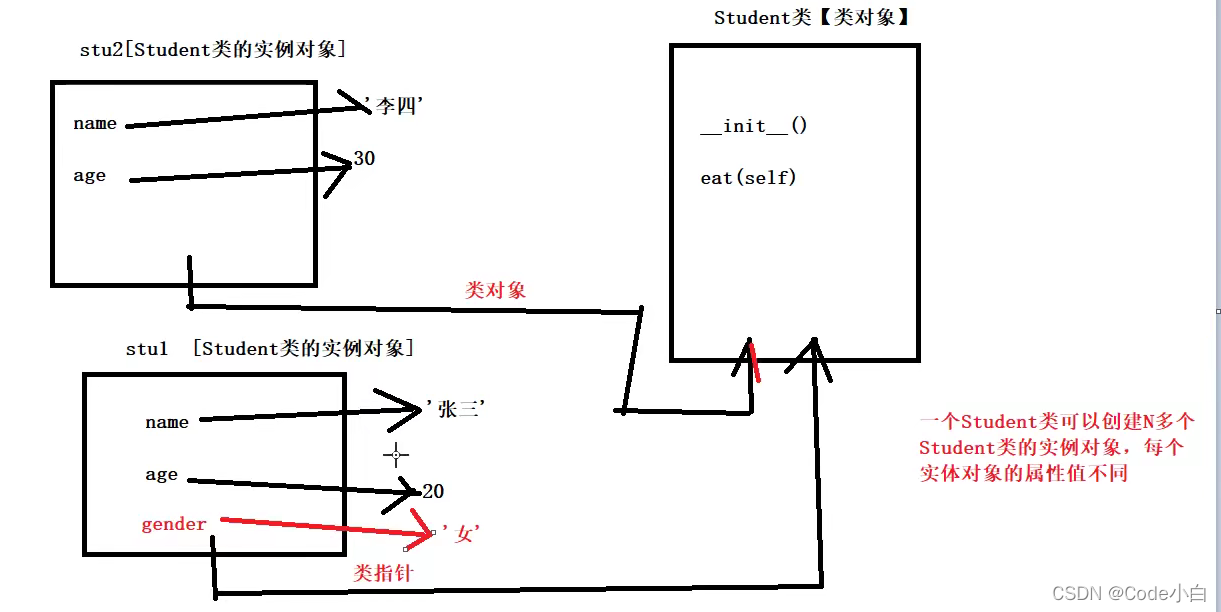
内存分析:
七、面向对象的三大特征
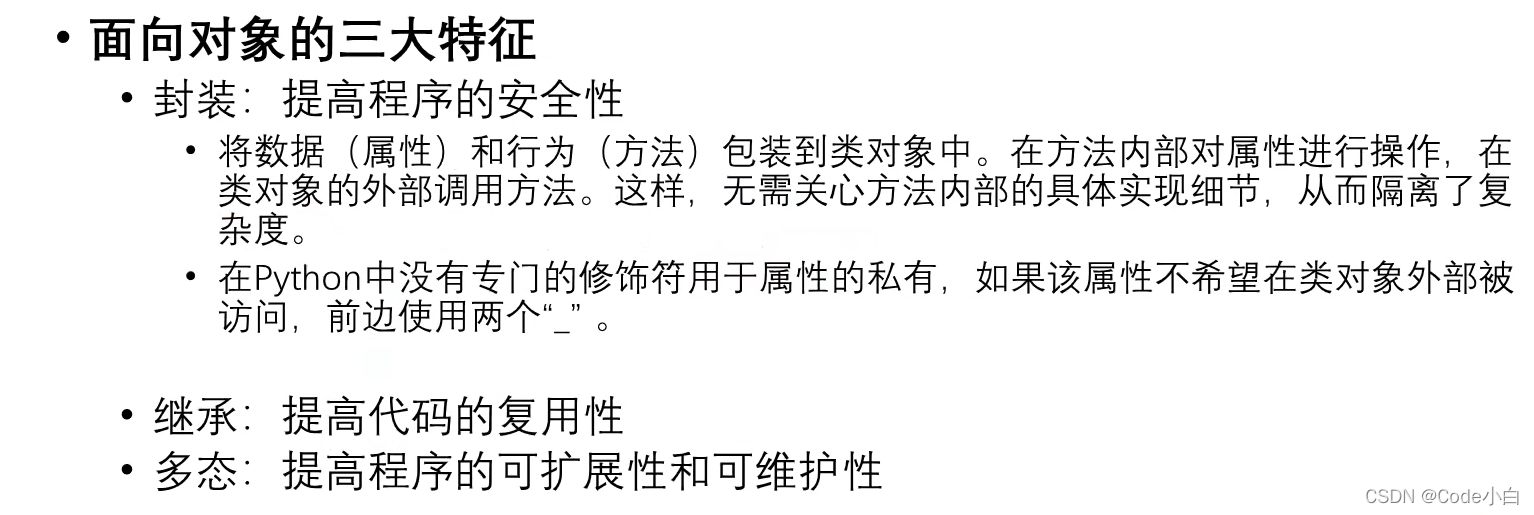
1、封装
class Car:
    def __init__(self,brand,age):
        self.brand=brand
        self.__age=age

    def show(self):
        print(self.brand,self.__age)

car1=Car('宝马X5',50)
print(car1.brand) #宝马X5
# print(car1.__age) __标识的属性限制其在类外使用,在类的内部可以使用,在外面访问是会报错
#若要使用__标识的属性,可以先用dir()查出属性,再访问
print(dir(car1))
#输出['_Car__age', '__class__', '__delattr__', '__dict__', '__dir__', '__doc__', '__eq__', '__format__', '__ge__', '__getattribute__', '__gt__', '__hash__', '__init__', '__init_subclass__', '__le__', '__lt__', '__module__', '__ne__', '__new__', '__reduce__', '__reduce_ex__', '__repr__', '__setattr__', '__sizeof__', '__str__', '__subclasshook__', '__weakref__', 'brand', 'show']
print(car1._Car__age)#50
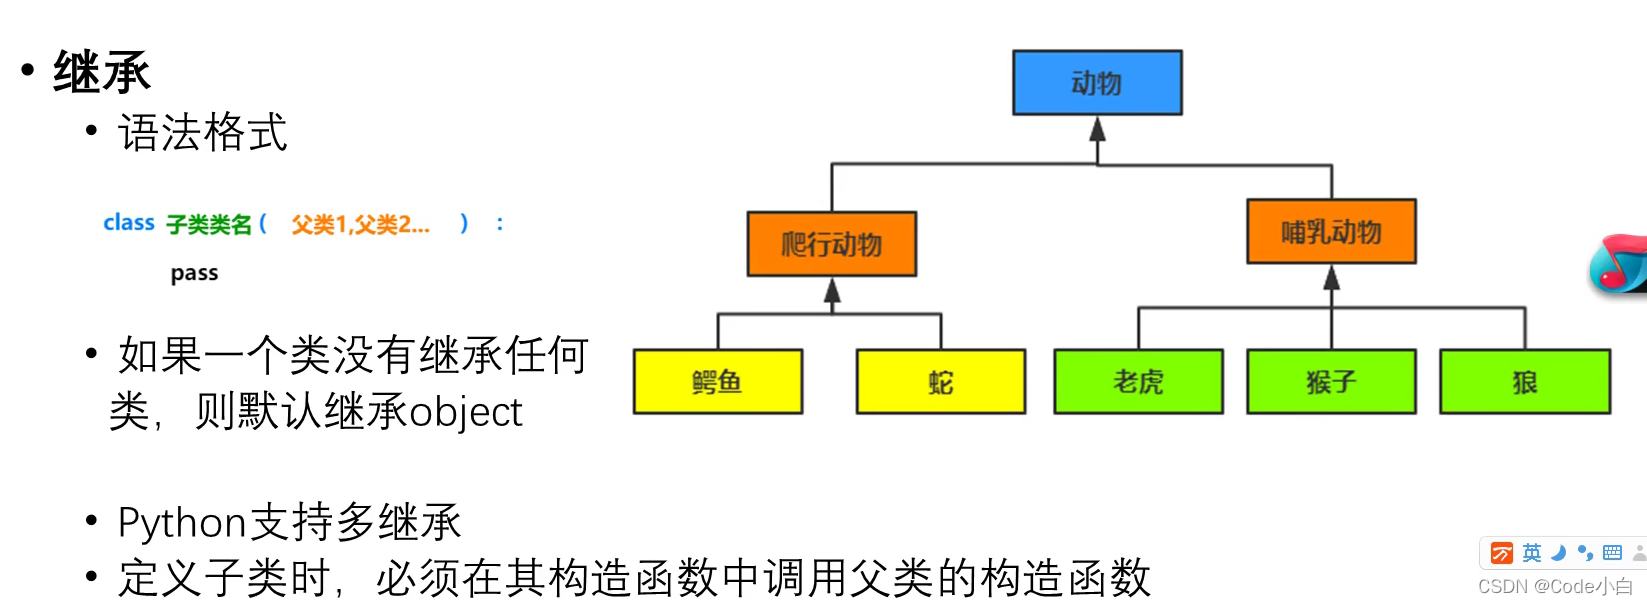
2、继承(与其他语言不同,python支持多继承)
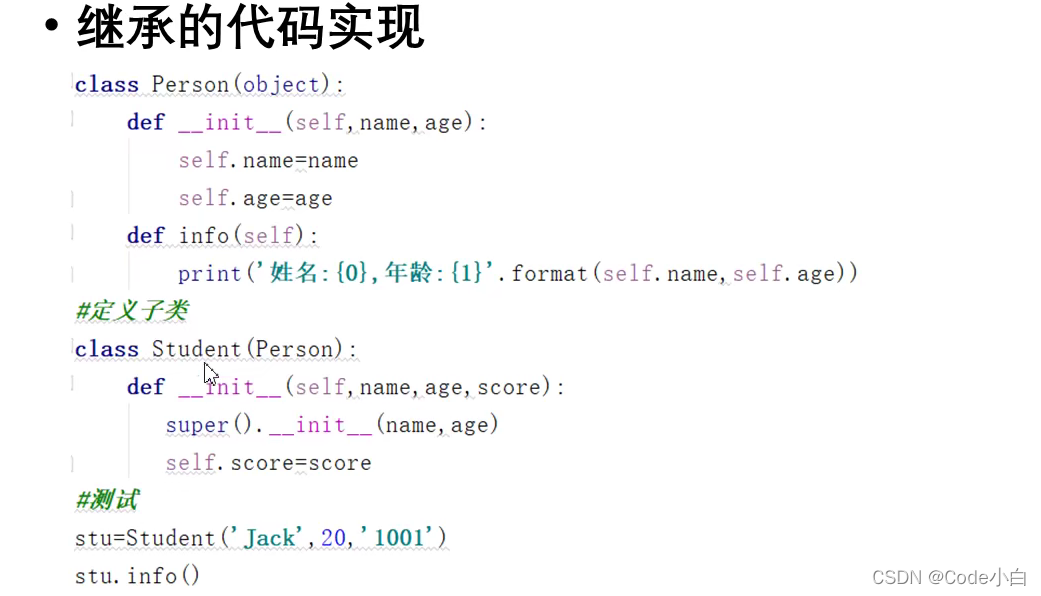
举例:
class People:
    def __init__(self,name,age):
        self.name=name
        self.age=age
    def info(self):
        print(self.name,self.age)

class Student(People):
    def __init__(self,name,age,sno):
        super().__init__(name,age)
        self.sno=sno
class Teacher(People):
    def __init__(self,name,age,teachofage):
        super().__init__(name,age)
        self.teachofage=teachofage

student1=Student('张三',18,122)
teacher1=Teacher('李四',36,10)
student1.info() #张三 18
teacher1.info() #李四 36
3、多态

八、方法重写
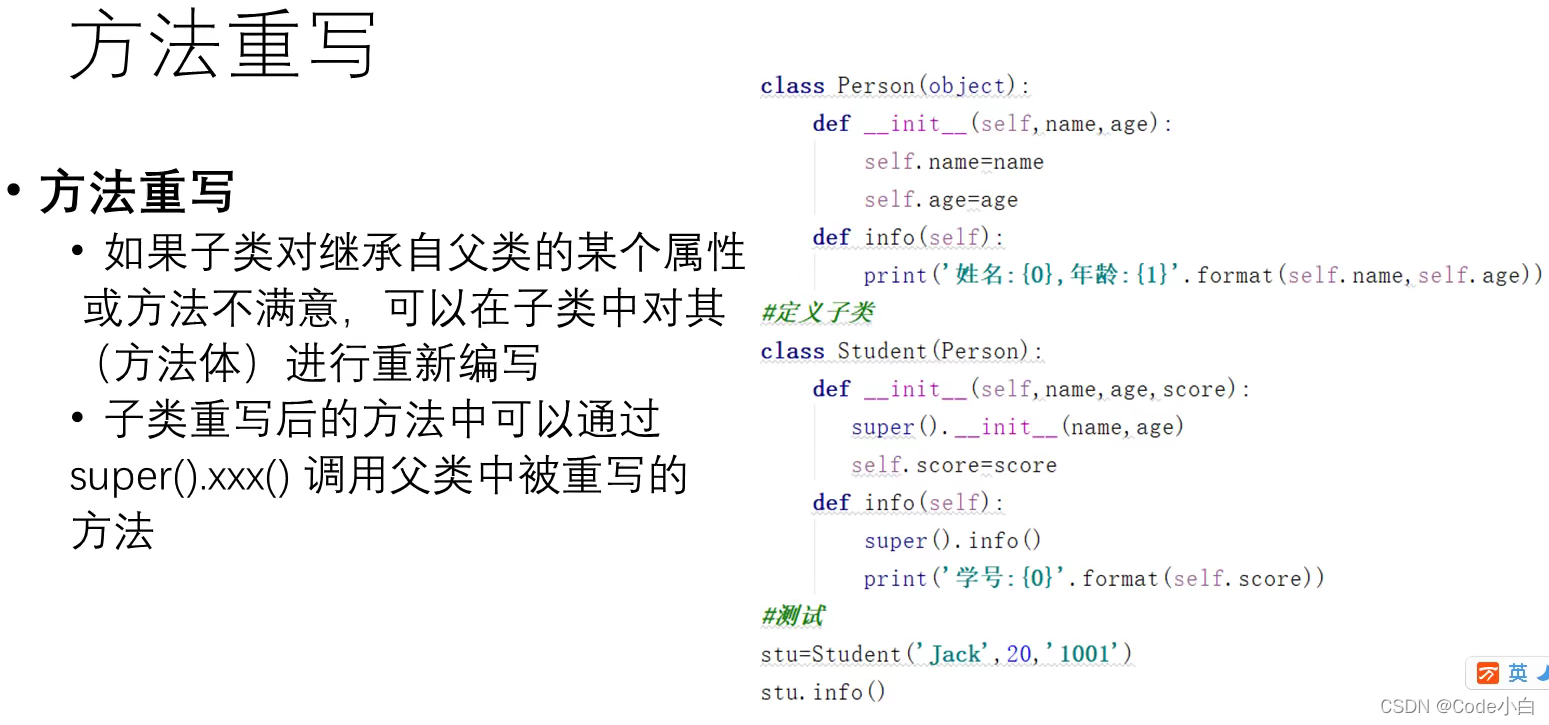
举例:
class People:
    def __init__(self,name,age):
        self.name=name
        self.age=age
    def info(self):
        print(self.name,self.age)

class Student(People):
    def __init__(self,name,age,sno):
        super().__init__(name,age)
        self.sno=sno
    def info(self):
        super().info()
        print(self.sno)
class Teacher(People):
    def __init__(self,name,age,teachofage):
        super().__init__(name,age)
        self.teachofage=teachofage
    def info(self):
        super().info()
        print(self.teachofage)

student1=Student('张三',18,122)
teacher1=Teacher('李四',36,10)
student1.info()
teacher1.info()
结果为:
九、object类
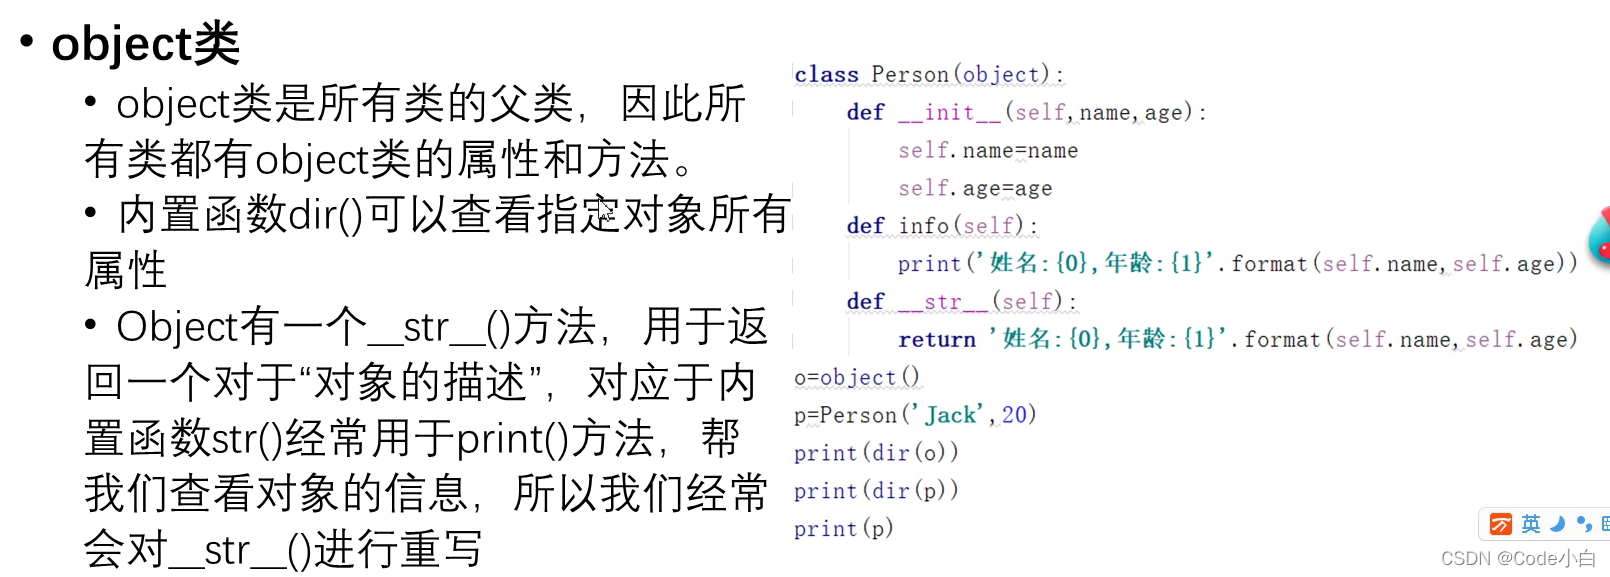
举例:
class People:
    def __init__(self,name,age):
        self.name=name
        self.age=age

    def __str__(self):
        return "我是{0},今年{1}".format(self.name,self.age)

people1=People('张三',28)
print(people1) #我是张三,今年28
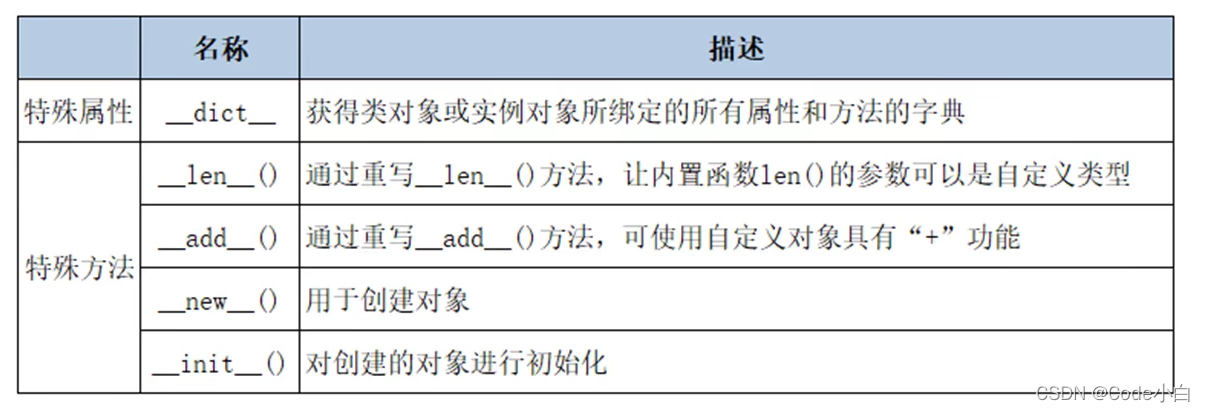
十、特殊属性和特殊方法
举例1:
class A:
    pass

class B:
    pass

class C(A,B):
    pass

c=C()
print(C.__dict__)#类对象的属性字典 {'__module__': '__main__', '__doc__': None}
print(c.__dict__)#实例对象的属性字典 {}
print(c.__class__)#输出对象所处的类 <class '__main__.C'>
print(C.__bases__)#C的父类类型元素 (<class '__main__.A'>, <class '__main__.B'>)
print(C.__base__)#类的基类(其中一个父类,与继承父类的先后顺序有关) <class '__main__.A'>
print(C.__mro__)#类的层次结构(<class '__main__.C'>, <class '__main__.A'>, <class '__main__.B'>, <class 'object'>)
print(A.__subclasses__())#子类的列表[<class '__main__.C'>]
举例2:
a=10
b=20
c=a+b
print(c)#30
#a+b实际上是调用a的__add__()方法
d=a.__add__(b)
print(d)#30

print("------------------------------------------------")

#实现两个类中的某个属性,可以重写__add__()方法
class People:
    def __init__(self,name):
        self.name=name

    def __add__(self, other):
        return self.name+other.name
    def __len__(self):
        return len(self.name)

people1=People('张三')
people2=People('李四')
print(people1+people2)#张三李四

print("------------------------------------------------")

lst=[1,2,3,4,5]
print(len(lst))#len()为内置函数,计算长度 5
print(lst.__len__())#可以重写__len__()方法,计算指定长度 5
print(people1.__len__())#2
举例3:__new__和__init__创建对象的过程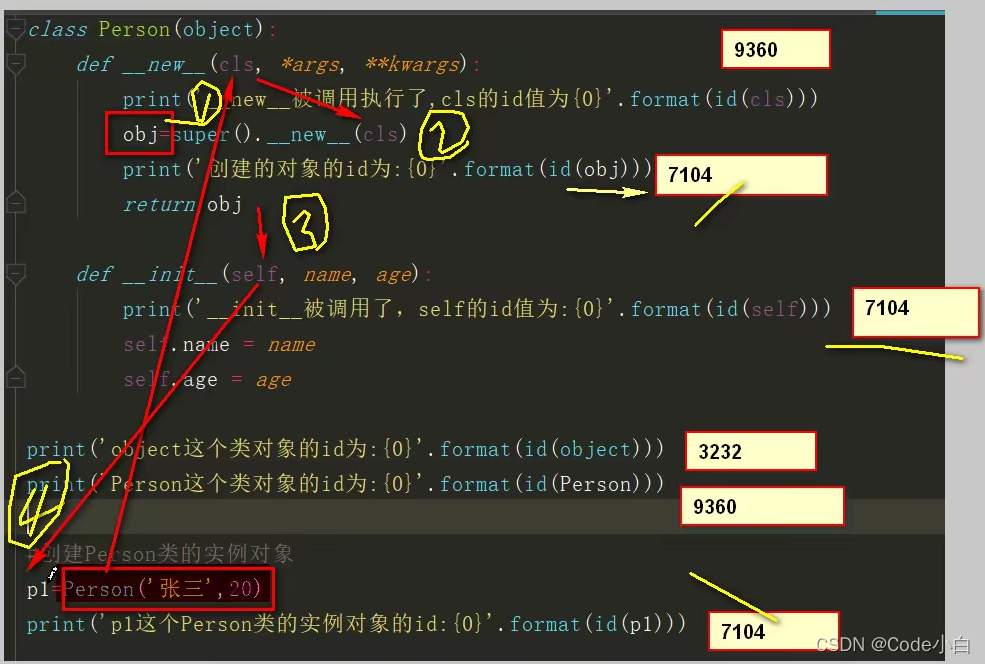
十一、类的深拷贝和浅拷贝

举例:
class CPU:
pass
class DISK:
pass
class Computer:
def __init__(self,cpu,disk):
self.cpu=cpu
self.disk=disk
#---------赋值操作---------------------
cpu1=CPU()
cpu2=cpu1
print(cpu1,id(cpu1)) #<__main__.CPU object at 0x00000206DCC20C88> 2228496764040
print(cpu2,id(cpu2)) #<__main__.CPU object at 0x00000206DCC20C88> 2228496764040
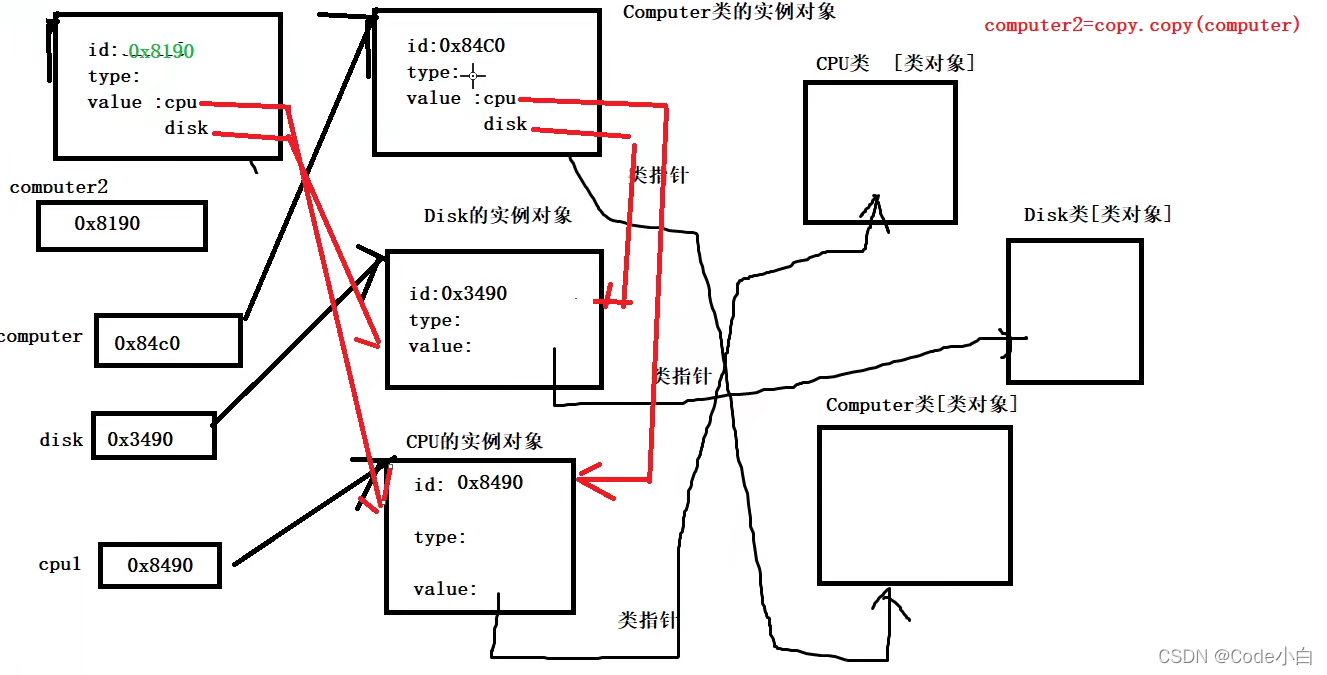
#---------浅拷贝-----------------------
disk=DISK()
computer1=Computer(cpu1,disk)
import copy
computer2=copy.copy(computer1)
print(computer1,computer1.disk,computer1.cpu)#<__main__.Computer object at 0x000002145D640F48> <__main__.DISK object at 0x000002145D640F08> <__main__.CPU object at 0x000002145D640E88>
print(computer2,computer2.disk,computer2.cpu)#<__main__.Computer object at 0x000002145D640F88> <__main__.DISK object at 0x000002145D640F08> <__main__.CPU object at 0x000002145D640E88>
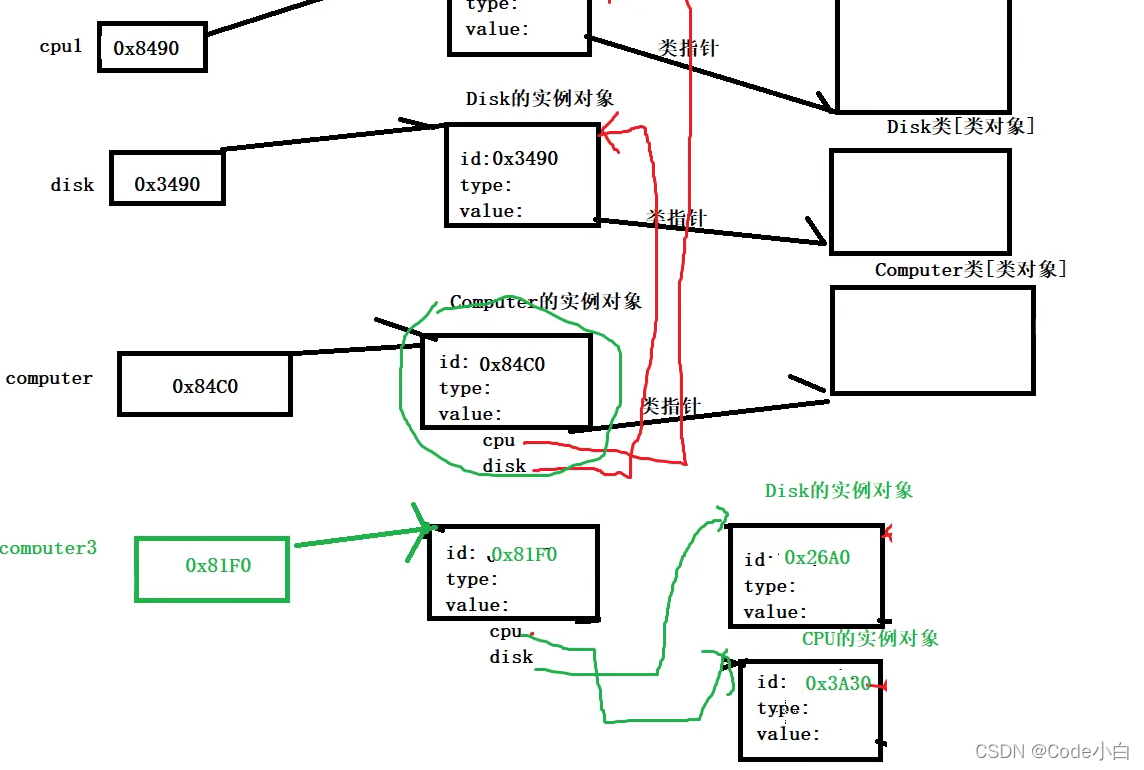
#----------深拷贝----------------------
computer3=copy.deepcopy(computer1)
print(computer1,computer1.disk,computer1.cpu)#<__main__.Computer object at 0x000001CF1EACE0C8> <__main__.DISK object at 0x000001CF1EACE088> <__main__.CPU object at 0x000001CF1CEA0FC8>
print(computer3,computer3.disk,computer3.cpu)#<__main__.Computer object at 0x000001CF1EACE148> <__main__.DISK object at 0x000001CF1EACECC8> <__main__.CPU object at 0x000001CF1EACEC08>
浅拷贝内存分析:只拷贝了computer的实例对象1,拷贝出的为computer2,对于computer2里面的子对象disk,cpu没有拷贝,还是指向原来的disk、cpu
深拷贝拷贝了computer的实例对象1,拷贝出的为computer3,对于computer3里面的子对象disk,cpu也全部拷贝


 1296
1296


 被折叠的 条评论
为什么被折叠?
被折叠的 条评论
为什么被折叠?
 到【灌水乐园】发言


