


这是我自己进行项目开发过程中遇到的一些问题,我将他们记录了下来
一、合理的安装开发软件的过程
1、安装jdk
1.1版本问题
不要安装最新的jdk,很容易出现bug,可以安装第三个版本左右的jdk
1.2配置环境变量
网上搜
2、安装Tomcat
2.1.版本问题
也是像jdk一样
2.2.配置环境变量
网上搜
3、安装maven
3.1.版本问题
我写着文件时用的3.6.3,可以根据需要安装,要注意版本兼容性,尽量不要最新版的
3.2.配置环境变量
网上搜
3.3.配置maven镜像
maven镜像网上搜一个就行,后面要是很慢,可以在不断的进行更换
3.3.配置maven仓库
一般是新建一个maven仓库,和maven放在同一个目录文件夹下,并且在maven文件夹的settings.xml文件中设置自己的maven仓库,具体步骤网上搜。
4、安装idea
4.1.配置maven
安装完idea记得配置maven,如何配置网上搜,记得不要用它默认的maven。
如果一直会恢复maven的话就去project.default.xml文件中强硬一点的设置,更加的安全。我的文件路径是C:\Users\Administrator\AppData\Roaming\JetBrains\IntelliJIdea2020.2\options\project.default.xml。
4.2.配置jdk
不要直接在idea里面配置,采用永久配置jdk的方法是在maven的settings.xml文件中配置,具体网上搜,注意不能出错,如果这个配置错误,那么会出现以下问题:
1、写项目时清除maven会出现Process terminated的错误,出现这个错误很有可能就是你的settings.xml在某一步设置的时候出现了问题,当然不一定就是配置jdk是出了问题,也有可能配置镜像时出现了问题,也有可能是配置maven仓库时出现了问题。总之是settings.xml出现了问题。
4.3.配置Tomcat
在进行web框架开发的时候要进行Tomcat服务器的配置,具体步骤网上搜
二、开发过程中遇到的问题
1、1 字节的 UTF-8 序列的字节 1 无效。
这个现实编码不匹配,将mybatis的核心配置文件的编码格式utf-8改为utf8即可。

2.解决静态资源过滤
<build>
    <resources>
        <resource>
            <directory>src/main/java</directory>
            <includes>
                <include>**/*.properties</include>
                <include>**/*.xml</include>
            </includes>
            <filtering>true</filtering>
        </resource>
        <resource>
            <directory>src/main/resources</directory>
            <includes>
                <include>**/*.properties</include>
                <include>**/*.xml</include>
            </includes>
            <filtering>true</filtering>
        </resource>
    </resources>
</build>
3.在初次使用SpringMVC时可能发布项目后会出现404错误
- 查看控制台输出,看一下是不是缺少了什么jar包。
- 如果jar包存在,显示无法输出,就在IDEA的项目发布中,添加lib依赖!
- 重启Tomcat 即可解决!
4.SpringMVC的执行流程

1、DispatcherServlet表示前置控制器,是整个SpringMVC的控制中心,用户发出请求,DispatcherServlet接收到请求并拦截请求。
我们假设请求的url为 : http://localhost:8080/SpringMVC/hello,
如上URL拆分成三部分:
http://localhost:8080服务器域名
SpringMVC部署在服务器上的站点
hello表示控制器
通过分析,如上URL表示为,请求位于服务器localhost:8080上的SpringMVC站点的hello控制器。
2 、HandlerMapping为处理器映射,DispatcherServlet调用HandlerMapping,HandlerMapping根据请求的URL查找处理器Handler。
3、HandlerExecution表示具体的Handler,其主要作用是根据URL查找控制器,如上URL被查找的控制器为hello。
4、HandlerExecution将解析后的信息传递给DispatcherServlet,如解析控制器映射等。
5、DispatcherServlet调用HandlerAdapter(处理器适配器),其按照特定的规则去执行Handler。
6、Handler让具体的Controller控制器类去执行。(调用业务层)
7、Controller执行之后将具体的信息返回给HandleAdapter,如ModelAndView。
8、HandlerAdapter将逻辑视图名或模型传递给DispatcherServlet。
9、DispatcherServlet调用视图解析器(ViewResolver)来解析HandlerAdapter传递的逻辑视图名或模型。
10、视图解析器(ViewResolver)将解析得到的逻辑视图名和数据传递给DispatcherServlet。
11、DispatcherServlet根据视图解析器解析的视图结果,调用具体的视图。
12、最终视图呈现给用户。
5.SSM框架整合流程
1、导入依赖
    <!--依赖-->
    <dependencies>
        <!--junit-->
        <dependency>
            <groupId>junit</groupId>
            <artifactId>junit</artifactId>
            <version>4.12</version>
            <scope>test</scope>
        </dependency>
        <!--mysql-->
        <dependency>
            <groupId>mysql</groupId>
            <artifactId>mysql-connector-java</artifactId>
            <version>5.1.49</version>
        </dependency>
        <!--数据库连接池-->
        <!-- https://mvnrepository.com/artifact/com.mchange/c3p0 -->
        <dependency>
            <groupId>com.mchange</groupId>
            <artifactId>c3p0</artifactId>
            <version>0.9.5.5</version>
        </dependency>

        <!--Servlet jsp jstl-->
        <dependency>
            <groupId>javax.servlet</groupId>
            <artifactId>servlet-api</artifactId>
            <version>2.5</version>
        </dependency>
        <dependency>
            <groupId>javax.servlet.jsp</groupId>
            <artifactId>jsp-api</artifactId>
            <version>2.2</version>
        </dependency>
        <dependency>
            <groupId>javax.servlet</groupId>
            <artifactId>jstl</artifactId>
            <version>1.2</version>
        </dependency>
        <!--mybatis-->
        <dependency>
            <groupId>org.mybatis</groupId>
            <artifactId>mybatis</artifactId>
            <version>3.5.5</version>
        </dependency>
        <!--mybatis-spring-->
        <dependency>
            <groupId>org.mybatis</groupId>
            <artifactId>mybatis-spring</artifactId>
            <version>2.0.6</version>
        </dependency>
        <!--springmvc-->
        <dependency>
            <groupId>org.springframework</groupId>
            <artifactId>spring-webmvc</artifactId>
            <version>5.3.4</version>
        </dependency>
        <!--spring-jdbc-->
        <dependency>
            <groupId>org.springframework</groupId>
            <artifactId>spring-jdbc</artifactId>
            <version>5.3.4</version>
        </dependency>
        <!--lombok-->
        <dependency>
            <groupId>org.projectlombok</groupId>
            <artifactId>lombok</artifactId>
            <version>1.18.18</version>
        </dependency>
    </dependencies>
1.2、maven静态资源过滤
    <!--静态资源过滤-->
    <build>
        <resources>
            <resource>
                <directory>src/main/java</directory>
                <includes>
                    <include>**/*.properties</include>
                    <include>**/*.xml</include>
                </includes>
                <filtering>true</filtering>
            </resource>
            <resource>
                <directory>src/main/resources</directory>
                <includes>
                    <include>**/*.properties</include>
                    <include>**/*.xml</include>
                </includes>
                <filtering>true</filtering>
            </resource>
        </resources>
    </build>
2、Mybatis层
2.1、mybatis核心配置文件–mybatis-config.xml
<?xml version="1.0" encoding="UTF-8" ?>
<!DOCTYPE configuration
        PUBLIC "-//mybatis.org//DTD Config 3.0//EN"
        "http://mybatis.org/dtd/mybatis-3-config.dtd">
<configuration>

    <typeAliases>
        <package name="com.mao.pojo"/>
    </typeAliases>

</configuration>
2.2、全局配置文件
<?xml version="1.0" encoding="UTF-8"?>
<beans xmlns="http://www.springframework.org/schema/beans"
       xmlns:xsi="http://www.w3.org/2001/XMLSchema-instance"
       xsi:schemaLocation="http://www.springframework.org/schema/beans
       http://www.springframework.org/schema/beans/spring-beans.xsd">

    <import resource="spring-dao.xml"/>
    <import resource="spring-service.xml"/>
    <import resource="spring-mvc.xml"/>

</beans>
2.3、关联数据库
jdbc.driver = com.mysql.jdbc.Driver
jdbc.url = jdbc:mysql://localhost:3306/ssmbuild?useSSL=true&useUnicode=true&characterEncoding=utf8
jdbc.username = root
jdbc.password = root
2.4、创建实体类
package com.mao.pojo;

import lombok.AllArgsConstructor;
import lombok.Data;
import lombok.NoArgsConstructor;

@Data
@AllArgsConstructor
@NoArgsConstructor
public class Books {

    private int bookID;
    private String bookName;
    private int bookCounts;
    private String detail;

}
2.5、创建Dao层的Mapper接口
package com.mao.dao;

import com.mao.pojo.Books;
import org.apache.ibatis.annotations.Param;

import java.util.List;

public interface BookMapper {

    //增加一本书
    public int addBook(Books books);
    //根据id删除一本书
    public int deleteBook(@Param("bookID") int bookID);
    //更新book
    public int updateBook(Books books);
    //根据id查询一本书
    public Books queryBook(@Param("bookID") int bookID);
    //查询全部书
    public List<Books> queryAllBooks();

}
2.6、编写接口对应的 Mapper.xml 文件。需要导入MyBatis的包;
<?xml version="1.0" encoding="UTF-8" ?>
<!DOCTYPE mapper
        PUBLIC "-//mybatis.org//DTD Config 3.0//EN"
        "http://mybatis.org/dtd/mybatis-3-mapper.dtd">
<mapper namespace="com.mao.dao.BookMapper">

    <insert id="addBook" parameterType="books">
        insert into ssmbuild.books(bookName,bookCounts,detail) values (#{bookName},#{bookCounts},#{detail})
    </insert>

    <delete id="deleteBook" parameterType="int">
        delete from ssmbuild.books where bookID = #{bookID}
    </delete>

    <update id="updateBook" parameterType="books">
        update ssmbuild.books
        set bookName = #{bookName},bookCounts = #{bookCounts},detail = #{detail} where bookID = #{bookID}
    </update>

    <select id="queryBook" resultType="books">
        select * from ssmbuild.books where bookID = #{bookID}
    </select>

    <select id="queryAllBooks" resultType="books">
        select * from ssmbuild.books
    </select>
</mapper>
2.7、编写Service层的接口和实现类
接口:
package com.mao.service;

import com.mao.pojo.Books;
import org.apache.ibatis.annotations.Param;

import java.util.List;

//BookService:底下需要去实现,调用dao层
public interface BookService {

    //增加一本书
    public int addBook(Books books);
    //根据id删除一本书
    public int deleteBook(@Param("bookID") int bookID);
    //更新book
    public int updateBook(Books books);
    //根据id查询一本书
    public Books queryBook(@Param("bookID") int bookID);
    //查询全部书
    public List<Books> queryAllBooks();
}
实现类:
package com.mao.service;

import com.mao.dao.BookMapper;
import com.mao.pojo.Books;

import java.util.List;

public class BookServiceImpl implements BookService {

    private BookMapper bookMapper;

    public void setBookMapper(BookMapper bookMapper) {
        this.bookMapper = bookMapper;
    }

    @Override
    public int addBook(Books books) {
        return bookMapper.addBook(books);
    }

    @Override
    public int deleteBook(int bookID) {
        return bookMapper.deleteBook(bookID);
    }

    @Override
    public int updateBook(Books books) {
        return bookMapper.updateBook(books);
    }

    @Override
    public Books queryBook(int bookID) {
        return bookMapper.queryBook(bookID);
    }

    @Override
    public List<Books> queryAllBooks() {
        return bookMapper.queryAllBooks();
    }
}
4、Spring层
1、配置Spring整合MyBatis,我们这里数据源使用c3p0连接池;
2、我们去编写Spring整合Mybatis的相关的配置文件;spring-dao.xml
4.1、spring整合mybatis–spring-dao.xml
<?xml version="1.0" encoding="UTF-8"?>
<beans xmlns="http://www.springframework.org/schema/beans"
       xmlns:xsi="http://www.w3.org/2001/XMLSchema-instance"
       xmlns:context="http://www.springframework.org/schema/context"
       xsi:schemaLocation="http://www.springframework.org/schema/beans
       http://www.springframework.org/schema/beans/spring-beans.xsd
       http://www.springframework.org/schema/context
       http://www.springframework.org/schema/context/spring-context.xsd">

    <!--整合mybatis-->
    <!--1、关联数据库文件-->
    <context:property-placeholder location="classpath:database.properties"/>

    <!--2、数据库连接池-->
    <!--数据库连接池
       dbcp 半自动化操作 不能自动连接
       c3p0 自动化操作(自动的加载配置文件 并且设置到对象里面)
   -->
    <bean id="dataSource" class="com.mchange.v2.c3p0.ComboPooledDataSource">
        <!--配置数据库属性-->
        <property name="driverClass" value="${jdbc.driver}"/>
        <property name="jdbcUrl" value="${jdbc.url}"/>
        <property name="user" value="${jdbc.username}"/>
        <property name="password" value="${jdbc.password}"/>
        <!--设置数据库连接池其他属性-->
        <!-- c3p0连接池的私有属性 -->
        <property name="maxPoolSize" value="30"/>
        <property name="minPoolSize" value="10"/>
        <!-- 关闭连接后不自动commit -->
        <property name="autoCommitOnClose" value="false"/>
        <!-- 获取连接超时时间 -->
        <property name="checkoutTimeout" value="10000"/>
        <!-- 当获取连接失败重试次数 -->
        <property name="acquireRetryAttempts" value="2"/>
    </bean>

    <!--3、创建sqlSessionFactory对象 -->
    <bean id="sqlSessionFactory" class="org.mybatis.spring.SqlSessionFactoryBean">
        <!--注入数据库连接池-->
        <property name="dataSource" ref="dataSource"/>
        <!--关联mybatis全局文件-->
        <property name="configLocation" value="classpath:mybatis-config.xml"/>
    </bean>
    <!--4、配置扫描Dao接口包,动态实现Dao接口注入到spring容器中-->
    <!--解释 :https://www.cnblogs.com/jpfss/p/7799806.html-->
    <bean class="org.mybatis.spring.mapper.MapperScannerConfigurer">
        <!--注入sqlSessionFactory-->
        <property name="sqlSessionFactoryBeanName" value="sqlSessionFactory"/>
        <!--给出需要扫描的Dao接口包-->
        <property name="basePackage" value="com.mao.dao"/>
    </bean>
</beans>
4.2、spring整合service层–spring-service.xml
<?xml version="1.0" encoding="UTF-8"?>
<beans xmlns="http://www.springframework.org/schema/beans"
       xmlns:xsi="http://www.w3.org/2001/XMLSchema-instance"
       xmlns:context="http://www.springframework.org/schema/context"
       xsi:schemaLocation="http://www.springframework.org/schema/beans
       http://www.springframework.org/schema/beans/spring-beans.xsd
       http://www.springframework.org/schema/context
       http://www.springframework.org/schema/context/spring-context.xsd">

    <!--扫描与service有关的包-->
    <context:component-scan base-package="com.mao.service"/>
    <!--将BookServiceImpl注入到容器中-->
    <bean id="bookServiceImpl" class="com.mao.service.BookServiceImpl">
        <property name="bookMapper" ref="bookMapper"/>
    </bean>

    <!--配置事务管理器-->
    <bean id="transactionManager" class="org.springframework.jdbc.datasource.DataSourceTransactionManager">
        <!--注入DataSource-->
        <property name="dataSource" ref="dataSource"/>
    </bean>
</beans>
5、SpringMVC层
5.1、web.xml
<?xml version="1.0" encoding="UTF-8"?>
<web-app xmlns="http://xmlns.jcp.org/xml/ns/javaee"
         xmlns:xsi="http://www.w3.org/2001/XMLSchema-instance"
         xsi:schemaLocation="http://xmlns.jcp.org/xml/ns/javaee http://xmlns.jcp.org/xml/ns/javaee/web-app_4_0.xsd"
         version="4.0">

    <!--配置DispatcherServlet-->
    <servlet>
        <servlet-name>DispatcherServlet</servlet-name>
        <servlet-class>org.springframework.web.servlet.DispatcherServlet</servlet-class>
        <init-param>
            <param-name>contextConfigLocation</param-name>
            <param-value>classpath:applicationContext.xml</param-value>
            <!--一定要注意:我们这里加载的是总的配置文件,之前被这里坑了!-->
        </init-param>
        <load-on-startup>1</load-on-startup>
    </servlet>
    <servlet-mapping>
        <servlet-name>DispatcherServlet</servlet-name>
        <url-pattern>/</url-pattern>
    </servlet-mapping>

    <!--字符编码过滤-->
    <filter>
        <filter-name>encoding</filter-name>
        <filter-class>org.springframework.web.filter.CharacterEncodingFilter</filter-class>
        <init-param>
            <param-name>encoding</param-name>
            <param-value>utf-8</param-value>
        </init-param>
    </filter>
    <filter-mapping>
        <filter-name>encoding</filter-name>
        <url-pattern>/*</url-pattern>
    </filter-mapping>

    <!--设置session过期时间-->
    <session-config>
        <session-timeout>15</session-timeout>
    </session-config>


</web-app>
5.2、spring-mvc.xml
<?xml version="1.0" encoding="UTF-8"?>
<beans xmlns="http://www.springframework.org/schema/beans"
       xmlns:xsi="http://www.w3.org/2001/XMLSchema-instance"
       xmlns:context="http://www.springframework.org/schema/context"
       xmlns:mvc="http://www.springframework.org/schema/mvc"
       xsi:schemaLocation="http://www.springframework.org/schema/beans
    http://www.springframework.org/schema/beans/spring-beans.xsd
   http://www.springframework.org/schema/context
   http://www.springframework.org/schema/context/spring-context.xsd
   http://www.springframework.org/schema/mvc
   https://www.springframework.org/schema/mvc/spring-mvc.xsd">


    <!--配置SpringMVC-->
    <!--1、配置springmvc注解驱动-->
    <mvc:annotation-driven/>
    <!--2、静态资源默认servlet配置-->
    <mvc:default-servlet-handler/>

    <!--3、配置jsp视图解析器:ViewResolver-->
    <bean class="org.springframework.web.servlet.view.InternalResourceViewResolver">
        <!--前缀-->
        <property name="prefix" value="/WEB-INF/jsp/"/>
        <!--后缀-->
        <property name="suffix" value=".jsp"/>
    </bean>

    <!--4、扫描web相关的bean,也就是controller层-->
    <context:component-scan base-package="com.mao.controller"/>


</beans>
5.3、spring配置整合文件,applicationContext.xml
<?xml version="1.0" encoding="UTF-8"?>
<beans xmlns="http://www.springframework.org/schema/beans"
       xmlns:xsi="http://www.w3.org/2001/XMLSchema-instance"
       xsi:schemaLocation="http://www.springframework.org/schema/beans
       http://www.springframework.org/schema/beans/spring-beans.xsd">

    <import resource="spring-dao.xml"/>
    <import resource="spring-service.xml"/>
    <import resource="spring-mvc.xml"/>

</beans>
配置文件暂时结束!!以上ssm框架整合的流程。
6、idea控制台输出日志乱码
1、配置idea文件(idea安装目录的bin目录下):64位系统配置idea64.exe.vmoptions,32位配置idea.exe.vmoptions,在文件内容末尾添加:-Dfile.encoding=UTF-8。保存后重新启动idea(必须重启idea);
2、在项目运行配置属性VM options,属性值为:-Dfile.encoding=UTF-8。
记得要重启idea,否则设置无效。
具体其他的乱码问题可以参考CSDN中的收藏。
7、无法加载js文件
就像maven静态资源过滤一样添加js静态资源过滤
<resource>
    <directory>src/main/resources</directory>
    <includes>
        <include>**/*.properties</include>
        <include>**/*.xml</include>
    </includes>
    <filtering>true</filtering>
</resource>
<resource>
    <directory>static/js</directory>
    <includes>
        <include>**/*.js</include>
        <include>**/*.js</include>
    </includes>
    <filtering>true</filtering>
</resource>
8、MySQL 8.0以上时区设置
在URL上加serverTimezone=Asia/Shanghai或者
jdbc:mysql://localhost:3306/blog?useUnicode=ture&characterEncoding=UTF-8&serverTimezone=GMT%2B8
9、使用FileReader与FileWriter进行文件复制中文乱码
进行debug调试,发现在读入的时候已经乱码了,说明是源文件编码的问题

查看源文件编码为ANSI,将其改为utf-8即可


10、使用gitclone是遇到fatal: unable to access ‘https://github.com/mxg133/learnforJava_DesignPattern.git/’: OpenSSL SSL_read: Connection was reset, errno 10054
只需要在命令行中执行
git config --global --unset http.proxy
git config --global --unset https.proxy
11、子类继承父类
子类不会继承父类的私有属性
子类不会继承父类的构造方法
但子类会在自己的构造方法中隐式地调用父类的构造方法
而且默认调用的父类的无参构造,即使在子类的有参构造里也是调用的父类的无参构造

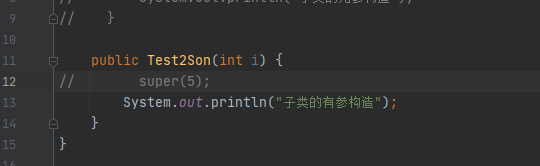
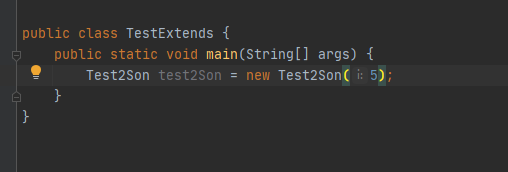

12、即使没有参数,也可以有有参构造方法

这个类中没有参数,但也可以拥有有参构造,也可调用父类有参构造
13、Reason: Failed to determine a suitable driver class、Failed to configure a DataSource: ‘url’ attribute is not specified and no embedded datasource could be configured.
找了很多的原因,我这里可能是静态资源的导出出现了问题,所以在pom.xml中加了静态资源过滤就OK了
<!--静态资源过滤-->
<resources>
    <resource>
        <directory>src/main/java</directory>
        <includes>
            <include>**/*.yml</include>
            <include>**/*.properties</include>
            <include>**/*.xml</include>
        </includes>
        <filtering>false</filtering>
    </resource>
    <resource>
        <directory>src/main/resources</directory>
        <includes>
            <include>**/*.yml</include>
            <include>**/*.properties</include>
            <include>**/*.xml</include>
        </includes>
        <filtering>false</filtering>
    </resource>
</resources>
14、springboot整合mybatis开启驼峰映射
mybatis:
  configuration:
    log-impl: org.apache.ibatis.logging.stdout.StdOutImpl
    map-underscore-to-camel-case: true
15、springboot解决跨域问题
自定义一个springboot配置类即可

@Configuration
public class CorsConfig implements WebMvcConfigurer {

    @Override
    public void addCorsMappings(CorsRegistry registry) {

        registry.addMapping("/*")
                .allowedOriginPatterns("*")
                .allowCredentials(true)
                .allowedMethods("GET","POST","DELETE","PUT","PATCH")
                .maxAge(3600);
    }
}
如果代码中的.allowedOriginPatterns这个为.allowedOrigins的时候可能会出现When allowCredentials is true, allowedOrigins cannot contain the specia错误
16、springboot中静态资源导出的问题
在springboot中尽量将mapper.xml文件放在resource目录下面,要是与mapper接口放在一起静态资源会被拦截
17、如果遇到OOM,安装Jprofiler
安装插件,安装Jprofiler客户端
18、关于String字符串相加
网上很多人说是创建一个StringBuilder对象,再进行append追加,我不清楚是不是这样,Debug了一下代码,发现好像不是这样,分以下几种情况:
-
两个new的字符串相加(底层调用的数组拷贝,然后创建String对象)
        System.out.println("============");
        // 两个newString相加得到一个新String对象,即s1指向堆中的一个新的String对象
        String s1 = new String("hello") + new String("123");
        // s2直接指向字符串常量池"hello123"的内存地址
        String s2 = "hello123";
        // s3是"hello"与"123"字符串拼接得到"hello123",也是直接指向字符串常量池"hello123"的内存地址
        String s3 = "hello" + "123";
        System.out.println(s1.hashCode());
        System.out.println(s2.hashCode());
        System.out.println(s3.hashCode());
        System.out.println(s1 == s2);
        System.out.println(s2 == s3);

-
两个String字符串相加(底层同样是调用的数组拷贝的方法,再通过byte数组创建对象)
// 两个String字符串直接相加其实和第一种情况是一样的 // 第一种是先创建好了两个String,这一种是s1,s2直接指向方法区常量池中的字符串内存地址 String s1="a"; String s2="b"; // 这里依旧会再new 一个String对象,底层同样调用的数组拷贝 String s3=s1+s2; String s4="ab"; System.out.println(s3 == s4);-
对第一种和第二种的解释:Debug打断点

进入MethodHandle方法

进入invokeStatic方法

进入到StringConcatHelper类,这个类是来自String字符串拼接的工厂,在这里执行simpleConcat方法,参数为两个相加的字符串


在这个方法里首先会把两个参数转化为String类型

接着判断参数个数,根据个数创建一个byte[]数组

进入这个方法之后会调用数组拷贝的方法


进入newString方法,并将数组作为参数传入

调用String类的构造方法


这个时候就创建好了一个String对象,s3指向这个String对象,并引用其内存地址。
-
并且我反编译了字节码文件,发现底层使用的是StringConcatFactory工厂的方法:
SourceFile: "TestString.java"
BootstrapMethods:
  0: #52 REF_invokeStatic java/lang/invoke/StringConcatFactory.makeConcatWithConstants:(Ljava/lang/invoke/MethodHandles$Lookup;Ljava/lang/String;Ljava/lang/invoke/MethodType;Ljava/lang/String;[Ljava/lang/Object;)Ljava/lang/invoke/CallSite;
    Method arguments:
      #58 \u0001\u0001
InnerClasses:
  public static final #65= #61 of #63;    // Lookup=class java/lang/invoke/MethodHandles$Lookup of class java/lang/invoke/MethodHandles
-

-
直接两个字符串相加
        System.out.println("==========");
        // 两个字符串直接相加,底层JVM会直接将两个字符串拼接,
        // 如果拼接后的字符串存在于常量池则直接指向其地址,
        // 否则在常量池创建一个字符串再指向其地址
        String z1 = "he" + "lm";
        String z2 = "helm";
        System.out.println(z1 == z2);
`bash
SourceFile: “TestString.java”
BootstrapMethods:
0: #52 REF_invokeStatic java/lang/invoke/StringConcatFactory.makeConcatWithConstants:(Ljava/lang/invoke/MethodHandlesKaTeX parse error: Expected 'EOF', got '#' at position 159: …ts: #̲58 \u0001\u0001…Lookup of class java/lang/invoke/MethodHandles
```
[外链图片转存中...(img-exp39Uow-1618064269846)]
-
直接两个字符串相加
        System.out.println("==========");
        // 两个字符串直接相加,底层JVM会直接将两个字符串拼接,
        // 如果拼接后的字符串存在于常量池则直接指向其地址,
        // 否则在常量池创建一个字符串再指向其地址
        String z1 = "he" + "lm";
        String z2 = "helm";
        System.out.println(z1 == z2);


 8044
8044


 被折叠的 条评论
为什么被折叠?
被折叠的 条评论
为什么被折叠?
 到【灌水乐园】发言


