一.Bean的声明
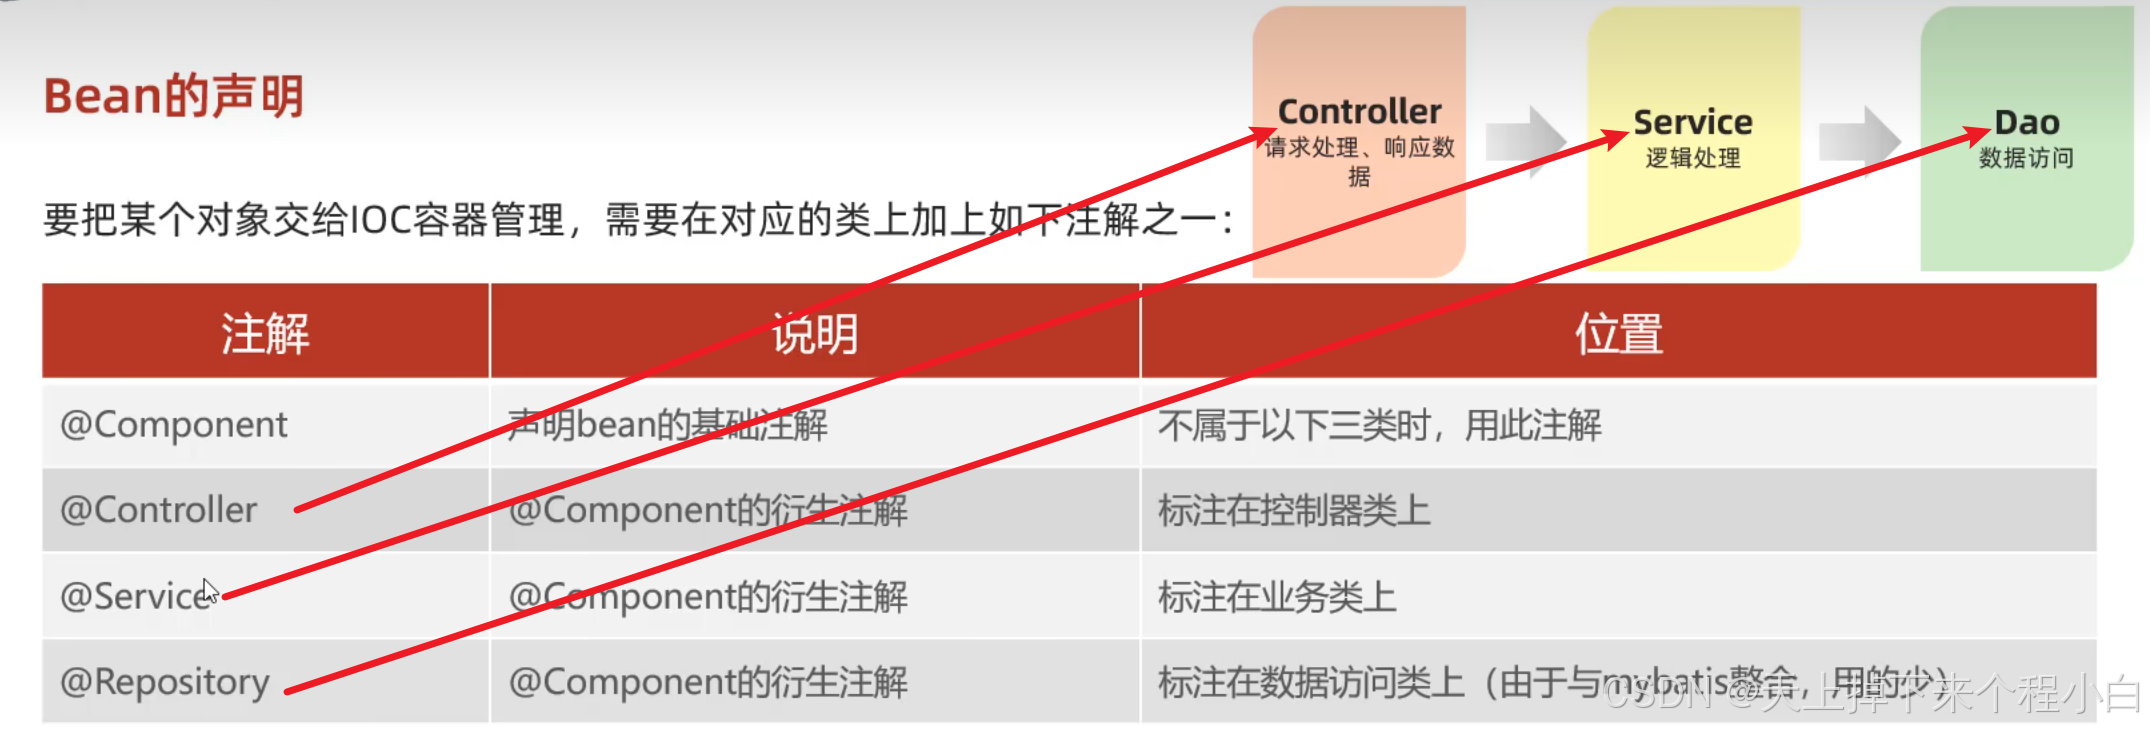
springboot为了更好地标识web应用开发中bean对象到底归属于哪一层,在@Component注解的基础上又衍生出了三个注解@Controller、@Service和@Repository。分别应用于Controller层,Service层和Dao层。推荐使用衍生注解,当无法判断该bean对象到底是属于哪一层时,使用@Component注解。
package com.gjw.dao.impl;

import com.gjw.dao.EmpDao;
import com.gjw.pojo.Emp;
import com.gjw.utils.XmlParserUtils;
import org.springframework.stereotype.Component;
import org.springframework.stereotype.Repository;

import java.util.List;

//@Component  // IOC:控制反转,将实现类对象交给容器。将当前类交给IOC容器管理,成为IOC容器中的bean
@Repository     // Dao层
public class EmpDaoA implements EmpDao {
    @Override
    public List<Emp> listEmp() {
        String file = this.getClass().getClassLoader().getResource("emp.xml").getFile();
        System.out.println(file);
        List<Emp> empList = XmlParserUtils.parse(file, Emp.class);
        return empList;
    }
}
package com.gjw.service.impl;

import com.gjw.dao.EmpDao;
import com.gjw.pojo.Emp;
import com.gjw.service.EmpService;
import org.springframework.beans.factory.annotation.Autowired;
import org.springframework.stereotype.Component;
import org.springframework.stereotype.Service;

import java.util.List;

//@Component  // IOC:控制反转,将实现类对象交给容器。将当前类交给IOC容器管理,成为IOC容器中的bean
@Service
public class EmpServiceA implements EmpService {
    @Autowired  // DI:依赖注入,service依赖于dao,运行时IOC容器会提供该类型的bean对象,并赋值给该变量
    private EmpDao empDao;
    @Override
    public List<Emp> listEmp() {
        List<Emp> empList = empDao.listEmp();
        empList.stream().forEach(emp ->
        {
            if ("1".equals(emp.getGender())) {
                emp.setGender("男");
            } else if ("2".equals(emp.getGender())) {
                emp.setGender("女");
            }
            if ("1".equals(emp.getJob())) {
                emp.setJob("讲师");
            } else if ("2".equals(emp.getJob())) {
                emp.setJob("班主任");
            } else if ("3".equals(emp.getJob())) {
                emp.setJob("就业指导");
            }
        });
        return empList;
    }
}
在controller代码中就不用加@Controller注解了,因为@RestController注解中已经有了@Controller注解
@RestController注解源码:
//
// Source code recreated from a .class file by IntelliJ IDEA
// (powered by FernFlower decompiler)
//

package org.springframework.web.bind.annotation;

import java.lang.annotation.Documented;
import java.lang.annotation.ElementType;
import java.lang.annotation.Retention;
import java.lang.annotation.RetentionPolicy;
import java.lang.annotation.Target;
import org.springframework.core.annotation.AliasFor;
import org.springframework.stereotype.Controller;

@Target({ElementType.TYPE})
@Retention(RetentionPolicy.RUNTIME)
@Documented
@Controller
@ResponseBody
public @interface RestController {
    @AliasFor(
        annotation = Controller.class
    )
    String value() default "";
}
@RestController = @Controller + @ResponseBody
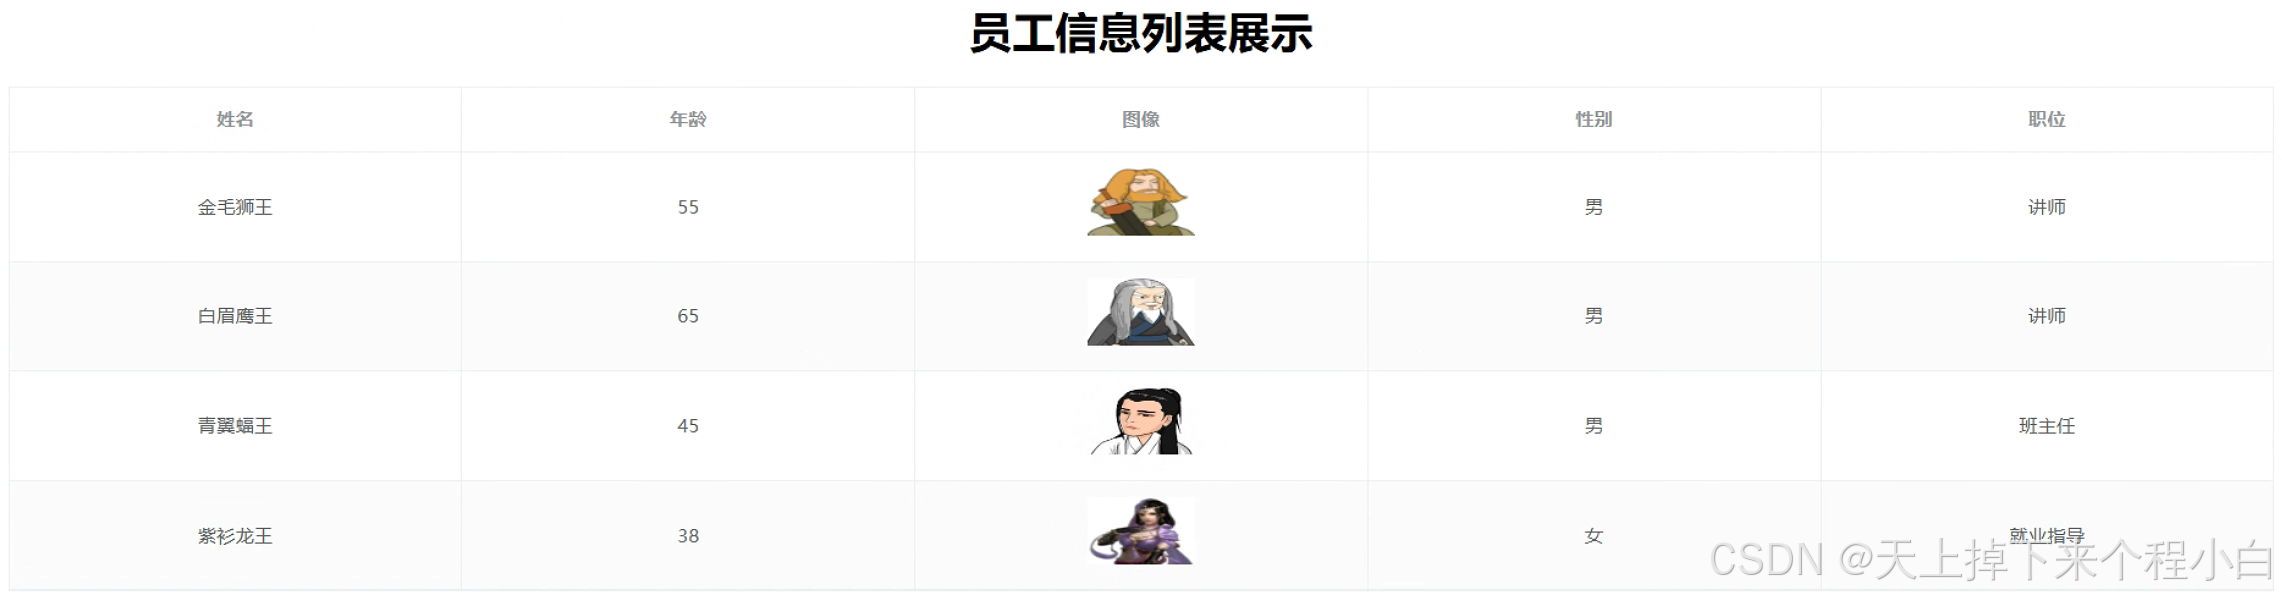
将原来的@Component注解替换为对应层的注解,刷新后依然可以看到数据,证明成功
二.Bean的名字
在我们声明一个bean时,每一个bean都有一个名字。在声明一个bean时,我们可以通过注解当中的value属性来指定一个bean的名字,如果不指定,默认就是类名的首字母小写。
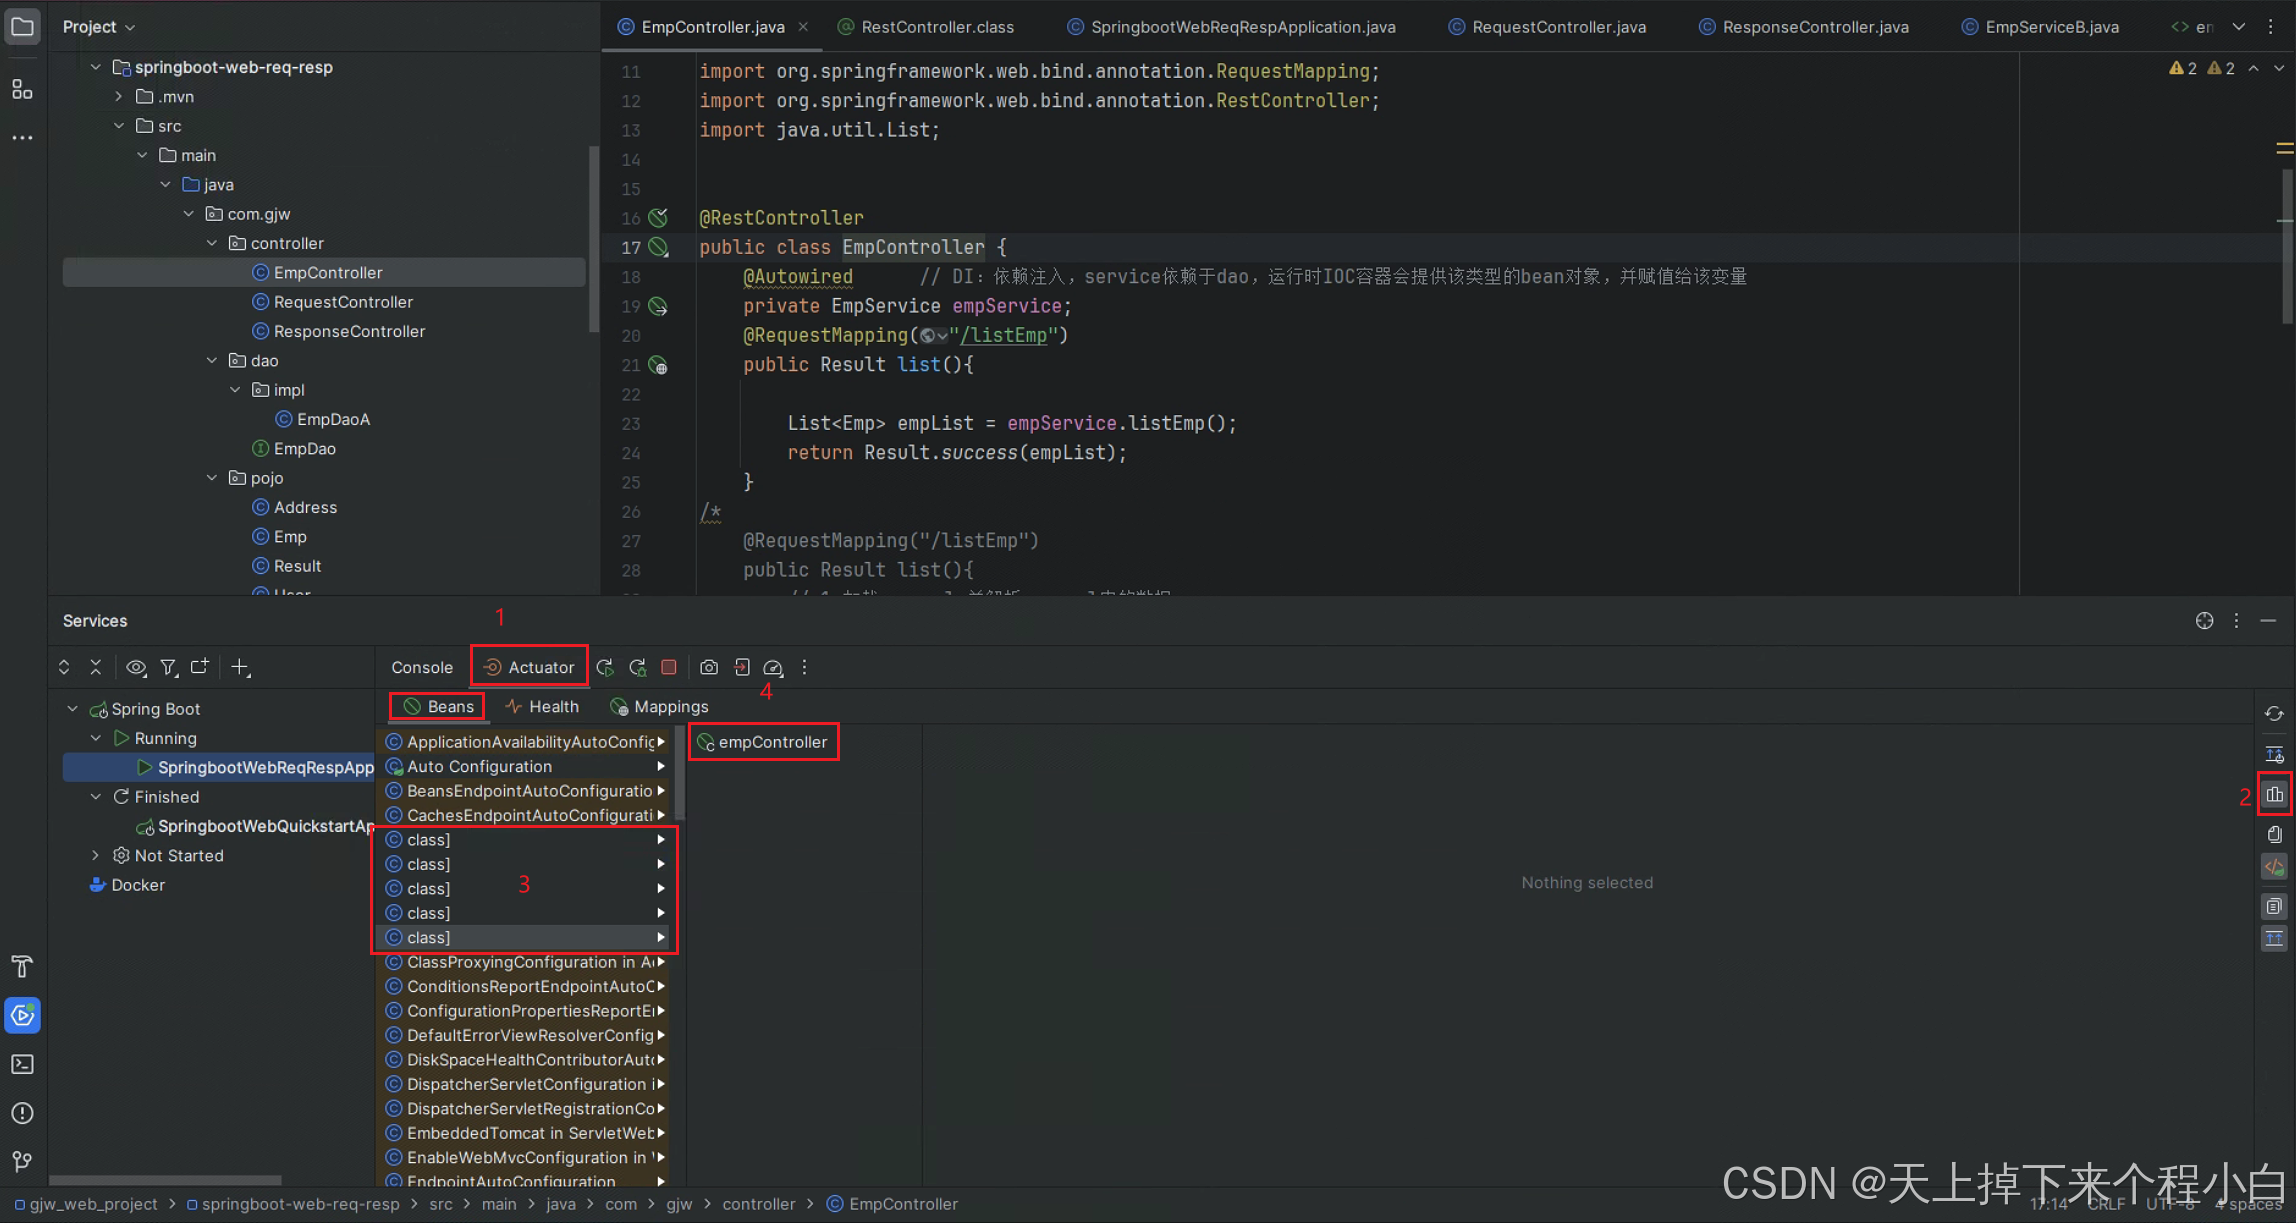
将程序运行起来之后,在控制台中进入Actuator,点击右边按键。其中非黄色部分就是自己定义的bean对象的类,而点击三角显示出来的就是其bean的名字。
@Service和@Repository源码
// Source code recreated from a .class file by IntelliJ IDEA
// (powered by FernFlower decompiler)

package org.springframework.stereotype;

import java.lang.annotation.Documented;
import java.lang.annotation.ElementType;
import java.lang.annotation.Retention;
import java.lang.annotation.RetentionPolicy;
import java.lang.annotation.Target;
import org.springframework.core.annotation.AliasFor;

@Target({ElementType.TYPE})
@Retention(RetentionPolicy.RUNTIME)
@Documented
@Component
public @interface Service {
    @AliasFor(
        annotation = Component.class
    )
    String value() default "";
}
//
// Source code recreated from a .class file by IntelliJ IDEA
// (powered by FernFlower decompiler)
//

package org.springframework.stereotype;

import java.lang.annotation.Documented;
import java.lang.annotation.ElementType;
import java.lang.annotation.Retention;
import java.lang.annotation.RetentionPolicy;
import java.lang.annotation.Target;
import org.springframework.core.annotation.AliasFor;

@Target({ElementType.TYPE})
@Retention(RetentionPolicy.RUNTIME)
@Documented
@Component
public @interface Repository {
    @AliasFor(
        annotation = Component.class
    )
    String value() default "";
}
我们可以通过使用注解中的value方法来为bean对象重新起一个名字。
@Service(value = "serviceA")
通过value指定的bean对象的名字,可以将value省略。
@Service("serviceA")
 已修改。一般不会修改名字。

三.Bean组件扫描
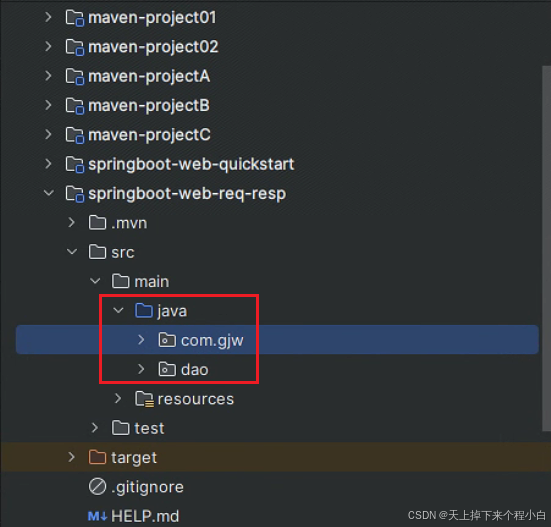
我们将dao移出来,放在java包下,与com.gjw平级。 再次启动程序。
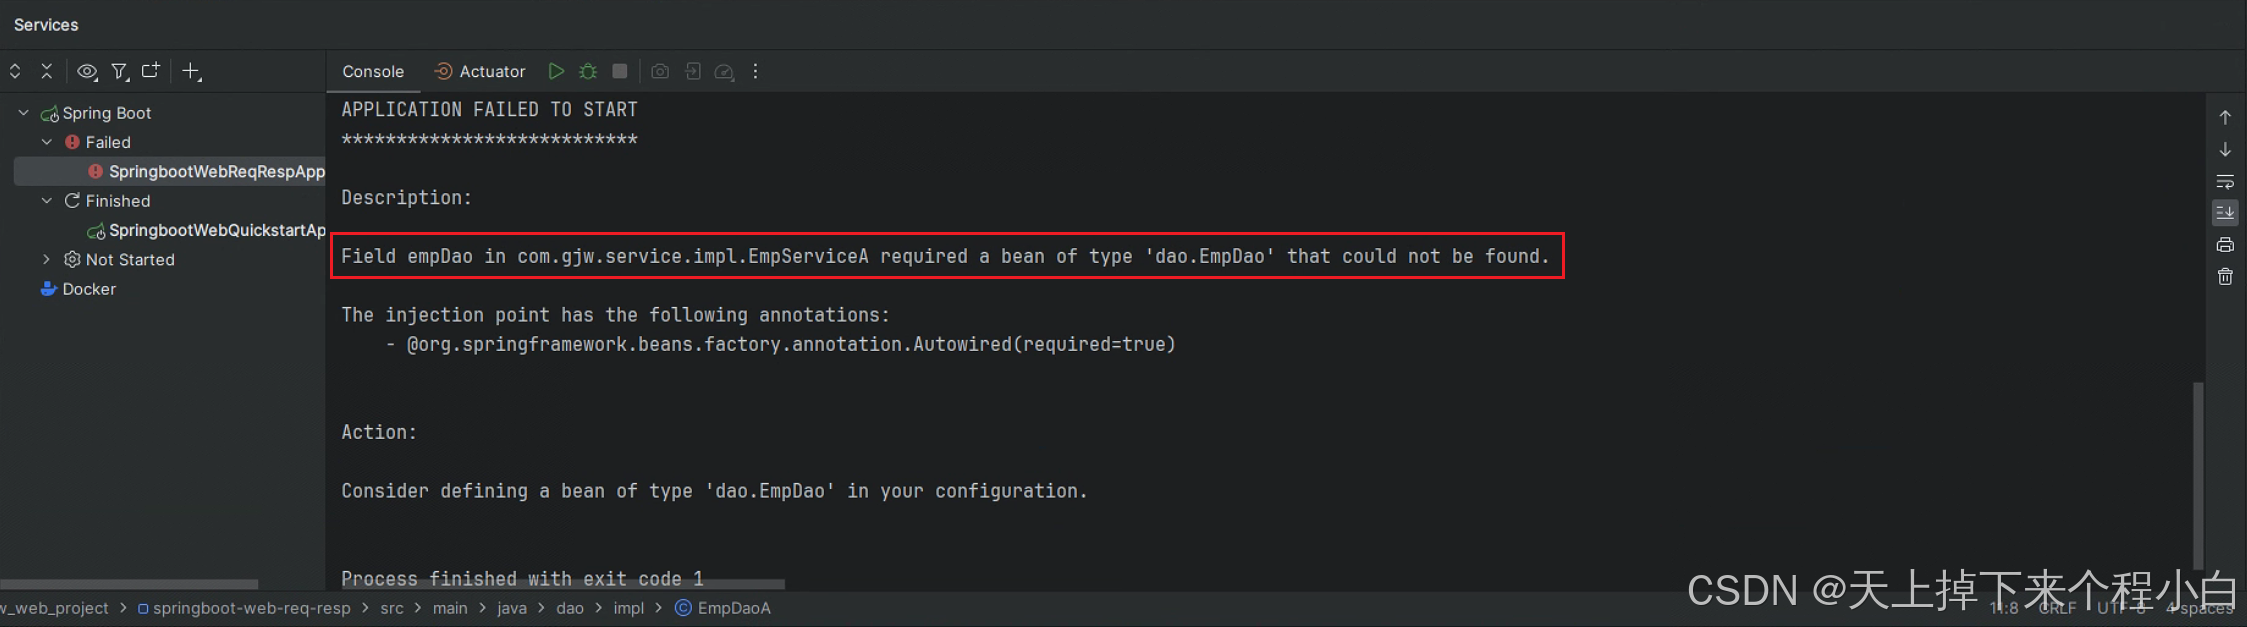
程序报错,报错原因是EmpServiceA这个类中要找的EmpDao这个接口的实现类发现找不到了。
为什么会找不到呢?原因一定在将dao包移动到和com.gjw包平级的位置有关。这就涉及到bean的组件扫描问题。

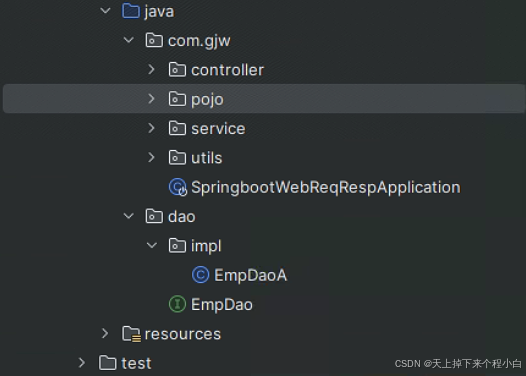
 也就是说,bean组件扫描只会扫描com.gjw包下的所有包及其子包。而dao包与其平级,自然不会被扫描到。因此也就找不到。
四.解决办法
方法一:手动设置包扫描@ComponentScan(指定扫描包)(不推荐)
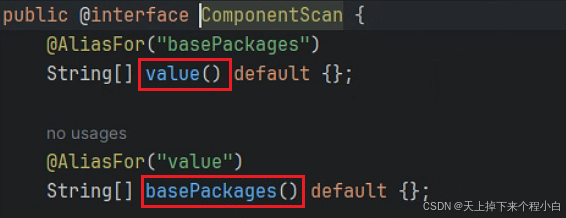
通过value属性和basePackages属性都可以来指定要扫描哪个包。返回类型为字符串数组。
@ComponentScan({"dao","com.gjw"})
@SpringBootApplication  // 默认扫描当前包及其子包
public class SpringbootWebReqRespApplication {

    public static void main(String[] args) {
        SpringApplication.run(SpringbootWebReqRespApplication.class, args);
    }

}
手动指定,一旦手动指定,那么默认的com.gjw包就会没有,需要手动添加上去。
成功
方法二:将所写代码全部放在启动类所在包及其子包下,按照规范来(推荐)

五.总结


 120
120

 被折叠的 条评论
为什么被折叠?
被折叠的 条评论
为什么被折叠?
 到【灌水乐园】发言


