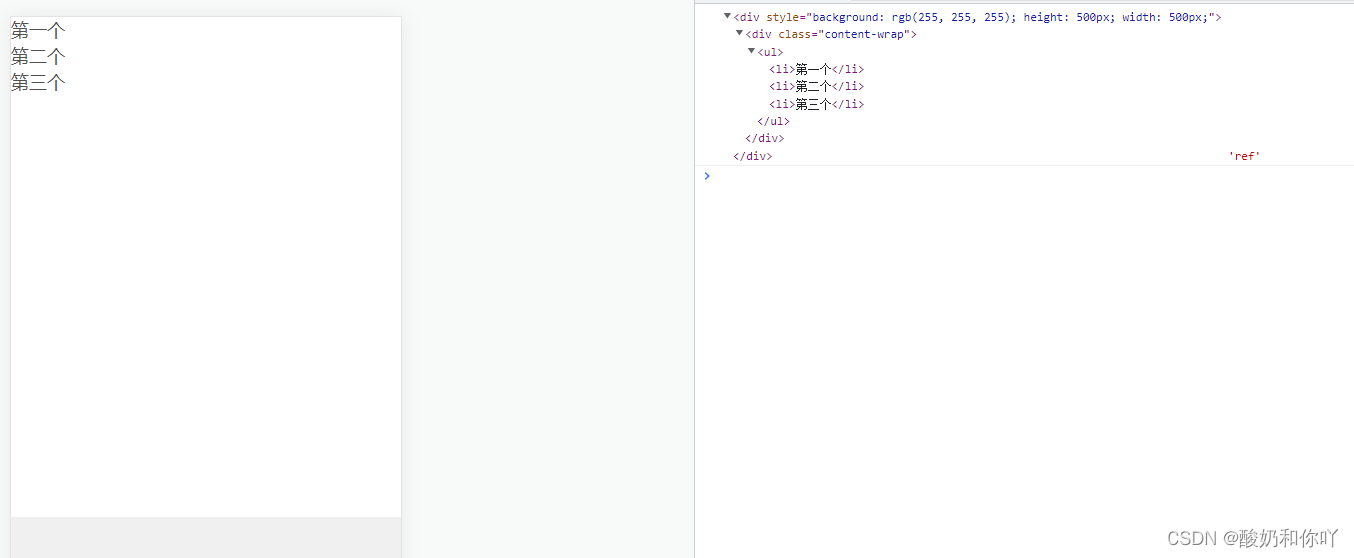
1、React中的ref是用来干什么的?
用来获取组件的dom对象,便于我们想要去操作dom元素
2、如何获取ref并使用
2.1、类组件(使用React.createRef()方法)
import React, { createRef } from 'react'

export default class Test extends React.Component {
    constructor(props) {
        super(props)
        this.testRef = createRef()
    }

    handleClick = () =>{
        console.log(this.testRef.current,'ref')
    }

    render() {
        const array = [
            {key:1,name:'第一个'},
            {key:2,name:'第二个'},
            {key:3,name:'第三个'},
        ]

        return (
            <div ref={this.testRef} style={{background:'#fff',height:'500px',width:'500px'}} onClick={()=>this.handleClick()}>
                <div className='content-wrap'>
                    <ul>
                        {array.map(item => (
                            <li key={item.key}>{item.name}</li>
                        ))}
                    </ul>
                </div>
            </div>
        )
    }
}
当点击的时候即可获得div的dom结构

获取dom元素可以干嘛呢?例如我们需要前端实现PDF下载功能
<div ref={pdfRefs}>需要下载的页面</div>
<div
	 id="pdf-con"
	  style={{
	      backgroundColor: '#cccccc',
	      opacity: 0
	  }}
/> //
//打印的方法
handlePdfDownload = () => {
        setTimeout(()=>{
            let targetDom = pdfRefs.current;
            // 获取节点高度,后面为克隆节点设置高度。
            let height = targetDom.height;
            // 克隆节点,默认为false,不复制方法属性,为true是全部复制。
            let cloneDom = targetDom.cloneNode(true);
            // 设置克隆节点的css属性,因为之前的层级为0,我们只需要比被克隆的节点层级低即可。
            cloneDom.style.position = 'absolute';
            cloneDom.style.top = '-100%';
            cloneDom.style.index = '-1';
            cloneDom.style.height = height;
            cloneDom.style.fontSize = '14px';
            // 将克隆节点动态追加到body后面。
            document.getElementById('pdf-con')?.appendChild(cloneDom);
            // 插件生成base64img图片。
            html2Canvas(cloneDom, {
                useCORS: true,
                // 画布开始渲染的y坐标位置
                y: 0
            }).then((canvas) => {
                let contentWidth = canvas.width;
                let contentHeight = canvas.height;
                // 一页pdf显示html页面生成的canvas高度;
                let pageHeight = (contentWidth / 592.28) * 841.89;
                // 未生成pdf的html页面高度
                let leftHeight = contentHeight;
                // 页面偏移
                let position = 0;
                // a4纸的尺寸[595.28,841.89],html页面生成的canvas在pdf中图片的宽高
                let pageData = canvas.toDataURL('image/jpeg', 1.0);
                let pdf = new JsPDF(null, 'pt', 'a4');
                // 有两个高度需要区分,一个是html页面的实际高度,和生成pdf的页面高度(841.89)
                // 当内容未超过pdf一页显示的范围,无需分页

                // 设置内容图片的尺寸,img是pt单位 已知 1pt/1px = 0.75   pt = (px/scale)* 0.75
                let imgX = contentWidth * 0.75;
                let imgY = contentHeight * 0.75;

                if (leftHeight < pageHeight) {
                    pdf.addImage(pageData, 'JPEG', 0, 0, imgX, imgY);
                } else {
                    while (leftHeight > 0) {
                    pdf.addImage(pageData, 'JPEG', 0, position, imgX, imgY);
                    leftHeight -= pageHeight;
                    // 避免添加空白页
                    position -= 841.89;
                    if (leftHeight > 0) {
                        pdf.addPage();
                    }
                    }
                }
                let nowDate = moment(new Date()).format('YYYY-MM-DD');
                //下载
                pdf.save('打印文件-' + nowDate + '.pdf');
                this.setState({ loadingDown: false });
            });
        })
    };
具体pdf下载功能实现请参考此博客
2.2、类组件(直接在div中使用ref)
<div ref={ref => this.testRef = ref}><div className="sfsfs">测试</div></div>
然后直接使用this.testReft就可以获得这个div的dom结构啦

可以相对应的去进行一些操作,例如当鼠标移入移出这个div的时候想做一些操作
this.testReft.onmouseover = () => {

}
this.testReft.onmouseout = () => {

}
2.3、函数组件(在普通dom元素上的使用)
注:函数组件本身是不能使用ref的,因为它们没有实例
在函数组件中的普通dom元素上使用ref的步骤如下:
import React, {useEffect,useRef} from 'react' //1.引入useRef
import './index.scss'
import swiper from 'swiper'
import 'swiper/dist/css/swiper.css';

const AntdTest = () => {
    const swiperRef = useRef(null) //2.创建一个ref对象,并将这个ref对象的current属性初始化为null,ref对象的current属性指向的是DOM实例

    useEffect(()=>{
        swiperRef.onmouseover = () => { // 4.ref对象的使用,给这个div绑定移入移除事件

        }
        swiperRef.onmouseout = () => {

        }
        console.log(swiperRef,'swiperRef')
    },[])

    return (
        <div className='antdTest'>
            <div className='swiper-container' id='swiper-container1' ref={swiperRef}> //3.将这个ref对象赋值给普通dom元素的ref属性
                <div className='swiper-wrapper'>
                    <div className='swiper-slide'>
                        <div style={{height:200,background:'red'}}>页面一</div>
                    </div>
                    <div className='swiper-slide'>
                        <div style={{height:200,background:'blue'}}>页面二</div>
                    </div>
                    <div className='swiper-slide'>
                        <div style={{height:200,background:'yellow'}}>页面三</div>
                    </div>
                </div>
                <div className='swiper-pagination' id='swiper-pagination1' />
            </div>
        </div>
    )
}

export default AntdTest
打印结果如下:

2.3、函数组件(直接给ref对象赋值)
 const mapRef= useRef(null)  //1.创建ref对象
 mapRef.current = xxx //2.直接把某个实例对象赋值给ref对象的current属性
 mapRef.current.xxx // 3.可以直接通过ref对象的current属性操作某个实例对象


 754
754


 被折叠的 条评论
为什么被折叠?


