


Maven项目建好后配置DispatcherServlet后,实现简单登录操作
web.xml
<?xml version="1.0" encoding="UTF-8"?>
<web-app xmlns:xsi="http://www.w3.org/2001/XMLSchema-instance" xmlns="http://xmlns.jcp.org/xml/ns/javaee" xsi:schemaLocation="http://xmlns.jcp.org/xml/ns/javaee http://xmlns.jcp.org/xml/ns/javaee/web-app_3_1.xsd" id="WebApp_ID" version="3.1">

<display-name>Archetype Created Web Application</display-name>
<servlet>
	<description>
	</description>
	<display-name>DispatcherServlet</display-name>
	<servlet-name>DispatcherServlet</servlet-name>
	<servlet-class>org.springframework.web.servlet.DispatcherServlet</servlet-class>
	<init-param>
		<description>
		</description>
		<param-name>contextConfigLocation</param-name>
		<param-value>classpath:conf/spring-*.xml</param-value>
	</init-param>
	<load-on-startup>1</load-on-startup>
    </servlet>
    <servlet-mapping>
	    <servlet-name>DispatcherServlet</servlet-name>
	    <url-pattern>*.do</url-pattern>
    </servlet-mapping>
</web-app>
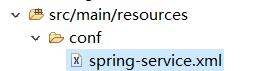
在src/main/resources下新建文件夹conf,在conf文件夹下新建spring-service.xml文件
在src/main/java下新建包,名称为com.test.controller,在新建包下新建UserController类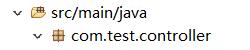
在spring-service配置扫描,代码如图
<?xml version="1.0" encoding="UTF-8"?>
<beans xmlns="http://www.springframework.org/schema/beans"
	xmlns:xsi="http://www.w3.org/2001/XMLSchema-instance"
	xmlns:context="http://www.springframework.org/schema/context"
	xmlns:jdbc="http://www.springframework.org/schema/jdbc"
	xmlns:jee="http://www.springframework.org/schema/jee"
	xmlns:tx="http://www.springframework.org/schema/tx"
	xmlns:aop="http://www.springframework.org/schema/aop"
	xmlns:mvc="http://www.springframework.org/schema/mvc"
	xmlns:util="http://www.springframework.org/schema/util"
	xmlns:jpa="http://www.springframework.org/schema/data/jpa"
	xsi:schemaLocation="
		http://www.springframework.org/schema/beans http://www.springframework.org/schema/beans/spring-beans-3.2.xsd
		http://www.springframework.org/schema/context http://www.springframework.org/schema/context/spring-context-3.2.xsd
		http://www.springframework.org/schema/jdbc http://www.springframework.org/schema/jdbc/spring-jdbc-3.2.xsd
		http://www.springframework.org/schema/jee http://www.springframework.org/schema/jee/spring-jee-3.2.xsd
		http://www.springframework.org/schema/tx http://www.springframework.org/schema/tx/spring-tx-3.2.xsd
		http://www.springframework.org/schema/data/jpa http://www.springframework.org/schema/data/jpa/spring-jpa-1.3.xsd
		http://www.springframework.org/schema/aop http://www.springframework.org/schema/aop/spring-aop-3.2.xsd
		http://www.springframework.org/schema/mvc http://www.springframework.org/schema/mvc/spring-mvc-3.2.xsd
		http://www.springframework.org/schema/util http://www.springframework.org/schema/util/spring-util-3.2.xsd">

	  <!-- 包自动扫描 -->
	  <context:component-scan base-package="com.test" ></context:component-scan>
	  <!-- 启动注解版的Spring MVC -->
	  <mvc:annotation-driven></mvc:annotation-driven>

</beans>
实现UserController类扫描到Spring容器里,需要配置注解 @Controller或**@Component**
在UserController类中实现登录方法前,要给方法和类配置请求映射**@RequestMapping()**
将返回内容输出到网页端需要配置注解**@ResponseBody**
我们通过ajax访问controller,实现页面和 web 服务器之间数据的传输
UserController代码如下
@Controller//将该类扫描到spring容器中
@RequestMapping("/user")//UserController类的映射路径
public class UserController {

	/*
	 * 登录方法
	 * */
	@RequestMapping("/login")//将login方法映射
	@ResponseBody//将返回内容输出到网页端
	public String login(String name,String password) {
		System.out.println("账号:"+name);
		System.out.println("密码:"+password);
		return "hello world";
	}


}
login.html代码如下
<!DOCTYPE html>
<html lang="en">
<head>
    <meta charset="UTF-8">
    <title>login</title>
    <script type="text/javascript"  src="js/jquery-2.1.1.min.js"></script>
    <script>
     $(function(){
    	 $('#login').click(function(){
    		var sendDate={"name":$('#name').val(),"password":$('#ps').val()};
        	$.ajax({
        		type:"post",
        		url:"user/login.do",
        		data:sendDate,
        		datatype:"json",
        		success:function(msg){
        			console.log(msg);
        		},
        		error:function(msg){
        			alert('通信失败');
        		}
        	});
        })
     });
    </script>
</head>
<body>


        <div id="form">
            <div><input type="text" placeholder="名称" id="name"></div>
            <div><input type="password" placeholder="密码" id="ps"></div>

            <button id="login">登录</button>

        </div>


</body>
</html>
注意:UserController中的login方法中的参数名称要跟sendDate的键名称一致
运行
运行结果


 342
342


 被折叠的 条评论
为什么被折叠?
被折叠的 条评论
为什么被折叠?
 到【灌水乐园】发言


