


一、创建多模块项目
1.新建父级模块
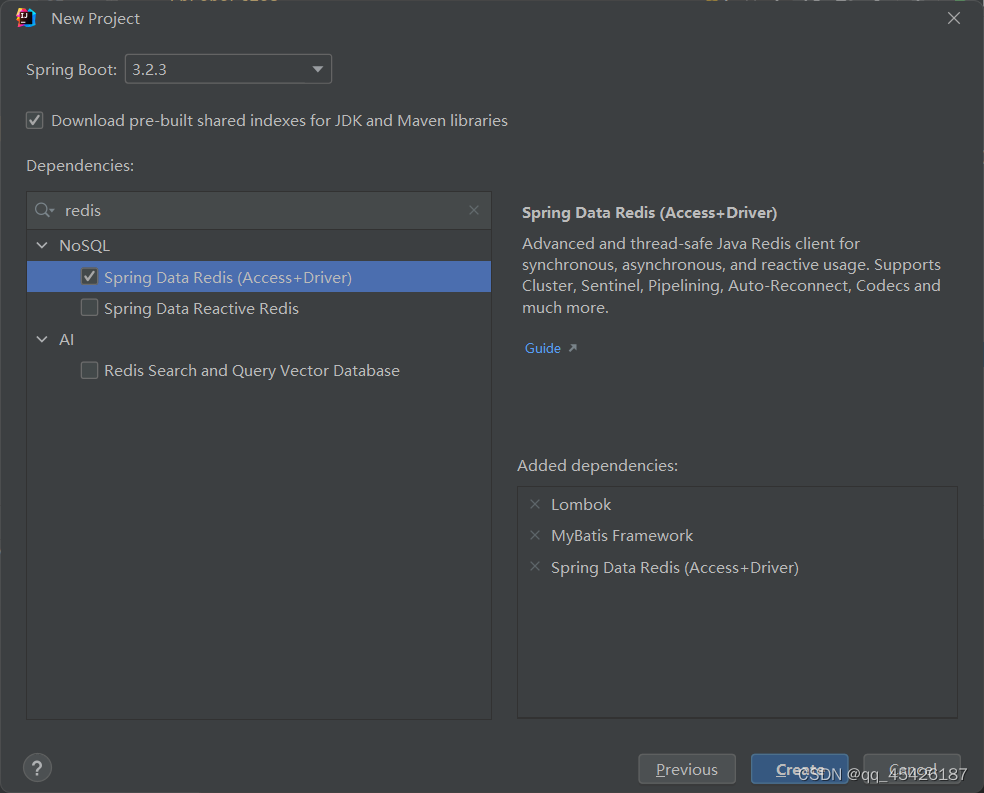
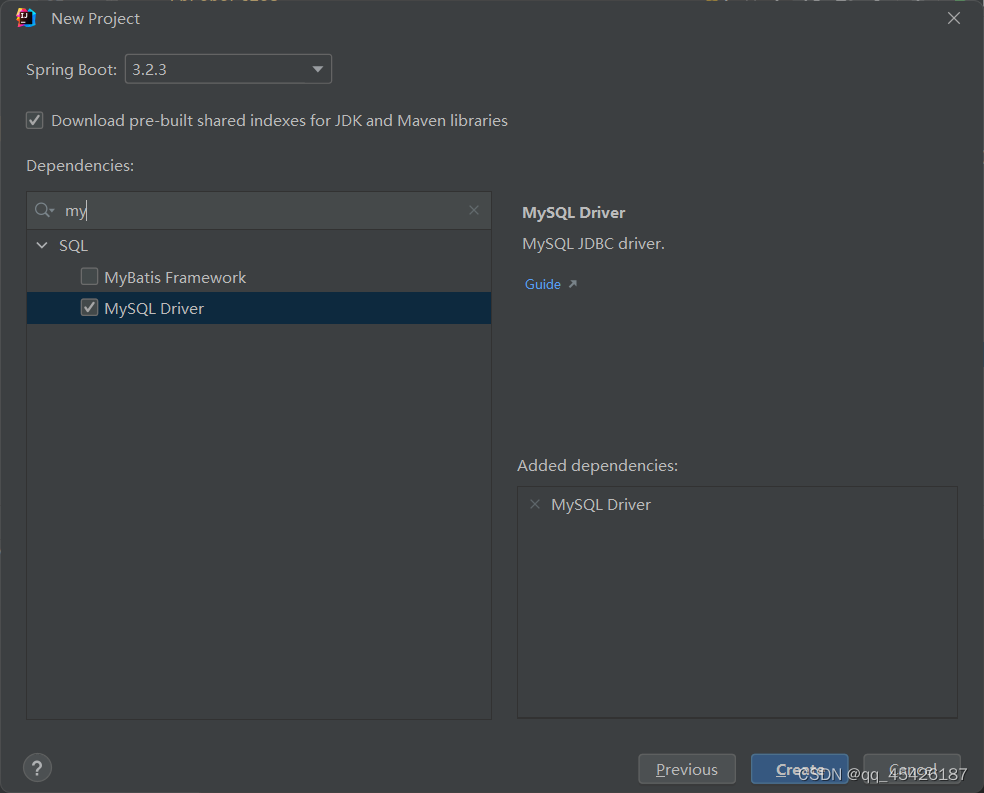
更改项目名称以及组名称, 删除包名后缀项目名称, 选择java17并点击next 选择lombok, 此外还需要勾选Spring Data Redis(Access+Driver), mybatis并点击创建
父级模块不需要src所以这里删除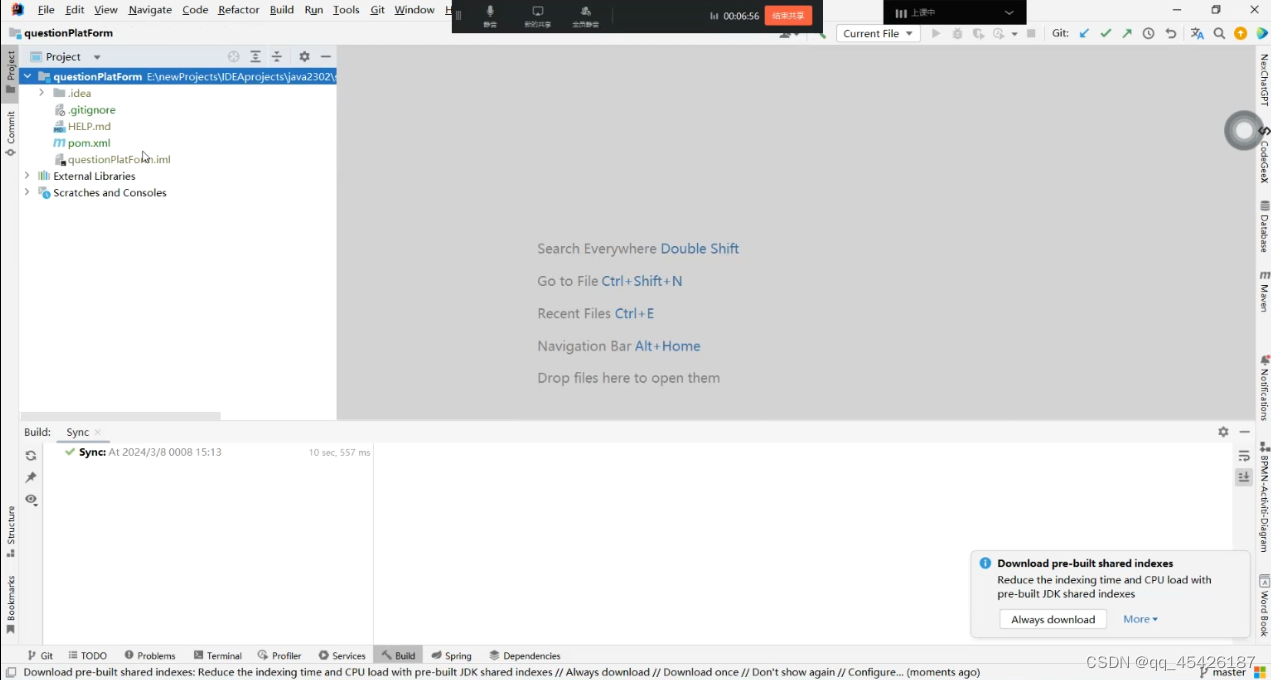
父级模块pom.xml当中删除
<dependency>
     <groupId>org.springframework.boot</groupId>
     <artifactId>spring-boot-starter-test</artifactId>
     <scope>test</scope>
</dependency>
<configuration>
<mainClass>cn.kgc.QuestionPlatFormApplication</mainClass>
<skip>true</skip>
</configuration><build>
<plugins>
<plugin>
<groupId>org.springframework.boot</groupId>
<artifactId>spring-boot-maven-plugin</artifactId>
<configuration>
<excludes>
<exclude>
<groupId>org.projectlombok</groupId>
<artifactId>lombok</artifactId>
</exclude>
</excludes>
</configuration>
</plugin>
</plugins>
</build>2.新建bean模块
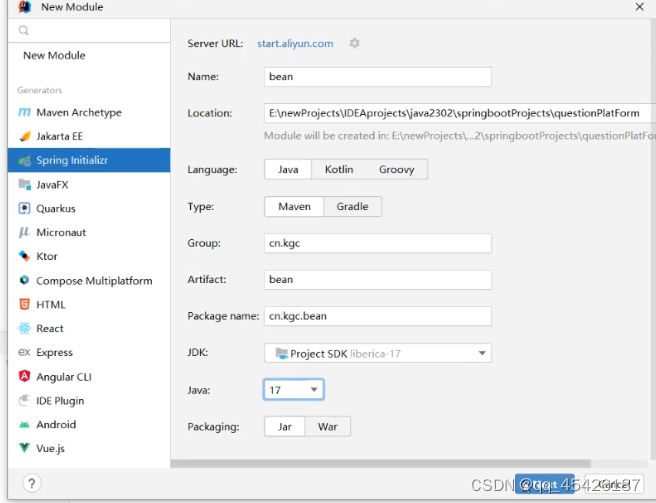
不需要添加额外jar包直接点击create即可
删除.gitignore, 删除test包, 删除src.main.java.cn.kgc.bean当中的启动项, 删除main当中的resources包
在src当中bean包下面新建dto, pojo, vo
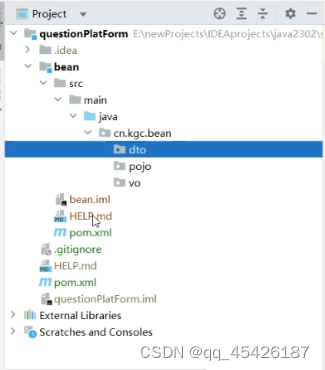
删除HELP.md
打开bean模块的pom.xml文件
1.删除<properties></properties>
<properties>
     <java.version>17</java.version>
</properties>
2.删除<dependencies></dependencies>当中的jar包依赖
<dependency>
     <groupId>org.springframework.boot</groupId>
     <artifactId>spring-boot-starter</artifactId>
</dependency>

<dependency>
     <groupId>org.springframework.boot</groupId>
     <artifactId>spring-boot-starter-test</artifactId>
     <scope>test</scope>
</dependency>
3.删除<dependencies></dependencies>以及<dependencyManagement></dependencyManagement>
(如果有dependencyManagement的话, 我就没有这个)
4.需要在<build></build>的<plugins></plugins>当中的<plugin></plugin>创建
<configuration>
    <skip>true</skip>
</configuration>
5.ctrl + F搜索<description>
在<description>bean</description>末尾回车
新建
<packaging>jar</packaging>6.返回父级的pom.xml
比如我的父级pom文件
在<description>questionPlatform</description>末尾回车
新建
(这里还需要添加bean作为子模块)
<packaging>pom</packaging>
<modules>
    <module>bean</module>
</modules>
7.复制父级模块当中的
<groupId>cn.kgc</groupId>
<artifactId>questionPlatForm</artifactId>
<version>0.0.1-SNAPSHOT</version>
作为模块引入到子模块的pom.xml当中
这里是bean模块当中的pom.xml
(父级模块当中的所有模块需要被子模块共享)
将上方父级模块的内容作为parent引入
在子模块<packaging>jar</packaging>末尾回车
新建
<parent>
    <groupId>cn.kgc</groupId>
    <artifactId>questionPlatForm</artifactId>
    <version>0.0.1-SNAPSHOT</version>
<parent>
如果遇到报错可能是当前pom.xml当中存在第二个parent, 将其中内容删除并且替换为父级内容也可以生效
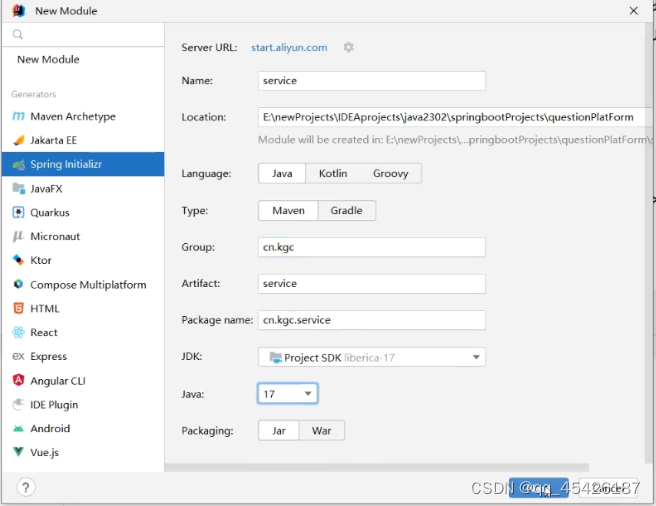
3.新建mapper模块

添加mysql依赖
1.新建好模块后删除模块当中的HELP.md, .gitignore, src当中的resources配置以及启动项

2.打开mapper的pom.xml, 删除<properties></properties>
在<description>mapper</description>
下新建
<packaging>jar</packaging>3.删除
<dependency>
      <groupId>org.mybatis.spring.boot</groupId>
      <artifactId>mybatis-spring-boot-starter-test</artifactId>
      <version>3.0.3</version>
      <scope>test</scope>
</dependency>
删除<dependencyManagement></dependencyManagement>
(如果有的话)
4.需要在<build></build>的<plugins></plugins>当中的<plugin></plugin>创建
<configuration>
    <skip>true</skip>
</configuration>
5.添加parent父级依赖
<parent>
    <groupId>cn.kgc</groupId>
    <artifactId>questionPlatForm</artifactId>
    <version>0.0.1-SNAPSHOT</version>
</parent>
6.在父级pom.xml
<modules>
    <module>bean</module>
</modules>
新增mapper子模块
<modules>
        <module>bean</module>
        <module>mapper</module>
</modules>
4.新建service层
创建好模块进行一系列删除, 删除test包,resources包 .gitignore, HELP.md, main当中的启动类
1.打开Service模块的pom.xml
删除<properties></properties>
在<description>mapper</description>
下新建
<packaging>jar</packaging>2.删除<dependencies></dependencies>当中jar包依赖, 以及
<dependencyManagement></dependencyManagement>
(如果有的话)
3.需要在<build></build>的<plugins></plugins>当中的<plugin></plugin>创建
<configuration>
    <skip>true</skip>
</configuration>
4.添加parent父级依赖
<parent>
    <groupId>cn.kgc</groupId>
    <artifactId>questionPlatForm</artifactId>
    <version>0.0.1-SNAPSHOT</version>
</parent>
5.在父级pom.xml
<modules>
    <module>bean</module>
</modules>
新增service子模块
<modules>
        <module>bean</module>
        <module>mapper</module>
        <module>service</module>
</modules>
5.新建web层

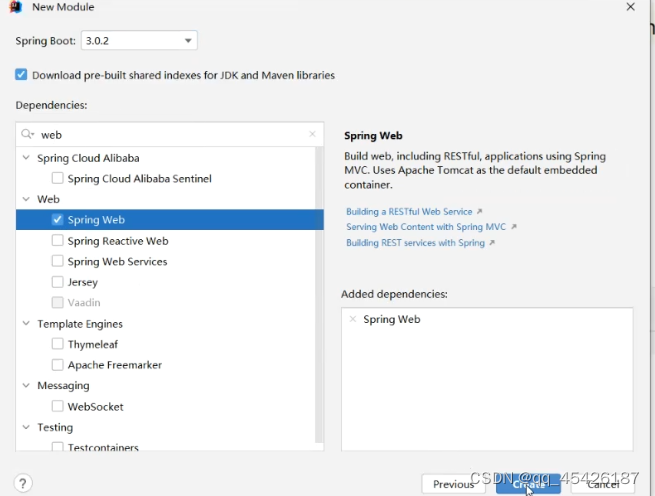
选择web依赖
创建好模块进行一系列删除, 删除test包, .gitignore, HELP.md
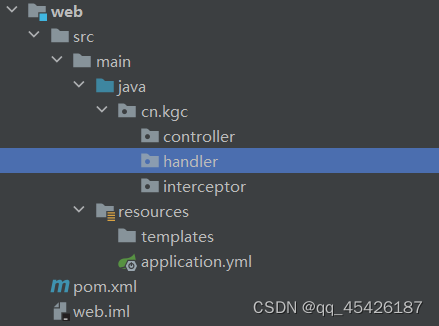
1.保留main当中的启动类
在java.cn.kgc新建controller, interceptor, handler
保留resources包但是删除包下的static
2.修改application.properties为yml文件
3.新建mappers
1.打开web层的pom.xml
删除<properties></properties>
在<description>mapper</description>
下新建
<packaging>jar</packaging>2.删除<dependencies></dependencies>当中
 <dependency>
      <groupId>org.springframework.boot</groupId>
      <artifactId>spring-boot-starter-test</artifactId>
      <scope>test</scope>
</dependency>
jar包依赖, 以及
<dependencyManagement></dependencyManagement>
(如果有的话)
3.需要在<build></build>的<plugins></plugins>当中的<plugin></plugin>创建
<configuration>
    <mainClass>cn.kgc.WebApplication</mainClass>
</configuration>
4.添加parent父级依赖
<parent>
    <groupId>cn.kgc</groupId>
    <artifactId>questionPlatForm</artifactId>
    <version>0.0.1-SNAPSHOT</version>
</parent>
5.在父级pom.xml
<modules>
    <module>bean</module>
</modules>
新增web子模块
<modules>
        <module>bean</module>
        <module>mapper</module>
        <module>service</module>
        <module>web</module>
</modules>
5.新建config层
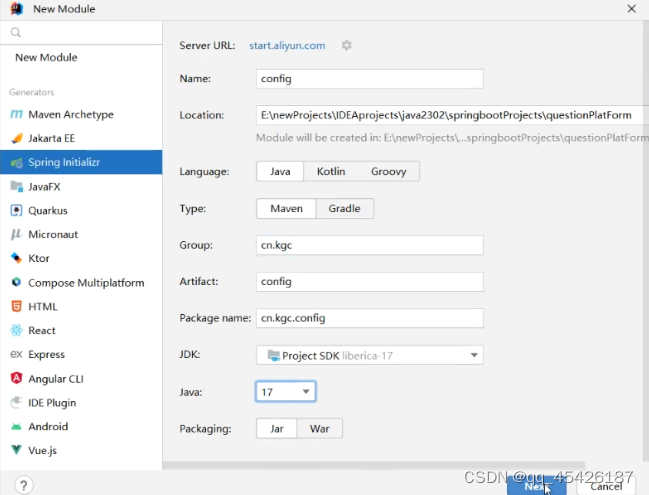
创建好模块进行一系列删除, 删除test包,resources包 .gitignore, HELP.md, main当中的启动类
1.打开Service模块的pom.xml
删除<properties></properties>
在<description>mapper</description>
下新建
<packaging>jar</packaging>2.删除<dependencies></dependencies>当中jar包依赖, 以及
<dependencyManagement></dependencyManagement>
(如果有的话)
3.需要在<build></build>的<plugins></plugins>当中的<plugin></plugin>创建
<configuration>
    <skip>true</skip>
</configuration>
4.添加parent父级依赖
<parent>
    <groupId>cn.kgc</groupId>
    <artifactId>questionPlatForm</artifactId>
    <version>0.0.1-SNAPSHOT</version>
</parent>
5.在父级pom.xml
<modules>
    <module>bean</module>
</modules>
新增config子模块
<modules>
        <module>bean</module>
        <module>mapper</module>
        <module>service</module>
        <module>web</module>
        <module>config</module>
</modules>
6.新建common层

创建好模块进行一系列删除, 删除test包,resources包 .gitignore, HELP.md, main当中的启动类
1.在java.cn.kgc.common下新建文件夹 utils, exceptions, constants

1.2打开Service模块的pom.xml
删除<properties></properties>
在<description>mapper</description>
下新建
<packaging>jar</packaging>2.删除<dependencies></dependencies>当中jar包依赖, 以及
<dependencyManagement></dependencyManagement>
(如果有的话)
3.需要在<build></build>的<plugins></plugins>当中的<plugin></plugin>创建
<configuration>
    <skip>true</skip>
</configuration>
4.添加parent父级依赖
<parent>
    <groupId>cn.kgc</groupId>
    <artifactId>questionPlatForm</artifactId>
    <version>0.0.1-SNAPSHOT</version>
</parent>
5.在父级pom.xml
<modules>
    <module>bean</module>
</modules>
新增common子模块
<modules>
        <module>bean</module>
        <module>mapper</module>
        <module>service</module>
        <module>web</module>
        <module>config</module>
        <module>common</module>
</modules>
7.新建aop层
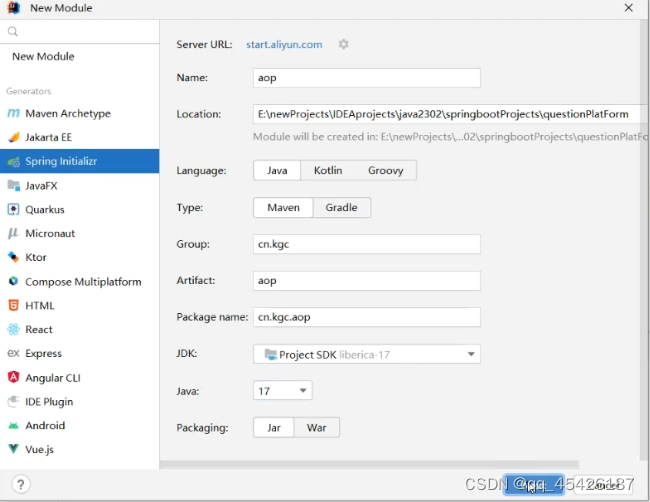
创建好模块进行一系列删除, 删除test包,resources包 .gitignore, HELP.md, main当中的启动类
1.打开Service模块的pom.xml
删除<properties></properties>
在<description>mapper</description>
下新建
<packaging>jar</packaging>2.删除<dependencies></dependencies>当中jar包依赖
只添加并保留
<dependencies>
     <dependency>
         <groupId>org.springframework.boot</groupId>
         <artifactId>spring-boot-starter-aop</artifactId>
     </dependency>
</dependencies>
, 以及
<dependencyManagement></dependencyManagement>
(如果有的话)
3.需要在<build></build>的<plugins></plugins>当中的<plugin></plugin>创建
<configuration>
    <skip>true</skip>
</configuration>
4.添加parent父级依赖
<parent>
    <groupId>cn.kgc</groupId>
    <artifactId>questionPlatForm</artifactId>
    <version>0.0.1-SNAPSHOT</version>
</parent>
5.在父级pom.xml
<modules>
    <module>bean</module>
</modules>
新增aop子模块
<modules>
        <module>bean</module>
        <module>mapper</module>
        <module>service</module>
        <module>web</module>
        <module>config</module>
        <module>common</module>
        <module>aop</module>
</modules>
二、引入模块之间依赖(依赖传递)
1.复制bean模块的pom.xml当中的
<groupId>cn.kgc</groupId>
<artifactId>bean</artifactId>
<version>0.0.1-SNAPSHOT</version>
并将其粘贴到mapper层的pom.xml的<dependencies></dependencies>当中
<!--引入bean层依赖-->
<dependency>
     <groupId>cn.kgc</groupId>
     <artifactId>bean</artifactId>
     <version>0.0.1-SNAPSHOT</version>
</dependency>
2.复制mapper模块的pom.xml当中的
<groupId>cn.kgc</groupId>
<artifactId>mapper</artifactId>
<version>0.0.1-SNAPSHOT</version>
并将其粘贴到service层的pom.xml的<dependencies></dependencies>当中
<!--引入mapper层依赖-->
<dependency>
     <groupId>cn.kgc</groupId>
     <artifactId>mapper</artifactId>
     <version>0.0.1-SNAPSHOT</version>
</dependency>
3.复制service模块的pom.xml当中的
<groupId>cn.kgc</groupId>
<artifactId>service</artifactId>
<version>0.0.1-SNAPSHOT</version>
并将其粘贴到web层的pom.xml的<dependencies></dependencies>当中
<!--引入service层依赖-->
<dependency>
     <groupId>cn.kgc</groupId>
     <artifactId>service</artifactId>
     <version>0.0.1-SNAPSHOT</version>
</dependency>
以及aop层的 pom.xml的<dependencies></dependencies>当中
<!--引入service层依赖-->
<dependency>
     <groupId>cn.kgc</groupId>
     <artifactId>service</artifactId>
     <version>0.0.1-SNAPSHOT</version>
</dependency>
4.复制aop模块的pom.xml当中的
<groupId>cn.kgc</groupId>
<artifactId>aop</artifactId>
<version>0.0.1-SNAPSHOT</version>
并将其粘贴到web层的pom.xml的<dependencies></dependencies>当中
<!--引入aop层依赖-->
<dependency>
     <groupId>cn.kgc</groupId>
     <artifactId>aop</artifactId>
     <version>0.0.1-SNAPSHOT</version>
</dependency>
5.复制config模块的pom.xml当中的
<groupId>cn.kgc</groupId>
<artifactId>config</artifactId>
<version>0.0.1-SNAPSHOT</version>
并将其粘贴到web层的pom.xml的<dependencies></dependencies>当中
<!--引入config层依赖-->
<dependency>
     <groupId>cn.kgc</groupId>
     <artifactId>config</artifactId>
     <version>0.0.1-SNAPSHOT</version>
</dependency>
6.复制common模块的pom.xml当中的
<groupId>cn.kgc</groupId>
<artifactId>common</artifactId>
<version>0.0.1-SNAPSHOT</version>
并将其粘贴到bean层的pom.xml的<dependencies></dependencies>当中
<!--引入common层依赖-->
<dependency>
     <groupId>cn.kgc</groupId>
     <artifactId>common</artifactId>
     <version>0.0.1-SNAPSHOT</version>
</dependency>
三、确认项目创建成功
点击idea右侧maven, 找到 questionPlatForm(root) 带有root标识的
子选项 Lifecyle
找到install并点击运行
如果运行完毕并且出现
[INFO] ------------------------------------------------------------------------
[INFO] Reactor Summary for questionPlatForm 0.0.1-SNAPSHOT:
[INFO]
[INFO] questionPlatForm ................................... SUCCESS [  0.315 s]
[INFO] common ............................................. SUCCESS [  3.208 s]
[INFO] bean ............................................... SUCCESS [  0.283 s]
[INFO] mapper ............................................. SUCCESS [  0.698 s]
[INFO] aop ................................................ SUCCESS [  0.247 s]
[INFO] service ............................................ SUCCESS [  0.228 s]
[INFO] config ............................................. SUCCESS [  0.215 s]
[INFO] web ................................................ SUCCESS [  6.040 s]
[INFO] ------------------------------------------------------------------------
[INFO] BUILD SUCCESS
[INFO] ------------------------------------------------------------------------
[INFO] Total time:  11.912 s
[INFO] Finished at: 2024-03-14T11:27:55+08:00
[INFO] ------------------------------------------------------------------------

Process finished with exit code 0
则表示项目配置是没有问题的


 1086
1086


 被折叠的 条评论
为什么被折叠?
被折叠的 条评论
为什么被折叠?
 到【灌水乐园】发言


