


#include "mainwindow.h"
#include "ui_mainwindow.h"
#include <QGraphicsOpacityEffect>
#include <QGraphicsDropShadowEffect>
#include <QPainter>

MainWindow::MainWindow(QWidget *parent) :
    QMainWindow(parent),
    ui(new Ui::MainWindow)
{
    ui->setupUi(this);

//    //1.设置样式
//    ui->pushButton->setStyleSheet("background:yellow");
//    ui->pushButton->setStyleSheet("color:red");
//    setStyleSheet("QPushButton{background:yellow;color:red}");

//    ui->horizontalSlider->setStyleSheet("background:blue");

    //2.透明效果
    //窗口透明属性,取值0~1,0表完全透明,1表完全不透明
    //setWindowOpacite(0.5);

    //部件不透明,窗体完全透明,Windows下配合无边款风格Qt::FramelessWindowHint
    setWindowFlags(Qt::FramelessWindowHint);
    setAttribute(Qt::WA_TranslucentBackground);

    //3.部件设置透明
    //透明度效果  要添加头文件 #include <QGraphicsOpacityEffect>
//    QGraphicsOpacityEffect *opacityEffect = new QGraphicsOpacityEffect;
//    opacityEffect->setOpacity(0.4);
//    ui->label->setGraphicsEffect(opacityEffect);

    //4.阴影效果 添加头文件
//    QGraphicsDropShadowEffect *shadowEffect = new QGraphicsDropShadowEffect;
//    //阴影色,透明度
//    shadowEffect->setColor(QColor(100,100,100));
//    shadowEffect->setBlurRadius(20);//阴影模糊半径
//    shadowEffect->setOffset(20);//阴影偏移值
//    ui->label->setGraphicsEffect(shadowEffect);

}

//5.窗体半透明,重写void paintEvent(QPaintEvent* event);绘图事件
//把2透明效果打开
void MainWindow::paintEvent(QPaintEvent *event)
{
    QPainter painter(this);
    //绘图区域填充
    painter.fillRect(rect(),QColor(255,255,255,100));

}

MainWindow::~MainWindow()
{
    delete ui;
}
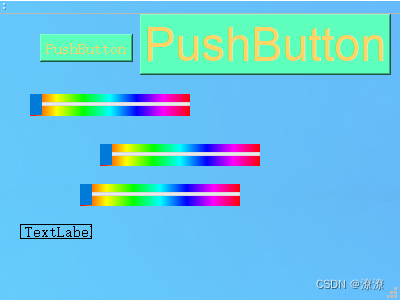
代码效果:


 1060
1060


 被折叠的 条评论
为什么被折叠?
被折叠的 条评论
为什么被折叠?
 到【灌水乐园】发言


