


完成一个企业级项目后,发现自己对Vue Component使用的不够通透,想重学一遍才有了这篇博客;
需要的前置知识:ES6,Vue组件基础知识
一,组件注册
组件名
注册组件时,需要给它一个名字。比如在全局注册的时候我们已经看到了:
Vue.component('my-component',{...});
Vue.component中第一个参数就是该组件名
组件大小写
定义组件名方式有两种:
短横线分隔命名
Vue.component('my-component',{...});
使用短线分隔命名定义一个组件时,我们引用该组件时必须使用短线分隔命名,my-component
驼峰命名
Vue.component('MyComponent',{...});
当使用大驼峰定义一个组件时,引用该组件时两种命名法都可以使用,my-component和MyComponent都可以引用成功
Vue.component('myComponent',{...});
使用小驼峰定义组件时,引用时只能使用my-component
组件命名建议
命名组件时,统一使用大驼峰命名,引用时统一使用短横线分隔命名
import MyComponent from "./MyComponent.vue";
export default{
    name:"MyComponent"
}
<!--引用组件-->
<my-component></my-component>
在模板字符串中上面的规则已同样适用
<body>
    <div id="app">
    </div>
    <script src="https://cdn.bootcdn.net/ajax/libs/vue/2.6.9/vue.min.js"></script>
    <script>
        Vue.component('MyComponent', {
            template: `<div>晶晶</div>`
        });
        new Vue({
            el: "#app",
            template: `<my-component />`
        })
    </script>
</body>

眼见为实:https://codepen.io/lihai-boop/pen/yLVJybp
全局注册
在new Vue()之前,使用Vue.component方法定义组件,即为全局组件,可以在new Vue()根实例中任意引用,例如:
Vue.component('ComponentA', { /* ... */ });
Vue.component('ComponentB', { /* ... */ });
Vue.component('ComponentC', { /* ... */ });
new Vue({
    el:"#app"
});
<div id="app">
    <component-a></component-a>
    <component-b></component-b>
    <component-c></component-c>
</div>
局部注册
全局注册不够理想,在构建工具中,例如:webpack。全局注册的组件会被打包在一个文件,即使你不需要再引用它。这样会造成用户下载js文件体积没有意义的增大。
在这种情况下,可以通过一个对象来定义组件
let ComponentA = { /* ... */ }
let ComponentB = { /* ... */ }
let ComponentC = { /* ... */ }
然后在components中定义需要引用的组件:
new Vue({
    el:"#app",
    component:{
        ComponentA,
        ComponentB,
        ComponentC
    }
})
局部注册的组件在其子组件中不可用。例如,如果你希望ComponentA在ComponentB中使用,需要这样写:
let ComponentA = { /* ... */ };
let ComponentB ={
    components:{
        ComponentA
    }
}
或者通过Babel和webpack使用ES2015模块,代码看起来更像:
import ComponentA from "./ComponentA.vue";
export default {
    components:{
        ComponentA
    }
}
批量注册
要求:在webpack环境中
需求:将在components文夹件下的所有组件注册成全局组件
使用require.context可以快速批量将组件注册,节省手工一个一个的注册时间。
src/main.js
import Vue from "vue";
const components = require.context(
    //查询目录
    './components',
    //是否查询子目录
    true,
    //匹配文件正则
    /\w+\.(vue|js)$/);
console.log(components.keys());
components.keys().forEach(val => {
  console.log(val);
  const component = val.default;
  Vue.components(component.name, component);
})
更详细的使用需要移步Vue官网
Vue.use()注册全局组件
当我们使用Vue-cli搭建项目时,生成的模板中注册全局组件时会使用Vue.use()方法
import Vue from 'vue';
import MyComponent from "MyComponet";
Vue.use(MyComponent);
我们自定义的组件要想也使用Vue.use注册,前提是组件必须要install方法。
MyComponent.install = (Vue)=>{
    Vue.component(MyComponent,MyComponent);
}
Vue.use本质上还是使用Vue.component进行注册
二,Prop
Prop大小写
在HTML中attribute名大小写不敏感,浏览器会将大写字符转化成小写字符。所以我们在DOM模板中需要将驼峰命名换成短横线分隔命名
<!DOCTYPE html>
<html lang="en">
<head>
<meta charset="UTF-8">
<meta http-equiv="X-UA-Compatible" content="IE=edge">
<meta name="viewport" content="width=device-width, initial-scale=1.0">
<title>Document</title>
</head>
<body>
<div id="app">
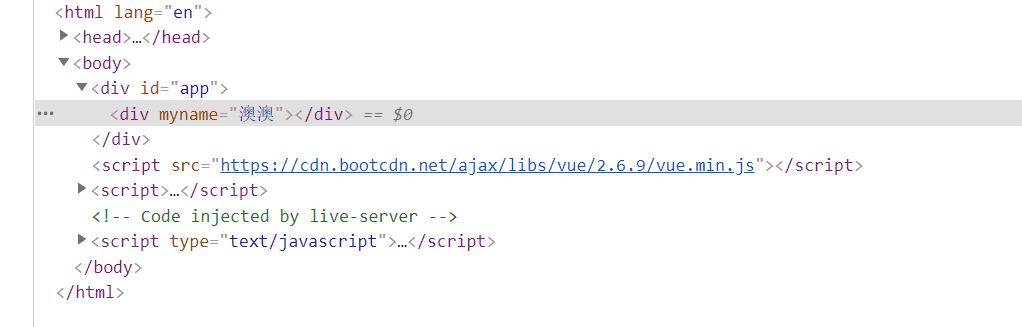
<my-component :myName="name" />
</div>
<script src="https://cdn.bootcdn.net/ajax/libs/vue/2.6.9/vue.min.js"></script>
<script>
Vue.component('MyComponent', {
props: ["myName"],
template: `<div>{{myName}}</div>`
});
new Vue({
el: "#app",
data: {
name: "澳澳"
},
})
</script>
</body>
</html>
 <!--在HTML中使用短横线分隔命名-->
<my-component :my-name="name" />
在字符串模板或template中是没有该限制的,
Prop类型
组件接收Prop时可以使用数组或对象接收,使用数组时是无法传递的Prop类型
props:["myName","myAge"];
如果需要规定Prop传递的类型需要使用对象
props:{
    myName:String,
    myAge:Number
}
一共八种类型值:Number,String,Boolean,Object,Funtion,Array,Symbol,Date
一个props属性可以定义多个类型
props:{
    myName:String,
    myAge:[Number,String]
}
传递静态或动态prop
静态传递prop
<my-component my-name="晶晶" my-age="保密"/>
动态传递prop
<my-component  :my-name="name" :my-age="age"/>

new Vue({
	data:{
        name:"晶晶",
        age:'保密'
	}
})
传递一个数组
<my-component :my-name="['晶晶','澳澳']"/>
传递一个对象
<my-component :my-name="{name:'晶晶',age:'保密}"/>
或
<my-component  v-bind="myObj"/>
new Vue({
    data:{
    	myObj:{name:'晶晶',age:'保密}
    }
})
等价于
<my-component :name="myObj.name" :age="myObj.age"/>
更详细的prop不再废话了,官网介绍的非常详细了Prop
非Prop的Attribute
Vue.component('MyComponent',{
	props:{
		myName:String
	},
    template:`<div>{{myName}}</div>`
})
new Vue({
    data:{
        name:'晶晶'
    },
	template:`<my-componet :myName="name" class="com">`
})
MyComponent组件中prop并没有定义class,但MyComponent根元素会自动继承class。渲染后的元素即为<div class="com">晶晶</div>
注意:class 和 style 非prop的attribute会合并,而其他的直接替换掉,例如:<input type='text'> 非prop的attribute会替换掉它成<input type='data'>
禁用Attribute
如果希望根元素不继续attribute属性,需要使用inheritAttrs: false禁用。
Vue.component('MyComponent',{
	inheritAttrs:false,
})
当某个元素需要使用attribute时,可以使用$attrs进行绑定
Vue.component('MyComponent',{
	inheritAttrs:false,
	template:`<div>
        <input v-bind="$attrs"/>
</div>`
})
注意: 禁用Attribute对class,style并不起作用,并且$attrs获取不到class,style
三,自定义事件
自定义组件的v-model
v-model仅适用于表单元素
Vue.component('MyComponent', {
    props: ["myName"],
    model:{
    prop:'myName',
    event:'input'
},
	template: `<input :value="myName" @input="$emit('input',$event.target.value)"/>`
});
new Vue({
    el: "#app",
    data: {
    	name: "晶晶"
    }
})
<my-component v-model="name"></my-component>
v-model原理是对组件绑定input事件,然后在子组件中利用$emit事件触发父组件绑定的input事件
<!--HTML模板中大小写不敏感,短横线分隔命名-->
<my-component @input='name=$event' :my-name=‘name’></my-component>
<!--等价于-->
<my-component v-model="name"></my-component>

new Vue({
	el:'#app',
	data:{
		name:"晶晶"
	}
})
组件的v-model默认利用为value的prop和名为input事件,但我们可以利用model选项修改事件。
将input事件修改成checked
Vue.component('MyComponent',{
	model:{
        prop:'value',
        event:'cheaked'
    },
    prop:['value'],
    template:`<input :value="value" @cheaked="$emit('cheaked',$event.target.value)"  />`,
})
<my-component v-model="name"></my-component>
组件上v-model中的值name,传递到组件后被重新赋值给value。prop需要接收value
原生事件绑定组件
有时候需要将一个原生事件绑定到组件根元素中,vue中的事件或多或少被封装了。如果需要使用原生要加一个修饰符.native
<my-component @click.native="fn"></my-component>


Vue.component('MyComponent', {
	template: `<div/>晶晶</div>`
});
new Vue({
	el:"#app",
	methods:{
		fn(){
			console.log(1);
		}
	}
})
使用原生事件会出现Attribute一样的问题,它只会继承到根元素身上。
<my-component :focus.native="..."></my-component>

Vue.component('MyComponent', {
	template: `<div>
        <input />
		</div>`
});
原生focus事件绑定在div,而不是在input。
解决这类问题与处理Attribute一样,使用inheritAttrs: false阻止根元素继承,$listeners可以获取组件上所有的监听事件
<my-component :focus.native="..."></my-component>
Vue.component('MyComponent', {
	inheritAttrs:false,
	template: `<div>
        <input v-bind="$listeners"/>
		</div>`
});
.sync`修饰符
**双向绑定原理:**vue中没有做真正的双向绑定,vue建议使用$emit事件模拟。
vue推荐双向绑定事件命名使用update:自定义事件名写法
<!--THML中,短横线分隔-->
  <my-component :name="preson.name" @update:my-event='preson.name=$event'></my-component>

Vue.component('MyComponent',{
	props:['name'],
	data:{
		msg:"澳澳"
	},
	template:`<div @click="$emit('update:my-event',msg)">{{name}}</div>`
})
new Vue({
	data:{
	preson:{
		name:'晶晶'
	}}
})
这个就是所谓的”双向绑定“
.sync只是简化了这个过程
<!--THML中,短横线分隔-->
  <my-component  @my-event.sync='preson.name=$event'></my-component>

Vue.component('MyComponent',{
	props:['name'],
	data:{
		msg:"澳澳"
	},
	template:`<div @click="$emit('update:my-event',msg)">{{name}}</div>`
})
new Vue({
	data:{
	preson:{
		name:'晶晶'
	}}
})
注意:.sync修饰后,不能再传入表达式,例如@my-event.sync='preson.name+1'是无效的
多个prop绑定
<my-component v-bind.sync='preson'></my-component>
<!--等价于-->
<my-component
:name="preson" @name.sync="preson.name=$event"
:age="age"  @age.sync = "preson.age=$event"
></my-component>

new Vue({
	el:"#app",
	data:{
		preson:{
			name:"晶晶",
			age:"保密"
		}
	}
})
四,插槽
具体介绍官网解释的很清楚了,我不废话了
编译作用域
<my-component name="晶晶">
    <!--此处name为undefined,-->
	我的名字叫{{name}}
</my-component>
Vue.component("MyComponent",{
	prop:["name"]
})
父级模板里的所有内容都是在父级作用域中编译的;子模板里的所有内容都是在子作用域中编译的。
后备内容
我们可以默认设置一个内容,当组件没有内容时,默认渲染组件中插槽中的内容。组件提供了内容则渲染提供的内容覆盖插槽中的内容
<my-component>我叫澳澳</my-component>

Vue.component("MyComponent",{
	template:`<div>
        	<slot>我叫晶晶</slot>
		    </div>`
})
具名插槽
有时候,我们需要使用多个插槽。例如MyComponent组件
Vue.component("MyComponent",{
	template:`<div class="container">
  <header>
    <!-- 我们希望把页头放这里 -->
  </header>
  <main>
    <!-- 我们希望把主要内容放这里 -->
  </main>
  <footer>
    <!-- 我们希望把页脚放这里 -->
  </footer>
  </div>`
})
<slot>元素有一个额外的属性name,可以利用它来定义额外的插槽
Vue.component("MyComponent",{
	template:`<div class="container">
  <header>
   <slot name="header"></slot>
  </header>
  <main>
   <slot></slot>
  </main>
  <footer>
     <slot name="footer"></slot>
  </footer>
  </div>`
})
不带name的<slot>元素会带有隐含名字default
向具名插槽提供内容时,需要使用template元素上使用v-slot指令,并以v-slot的参数的形式提供其名称
<my-component>
 <template v-slot:header>
    <h1>Here might be a page title</h1>
  </template>

  <!--给默认插槽提供内容可以不用 <template v-slot:default></template>-->
  <template v-slot:default>
        <p>A paragraph for the main content.</p>
  		<p>And another one.</p>
  </template>


  <template v-slot:footer>
    <p>Here's some contact info</p>
  </template>
</my-component>
注意:v-slot只能添加至template上,一种情况除外特殊情况
具名插槽缩写:
<my-component>
 <template #header>
    <h1>Here might be a page title</h1>
  </template>

  <!--给默认插槽提供内容可以不用 <template v-slot:default></template>-->
  <template #default>
        <p>A paragraph for the main content.</p>
  		<p>And another one.</p>
  </template>


  <template #footer>
    <p>Here's some contact info</p>
  </template>
</my-component>
作用域插槽
<my-component>
	{{user.lastName}}
</my-component>

Vue.component('MyComponent',{
	data(){
		return {
			user:{
				fristName:"晶晶",
				lastName:'澳澳'
			}
		}
	},
	template:`<div>
        <slot>{{user.fristName}}</slot>
</div>`
})
new Vue ({
	el:"#app"
})
上面渲染会失败,因为user在MyComponent组件下,根实例中得不到user
为user在父级插槽中可用,可以将user作为slot元素的一个属性绑定上去:
 Vue.component('MyComponent', {
	data() {
		return {
			user: {
				fristName: "晶晶",
				lastName: "澳澳"
			}
		}
	},
	template: `<div><slot v-bind="user">{{user.fristName}}</slot></div>`,
})
new Vue({
	el: '#app'
})
绑定的slot元素上属性叫做插槽prop。在父级作用域中,可以使用v-slot获取到插槽prop:
 <my-component>
     <template v-slot:default="slotObj">
         {{slotObj.lastName}}
     </template>
</my-component>
解构插槽Prop
插槽Prop实质是将绑定的变量传递到一个函数中:
function (slotObj){
    //插槽内容
}
意味着我们可以在v-slot中对传递过来的参数进行解构:
 <my-component>
   <template v-slot:default="{fristName,lastName}">
          {{fristName}}-{{lastName}}
   </template>
</my-component>
动态插槽名
2.6.0版本以上支持动态指令参数用于v-slot上,来定义动态的插槽名:
 <my-component>
   <template v-slot:[name]>
         动态插槽名
   </template>
</my-component>
new Vue({
	el: '#app',
	data:{
		name:"header"
	}
})
v-slot与v-bind,v-on一样可以缩写
 <my-component>
	<template #header>
    <h1>Here might be a page title</h1>
  	</template>

  	<p>A paragraph for the main content.</p>
  	<p>And another one.</p>

  	<template #footer>
    <p>Here's some contact info</p>
  	</template>
</my-component>
五,动态组件&异步组件
动态组件
动态切换组件,需要使用vue自带组件component
<div id="app" @click="changeComponent">
    <component :is="whichComponet"></component>
</div>

Vue.component('MyComponent', {
	template: `<div>组件1</div>`,
})
Vue.component('OtherComponent', {
	template: `<div>组件2</div>`,
})
new Vue({
    el: '#app',
    data: {
    	whichComponet: 'my-component'
    },
    methods: {
    	changeComponent() {
        	const CUT_COMPONENT = "my-component",
    		Other_COMPONENT = "other-component";//当前组件;
    		this.whichComponet = this.whichComponet === CUT_COMPONENT ? Other_COMPONENT : CUT_COMPONENT;
    }
    }
})
每一次切换新的组件都会重新创建一个实例,对性能不友好。为解决这个问题:可以使用keep-alive组件将动态组件包裹起来
<div id="app" @click="changeComponent">
    <keep-alive>
         <component :is="whichComponet"></component>
    </keep-alive>
</div>
keep-alive会将组件进行缓存,切换时不会再重新创建实例
注意点:keep-alive组件要求切换的组件需要有自己的名字
异步组件
大型应用中,我们可以需要将应用代码分割成小一些的代码块,并且只在需要的时候才向服务器请求加载一个模块,Vue中可以使用一个函数定义组件,它可以异步解析你的组件,只有在需要的渲染它的时候才触发该函数,并将其缓存起来供未来重新渲染:
Vue.component("MyComponent",function(resolve,reject){
	resolve({
		template:`<div>I am async!</div>`,
	})
})
有点类似promise,reject表示加载失败。
与webpack配合:
Vue.component("MyComponent",function(resolve,reject){
	require(['./MyComponent'],resolve);
})
require会告诉webpack将该组件打包成一个包,需要时会通过Ajax请求加载
推荐写写法:
Vue.component(
  'MyComponent',
  // 这个动态导入会返回一个 `Promise` 对象。
  () => import('./MyComponent')
)
异步局部组件:
new Vue({
  components: {
    'MyComponent': () => import('./MyComponent')
  }
})
异步加载时会有请求延时,我们可以处理加载状态:
new Vue({
  components: {
    'MyComponent': () => ({
      // 需要加载的组件 (应该是一个 `Promise` 对象)
      component: import('./MyComponent.vue'),
      // 异步组件加载时使用的组件
      loading: LoadingComponent,
      // 加载失败时使用的组件
      error: ErrorComponent,
      // 展示加载时组件的延时时间。默认值是 200 (毫秒)
      delay: 200,
      // 如果提供了超时时间且组件加载也超时了,
      // 则使用加载失败时使用的组件。默认值是:`Infinity`
      timeout: 3000
    })
  }
})
六,组件通信
子孙组件访问父祖组件
子组件访问根实例
在每个new Vue实例的子组件中,根实例可以通过$root进行访问:
new Vue({
    data:{
        num:1
    },
    methods:{
        fn(){
            this.num+=1;
        }
    }
})
子组件访问根实例:
this.$root.num = 2;
this.$root.fn();
子组件访问父组件
<my-component>
     <other-component></other-component>
</my-component>
<script>
Vue.component('MyComponent', {
    data() {
        return {
        	name: "父级"
        }
    },
    template: `<div><slot></slot></div>`,
})
Vue.component("OtherComponent", {
    data() {
        return {
        	age: 20
        }
    },
    template: `<div >{{this.$parent.name}}</div>`,

})

const vue = new Vue({
    el: '#app',
    data: {
        whichComponet: 'my-component',
        name: "根实例"
    },
})
</script>
渲染的结果是父级。
使用$parent非常方便,不需要prop进行传递,省事。但它不易扩展,不适合嵌套深的组件中使用
<parent-component>
    <chlid-component>
        <sun-component></sun-component>
    </chlid-component>
</parent-component>
<script>
    Vue.component('ParentComponent', {
        data() {
            return {
                name: "parent"
            }
        },
        template: `<div><slot></slot></div>`,
    })
    Vue.component("ChlidComponent", {
        data() {
            return {
                name: "child"
            }
        },
        template: `<div><slot></slot></div>`,
    })
    Vue.component("SunComponent", {
        template: `<div >{{$parent.$parent.name}}</div>`,
    })
    const vue = new Vue({
        el: '#app',
        data: {
            whichComponet: 'my-component',
            name: "根实例"
        },
    })
</script>
组件SunComponent获取祖父组件ParentComponent时,需要使用$parent.$parent.name。如果组件再嵌套深一点,我们就需要连续.$parent下去,维护起来费力。当遇到这种情况时,推荐使用依赖注入
依赖注入
<parent-component>
    <chlid-component>
        <sun-component></sun-component>
    </chlid-component>
</parent-component>
使用依赖注入嵌套的组件可以非常方便的父子交互
Vue.component('ParentComponent', {
    data() {
        return {
            name: "parent"
        }
    },
    provide() {
        console.log(this.name);
        return {
            parent: this.name
        }
    },

    template: `<div><slot></slot></div>`,
})
父级组件ParentComponent,使用provide注入值后,它的后代组件只需要使用inject即可访问到父级传递过来值。组件嵌套再深也可以访问到:
Vue.component("ChlidComponent", {
    inject: ["parent"],
    data() {
        return {
            name: "child"
        }
    },
    created() {
        console.log(this.parent);
    },
    template: `<div><slot></slot>
</div>`,
})
Vue.component("SunComponent", {
    inject: ["parent"],
    created(){
        console.log(this.parent);
    },
    template: `<div >{{$parent.$parent.name}}</div>`,
})
缺陷:
传递的值并不是响应式的,意味着当父级修改值后,后代组件不会重新渲染;
它使组件耦合起来,重构困难;
官方不推荐我们使用,官方推荐遇到嵌套深的组件使用状态管理Vux
父级组件访问子级组件
访问子组件实例或子元素
借助ref我们可以轻松的访问到子组件:
<my-component ref="child"></my-component>
定义这个ref组件时,可以使用:
this.$refs.child;
$refs只会在组件渲染完成以后才生效,并且它们不是响应式的。
还有一个方法$children:
<chlid-component>
    <sun-component></sun-component>
</chlid-component>
<script>
Vue.component("ChlidComponent", {
    data() {
        return {
            name: "child"
        }
    },
    created() {
        console.log(this.parent);
    },
    template: `<div>{{$children.name}}
</div>`,
})
Vue.component("SunComponent", {
    data(){
        return {
            name:"sun"
        }
    },
    template: `<div >{{$parent.$parent.name}}</div>`,
})
//...
</script>
缺陷:
传递的值并不是响应式的,意味着当父级修改值后,后代组件不会重新渲染;
它使组件耦合起来,重构困难;
官方不推荐我们使用,官方推荐遇到嵌套深的组件使用状态管理Vux
父级组件访问子级组件
访问子组件实例或子元素
借助ref我们可以轻松的访问到子组件:
<my-component ref="child"></my-component>
定义这个ref组件时,可以使用:
this.$refs.child;
$refs只会在组件渲染完成以后才生效,并且它们不是响应式的。
还有一个方法$children:
<chlid-component>
    <sun-component></sun-component>
</chlid-component>
<script>
Vue.component("ChlidComponent", {
    data() {
        return {
            name: "child"
        }
    },
    created() {
        console.log(this.parent);
    },
    template: `<div>{{$children.name}}
</div>`,
})
Vue.component("SunComponent", {
    data(){
        return {
            name:"sun"
        }
    },
    template: `<div >{{$parent.name}}</div>`,
})
//...
</script>
参考:


 450
450

 被折叠的 条评论
为什么被折叠?
被折叠的 条评论
为什么被折叠?
 到【灌水乐园】发言


