


一、引入
前面两个章节介绍了入库 MySQL 的方法,本文介绍另外一种入库方式:入库到阿里云MaxCompute数仓。
什么情况下会使用到该方法论呢?至少得有购买了阿里云 MaxCompute 服务,并将阿里云 MaxCompute 作为数仓集成各个来源的数据集,一般是公司层面使用。
本文直接结合前面两个章节:MySQL 入库的通用版和定制版,对入库的逻辑加以修改,以适配阿里云 MaxCompute 的配置需求,并将数据数据写入到 MaxCompute 数仓中。
注意:以下操作是在阿里的 Dataworks 中测试。
二、异同点分析
2.1 数据类型
阿里云 MaxCompute 的数据类型和 MySQL 的有一些不太一样,比如字符串,在 MySQL 中一般入库为 varchar,而在 MaxCompute 一般入库为 string。MaxCompute 没有 json 数据类型,取而代之的是使用 array 和 map 数据类型。
具体可参考阿里云官方文档:与Hive、MySQL、Oracle数据类型映射表。
| MySQL | MaxCompute | 补充说明 |
|---|---|---|
| varchar | string 或 varchar | |
| float | float 或 double | |
| json | array | 此处不涉及类似字典结构的存储,如有,MaxCompute 则使用 map<key,value>。 |
| boolean | boolean | |
| datetime | datetime |
多维表字段和入库字段的数据类型映射关系参考如下,将 varchar(256) 改为 string,将 float 改为 double,将 json 改为 array。
注意:19(查找引用)和20(公式)存为 string。
data_type_map = [{"feishu_type": 1   ,"mc_type": "string"        }
                ,{"feishu_type": 2   ,"mc_type": "double"        }
                ,{"feishu_type": 3   ,"mc_type": "string"        }
                ,{"feishu_type": 4   ,"mc_type": "array<string>" }
                ,{"feishu_type": 5   ,"mc_type": "datetime"      }
                ,{"feishu_type": 7   ,"mc_type": "boolean"       }
                ,{"feishu_type": 11  ,"mc_type": "string"        }
                ,{"feishu_type": 13  ,"mc_type": "string"        }
                ,{"feishu_type": 15  ,"mc_type": "string"        }
                ,{"feishu_type": 17  ,"mc_type": "array<string>" }
                ,{"feishu_type": 18  ,"mc_type": "array<string>" }
                ,{"feishu_type": 19  ,"mc_type": "string"        }
                ,{"feishu_type": 20  ,"mc_type": "string"        }
                ,{"feishu_type": 21  ,"mc_type": "array<string>" }
                ,{"feishu_type": 22  ,"mc_type": "string"        }
                ,{"feishu_type": 23  ,"mc_type": "string"        }
                ,{"feishu_type": 1001,"mc_type": "datetime"      }
                ,{"feishu_type": 1002,"mc_type": "datetime"      }
                ,{"feishu_type": 1003,"mc_type": "string"        }
                ,{"feishu_type": 1004,"mc_type": "string"        }
                ,{"feishu_type": 1005,"mc_type": "string"        }]
除了修改数据类型,还需要修改处理函数extract_key_fields()中的几个处理逻辑:
- 附件、单向关联、双向关联入库为 array,插入数据时要保留列表格式,不能使用
json.dumps()将列表转为字符串 - 多选也是入库为 array,需要去掉
json.dumps(),但是查找引用和公式入库为 string 类型,不需要改变,所以需要将多选单独提取出来处理,当然由于也可以直接放在数字处理逻辑中,因为最终都是使用x.get(row['field_name'])处理数据。
# 处理前
        elif row['type'] in (2, 3, 7, 13, 1005):  #数字、单选、复选框、手机号、自动编号
            df_return[row['tb_field_name']] = df_feishu['fields'].apply(lambda x:x.get(row['field_name']))

        elif row['type'] == 17:    #附件,遍历取url
            df_return[row['tb_field_name']] = df_feishu['fields'].apply(lambda x:json.dumps([i.get('url') for i in x.get(row['field_name'],[{}])])) #需要遍历

        elif row['type'] in(18, 21):    #单向关联、双向关联,取link_record_ids
            df_return[row['tb_field_name']] = df_feishu['fields'].apply(lambda x:json.dumps(x.get(row['field_name'],{}).get('link_record_ids')))

        elif row['type'] in(4, 19, 20):    #多选、查找引用和公式
            df_return[row['tb_field_name']] = df_feishu['fields'].apply(lambda x:json.dumps(x.get(row['field_name'])))

# 处理后
        elif row['type'] in (2, 3, 4, 7, 13, 1005):  #数字、单选、多选、复选框、手机号、自动编号
            df_return[row['tb_field_name']] = df_feishu['fields'].apply(lambda x:x.get(row['field_name']))

        elif row['type'] == 17:    #附件,遍历取url
            df_return[row['tb_field_name']] = df_feishu['fields'].apply(lambda x:[i.get('url') for i in x.get(row['field_name'],[{}])]) #需要遍历

        elif row['type'] in(18, 21):    #单向关联、双向关联,取link_record_ids
            df_return[row['tb_field_name']] = df_feishu['fields'].apply(lambda x:x.get(row['field_name'],{}).get('link_record_ids'))

        elif row['type'] in(19, 20):    #查找引用和公式
            df_return[row['tb_field_name']] = df_feishu['fields'].apply(lambda x:json.dumps(x.get(row['field_name'])))
2.2 建表
阿里云通过 PyODPS 提供了通过o.create_table()进行建表的方法,具体分两种方法:一种是通过创建表 Schema,再通过表 Schema 创建表;另外一种是直接使用字段名及字段类型创建表。所以在建表的时候,需要参考相关的文档来操作。
具体可参考阿里云官方文档:PyODPS创建表
2.2.1 创建 Schema,再建表
创建 Schema 很简单,跟写建表 SQL 差不多,调用 MaxCompute 的 Schema, 和 Column 来完成,字段名、字段类型和字段备注分别传递给 Column 方法的 name、type 和 comment 参数,然后用列表存放每一列的信息,传递给 Schema() 即可,基本框架参考如下:
from odps.models import Schema, Column
columns = []
name = 'field_text'; type='string'; comment='文本'
columns.append(Column(name=name, type=type, comment=comment))
schema = Schema(columns=columns)
使用以上框架,遍历读取需要入库的列的信息,并依次赋值给 name、type 和 comment 参数,然后添加到 columns 列表中,最终传递给 Schema() 便创建需要用于建表的 chema 。具体参考如下:
from odps.models import Schema, Column

def generate_create_schema(store_fields_info_df):
    columns = []
    for index, row in store_fields_info_df.iterrows():
        name = row['tb_field_name']; type=row['mc_type']; comment=row['feishu_field_name']
        columns.append(Column(name=name, type=type, comment=comment))
    columns.append(Column(name='record_id', type='string', comment='飞书表行record_id'))
    columns.append(Column(name='last_modified_time', type='datetime', comment='数据更新时间'))
    schema = Schema(columns=columns)
    print(f'成功生成 MaxCompute 建表 schema。关联方法:generate_create_schema。')
    return schema
有了 schema,建表就非常简单了,传递表名和 schema 给create_table()即可,参考如下:
o.create_table(db_table_name, schema, if_not_exists=True)
封装一下,使用o.exist_table(db_table_name)判断表单是否已存在,返回True表示已存在,为False才新建。
def cre_mc_table(db_table_name, schema):
    if o.exist_table(db_table_name):
        print(f'表单 {db_table_name} 已存在,不需要新建。关联方法:cre_mc_table。')
    else:
        table = o.create_table(db_table_name, schema, if_not_exists=True)
        print(f'成功创建 MaxCompute 表:{db_table_name}。关联方法:cre_mc_table。')
2.2.2 使用字段名和字段类型建表
使用字段名和字段类型建表,需要类似 MySQL 创建建表 DDL,不过仅包含了字段、字段类型和备注即可。官方给的 demo 如下:
o.create_table(table_name, 'num bigint, num2 double', if_not_exists=True)
先构建类建表 DDL 部分的字符串,参考如下:
def generate_create_ddl(store_fields_info_df):
    cre_ddl = ''
    for index, row in store_fields_info_df.iterrows():
        cre_ddl += f"{row['tb_field_name']} {row['mysql_type']} comment '{row['feishu_field_name']}',"
    default_fields = "record_id string comment '飞书表行record_id',last_modified_time datetime comment '数据更新时间'"
    cre_ddl = cre_ddl + default_fields
    print(f'成功生成 MaxCompute 类建表 DDL。关联方法:generate_create_ddl。')
    return cre_ddl
再通过 cre_ddl 建表,和 schema 建表类似。参考如下:
def cre_mc_table(db_table_name, cre_ddl):
    if o.exist_table(db_table_name):
        print(f'表单 {db_table_name} 已存在,不需要新建。关联方法:cre_mysql_table。')
    else:
        table = o.create_table(db_table_name, cre_ddl, if_not_exists=True)
        print(f'创建 MaxCompute 表:{db_table_name}。关联方法:cre_mc_table。')
2.3 写入数据
通过 pandas 的 DataFrame 处理的数据,可以通过两种方式写入 MaxCompute 表单,一种是转为阿里云的 DataFrame,然后类似 pandas 的 DataFrame 直接写入 MySQL 的方法,将数据写入表中;另外一种是转为列表,再写入 MaxCompute 表。
前者比较复杂,因为 pandas 的 DataFrame 转为 MaxCompute 的 DataFrame 时,为了保证数据类型统一,需要对数据类型进行映射,也就是说,需要再加一个映射关系。
后者则不需要,只要可迭代的结构数据(如:列表、数组、迭代器等)的数据类型能和表单的数据类型兼容既可以写入。
此处只对后者进行展开。如果对前者感兴趣,可以参考以下两个文档:
使用后者插入数据,只需使用feishu_df.values.tolist()将飞书的 DataFrame 数据转为列表,然后调用open_writer()方法写入即可。具体参考代码如下:
def insert_mc_table(feishu_df, table_name):
    """
    Maxcompute 插入数据
    """
    feishu_data_ary = feishu_df.values.tolist()
    t = o.get_table(table_name)
    with t.open_writer() as writer:
        writer.write(feishu_data_ary)
    print(f'成功将飞书数据写入 MaxCompute 数据表:{table_name}。关联方法:insert_mc_table。')
需要特别注意,在实际的应用中,由于多维表数据可能为空,数字列的空值在 pandas 的 DataFrame 中会被处理为 numpy 的 nan 类型,转为列表之后,会变成现浮点数类型的 nan,该值不能直接插入到 Maxcompute 数据表中,否则会报以下错误:
ValueError: cannot convert float NaN to integer.
所以需要对浮点数类型的 nan 进行数据处理,将其替换为 None 即可。这里新增一个函数replace_nan_with_none()对列表递归遍历,判断每个值的数据类型是否为 float 和是否为空。判断空值需要借助math.isnan(),判断数据类型则使用isinstance()。参考代码如下:
import math

# 需要处理 nan 值
def replace_nan_with_none(data):
    """递归地将列表中的nan替换为None"""
    # math.isnan(df.values.tolist()[1][2])
    if isinstance(data, list):
        return [replace_nan_with_none(item) for item in data]
    elif isinstance(data, float) and math.isnan(data):
        return None
    else:
        return data

def insert_mc_table(feishu_df, table_name):
    """
    Maxcompute 插入数据
    """
    feishu_data_ary = feishu_df.values.tolist()
    feishu_data_ary = replace_nan_with_none(feishu_data_ary)
    # print(feishu_data_ary)
    t = o.get_table(table_name)
    with t.open_writer() as writer:
        writer.write(feishu_data_ary)
    print(f'成功将飞书数据写入 MaxCompute 数据表:{table_name}。关联方法:insert_mc_table。')
2.4 定制化
当需要对某些列进行定制化的时候,还是通过一个定制化的函数来处理。
如果使用字段名和字段类型建表,和 MySQL 类型,对文本进行处理即可。但是,如果是通过 schema 建表,需要在生成 schema 的函数generate_create_schema()做一些调整,这里以该方法来展开。
把generate_create_schema()中的columns和每个字段名以及在columns中的索引存在来并返回,然后在定制函数中,通过字段名获取到对应的索引,然后替换原有columns的元素。然后使用新的columns创建新的schema。
需要注意的是,在PyODPS中,一旦创建了Schema对象,该对象是不可变的,这意味着你不能直接修改其内部的列定义。如果你想改变列的数据类型,你需要创建一个新的Schema对象。
def generate_create_schema(store_fields_info_df):
    columns = []
    columns_index = {}
    for index, row in store_fields_info_df.iterrows():
        name = row['tb_field_name']; type=row['mc_type']; comment=row['feishu_field_name']
        columns.append(Column(name=name, type=type, comment=comment))
        columns_index[name] = (index, comment)
    columns.append(Column(name='record_id', type='string', comment='飞书表行record_id'))
    columns.append(Column(name='last_modified_time', type='datetime', comment='数据更新时间'))
    schema = Schema(columns=columns)
    print(f'成功生成 MaxCompute 建表 schema。关联方法:generate_create_schema。')
    return schema, columns, columns_index

def custom_field(df_return, columns, columns_index):
    # 2.1 场景一:把数字入库为 int 类型
    # 修改 SQL 即可
    # cre_ddl = cre_ddl.replace('field_number float','field_number int')
    column = Column(name='field_number', type='int', comment=columns_index['field_number'][1])
    columns[columns_index['field_number'][0]] = column

    # 2.2 场景二:把日期入库为 date 类型
    # 修改 df,MySQL会自动截断,Maxcompute不行,需要使用 x.date() 处理
    df_return['field_createdtime'] = df_return['field_createdtime'].apply(lambda x:x.date())
    # 修改 SQL
    # cre_ddl = cre_ddl.replace('field_createdtime datetime','field_createdtime date')
    column = Column(name='field_createdtime', type='date', comment=columns_index['field_createdtime'][1])
    columns[columns_index['field_createdtime'][0]] = column

    # 2.3 场景三:日期给定默认最大值
    # 修改 df 即可
    #默认值改为 2222-01-01 00:00:00
    mask = df_return['field_date'] == pd.Timestamp('1970-01-01 08:00:01')
    df_return.loc[mask, 'field_date'] = pd.Timestamp('2222-01-01 00:00:00')

    # 2.4 场景四:公式保留具体值
    # 修改 df
    # 修改 SQL
    df_return['field_numformula'] = df_return['field_numformula'].apply(lambda x:json.loads(x)['value'][0])
    # cre_ddl = cre_ddl.replace('field_numformula varchar(256)','field_numformula int')
    column = Column(name='field_numformula', type='int', comment=columns_index['field_numformula'][1])
    columns[columns_index['field_numformula'][0]] = column

    # 创建新的 schema
    schema = Schema(columns=columns)
    print('定制函数打印数据和建表语句')
    print('----------------------------------------------\n', df_return[['field_number','field_createdtime','field_date','field_numformula']].head(5))
    print('----------------------------------------------\n', schema.columns)
    return df_return, schema
三、整合代码
将《二、异同点分析》中的数据类型、建 schema 的函数、建表的函数、插入数据的函数和定制化的函数替换 MySQL 代码中对应的内容即可。
extract_key_fields()修改多选、附件、单向关联、双向关联 四者的处理逻辑generate_create_schema()替换generate_create_ddl()cre_mc_table()替换cre_mysql_table()insert_mc_table()替换insert_mysql_table(),并加上replace_nan_with_none()辅助处理 nan 值- 迭代
custom_field()函数以符合入库 Maxcompute 规则 - 迭代
main()函数,调用新的函数处理数据。 - 最后更新
if __name__ == '__main__':的逻辑,在 dataworks 跑该代码,默认已关联上 Maxcompute,不需要另外写连接数据库的逻辑。
完整代码参考如下:
import requests
import json
import datetime
import pandas as pd
from sqlalchemy import create_engine, text
from urllib.parse import urlparse, parse_qs
from odps.models import Schema, Column
import math

def get_table_params(bitable_url):
    # bitable_url = "https://feishu.cn/base/aaaaaaaa?table=tblccc&view=vewddd"
    parsed_url = urlparse(bitable_url)              #解析url:(ParseResult(scheme='https', netloc='feishu.cn', path='/base/aaaaaaaa', params='', query='table=tblccc&view=vewddd', fragment='')
    query_params = parse_qs(parsed_url.query)       #解析url参数:{'table': ['tblccc'], 'view': ['vewddd']}
    app_token = parsed_url.path.split('/')[-1]
    table_id = query_params.get('table', [None])[0]
    view_id = query_params.get('view', [None])[0]
    print(f'成功解析链接,app_token:{app_token},table_id:{table_id},view_id:{view_id}。关联方法:get_table_params。')
    return app_token, table_id, view_id

def get_tenant_access_token(app_id, app_secret):
    url = "https://open.feishu.cn/open-apis/auth/v3/tenant_access_token/internal"
    payload = json.dumps({
        "app_id": app_id,
        "app_secret": app_secret
    })
    headers = {'Content-Type': 'application/json'}
    response = requests.request("POST", url, headers=headers, data=payload)
    tenant_access_token = response.json()['tenant_access_token']
    print(f'成功获取tenant_access_token:{tenant_access_token}。关联函数:get_table_params。')
    return tenant_access_token

def get_bitable_datas(tenant_access_token, app_token, table_id, view_id, page_token='', page_size=20):
    url = f"https://open.feishu.cn/open-apis/bitable/v1/apps/{app_token}/tables/{table_id}/records/search?page_size={page_size}&page_token={page_token}&user_id_type=user_id"
    payload = json.dumps({"view_id": view_id})
    headers = {
        'Content-Type': 'application/json',
        'Authorization': f'Bearer {tenant_access_token}'
    }
    response = requests.request("POST", url, headers=headers, data=payload)
    print(f'成功获取page_token为【{page_token}】的数据。关联函数:get_bitable_datas。')
    return response.json()


def get_all_bitable_datas(tenant_access_token, app_token, table_id, view_id, page_token='', page_size=20):
    has_more = True
    feishu_datas = []
    while has_more:
        response = get_bitable_datas(tenant_access_token, app_token, table_id, view_id, page_token, page_size)
        if response['code'] == 0:
            page_token = response['data'].get('page_token')
            has_more = response['data'].get('has_more')
            # print(response['data'].get('items'))
            # print('\n--------------------------------------------------------------------\n')
            feishu_datas.extend(response['data'].get('items'))
        else:
            raise Exception(response['msg'])
    print(f'成功获取飞书多维表所有数据,返回 feishu_datas。关联函数:get_all_bitable_datas。')
    return feishu_datas

def get_bitable_fields(tenant_access_token, app_token, table_id, page_size=500):
    url = f"https://open.feishu.cn/open-apis/bitable/v1/apps/{app_token}/tables/{table_id}/fields?page_size={page_size}"
    payload = ''
    headers = {'Authorization': f'Bearer {tenant_access_token}'}

    response = requests.request("GET", url, headers=headers, data=payload)
    field_infos = response.json().get('data').get('items')
    print('成功获取飞书字段信息,关联函数:get_bitable_fields。')
    return field_infos

def merge_list(ls_from, ls_join, on=None, left_on=None, right_on=None):
    """将两个[{},{}]结构的数据合并"""
    df_from = pd.DataFrame(ls_from)
    df_join = pd.DataFrame(ls_join)
    if on is not None:
        df_merge = df_from.merge(df_join, how='left', on=on)
    else:
        df_merge = df_from.merge(df_join, how='left', left_on=left_on, right_on=right_on) # , suffixes=('', '_y')
    print(f'成功合并列表或DataFrame。关联方法:merge_list。')
    return df_merge


def extract_key_fields(feishu_datas, store_fields_info_df):
    """处理飞书数据类型编号的数据"""
    print('开始处理飞书多维表关键字段数据...')
    # 需要record_id 和 订单号,用于和数据库数据匹配
    df_feishu = pd.DataFrame(feishu_datas)
    df_return = pd.DataFrame()

    #根据列的数据类型,分别处理对应的数据。注意:仅返回以下列举的数据类型,如果fields_map的内容包含按钮、流程等数据类型的飞书列,忽略。
    for index, row in store_fields_info_df.iterrows():
        if row['type'] == 1:       #文本
            df_return[row['tb_field_name']] = df_feishu['fields'].apply(lambda x:x.get(row['field_name'],[{}])[0].get('text'))

        elif row['type'] in (2, 3, 4, 7, 13, 1005):  #数字、单选、多选、复选框、手机号、自动编号
            df_return[row['tb_field_name']] = df_feishu['fields'].apply(lambda x:x.get(row['field_name']))

        elif row['type'] in (5, 1001, 1002):         #日期(包含创建和更新),需要加 8 小时,即 8*60*60*1000=28800 秒
            df_return[row['tb_field_name']] = pd.to_datetime(df_feishu['fields'].apply(lambda x:28800 + int(x.get(row['field_name'],1000)/1000)), unit='s')

        elif row['type'] in(11, 23, 1003, 1004):       #人员、群组、创建人、修改人,遍历取name
            df_return[row['tb_field_name']] = df_feishu['fields'].apply(lambda x: ','.join([i.get('name') for i in x.get(row['field_name'],[{"name":""}])]))  # 需要遍历

        elif row['type'] == 15:    #链接
            df_return[row['tb_field_name']] = df_feishu['fields'].apply(lambda x:x.get(row['field_name'],{}).get('link'))

        elif row['type'] == 17:    #附件,遍历取url
            df_return[row['tb_field_name']] = df_feishu['fields'].apply(lambda x:[i.get('url') for i in x.get(row['field_name'],[{}])]) #需要遍历

        elif row['type'] in(18, 21):    #单向关联、双向关联,取link_record_ids
            df_return[row['tb_field_name']] = df_feishu['fields'].apply(lambda x:x.get(row['field_name'],{}).get('link_record_ids'))

        elif row['type'] in(19, 20):    #查找引用和公式
            df_return[row['tb_field_name']] = df_feishu['fields'].apply(lambda x:json.dumps(x.get(row['field_name'])))

        elif row['type'] == 22:    #地理位置
            df_return[row['tb_field_name']] = df_feishu['fields'].apply(lambda x:x.get(row['field_name'],{}).get('location'))

    #加上record_id
    df_return['record_id'] = df_feishu.record_id
    #加上表更新字段
    df_return['last_modified_time'] = datetime.datetime.now()
    print(f'成功提取入库字段的数据。关联方法:extract_key_fields。')
    return df_return

def generate_create_schema(store_fields_info_df):
    columns = []
    columns_index = {}
    for index, row in store_fields_info_df.iterrows():
        name = row['tb_field_name']; type=row['mc_type']; comment=row['feishu_field_name']
        # print(name,type,comment)
        columns.append(Column(name=name, type=type, comment=comment))
        columns_index[name] = (index, comment)
    columns.append(Column(name='record_id', type='string', comment='飞书表行record_id'))
    columns.append(Column(name='last_modified_time', type='datetime', comment='数据更新时间'))
    schema = Schema(columns=columns)
    print(f'成功生成 MaxCompute 建表 schema。关联方法:generate_create_schema。')
    return schema, columns, columns_index

def cre_mc_table(db_table_name, schema):
    if o.exist_table(db_table_name):
        print(f'表单 {db_table_name} 已存在,不需要新建。关联方法:cre_mc_table。')
    else:
        table = o.create_table(db_table_name, schema, if_not_exists=True)
        print(f'成功创建 MaxCompute 表:{db_table_name}。关联方法:cre_mc_table。')


def replace_nan_with_none(data):
    """递归地将列表中的nan替换为None"""
    # math.isnan(df.values.tolist()[1][2])
    if isinstance(data, list):
        return [replace_nan_with_none(item) for item in data]
    elif isinstance(data, float) and math.isnan(data):
        return None
    else:
        return data

def insert_mc_table(feishu_df, table_name):
    """
    Maxcompute 插入数据
    """
    feishu_data_ary = feishu_df.values.tolist()
    feishu_data_ary = replace_nan_with_none(feishu_data_ary)
    # print(feishu_data_ary)
    t = o.get_table(table_name)
    with t.open_writer() as writer:
        writer.write(feishu_data_ary)
    print(f'成功将飞书数据写入 MaxCompute 数据表:{table_name}。关联方法:insert_mc_table。')

def custom_field(df_return, columns, columns_index):
    # 2.1 场景一:把数字入库为 int 类型
    # 修改 SQL 即可
    # cre_ddl = cre_ddl.replace('field_number float','field_number int')
    column = Column(name='field_number', type='int', comment=columns_index['field_number'][1])
    columns[columns_index['field_number'][0]] = column

    # 2.2 场景二:把日期入库为 date 类型
    # 修改 df,MySQL会自动截断,Maxcompute不行,需要使用 x.date() 处理
    df_return['field_createdtime'] = df_return['field_createdtime'].apply(lambda x:x.date())
    # 修改 SQL
    # cre_ddl = cre_ddl.replace('field_createdtime datetime','field_createdtime date')
    column = Column(name='field_createdtime', type='date', comment=columns_index['field_createdtime'][1])
    columns[columns_index['field_createdtime'][0]] = column

    # 2.3 场景三:日期给定默认最大值
    # 修改 df 即可
    #默认值改为 2222-01-01 00:00:00
    mask = df_return['field_date'] == pd.Timestamp('1970-01-01 08:00:01')
    df_return.loc[mask, 'field_date'] = pd.Timestamp('2222-01-01 00:00:00')

    # 2.4 场景四:公式保留具体值
    # 修改 df
    # 修改 SQL
    df_return['field_numformula'] = df_return['field_numformula'].apply(lambda x:json.loads(x)['value'][0])
    # cre_ddl = cre_ddl.replace('field_numformula varchar(256)','field_numformula int')
    column = Column(name='field_numformula', type='int', comment=columns_index['field_numformula'][1])
    columns[columns_index['field_numformula'][0]] = column

    # 创建新的 schema
    schema = Schema(columns=columns)
    print('定制函数打印数据和建表语句')
    print('----------------------------------------------\n', df_return[['field_number','field_createdtime','field_date','field_numformula']].head(5))
    print('----------------------------------------------\n', schema.columns)
    return df_return, schema

def main(mc_table_name, bitable_url, fields_map):
    # 基本配置
    app_token, table_id, view_id = get_table_params(bitable_url)
    app_id = 'your_app_id'
    app_secret = 'your_app_secret'
    tenant_access_token = get_tenant_access_token(app_id, app_secret)
    page_size = 50

    # 获取飞书多维表所有数据
    feishu_datas = get_all_bitable_datas(tenant_access_token, app_token, table_id, view_id, page_size=page_size)

    #获取飞书字段信息
    feishu_fields = get_bitable_fields(tenant_access_token, app_token, table_id)

    # 以 fields_map 为准关联数据
    store_fields_info_df = merge_list(fields_map, feishu_fields, left_on='feishu_field_name', right_on='field_name')

    # 处理入库字段数据
    feishu_df = extract_key_fields(feishu_datas, store_fields_info_df)

    # 关联入库数据类型
    data_type_map = [{"feishu_type": 1   ,"mc_type": "string"        }
                    ,{"feishu_type": 2   ,"mc_type": "double"        }
                    ,{"feishu_type": 3   ,"mc_type": "string"        }
                    ,{"feishu_type": 4   ,"mc_type": "array<string>" }
                    ,{"feishu_type": 5   ,"mc_type": "datetime"      }
                    ,{"feishu_type": 7   ,"mc_type": "boolean"       }
                    ,{"feishu_type": 11  ,"mc_type": "string"        }
                    ,{"feishu_type": 13  ,"mc_type": "string"        }
                    ,{"feishu_type": 15  ,"mc_type": "string"        }
                    ,{"feishu_type": 17  ,"mc_type": "array<string>" }
                    ,{"feishu_type": 18  ,"mc_type": "array<string>" }
                    ,{"feishu_type": 19  ,"mc_type": "string"        }
                    ,{"feishu_type": 20  ,"mc_type": "string"        }
                    ,{"feishu_type": 21  ,"mc_type": "array<string>" }
                    ,{"feishu_type": 22  ,"mc_type": "string"        }
                    ,{"feishu_type": 23  ,"mc_type": "string"        }
                    ,{"feishu_type": 1001,"mc_type": "datetime"      }
                    ,{"feishu_type": 1002,"mc_type": "datetime"      }
                    ,{"feishu_type": 1003,"mc_type": "string"        }
                    ,{"feishu_type": 1004,"mc_type": "string"        }
                    ,{"feishu_type": 1005,"mc_type": "string"        }]

    store_fields_info_df = merge_list(store_fields_info_df, data_type_map, left_on='type', right_on='feishu_type')

    # 生成 MaxCompute schema
    schema, columns, columns_index = generate_create_schema(store_fields_info_df)

    # 定制化
    feishu_df, schema = custom_field(feishu_df, columns, columns_index)

    # 建 MaxCompute 数据表
    cre_mc_table(mc_table_name, schema)

    # MaxCompute 表插入数据
    insert_mc_table(feishu_df, mc_table_name)
    print(f'成功将飞书多维表({bitable_url})的数据入库到 mysql 数据表:{mc_table_name}。')

if __name__ == '__main__':
    mc_table_name = 'for_ods.feishu_data_type_test'
    bitable_url = "https://forchangesz.feishu.cn/base/SpY3b9LMFaodpOsE0kdcGEyonbg?table=tbl5BZE0Aubjz5Yy&view=vewDM4NGlP"
    fields_map = [{'tb_field_name': 'field_text','feishu_field_name': '文本'}
            ,{'tb_field_name': 'field_email','feishu_field_name': 'email'}
            ,{'tb_field_name': 'field_select','feishu_field_name': '单选'}
            ,{'tb_field_name': 'field_mobile','feishu_field_name': '电话号码'}
            ,{'tb_field_name': 'field_no','feishu_field_name': '自动编号'}
            ,{'tb_field_name': 'field_member1','feishu_field_name': '人员1'}
            ,{'tb_field_name': 'field_group1','feishu_field_name': '群组1'}
            ,{'tb_field_name': 'field_creator','feishu_field_name': '创建人'}
            ,{'tb_field_name': 'field_modifier','feishu_field_name': '修改人'}
            ,{'tb_field_name': 'field_member2','feishu_field_name': '人员2'}
            ,{'tb_field_name': 'field_group2','feishu_field_name': '群组2'}
            ,{'tb_field_name': 'field_url','feishu_field_name': '超链接'}
            ,{'tb_field_name': 'field_location','feishu_field_name': '地理位置'}
            ,{'tb_field_name': 'field_findnum','feishu_field_name': '查找引用数值'}
            ,{'tb_field_name': 'field_numformula','feishu_field_name': '数字公式'}
            ,{'tb_field_name': 'field_number','feishu_field_name': '数字'}
            ,{'tb_field_name': 'field_progress','feishu_field_name': '进度'}
            ,{'tb_field_name': 'field_money','feishu_field_name': '货币'}
            ,{'tb_field_name': 'field_Rating','feishu_field_name': '评分'}
            ,{'tb_field_name': 'field_bool','feishu_field_name': '复选框'}
            ,{'tb_field_name': 'field_date','feishu_field_name': '日期'}
            ,{'tb_field_name': 'field_createdtime','feishu_field_name': '创建时间'}
            ,{'tb_field_name': 'field_updatedtime','feishu_field_name': '更新时间'}
            ,{'tb_field_name': 'field_mulselect','feishu_field_name': '多选'}
            ,{'tb_field_name': 'field_singleunion','feishu_field_name': '单向关联'}
            ,{'tb_field_name': 'field_doubleunion','feishu_field_name': '双向关联'}
            ,{'tb_field_name': 'field_file','feishu_field_name': '附件'}
            ]
    main(mc_table_name, bitable_url, fields_map)
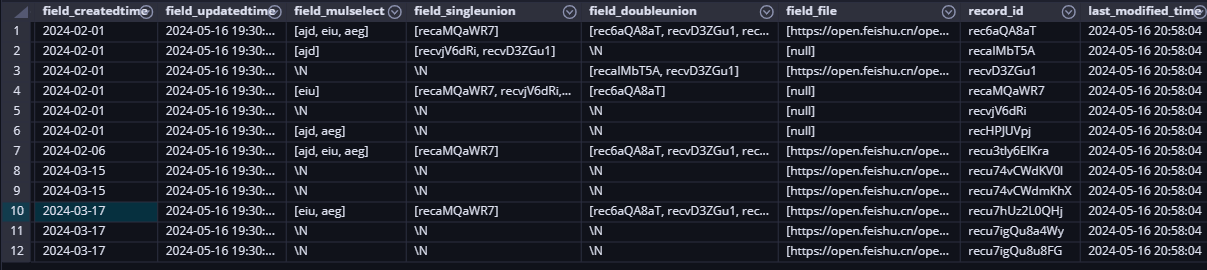
最终执行的结果参考如下:

四、小结
本文结合前面两个章节:MySQL 入库的通用版和定制版,探讨了如何将飞书多维表的数据入库到阿里云 Maxcompute 的数据表,并实现通用版和定制版的逻辑。
首先分析了 MySQL 和 MaxCompute 之间的数据类型差异,并提到了处理函数extract_key_fields()中需要修改的逻辑,以适应MaxCompute的配置需求。
然后探讨了建表和写表的方法,建表分为通过创建表Schema再建表和直接使用字段名和字段类型创建表两种方法。写表也有两种方法,一种是转为阿里云的 DataFrame,再写表;另外一种是转为列表(本文重点讨论了后者),再写入 MaxCompute 表。在建表和写表时需要参考阿里云官方文档来操作。
最后探讨了定制化,定制化相对写入 MySQL 表的逻辑复杂一些,使用需要重新创建 Schema,而不能直接修改。


 866
866

 被折叠的 条评论
为什么被折叠?
被折叠的 条评论
为什么被折叠?
 到【灌水乐园】发言


