


在上一篇中,通过网址发送请求转发到test.jsp页面,${msg}中的信息存放在request域中。
SpringMVC在进行视图跳转的时候是可以转发到html页面的,但是需要在springmvc.xml文件中设置:<mvc:default-servlet-handler/>,但是html页面不支持EL表达式,无法获取到后端携带的数据,如果想要获取数据,就使用模板引擎+html。
在以上的写法中,一个controller只能做一件事,需要配置多个bean,显然是不够的,如果让一个controller做多件事情呢??
SpringMVC的第二个程序
一个controller类实现多个功能
代码演示:
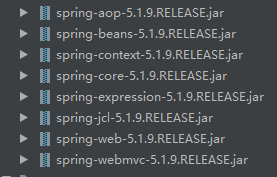
导入必要的jar包
编写配置文件springmvc-second.xml
<?xml version="1.0" encoding="UTF-8"?>
<beans xmlns="http://www.springframework.org/schema/beans"
       xmlns:xsi="http://www.w3.org/2001/XMLSchema-instance"
       xmlns:context="http://www.springframework.org/schema/context"
       xmlns:mvc="http://www.springframework.org/schema/mvc"
       xsi:schemaLocation="http://www.springframework.org/schema/beans http://www.springframework.org/schema/beans/spring-beans.xsd http://www.springframework.org/schema/context https://www.springframework.org/schema/context/spring-context.xsd http://www.springframework.org/schema/mvc https://www.springframework.org/schema/mvc/spring-mvc.xsd">

<!--    包扫描-->
    <context:component-scan base-package="com.codeyancy.cn.controller"/>

<!--    配置处理器映射器
    <bean class="org.springframework.web.servlet.mvc.method.annotation.RequestMappingHandlerMapping"/>

        配置处理器适配器
    <bean class="org.springframework.web.servlet.mvc.method.annotation.RequestMappingHandlerAdapter"/>-->


    <!--    开启注解代替配置处理器映射器和处理器适配器-->
    <mvc:annotation-driven/>

    <!--    配置视图解析器-->
    <bean  class="org.springframework.web.servlet.view.InternalResourceViewResolver">
<!--        前缀-->
        <property name="prefix" value="/WEB-INF/pages/"/>
<!--        后缀-->
        <property name="suffix" value=".jsp"/>
    </bean>

</beans>
注意事项:
<mvc:annotation-driven/>可以代替处理器映射器和处理器适配器
编写SecondController
@Controller
public class SecondController {

    @GetMapping("login")
    public ModelAndView doLogin(){
        ModelAndView mv = new ModelAndView();
        mv.setViewName("login");
        return mv;
    }

    @GetMapping("register")
    public ModelAndView doRegister(){
        ModelAndView mv = new ModelAndView();
        mv.setViewName("register");
        return mv;
    }
}
注意事项:
1、SecondController类中 @Controller 是为了包扫描 但是不能替换为 @Component
2、请求注释相关
- @GetMapping 处理get请求
- @DeleteMapping
- @PutMapping
- @PostMapping
- @RequestMapping
@GetMapping("login") 相当于 @RequestMapping(value = "login",method = RequestMethod.GET)
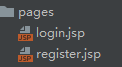
创建jsp页面
配置web.xml
<servlet>
        <servlet-name>dispacherServlet</servlet-name>
        <servlet-class>org.springframework.web.servlet.DispatcherServlet</servlet-class>
        <init-param>
        <!--contextConfigLocation固定写法 -->
            <param-name>contextConfigLocation</param-name>
            <param-value>classpath:springmvc-second.xml</param-value>
        </init-param>
        <!--配置启动级别 -->
        <load-on-startup>1</load-on-startup>
    </servlet>
    <servlet-mapping>
        <servlet-name>dispacherServlet</servlet-name>
        <url-pattern>/</url-pattern>
    </servlet-mapping>
在浏览器输入网址http://localhost:8080/login或者http://localhost:8080/register测试即可
这样就做到了一个controller可以做多个业务逻辑了。


 211
211


 被折叠的 条评论
为什么被折叠?
被折叠的 条评论
为什么被折叠?
 到【灌水乐园】发言


