


Nexus私服CentOS环境部署【第一期】
大家好,我是你们的好朋友猿仁,这期给大家带来Nexus部署教程
-
准备好环境需要的工具,我这边提供各项环境给大家,由于很多小伙伴可能第一次搞linux,没有虚拟机和镜像文件或者不知道怎么安装一些繁琐的步骤操作,我这里给大家准备了一套干货。
虚拟机、Linux安装教程获取地址
提取码:TIAN -
给大家提供Nexus安装包
链接:Nexus安装包<<<点击此处>>>
提取码:TIAN
安装步骤
下载后的文件如下:

1、通过FileZilla软件从win10植入到Linux系统中
FileZilla软件获取<<<点击此处>>>
提取码:TIAN
2、打开虚拟机,将文件植入Linux系统
2.1 首先创建好文件夹
操作步骤:
1.切换root权限用户
命令:su root【注意:这个root密码是在安装so7镜像时设置的那个密码,不是当前用户的登录密码】
2.进入主目录
命令:cd /
3.查看目录
命令:ll
4.是否创建了文件夹?
从下面目录可以看出,这里我是创建好了文件夹的[nexus],所以这里我就没有再创建了
创建文件夹命令:mkdir nexus
注意:为了后续版本问题,这里我在nexus文件中还创建了一个版本文件夹,装不同版本的文件
5.tree树形结构查看目录结构
命令:tree 文件夹名称
安装tree命令:sudo apt-get install tree
[getring@localhost ~]$ su root
密码:
[root@localhost getring]# cd /
[root@localhost /]# ll
总用量 40
drwxrwxrwx.   3 root root   147 3月  29 19:27 apollo
lrwxrwxrwx.   1 root root     7 3月  25 18:51 bin -> usr/bin
dr-xr-xr-x.   5 root root  4096 3月  25 19:06 boot
drwxr-xr-x.   3 root root    19 3月  25 19:36 data
drwxr-xr-x.  20 root root  3340 4月   6 09:28 dev
drwxr-xr-x. 144 root root  8192 4月   6 09:59 etc
drwxr-xr-x.   3 root root    21 3月  25 19:05 home
lrwxrwxrwx.   1 root root     7 3月  25 18:51 lib -> usr/lib
lrwxrwxrwx.   1 root root     9 3月  25 18:51 lib64 -> usr/lib64
drwxr-xr-x.   2 root root     6 4月  11 2018 media
drwxr-xr-x.   2 root root     6 4月  11 2018 mnt
drwxrwxrwx.   2 root root    56 3月  25 19:30 mysql
drwxr-xr-x.   3 root root    26 4月   2 14:51 nexus
drwxr-xr-x.   5 root root    44 3月  29 15:04 opt
dr-xr-xr-x. 196 root root     0 4月   6 09:27 proc
dr-xr-x---.   6 root root  4096 4月   6 11:37 root
drwxr-xr-x.  43 root root  1280 4月   6 09:59 run
lrwxrwxrwx.   1 root root     8 3月  25 18:51 sbin -> usr/sbin
drwxr-xr-x.   2 root root     6 4月  11 2018 srv
dr-xr-xr-x.  13 root root     0 4月   6 09:27 sys
drwxrwxrwt. 161 root root 12288 4月   6 11:37 tmp
drwxr-xr-x.  13 root root   155 3月  25 18:51 usr
drwxr-xr-x.  21 root root  4096 3月  25 19:08 var
[root@localhost /]# tree nexus

>nexus
>└── nexus-3.28.1
>  └── nexus-3.28.1-01-unix.tar.gz
>
> 1 directory, 1 file
2.2 将文件植入nexus-3.28.1文件夹中
2.2.1 通过上面介绍的软件推送到Linux系统中
打开软件图下如展示:

注意:这里可能会出现植入失败的问题,看看当前文件是否有读写权限
操作步骤:
1.查看文件的是否有读写权限
命令:ll
drwxr-xr-x. 2 root root 41 4月 2 14:53 nexus-3.28.1[drwxr-xr-x.:无权限]
2.给当前文件夹添加权限
命令:chmod -R 777 /nexus-3.28.1[drwxrwxrwx.:权限设置成功]
[root@localhost nexus]# ll
总用量 0
drwxrwxrwx. 2 root root 41 4月   2 14:53 nexus-3.28.1
2.2.2 通过命令下载
wget https://sonatype-download.global.ssl.fastly.net/repository/repositoryManager/3/nexus-3.28.1-01-unix.tar.gz
2.3 将文件解压到指定文件夹下
操作步骤:
1.解压到/usr/local文件夹下面
解压命令:tar -zxvf nexus-3.28.1-01-unix.tar.gz -C /usr/local/nexus/nexus-3.28.1
可以看出我在local文件夹下创建了2个文件夹,一个母文件夹,一个版本子文件夹
2.查看文件路径
命令:pwd
3.查看解压后的文件夹
命令:ll
[root@localhost nexus-3.28.1]# pwd
/usr/local/nexus/nexus-3.28.1
[root@localhost nexus-3.28.1]# ll
总用量 0
drwxr-xr-x. 9 root root 215 4月   2 15:41 nexus-3.28.1-01
drwxr-xr-x. 3 root root  20 4月   2 15:00 sonatype-work
2.4 修改配置
1.修改nexus-3.28.1-01/etc文件下的nexus-default.properties文件
命令:vim nexus-default.properties
有些小朋友进入了文件页面,但是不知道怎么编辑和保存,按i:编辑,按Esc+:wq:保存退出 wq!:强制保存退出
有两点修改处:
application-port:端口号,我这里设置为:8888(这个端口不能被占用)
nexus-context-path:访问路径 ,我这里设置为:/nexus/
2、修改bin下面的nexus文件,一定要有耐性,在最下面,一下向下滑
设置为root和false (开发时不建议用root)
run_as_user=root
run_as_root=false
3、开放端口号
查看端口:
firewall-cmd --zone=public --list-ports
没有8888端口被开放,永久开放端口设置:
firewall-cmd --zone=public --add-port=8888/tcp --permanent
重新加载防火墙:
firewall-cmd --reload
最后再验证一下是否开放成功,第一条命令
出现:success说明设置成功
【---------修改nexus-default.properties文件----------】
[root@localhost nexus-3.28.1-01]# cd nexus-3.28.1-01/etc
[root@localhost etc]# ll
总用量 8
drwxr-xr-x. 2 root root  190 4月   2 15:00 fabric
drwxr-xr-x. 2 root root  117 4月   2 15:00 jetty
drwxr-xr-x. 3 root root 4096 4月   2 15:00 karaf
drwxr-xr-x. 2 root root   51 4月   2 15:00 logback
-rw-r--r--. 1 root root  389 4月   2 17:44 nexus-default.properties
drwxr-xr-x. 2 root root   26 4月   2 15:00 ssl
[root@localhost etc]# vim nexus-default.properties

## DO NOT EDIT - CUSTOMIZATIONS BELONG IN $data-dir/etc/nexus.properties
##
# Jetty section
application-port=8888
application-host=0.0.0.0
nexus-args=${jetty.etc}/jetty.xml,${jetty.etc}/jetty-http.xml,${jetty.etc}/jetty-requestlog.xml
nexus-context-path=/nexus/

# Nexus section
nexus-edition=nexus-pro-edition
nexus-features=\
 nexus-pro-feature

nexus.hazelcast.discovery.isEnabled=true

【------修改nexus-3.28.1-01/bin/nexus文件------】
[root@localhost bin]# vim nexus
# user to execute as; optional but recommended to set
run_as_user=root

# load optional configuration
rc_file="$prg_dir/${progname}.rc"
if [ -f "$rc_file" ]; then
  . "$rc_file"
fi

# detect if execute as root user
run_as_root=false
2.5 启动nexus服务
到bin目录下执行一下操作
./nexus status (查看当前nexus运行状态)
./nexus start (启动nexus)
./nexus stop (停止nexus)
[root@localhost bin]# ./nexus start
Starting nexus
3、操作win10访问nexus服务器
访问地址:http://192.168.72.132:8888/nexus/

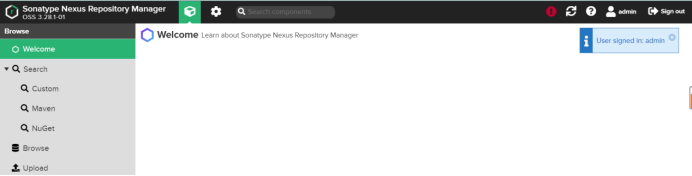
右上角的进行登录:Sign in

这里的登录密码在admin.password文件中,查看admin密码:cat /usr/local/nexus/nexus-3.28.1/sonatype-work/nexus3/admin.password

登录成功后,会让你重新设置密码

根据自身的条件筛选,下一步
所有的安装、部署、运行就到这完成了,感谢大家的观看,最后不要忘记关注一下猿仁! 下期再见。


 4678
4678


 被折叠的 条评论
为什么被折叠?
被折叠的 条评论
为什么被折叠?
 到【灌水乐园】发言


