


1、准备工作
1 搭建一个SpringBoot项目、选中web模块即可!
2. 导入Maven依赖 thymeleaf
<dependency>
	<groupId>org.springframework.boot</groupId>
	<artifactId>spring-boot-starter-thymeleaf</artifactId>
</dependency>
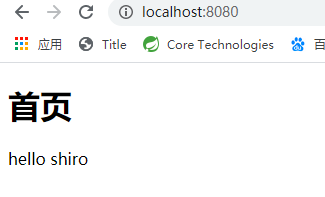
3.编写一个页面 index.html templates下
<!DOCTYPE html>
<html lang="en"
xmlns:th="http://www.thymeleaf.org">
<head>
    <meta charset="UTF-8">
    <title>首页</title>
</head>
<body>
<h1>首页</h1>
<p th:text="${msg}"></p>
</body>
</html>
4.编写controller进行访问测试
package com.loey.controller;

import org.springframework.stereotype.Controller;
import org.springframework.ui.Model;
import org.springframework.web.bind.annotation.RequestMapping;

@Controller
public class MyController {

    @RequestMapping({"/","/index"})
    public String index(Model model){

        model.addAttribute("msg","hello shiro");
        return "index";
    }
}
- 测试访问首页!
2、整合Shiro
回顾核心API:
- Subject:用户主体
- SecurityManager:安全管理器
- Realm:Shiro 连接数据
步骤:
1 导入Shiro 和 spring整合的依赖
<dependency>
	<groupId>org.apache.shiro</groupId>
	<artifactId>shiro-spring</artifactId>
	<version>1.7.0</version>
</dependency>
2.编写Shiro 配置类 config包
package com.loey.config;

import org.springframework.context.annotation.Configuration;

//声明为配置类
@Configuration
public class ShiroConfig {
     //创建 ShiroFilterFactoryBean

     //创建 DefaultWebSecurityManager

     //创建 realm 对象
}
3.我们倒着来,先想办法创建一个 realm 对象
4.我们需要自定义一个 realm 的类,用来编写一些查询的方法,或者认证与授权的逻辑
package com.loey.config;

//自定义Realm
public class UserRealm extends AuthorizingRealm{
    //执行授权逻辑
    @Override
    protected AuthorizationInfo doGetAuthorizationInfo(PrincipalCollection principals) {
        System.out.println("执行了=>授权逻辑PrincipalCollection");
        return null;
    }

    //执行认证逻辑
    @Override
    protected AuthenticationInfo doGetAuthenticationInfo(AuthenticationToken token) throws AuthenticationException {
        System.out.println("执行了=>认证逻辑AuthenticationToken");
        return null;
    }
}
5 将这个类注册到我们的Bean中! ShiroConfig
 //创建 realm 对象
    @Bean
    public UserRealm userRealm(){
        return new UserRealm();
    }
- 接下来我们该去创建 DefaultWebSecurityManager 了
   //创建 DefaultWebSecurityManager
    @Bean(name = "securityManager")
    public DefaultWebSecurityManager getDefaultWebSecurityManager(@Qualifier("userRealm") UserRealm userRealm){
        DefaultWebSecurityManager securityManager = new DefaultWebSecurityManager();

        //关联Realm
        securityManager.setRealm(userRealm);
        return securityManager;
    }
7.接下来我们该去创建 ShiroFilterFactoryBean 了
 //创建 ShiroFilterFactoryBean
    @Bean
    public ShiroFilterFactoryBean getShiroFilterFactoryBean(@Qualifier("securityManager") DefaultWebSecurityManager securityManager){
         ShiroFilterFactoryBean shiroFilterFactoryBean = new ShiroFilterFactoryBean();

         //设置安全管理器
        shiroFilterFactoryBean.setSecurityManager(securityManager);

        return shiroFilterFactoryBean;
    }
最后上完整的配置:
package com.loey.config;

import org.apache.shiro.spring.web.ShiroFilterFactoryBean;
import org.apache.shiro.web.mgt.DefaultWebSecurityManager;
import org.springframework.beans.factory.annotation.Qualifier;
import org.springframework.context.annotation.Bean;
import org.springframework.context.annotation.Configuration;

//声明为配置类
@Configuration
public class ShiroConfig {

     //创建 ShiroFilterFactoryBean
    @Bean
    public ShiroFilterFactoryBean getShiroFilterFactoryBean(@Qualifier("securityManager") DefaultWebSecurityManager securityManager){
         ShiroFilterFactoryBean shiroFilterFactoryBean = new ShiroFilterFactoryBean();

         //设置安全管理器
        shiroFilterFactoryBean.setSecurityManager(securityManager);

        return shiroFilterFactoryBean;
    }


     //创建 DefaultWebSecurityManager
    @Bean(name = "securityManager")
    public DefaultWebSecurityManager getDefaultWebSecurityManager(@Qualifier("userRealm") UserRealm userRealm){
        DefaultWebSecurityManager securityManager = new DefaultWebSecurityManager();

        //关联Realm
        securityManager.setRealm(userRealm);
        return securityManager;
    }

     //创建 realm 对象
    @Bean
    public UserRealm userRealm(){
        return new UserRealm();
    }
}
3、页面拦截实现
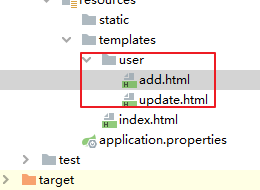
1.编写两个页面、在templates目录下新建一个 user 目录 add.html update.html
add.html
<!DOCTYPE html>
<html lang="en">
<head>
    <meta charset="UTF-8">
    <title>add</title>
</head>
<body>
<h1>add</h1>
</body>
</html>
update.html
<!DOCTYPE html>
<html lang="en">
<head>
    <meta charset="UTF-8">
    <title>update</title>
</head>
<body>
<h1>update</h1>
</body>
</html>
2.编写跳转到页面的controller
  @RequestMapping("/user/add")
    public String add(){

        return "user/add";
    }

    @RequestMapping("/user/update")
    public String update(){

        return "user/update";
    }
3.在index页面上,增加跳转链接
<!DOCTYPE html>
<html lang="en"
xmlns:th="http://www.thymeleaf.org">
<head>
    <meta charset="UTF-8">
    <title>首页</title>
</head>
<body>
<h1>首页</h1>
<p th:text="${msg}"></p>

<a th:href="@{/user/add}">add</a>
<a th:href="@{/user/update}">update</a>
</body>
</html>
4.测试页面跳转是否OK

5.准备添加Shiro的内置过滤器
 //创建 ShiroFilterFactoryBean
    @Bean
    public ShiroFilterFactoryBean getShiroFilterFactoryBean(@Qualifier("securityManager") DefaultWebSecurityManager securityManager){
         ShiroFilterFactoryBean shiroFilterFactoryBean = new ShiroFilterFactoryBean();

         //设置安全管理器
        shiroFilterFactoryBean.setSecurityManager(securityManager);

        Map<String, String> filterMap = new LinkedHashMap<String,String>();

         /*
                添加Shiro内置过滤器,常用的有如下过滤器:
                anon: 无需认证就可以访问
                authc: 必须认证才可以访问
                user: 如果使用了记住我功能就可以直接访问
                perms:  拥有某个资源权限才可以访问
                role: 拥有某个角色权限才可以访问
          */
        filterMap.put("/user/add","authc");
        filterMap.put("/user/update","authc");
        shiroFilterFactoryBean.setFilterChainDefinitionMap(filterMap);

        return shiroFilterFactoryBean;
    }
6.再起启动测试,访问链接进行测试!拦截OK!但是发现,点击后会跳转到一个404页面,这 个不是我们想要的效果,我们需要自己定义一个Login页面!
7.我们编写一个自己的Login页面
<!DOCTYPE html>
<html lang="en"
      xmlns:th="http://www.thymeleaf.org">
<head>
    <meta charset="UTF-8">
    <title>登录页</title>
</head>
<body>

<div style="margin-left:auto; margin-right:auto;width:200px;height:100px;">
    <form th:action="@{/login}">
        <h1 style="text-align:center">登录</h1><br/>
        用户名:<input type="text" name="username"><br/>
        密码: <input type="password" name="password"><br/>
        <input type="submit" value="登录"><br/>
    </form>
</div>
</body>
</html>
8.编写跳转的controller
    @RequestMapping("/toLogin")
    public String toLogin(){
        return "login";
    }
9.在shiro中配置一下! ShiroFilterFactoryBean() 方法下面
//修改要跳转的login页面
 shiroFilterFactoryBean.setLoginUrl("/toLogin");
10.再次测试,成功的跳转到了我们指定的Login页面!

11.优化一下代码,我们这里的拦截可以使用 通配符来操作
//        filterMap.put("/user/add","authc");
//        filterMap.put("/user/update","authc");

        filterMap.put("/user/*","authc");
        shiroFilterFactoryBean.setFilterChainDefinitionMap(filterMap);
4、登录认证操作
1.编写一个登录的controller
    //登录操作
    @RequestMapping("/login")
    public String login(String username,String password,Model model){

        //使用shiro编写认证操作

        //1.获取Subject(当前用户)
        Subject subject = SecurityUtils.getSubject();

        //2.封装用户的数据
        UsernamePasswordToken token = new UsernamePasswordToken(username, password);

        //3.执行登录的方法,只要没有异常就代表登录成功
        try {
            subject.login(token);
            return "index";
        }catch (UnknownAccountException uae) {//如果没有指定的用户,则 UnknownAccountException异常
            model.addAttribute("msg","用户名不存在");
            return "login";
        } catch (IncorrectCredentialsException ice) {//密码不对的异常
            model.addAttribute("msg","密码错误");
            return "login";
        }

    }
2.在前端修改对应的信息输出或者请求! 登录页面增加一个 msg 提示
登录页面增加一个 msg 提示
<p style="color:red;" th:text="${msg}"></p>
给表单增加一个提交地址
<form th:action="@{/login}">
- 理论,假设我们提交了表单,他会经过我们刚才编写的UserRealm,我们提交测试一下

确实执行了我们的认证逻辑!
4.在 UserRealm 中编写用户认证的判断逻辑
package com.loey.config;

import org.apache.shiro.authc.*;
import org.apache.shiro.authz.AuthorizationInfo;
import org.apache.shiro.realm.AuthorizingRealm;
import org.apache.shiro.subject.PrincipalCollection;

//自定义Realm
public class UserRealm extends AuthorizingRealm {
    //执行授权逻辑
    @Override
    protected AuthorizationInfo doGetAuthorizationInfo(PrincipalCollection principals) {
        System.out.println("执行了=>授权逻辑PrincipalCollection");
        return null;
    }

    //执行认证逻辑
    @Override
    protected AuthenticationInfo doGetAuthenticationInfo(AuthenticationToken token) throws AuthenticationException {
        System.out.println("执行了=>认证逻辑AuthenticationToken");

        //假设数据库的用户名和密码
        String name = "root";
        String password = "111";

        //1.判断用户名
        UsernamePasswordToken userToken = (UsernamePasswordToken) token;

        if(!userToken.getUsername().equals(name)){
            //用户名不存在
            return null;//shiro底层会抛出 UnknownAccountException
        }

        //2. 验证密码,我们可以使用一个AuthenticationInfo实现类 SimpleAuthenticationInfo
        //   shiro会自动帮我们验证!重点是第二个参数就是要验证的密码
        return new SimpleAuthenticationInfo("",password,"");
    }
}
5、完整的pom.xml
<?xml version="1.0" encoding="UTF-8"?>
<project xmlns="http://maven.apache.org/POM/4.0.0" xmlns:xsi="http://www.w3.org/2001/XMLSchema-instance"
	xsi:schemaLocation="http://maven.apache.org/POM/4.0.0 https://maven.apache.org/xsd/maven-4.0.0.xsd">
	<modelVersion>4.0.0</modelVersion>

	<parent>
		<groupId>org.springframework.boot</groupId>
		<artifactId>spring-boot-starter-parent</artifactId>
		<version>2.4.2</version>
		<relativePath/> <!-- lookup parent from repository -->
	</parent>

	<groupId>com.loey</groupId>
	<artifactId>shiro-02-springboot</artifactId>
	<version>0.0.1-SNAPSHOT</version>
	<name>shiro-02-springboot</name>
	<description>Demo project for Spring Boot</description>

	<properties>
		<java.version>11</java.version>
	</properties>

	<dependencies>

		<dependency>
			<groupId>org.apache.shiro</groupId>
			<artifactId>shiro-spring</artifactId>
			<version>1.7.0</version>
		</dependency>

		<dependency>
			<groupId>org.springframework.boot</groupId>
			<artifactId>spring-boot-starter-thymeleaf</artifactId>
		</dependency>

		<dependency>
			<groupId>org.springframework.boot</groupId>
			<artifactId>spring-boot-starter-web</artifactId>
		</dependency>

		<dependency>
			<groupId>org.springframework.boot</groupId>
			<artifactId>spring-boot-starter-test</artifactId>
			<scope>test</scope>
		</dependency>

	</dependencies>

	<build>
		<plugins>
			<plugin>
				<groupId>org.springframework.boot</groupId>
				<artifactId>spring-boot-maven-plugin</artifactId>
			</plugin>
		</plugins>
	</build>

</project>


 666
666


 被折叠的 条评论
为什么被折叠?
被折叠的 条评论
为什么被折叠?
 到【灌水乐园】发言


