


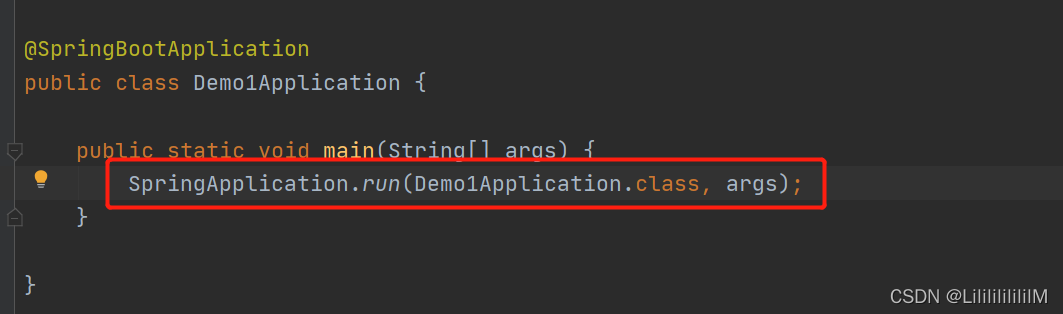
1.调用SpringApplication.run启动springboot应用
2.使用SpringApplication进行启动

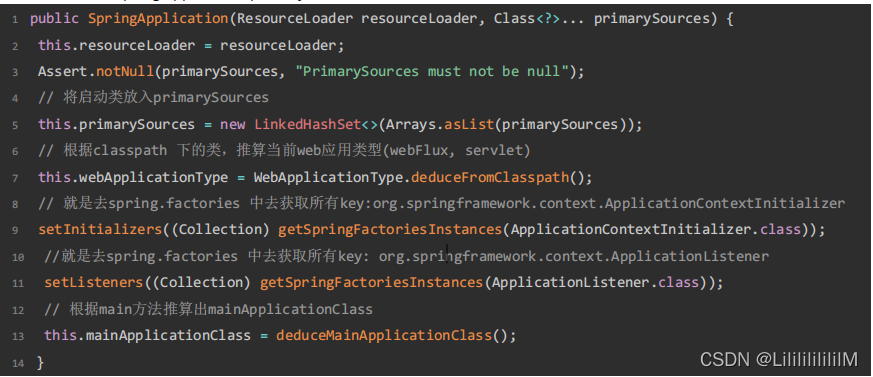
3.创建SpringApplication
4.启动
public ConfigurableApplicationContext run(String... args) {
		// 用来记录当前springboot启动耗时
		StopWatch stopWatch = new StopWatch();
		// 就是记录了启动开始时间
		stopWatch.start();
		// 它是任何spring上下文的接口, 所以可以接收任何ApplicationContext实现,ConfigurableApplicationContext就是我们spring-boot最核心的内容——应用容器,run方法内部也基本都是针对它进行的各种
		//初始化操作,运行完成后返回的也是它的实例,ConfigurableApplicationContext 继承ApplicationContext(是所有容器的基类,spring boot提供了很多容器的实现)
		ConfigurableApplicationContext context = null;
		Collection<SpringBootExceptionReporter> exceptionReporters = new ArrayList<>();
		// 开启了Headless模式:
		configureHeadlessProperty();
		// 去spring.factroies中读取了SpringApplicationRunListener 的组件, 就是用来发布事件或者运行监听器
		SpringApplicationRunListeners listeners = getRunListeners(args);
		// 发布1.ApplicationStartingEvent事件,在运行开始时发送
		listeners.starting();
		try {
			// 根据命令行参数 实例化一个ApplicationArguments
			ApplicationArguments applicationArguments = new DefaultApplicationArguments(args);
			// 预初始化环境: 读取环境变量,读取配置文件信息(基于监听器)
			ConfigurableEnvironment environment = prepareEnvironment(listeners, applicationArguments);
			// 忽略beaninfo的bean
			configureIgnoreBeanInfo(environment);
			// 打印Banner 横幅
			Banner printedBanner = printBanner(environment);
			// 根据webApplicationType创建Spring上下文
			context = createApplicationContext();
			exceptionReporters = getSpringFactoriesInstances(SpringBootExceptionReporter.class,
					new Class[] { ConfigurableApplicationContext.class }, context);
			//预初始化spring上下文
			prepareContext(context, environment, listeners, applicationArguments, printedBanner);
			// 加载spring ioc 容器 **相当重要 由于是使用AnnotationConfigServletWebServerApplicationContext 启动的sp ring容器所以springboot对它做了扩展:
			// 加载自动配置类:invokeBeanFactoryPostProcessors , 创建servlet容器onRefresh
			refreshContext(context);
			afterRefresh(context, applicationArguments);
			stopWatch.stop();
			if (this.logStartupInfo) {
				new StartupInfoLogger(this.mainApplicationClass).logStarted(getApplicationLog(), stopWatch);
			}
			listeners.started(context);
			callRunners(context, applicationArguments);
		}
		catch (Throwable ex) {
			handleRunFailure(context, ex, exceptionReporters, listeners);
			throw new IllegalStateException(ex);
		}

		try {
			listeners.running(context);
		}
		catch (Throwable ex) {
			handleRunFailure(context, ex, exceptionReporters, null);
			throw new IllegalStateException(ex);
		}
		return context;
	}
总结
1. 初始化SpringApplication 从spring.factories(spring.factories用键值对的方式记录了所有需要加入容器的类)  读取 listener ApplicationContextInitializer (通常用于需要对应用程序上下文进行编程初始化的web应用程序中。例如,根据上下文环境注册属性源或激活配置文件等)
2.运行run方法
3.读取 环境变量 配置信息.....
4. 创建springApplication上下文:ServletWebServerApplicationContext
5. 预初始化上下文 : 读取启动类
6.调用refresh 加载ioc容器 加载所有的自动配置类 创建servlet容器
7.在这个过程中springboot会调用很多监听器对外进行


 3375
3375


 被折叠的 条评论
为什么被折叠?
被折叠的 条评论
为什么被折叠?
 到【灌水乐园】发言


