


Swagger入门
一、what is Swagger?
用自己的话来说,swagger就是一款生成,描述,展示Restful风格接口的框架。对于现如今web开发大量使用前后端分离的开发方式的大环境下,swagger(丝袜哥)无疑是一个神器。
二、How use Swagger?
使用swagger主要分为三步:
- 引入swagger的依赖(可以到maven中央仓库找到,也可以到官网)
- swagger的配置(对于spring boot来说,就是建立swagger的相关的配置类)
- 使用swagger提供相关的注解编写api
三、swagger的常用注解(标注在controller层)
这里就暂时分为两类注解,一类是请求相关的,一类是响应的。
请求相关
- @Api:定义在controller类上,表示这一个controller类相关接口的总体描述。
- value:定义该类接口的总体名称
- description:对该类的总体描述
- tag:使用多个名称来定义该类接口,如tag存在,value值失效。
- hidden:是否隐藏文档。
2.@ApiOperation:用在controller的具体方法上,表示对该接口的描述。
-
value:对这个接口的描述
-
note:该接口相关细节的描述
-
esponse:该接口返回类型,是返回对象的实际结果,不是响应结果
-
hidden:是否隐藏
3.@ApiImplicitParam,@ApiImplicitParams:两者是个体和集合的概念。表示调用该接口需要的参数,用在具体的controller方法上。
- name:参数的名称
- value:参数值
- required:是否是必传字段
- deafultVlalue:默认字段
- type:参数类型
- hidden:是否隐藏
- allowMultiple:是否允许重复
4.@ApiParam:也是表示接口的参数,但是它的位置是放在接口的参数中,用在参数很小的情况下。
- name:参数的名称
- value:参数值
- required:是否是必传字段
- deafultVlalue:默认字段
- type:参数类型
- hidden:是否隐藏
响应相关
1.@ApiResponse,@ApiResponses,这二者也是个体和集合的概念。同样,也是用在controller的具体方法上。
-
code:http的状态码
-
message:http的状态信息
-
responseHeaders:htttp响应头
2.@ResponseHeader:和上述注解中responseHeader一样,只是单独标注。
-
name:响应头的名称
-
description:响应头的标注
3.@ApiModel:设置Api响应实体类,用作Api返回对象。
-
value:实体名称
-
description:实体类的描述
-
subType: 子类的类型
4.@ApiModelProperty:由字面意思可知,这个就是具体实体类中属性。
-
name:属性的名称
-
value:属性值
-
notes :属性的注释
-
dataType:属性的数据类型
-
required:是否是必传字段
-
hidden:是否隐藏
-
readOnly:是否只读
-
allowEmptyValue:是否允许为空值。
上述注解都是用的比较多的,如需更多,可以访问swagger的GitHub。地址:
四、swagger在spring boot中的基本使用
关于使用,这里就按照前面提到的三个步骤来:
1.引入依赖:
		<!--引入swagger2的规范-->
        <dependency>
            <groupId>io.springfox</groupId>
            <artifactId>springfox-swagger2</artifactId>
            <version>2.9.2</version>
        </dependency>

        <!--swagger的生成文档界面的依赖-->
        <dependency>
            <groupId>io.springfox</groupId>
            <artifactId>springfox-swagger-ui</artifactId>
            <version>2.9.2</version>
        </dependency>

        <!--lombok,省略setter,getter方法-->
        <dependency>
            <groupId>org.projectlombok</groupId>
            <artifactId>lombok</artifactId>
        </dependency>
2.配置swagger
/**
 * @author : kyg
 * @date : 2020-04-21 21:04
 **/
//表明这个类是配置类
@Configuration

//开启swagger
@EnableSwagger2
public class Swagger2Config {
    @Bean
    //注意这里采用的链式编程的风格
    public Docket createRestApi() {
        return new Docket(DocumentationType.SWAGGER_2)
                //配置api的详情,用一个方法配置
                .apiInfo(apiInfo())
                .select()
                //配置需要使用swagger注解的control类的全限定包名
                .apis(RequestHandlerSelectors.basePackage("com.example.swagger.controller"))
                .paths(PathSelectors.any())
                .build();
    }

    //这个方法就是上面配置了的关于整个api文档的相关信息
    private ApiInfo apiInfo() {
        return new ApiInfoBuilder()
                //api文档的标题
                .title("接口列表 v1.0.0")
                //接口文档的描述
                .description("接口文档的地址")
                //查看接口的地址,这里填的是官网,实际开发填的是指定的地址
                .termsOfServiceUrl("https://swagger.io/")
                //接口文档的版本
                .version("v1.0.0")
                .build();
    }
}
3.在controller中利用swagger提供的注解编写api:
/**
 * @author : kyg
 * @date : 2020-04-21 21:43
 **/
@RestController
@RequestMapping(value = "/users")
@Api(value = "用户操作接口" ,tags = "用户操作接口")
public class UserController {

    //依据id查询用户
    @ApiOperation(value = "获取用户的详细信息",notes = "根据用户的id来获取信息")
    @ApiImplicitParam(name = "id",value = "用户id",required = true,paramType = "query",dataType = "long")
    @GetMapping("/findById")
    public User findById(@RequestParam(value = "id") Long id) {
        return new User(id,"lwl","123");
    }

    //保存用户信息
    @ApiOperation(value = "保存用户",notes = "对用户的保存了")
    @PostMapping("/saveUser")
    public String saveUser(@RequestBody @ApiParam(name = "用户对象",value = "传入json格式",required = true) User user) {
        return user.toString();
    }


    //更新用户信息
    @ApiImplicitParams({
            @ApiImplicitParam(name = "id",value ="主键id",required = true,paramType = "query",dataType = "long"),
            @ApiImplicitParam(name = "username",value ="用户名",required = true,paramType = "query",dataType = "String"),
            @ApiImplicitParam(name = "password",value ="密码",required = true,paramType = "query",dataType = "String")
    })
    @GetMapping(value = "/updateUser")
    public String updateUser(@RequestParam(value = "id") Long id,@RequestParam(value = "username") String username,@RequestParam(value = "password") String password) {
        return new  User(id,username,password).toString();
    }


	//删除用户信息
    @ApiOperation(value = "删除用户", notes = "根据用户id删除用户")
    @ApiImplicitParam(name = "id",value ="用户id",required = true,paramType = "query",dataType = "long")
    @ApiResponses({
            @ApiResponse(code = 200,message = "成功"),
            @ApiResponse(code = 400,message = "未授权"),
            @ApiResponse(code = 404,message = "页面未找到"),
            @ApiResponse(code = 403,message = "出错了")
    })
    @DeleteMapping("/deleteUserById")
    public String deleteUserById(@RequestParam(value = "id") Long id) {
        return "success";
    }
}
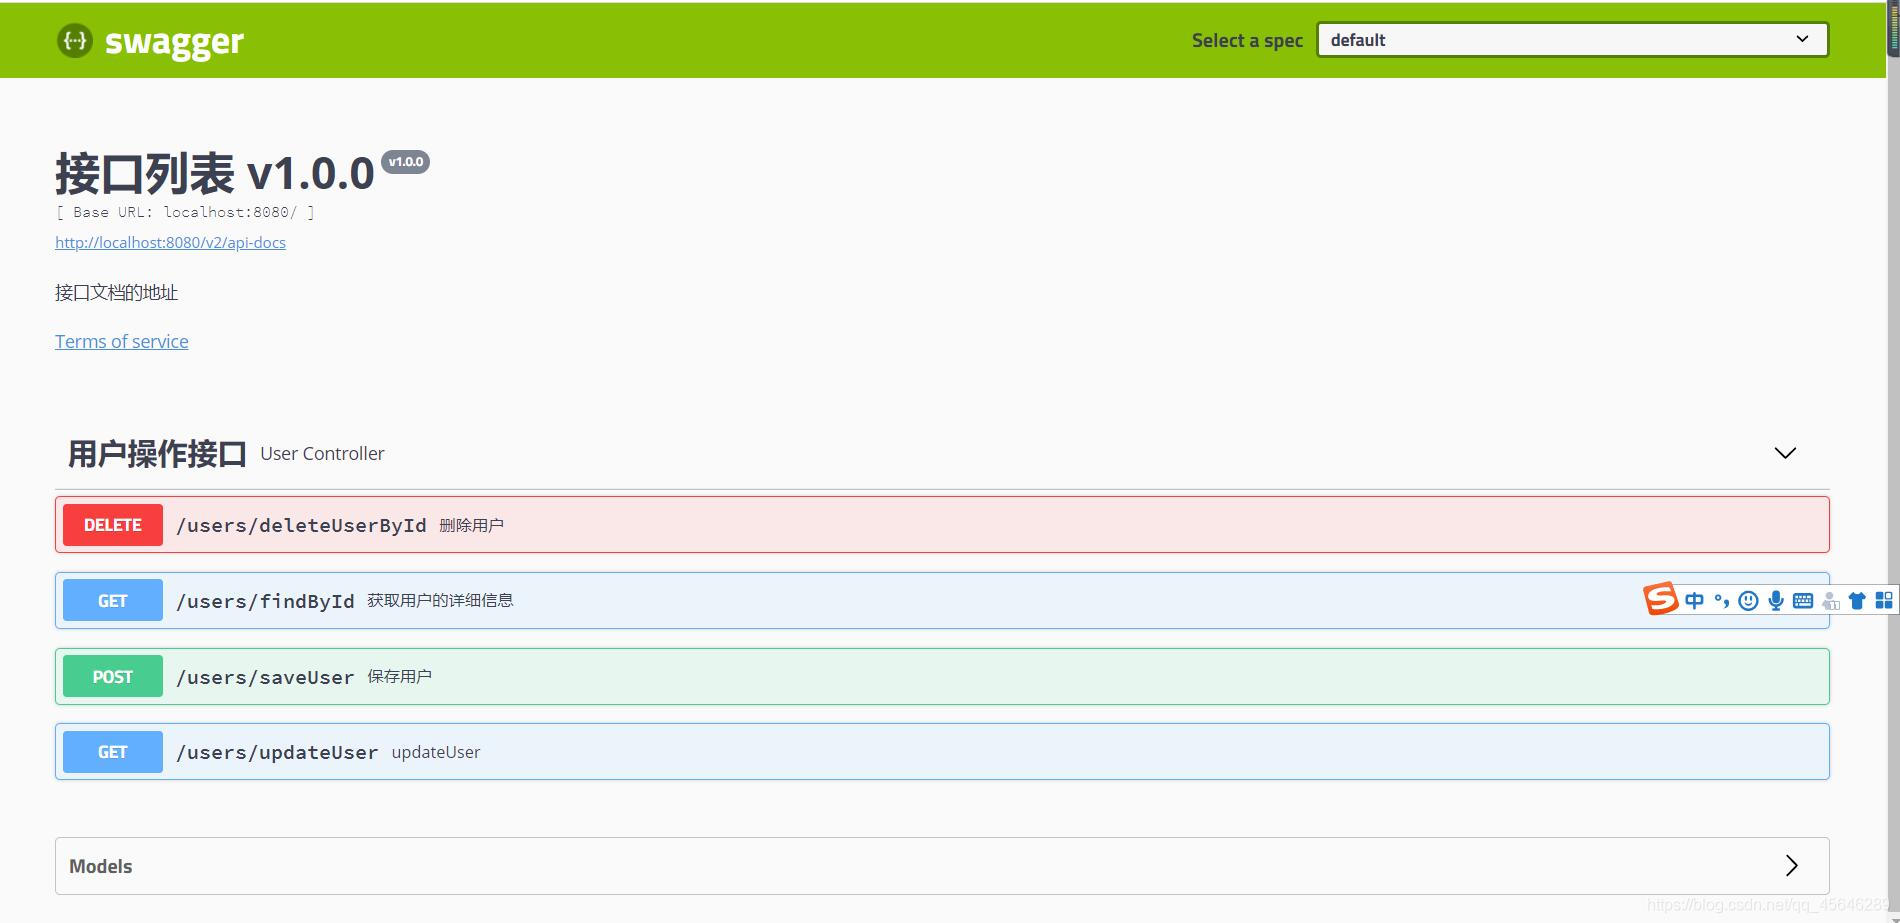
启动项目,访问http://localhost:8080/swagger-ui.html ,就可以看到swagger为为我们生成的api文档。
文档界面:
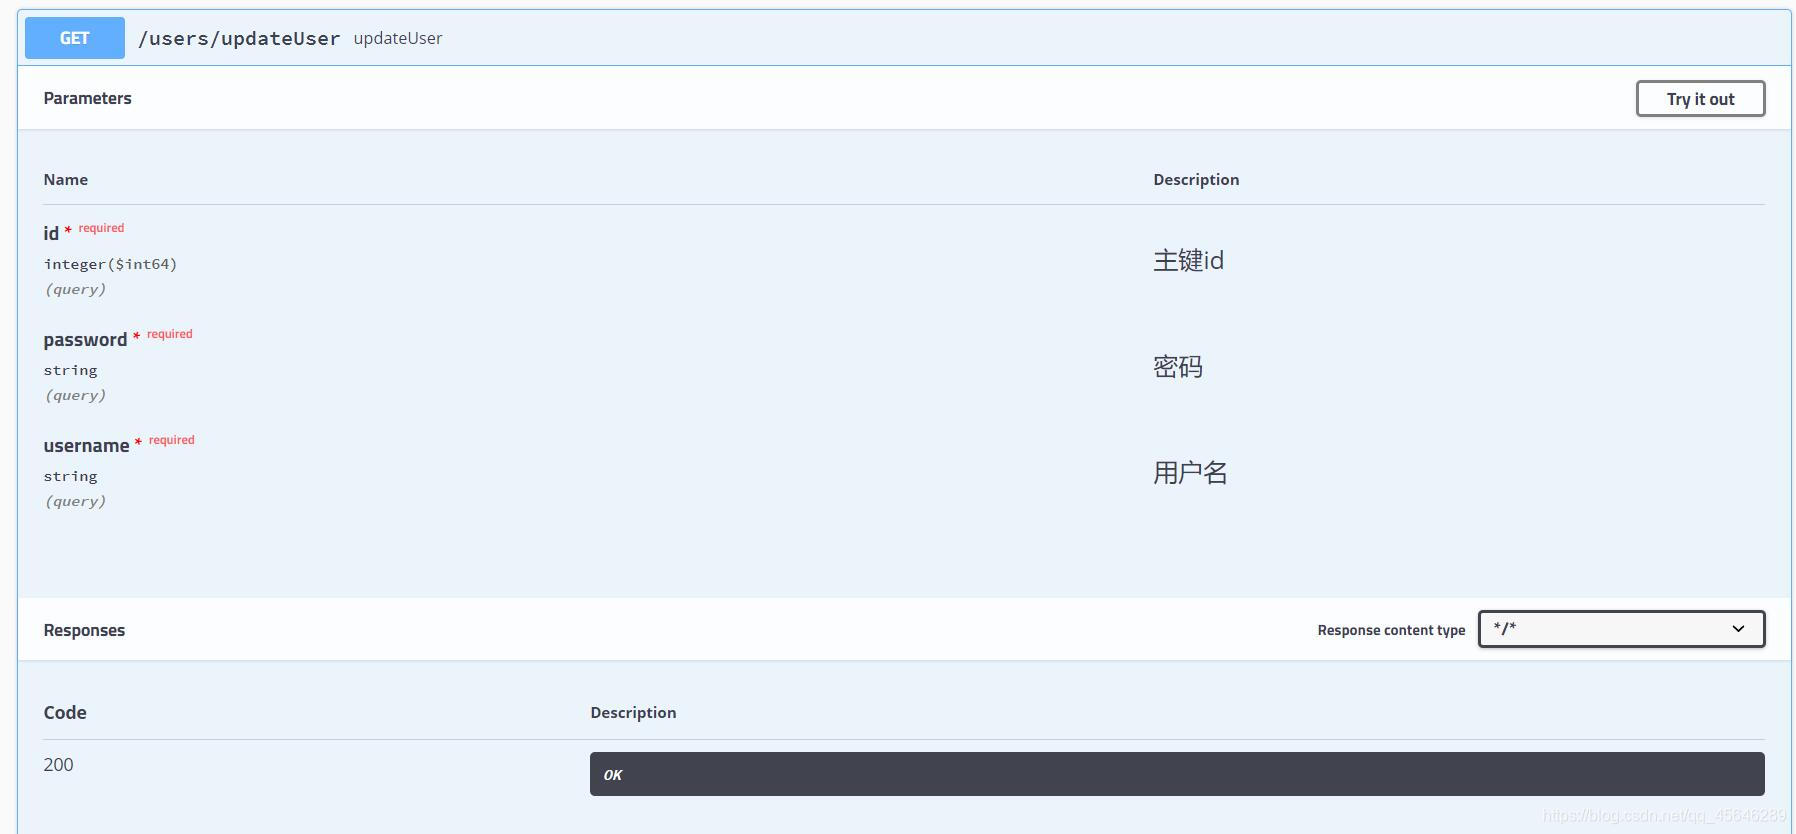
单个接口的界面:
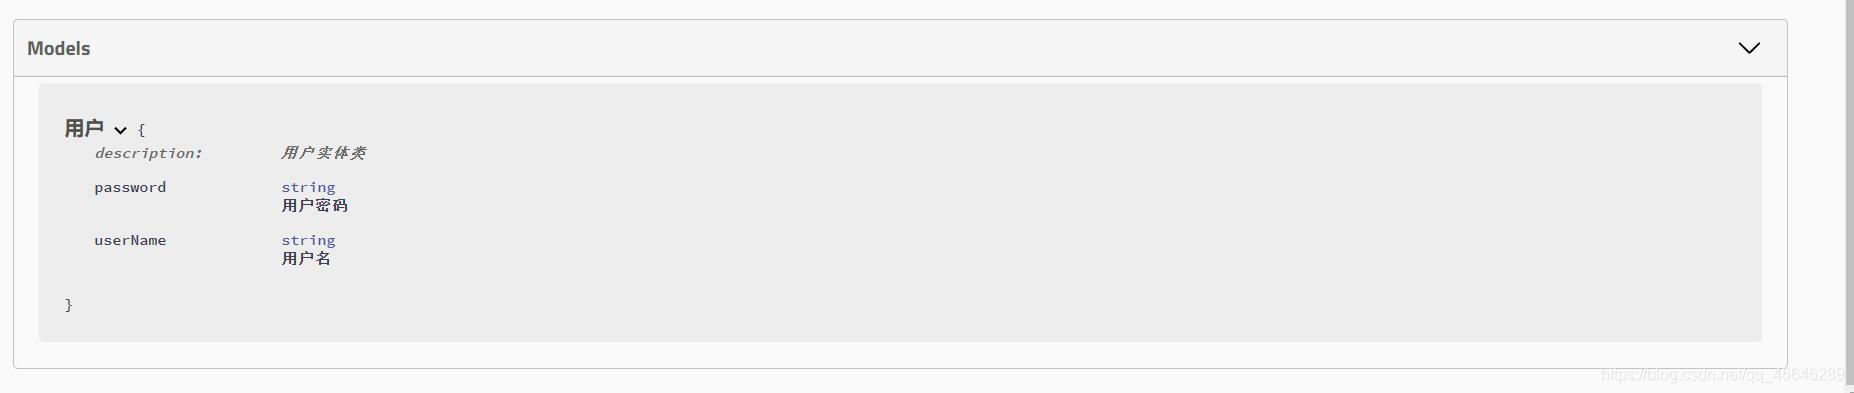
model(实体界面):
我们还可以点击try it out 对单个接口进行调试。
五、总结
swagger总体通过swagger注解在controller层自动生成api文档,直接在代码中实现了文档的编写,妈妈再也不用担心我们自己手动写文档了。


 446
446


 被折叠的 条评论
为什么被折叠?
被折叠的 条评论
为什么被折叠?
 到【灌水乐园】发言


