


Spring 2.5 引入了对基于注解的配置元数据的支持。
从 Spring 3.0 开始,Spring JavaConfig 项目提供的许多功能成为了核心 Spring Framework 的一部分。因此,您可以使用 Java 而不是 XML 文件来定义应用程序类外部的 bean。
Spring官方文档https://docs.spring.io/spring-framework/docs/current/reference/html/core.html#spring-core
1.创建实体类
public class Hello {
    private String str;

    public String getStr() {
        return str;
    }

    public void setStr(String str) {
        this.str = str;
    }

    @Override
    public String toString() {
        return "Hello{" +
                "str='" + str + '\'' +
                '}';
    }
}
2.创建xml文件绑定实体类
无参构造创建,实体类没有有参构造时默认有无参构造
<?xml version="1.0" encoding="UTF-8"?>
<beans xmlns="http://www.springframework.org/schema/beans"
xmlns:xsi="http://www.w3.org/2001/XMLSchema-instance"
xsi:schemaLocation="http://www.springframework.org/schema/beans
http://www.springframework.org/schema/beans/spring-beans.xsd">
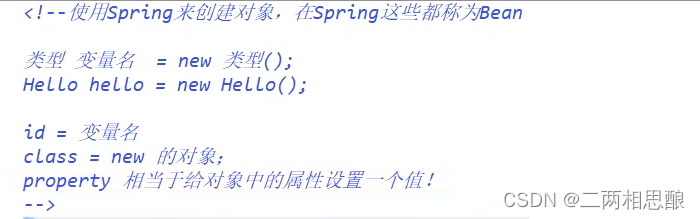
<bean id="hello" class="com.peng.pojo.Hello">
<property name="str" value="Spring"/>
</bean>
<!--
value:具体值
ref:引用Spring容器中创建好的对象
-->
</beans>
有参构造三种方式
①通过位置
    <bean id="user" class="com.peng.pojo.User">
        <constructor-arg index="0" value="鹏哥哥"/>
    </bean>
②通过类型创建(不推荐)
	<bean id="user" class="com.peng.pojo.User">
        <constructor-arg type="java.lang.String" value="鹏哥哥"/>
    </bean>
③通过参数名来创建(推荐经常使用这个)
    <bean id="hello" class="com.peng.pojo.User">
        <constructor-arg name="name" value="鹏哥"/>
    </bean>
绑定过程相当于对象的创建
3.实例化容器,在配置文件加载的时候容器中的对象已经初始化了
提供给ApplicationContext构造函数的位置路径是资源字符串,这些资源字符串使容器可以从各种外部资源(例如本地文件系统,Java CLASSPATH等)加载配置元数据。
public class MyTest {
    public static void main(String[] args) {
    	//获取上下文对象
        ApplicationContext context = new ClassPathXmlApplicationContext("beans.xml");
        Hello hello = (Hello) context.getBean("hello");
        System.out.println(hello.toString());
    }
}
xml文件属性
<bean>配置
id:bean的唯一标识,也就相当于我们学过过的对象名
class:bean对象所对应的全限定名:包名 + 类型
name:也是别名,而且name可以取多个别名
Import
多人写的文件可以统一引入到一个文件里面
<import resource="beans.xml"/>
各种类型注入
    <bean id="address" class="com.peng.pojo.Address">
        <property name="address" value="平顶山"/>
    </bean>
 	<bean id="student" class="com.peng.pojo.Student">
        <property name="name" value="鹏哥"/>
         <!--对象,跟上一个bean联系起来-->
        <property name="address" ref="address"/>
        <!--数组-->
        <property name="books" >
            <array>
                <value>万古神帝</value>
                <value>夜的命名术</value>
                <value>傲世九重天</value>
            </array>
        </property>
        <!--列表-->
        <property name="hobbys">
            <list>
                <value>飞翔</value>
                <value>游泳</value>
                <value>遁地</value>
            </list>
        </property>
        <!--map-->
        <property name="card">
            <map>
                <entry key="鹏哥" value="159852357"/>
                <entry key="身份证" value="111111111111111111"/>
                <entry key="手机卡" value="16637747365"/>
            </map>
        </property>
        <!--set-->
        <property name="games" >
            <set>
                <value>lol</value>
                <value>dnf</value>
                <value>cf</value>
            </set>
        </property>
        <!--空-->
        <property name="wife">
            <null/>
        </property>
        <!--Properties-->
        <property name="info">
            <props>
                <prop key="666">数学真好</prop>
                <prop key="777">幸运数字</prop>
            </props>
        </property>
    </bean>
官方解释

p-namespace引入约束xmlns:p="http://www.springframework.org/schema/p适用于set注入
<?xml version="1.0" encoding="UTF-8"?>
<beans xmlns="http://www.springframework.org/schema/beans"
       xmlns:xsi="http://www.w3.org/2001/XMLSchema-instance"
       xmlns:p="http://www.springframework.org/schema/p"
       xsi:schemaLocation="http://www.springframework.org/schema/beans
        https://www.springframework.org/schema/beans/spring-beans.xsd">
        <!--p空间命名注入可以注入属性值:property-->
        <bean id="user" class="com.peng.pojo.User" p:age="22" p:name="鹏哥"/>
</beans>
c-namespace 引入约束xmlns:c="http://www.springframework.org/schema/c适用于通过构造器输入:constructor-arg
<beans xmlns="http://www.springframework.org/schema/beans"
       xmlns:xsi="http://www.w3.org/2001/XMLSchema-instance"
       xmlns:c="http://www.springframework.org/schema/c"
       xsi:schemaLocation="http://www.springframework.org/schema/beans
        https://www.springframework.org/schema/beans/spring-beans.xsd">
        <!--c空间命名注入,通过构造器输入:constructor-arg-->
        <bean id="user2" class="com.peng.pojo.User" c:age="20" c:name="鹏哥哥"/>
</beans>
通过byName,byType的方式自动装配,前提是代码规范
byName会自动在容器上下文中查找,和自己对象set方法后面的值对应的bean id
使用时要保证bean的id唯一,并且这个bean需要和自动输入的set方法值保持一致
byType会自动在容器上下文中查找,和自己对象属性类型相同的bean
使用时要保证bean的class唯一,并且这个bean需要和自动输入的属性类型保持一致

byName
<?xml version="1.0" encoding="UTF-8"?>
<beans xmlns="http://www.springframework.org/schema/beans"
       xmlns:xsi="http://www.w3.org/2001/XMLSchema-instance"
       xsi:schemaLocation="http://www.springframework.org/schema/beans http://www.springframework.org/schema/beans/spring-beans.xsd">
    <bean id="cat" class="com.peng.pojo.Cat"/>
    <bean id="dog" class="com.peng.pojo.Dog"/>
    <bean id="people" class="com.peng.pojo.People" autowire="byName">
        <property name="name" value="鹏哥"/>
    </bean>
</beans>
byType
<?xml version="1.0" encoding="UTF-8"?>
<beans xmlns="http://www.springframework.org/schema/beans"
       xmlns:xsi="http://www.w3.org/2001/XMLSchema-instance"
       xsi:schemaLocation="http://www.springframework.org/schema/beans http://www.springframework.org/schema/beans/spring-beans.xsd">
    <bean id="cat" class="com.peng.pojo.Cat"/>
    <bean id="dog" class="com.peng.pojo.Dog"/>
    <bean id="people" class="com.peng.pojo.People" autowire="byType">
        <property name="name" value="鹏哥"/>
    </bean>
</beans>


 1226
1226


 被折叠的 条评论
为什么被折叠?
被折叠的 条评论
为什么被折叠?
 到【灌水乐园】发言


