


要求
引入Junit,对接口做单元测试
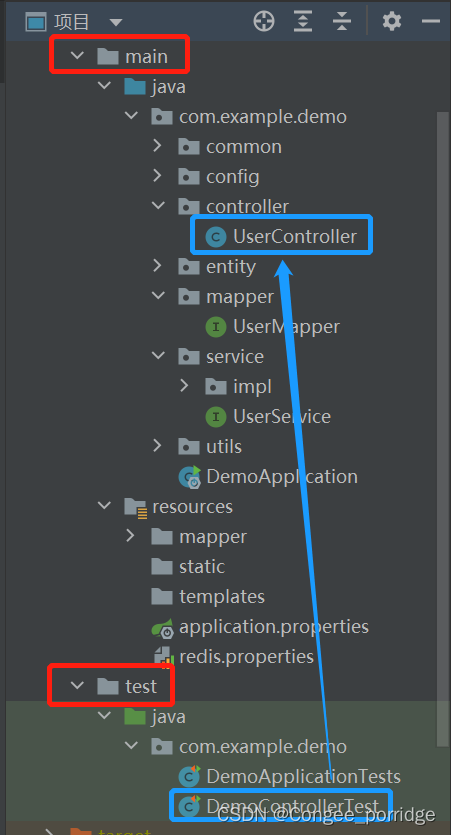
本文将对在Springboot中如何使用Junit进行单元测试进行简单示例和介绍,项目的完整目录层次如下图所示:
(在和main文件夹同级的文件中有一个test文件,在其中添加对应的测试类,一般以testXXXX或XXXXTest命名)
操作步骤:
1、添加依赖
<!--S        Junit依赖-->
        <dependency>
            <groupId>junit</groupId>
            <artifactId>junit</artifactId>
            <version>4.12</version>
        </dependency>
<!--E        Junit依赖-->
<!--S        springboot的测试框架,里面有对junit4的依赖-->
        <dependency>
            <groupId>org.springframework.boot</groupId>
            <artifactId>spring-boot-starter-test</artifactId>
            <scope>test</scope>
        </dependency>
<!--E        springboot的测试框架,里面有对junit4的依赖-->
2、对Controller层进行测试
在Springboot中可以通过TestRestTemplate对Controller进行测试;
目前遇到的是Controller中装配了其他Spring容器中的Bean这种情况,例如下面这个控制器,用到了com/example/demo/entity下的User。
@PostMapping(value = "/deleteUserInfo")
    public int deleteUser(@RequestBody User user) throws ServiceException{
        String userId = user.getUserId();
        if(userId==null || userId.equals("")){
            throw new ServiceException(500,"删除失败,请传入用户id");
        }else {
            List<User> users=service.queryByUserId(userId);
            if(users!=null && users.size()>0){
                int count = service.deleteUserInfo(userId);
                if(count>0){
                    return count;
                }else {
                    throw new ServiceException(500,"删除失败,请检查原因");
                }
            }else{
                throw new ServiceException(500,"删除失败,用户id不存在");
            }
        }
    }
此时除了要启动Spring容器,还需要启动内嵌的WEB环境,下面提供一种方法进行测试。
@RunWith(SpringRunner.class)
@SpringBootTest(webEnvironment = SpringBootTest.WebEnvironment.RANDOM_PORT)
public class DemoControllerTest {
    //注入我要测试的对象
    @Autowired
    private TestRestTemplate template;

    CommonResult result;

    @Test
    public void testDeleteUser() {
        User user=new User();
        result = template.postForObject("http://localhost:8080/updateUserInfo",user, CommonResult.class);
        Assert.assertEquals(500, result.getCode());//错误用例,验证用户没传id

        user.setUserId("d36b1940247d4fb59d4851105d5vbbv");
        result = template.postForObject("http://localhost:8080/updateUserInfo",user, CommonResult.class);
        Assert.assertEquals(500, result.getCode());//错误用例,验证id不存在

        user.setUserId("ba8ca9a376614215985ba7d0b2ac4b10");
        result = template.postForObject("http://localhost:8080/updateUserInfo",user, CommonResult.class);
        Assert.assertEquals(500, result.getCode());//成功用例
    }
}
3、遇到的问题
- 控制台报错:no runnable method
原因:test包导入错误
//import org.junit.jupiter.api.Test;
import org.junit.Test;//正确的包
- 要保证template.postForObject/template.getForObject/template.postForEntity/template.getForEntity返回结果和前面的变量类型对应
4、知识点
1.GET类型
1.1getForEntity
public <T> T getForEntity(String url, Class<T> responseType, Object... urlVariables) {
    return this.restTemplate.getForEntity(url, responseType, urlVariables);
}
第一个参数url为要调用的服务的地址;传递参数时可以用下例中name={name}的方法,或者直接写出具体参数值;
第二个参数responseType表示希望返回的body类型,一般为类名.class形式(可以是自定义的类);
示例:
@GetMapping("/getForEntity")
public ResponseEntity<String> getForEntity() {
    ResponseEntity<String> response = restTemplate.getForEntity("http://localhost:8080/getForEntity?name={name}", String.class);
    //ResponseEntity<String> response = restTemplate.getForEntity("http://localhost:8080/getForEntity?id=123456", String.class);
    System.out.println("statusCode:" + response.getStatusCode());
    System.out.println("Body:" + response.getBody());
	return response;
}
getForEntity方法的返回值是一个ResponseEntity,ResponseEntity是Spring对HTTP请求响应的封装,包括了几个重要的元素,如响应码、contentType、contentLength、响应消息体等。
1.2getForObject
getForObject函数是对getForEntity函数的进一步封装,如果只关注返回的消息体的内容,对其他信息都不关注,此时可以使用getForObject;
public <T> T getForObject(String url, Class<T> responseType, Object... urlVariables) {
    return this.restTemplate.getForObject(url, responseType, urlVariables);
}
2.POST类型
2.1postForEntity
public <T> ResponseEntity<T> postForEntity(String url, Object request, Class<T> responseType, Object... urlVariables) {
    return this.restTemplate.postForEntity(url, request, responseType, urlVariables);
}
第一个参数url为要调用的服务的地址;
第二个参数为请求体,传参位置;(也是体现了get和post请求传参时的一个差别所在)
第二个参数responseType表示希望返回的body类型,一般为类名.class形式(可以是自定义的类);
示例:
@PostMapping("/postForEntity")
public ResponseEntity<String> postForEntity() {
	User user=new User();
    user.setSex("女");
    ResponseEntity<String> response = restTemplate.postForEntity("http://localhost:8080/postForEntity",user,String.class);
    System.out.println("statusCode:" + response.getStatusCode());
    System.out.println("Body:" + response.getBody());
	return response;
}
postForEntity方法的返回值是一个ResponseEntity,ResponseEntity是Spring对HTTP请求响应的封装,包括了几个重要的元素,如响应码、contentType、contentLength、响应消息体等。
2.2postForObject
postForObject函数是对postForEntity函数的进一步封装,如果只关注返回的消息体的内容,对其他信息都不关注,此时可以使用postForObject;
public <T> T postForObject(String url, Object request, Class<T> responseType, Object... urlVariables) {
    return this.restTemplate.postForObject(url, request, responseType, urlVariables);
}


 2794
2794


 被折叠的 条评论
为什么被折叠?
被折叠的 条评论
为什么被折叠?
 到【灌水乐园】发言


